

What is an incoming webhook?
A webhook is an HTTP endpoint that an external system calls to notify FlowX when an event happens. Instead of FlowX polling for updates, the third-party system sends an HTTP POST the moment something occurs — and FlowX starts a process in response. Common uses include receiving events from payment processors, CRMs, ERPs, or CI/CD pipelines.Overview
Incoming Webhooks allow external systems to trigger FlowX processes by sending HTTP POST requests to a generated URL. Each webhook gets a unique, cryptographically secure API key for authentication — no IMAP setup, no polling, just a direct HTTP call. Use webhooks when you need to:- Receive events from third-party platforms (payment processors, CRMs, ERPs) that support outbound webhooks
- Trigger processes from CI/CD pipelines or internal tools via simple HTTP calls
- Replace polling-based integrations with event-driven process starts
API key authentication
Each webhook gets a unique, secure API key included in the URL
JSON payload forwarding
Webhook body and HTTP headers are forwarded to the process instance as variables
Manage Triggers UI
Activate, deactivate, and manage webhook URLs from Runtime Settings
Zero configuration
No server settings needed — create the data source, connect to a process, activate
How it works
A webhook does one of two things, depending on the Webhook Behavior you choose when you create the data source.- Start a process
- Resume a waiting process
Each POST creates a new process instance.
1
Create an Incoming Webhook data source
In Integration Designer, create a new data source and select Incoming Webhook. Provide a name and optional description, and leave Webhook Behavior on Start a Process/Workflow. No connection settings are required.
2
Connect to a Message Start Event
In your process definition, add a Message Start Event node. Set the Trigger Type to Incoming Webhook and select your webhook data source.
3
Commit and activate
Commit the version, then go to Runtime → Manage Triggers. The webhook appears as Deactivated. Click the action menu and select Activate.
4
Get the webhook URL
From the trigger’s action menu, select Get URL. Copy the generated URL (includes the API key as a query parameter) and configure it in your external system.
5
External system sends POST request
When the external system POSTs JSON to the webhook URL, the
webhook-gateway service validates the API key, publishes the event to Kafka, and the process engine starts a new process instance.Creating a webhook data source
1
Navigate to Data Sources
Go to Integrations → Data Sources in your project.
2
Add a new data source
Click + and select Incoming Webhook as the data source type.
3
Configure basic information
4
Create
Click Create. The webhook data source is ready to be connected to a process.
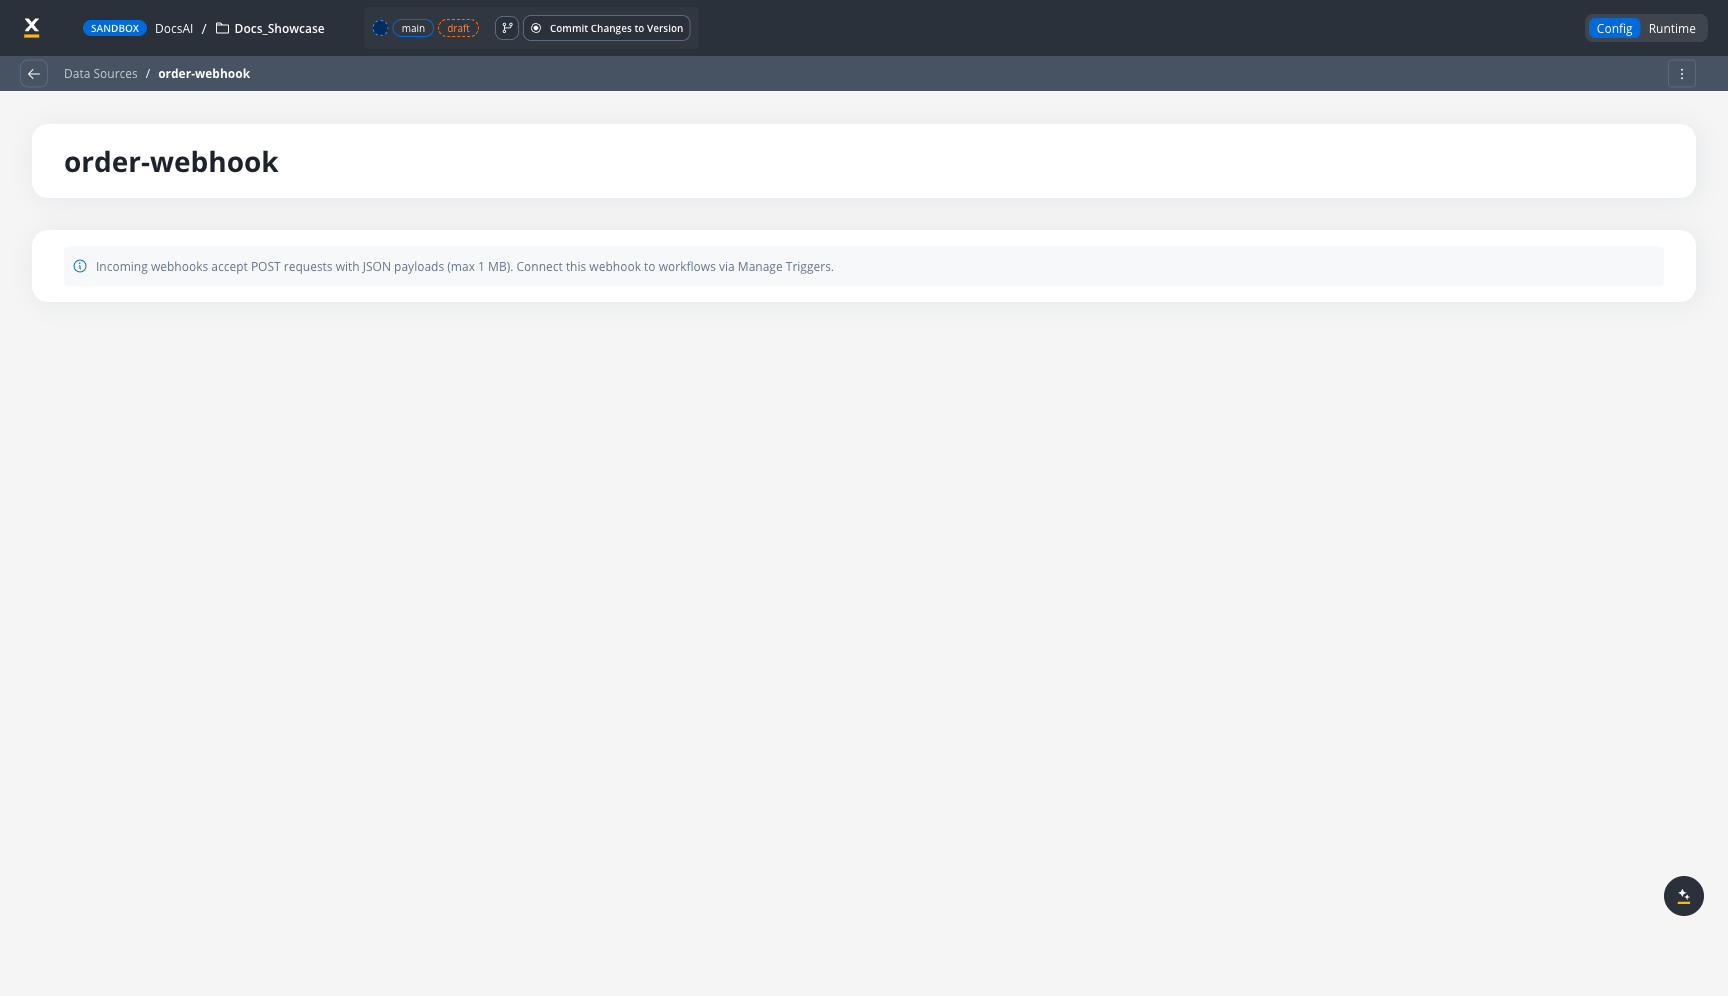
Incoming Webhooks accept POST requests with JSON payloads (max 1 MB). No connection settings, credentials, or polling configuration is needed.
Connecting to a Message Catch Event
A webhook can drive two kinds of message catch events:
You choose which of the two a webhook does when you create the data source, using the Webhook Behavior setting.
Webhook Behavior
On the webhook data source’s Settings tab, Webhook Behavior offers two options: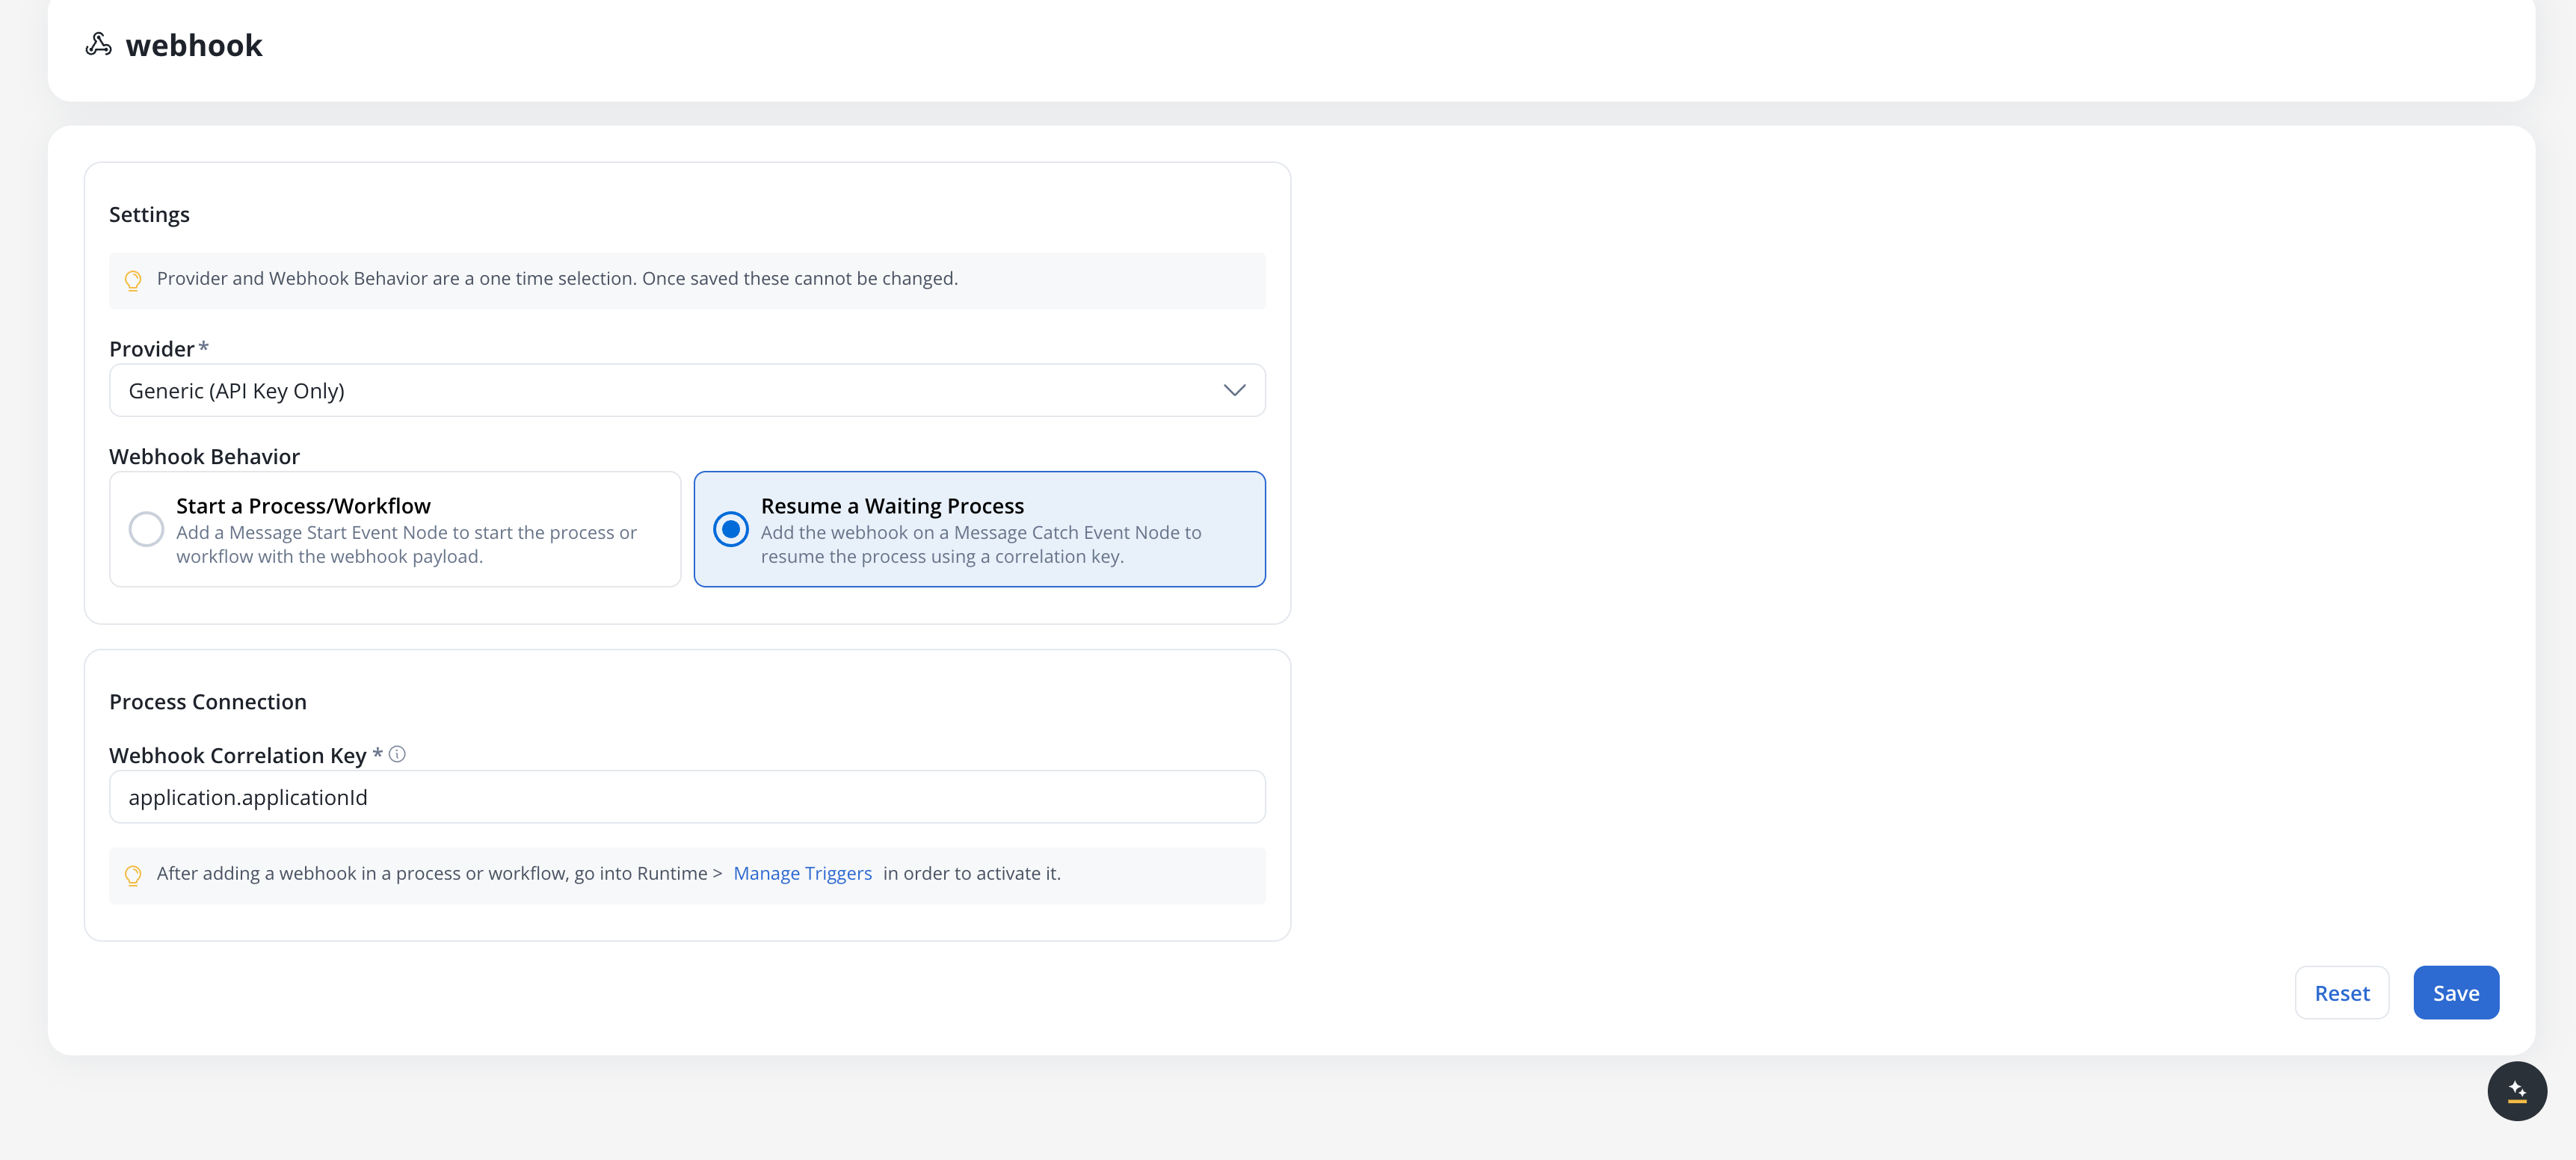
On a Message Start Event
1
Open your process definition
Open the process in the Process Designer.
2
Add a Message Start Event node
Drag a Message Start Event from the Start Events section of the node palette onto the canvas.
3
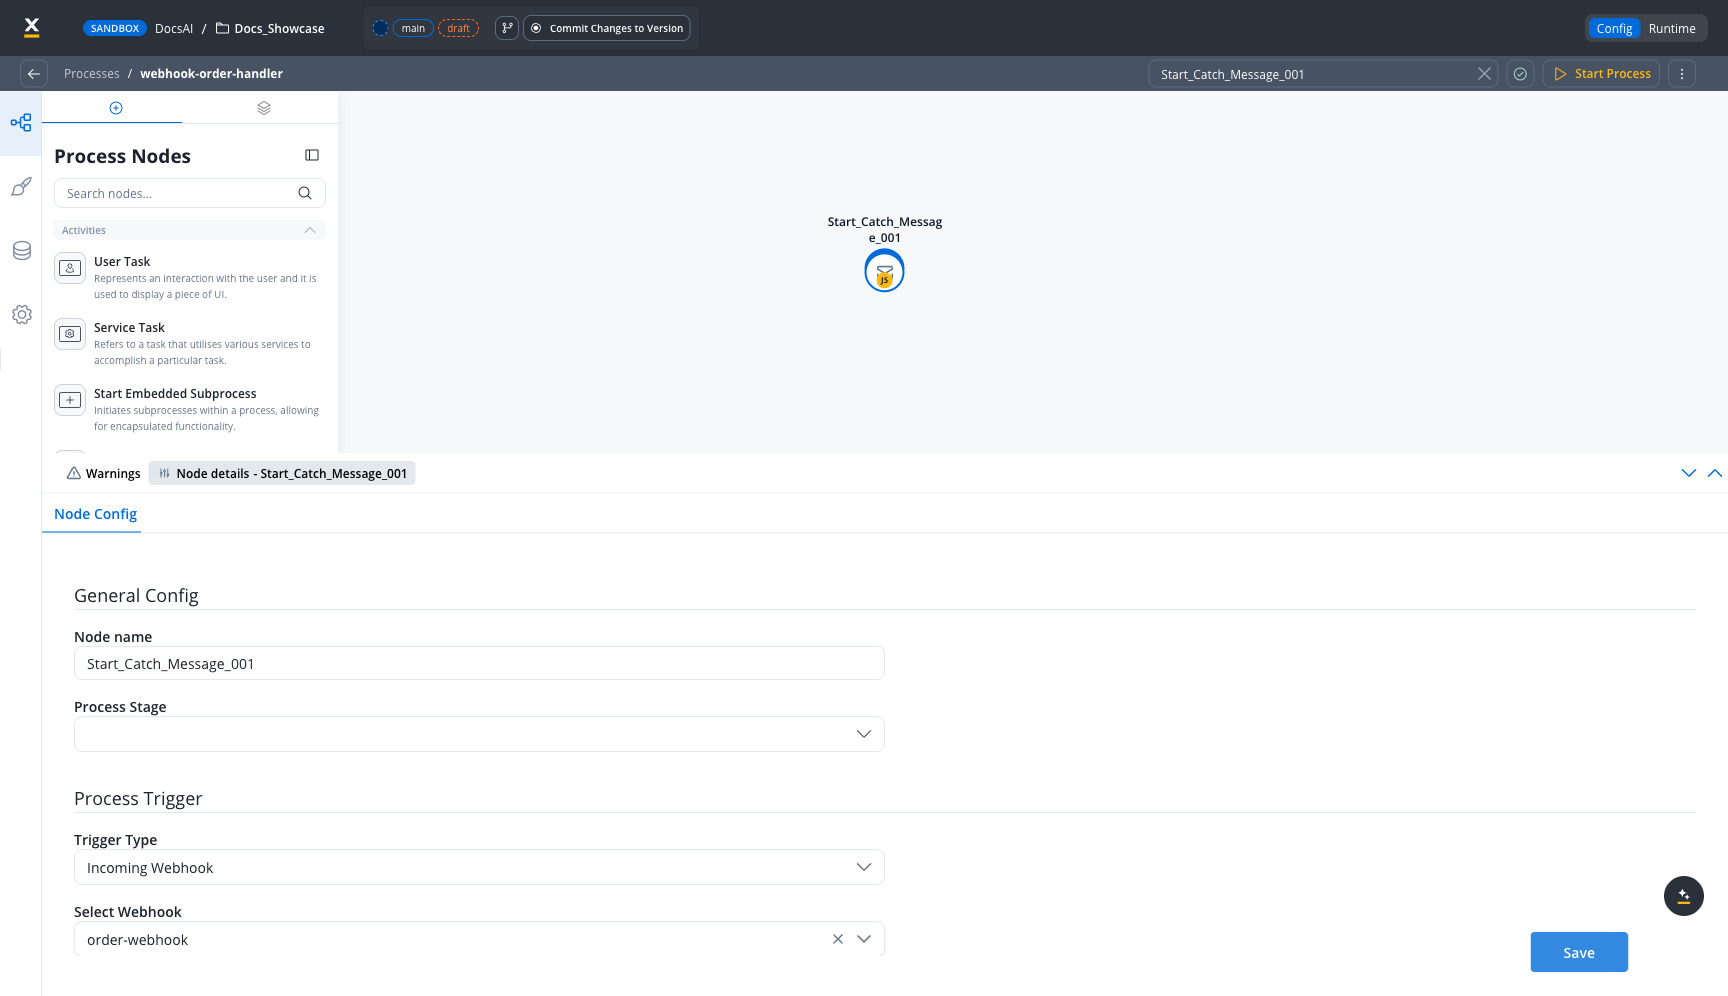
Configure the Process Trigger
In the node configuration panel, under Process Trigger:
- Set Trigger Type to Incoming Webhook
- In Select Webhook, choose your webhook data source from the dropdown
4
Save the node
Click Save to persist the configuration.
On a Message Catch Intermediate Event
Use a webhook on an intermediate catch event to resume a process instance that is waiting for an external signal — for example, a callback from a third-party document scanner, a downstream system confirming an enqueued job, or a manual operator action delivered over HTTP.1
Add a Webhook Trigger intermediate catch event
From the node palette, drag a Webhook Trigger message catch event onto the canvas at the point where the process should pause.
2
Select the webhook data source
In the node configuration panel, set the Data Source dropdown to the webhook that drives this catch event. The Webhook Correlation Key field appears as read-only and shows the correlation key defined on the webhook itself — included here so you can see how incoming requests are matched.
3
Set the Process Correlation Key
Set Process Correlation Key to a business or process variable from the data model (for example,
applicationId, orderId). At runtime this value is matched against the incoming payload to identify which waiting process instance to resume.4
Set the Process Key
Set Process Key to the data-model path where the incoming webhook data should be stored when the catch fires. The value stored there is the same
{ dateTime, payload, headers } envelope described in Webhook payload, not the bare POST body — read the request body from payload underneath it.5
Save the node
Click Save to persist the configuration.
The same webhook data source can drive multiple intermediate catch events as long as the Process Correlation Key disambiguates which instance to resume. Without a valid correlation match, the inbound request is rejected.
Webhook Correlation Key path syntax
The Webhook Correlation Key points into the incoming webhook payload. It uses dotted-path notation and supports array indices in square brackets, so deeply nested provider payloads can be addressed directly.Array index syntax (
field[N]) is supported in correlation keys, so the canonical Meta WhatsApp resume path works as-is. Paths like entry[0]... resolve directly and no longer need to be flattened in the producer before posting.Managing webhooks at runtime
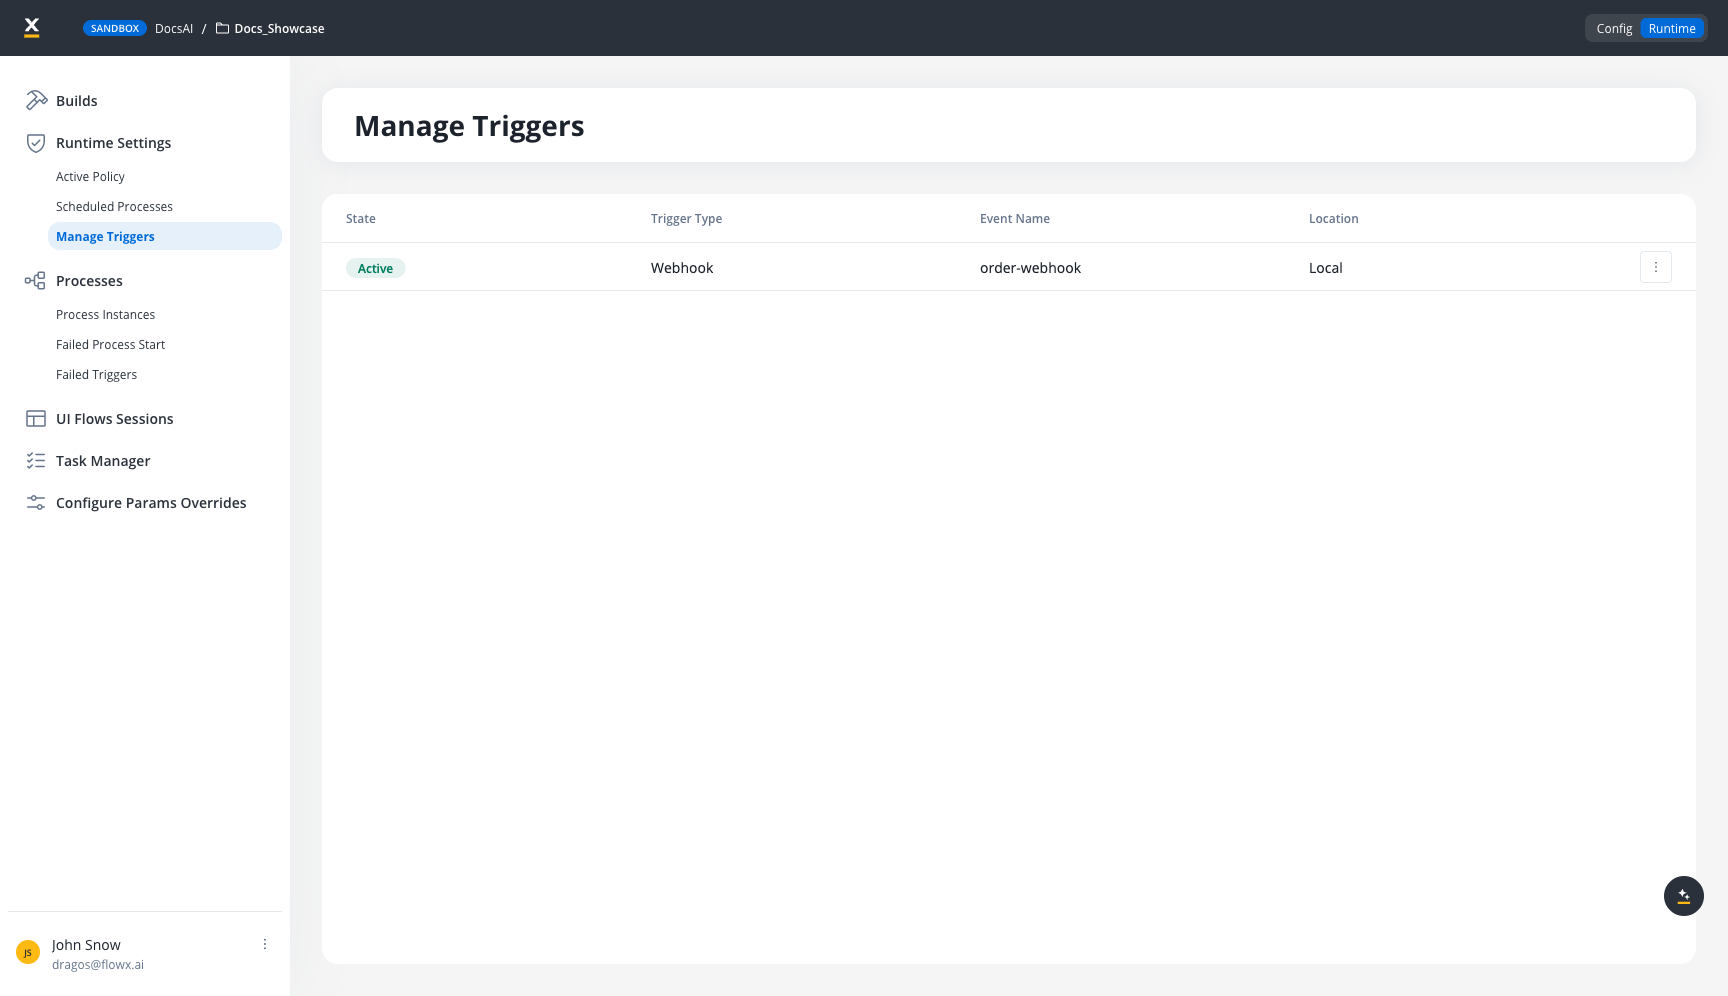
Activating a webhook
For a webhook to appear in Manage Triggers:- The webhook data source must be created
- The webhook must be connected to a node that can carry a webhook trigger — a Message Start Event or a Message Catch Intermediate Event. On SaaS (5.12), a Start a Process/Workflow webhook can also be bound to the Start node of an integration workflow; see External triggers
- The version must be committed
Use the action menu (three-dot icon) to:
- Activate — Start accepting webhook requests
- Deactivate — Stop accepting requests. The API key and URL are preserved, so you can reactivate later without reconfiguring external systems.
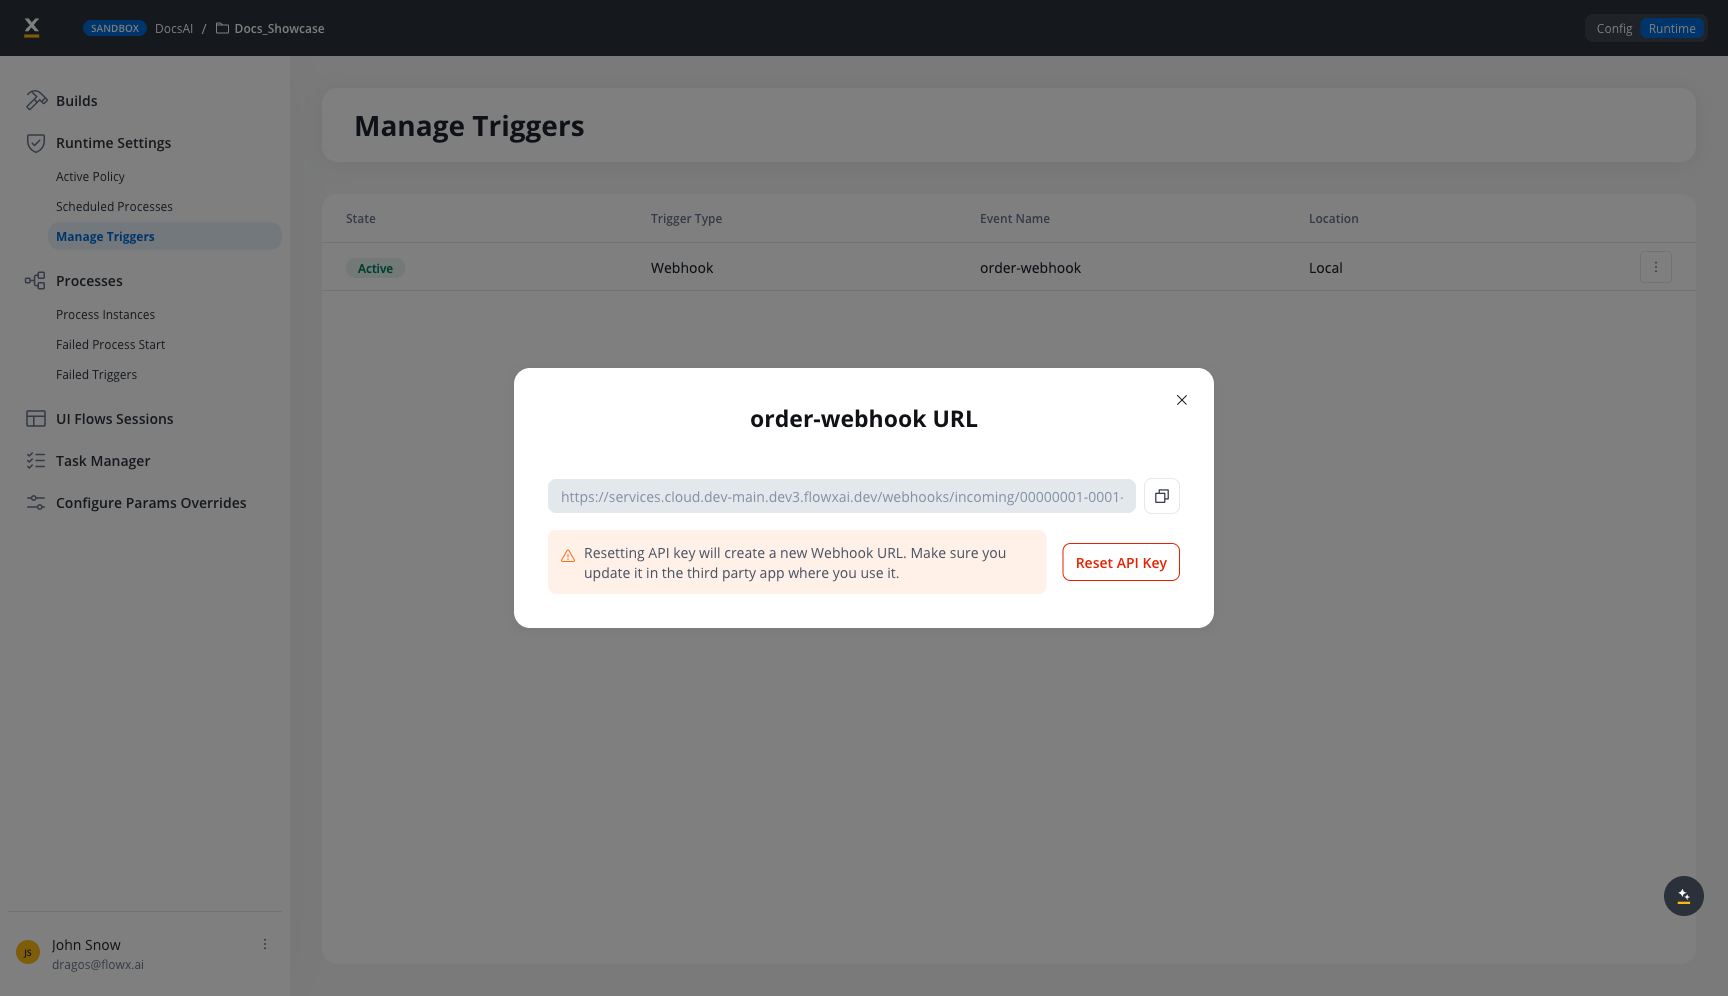
- Get URL — View and copy the webhook URL with API key
Webhook URL and API key
When you activate a webhook and select Get URL, a modal displays:- Webhook URL — The full URL including the API key as a
flowxApiKeyquery parameter - Copy button — Copies the URL to clipboard
- Reset API Key — Generates a new API key (invalidates the previous URL)
slack or meta) after /webhooks/incoming/:
Provider adapters
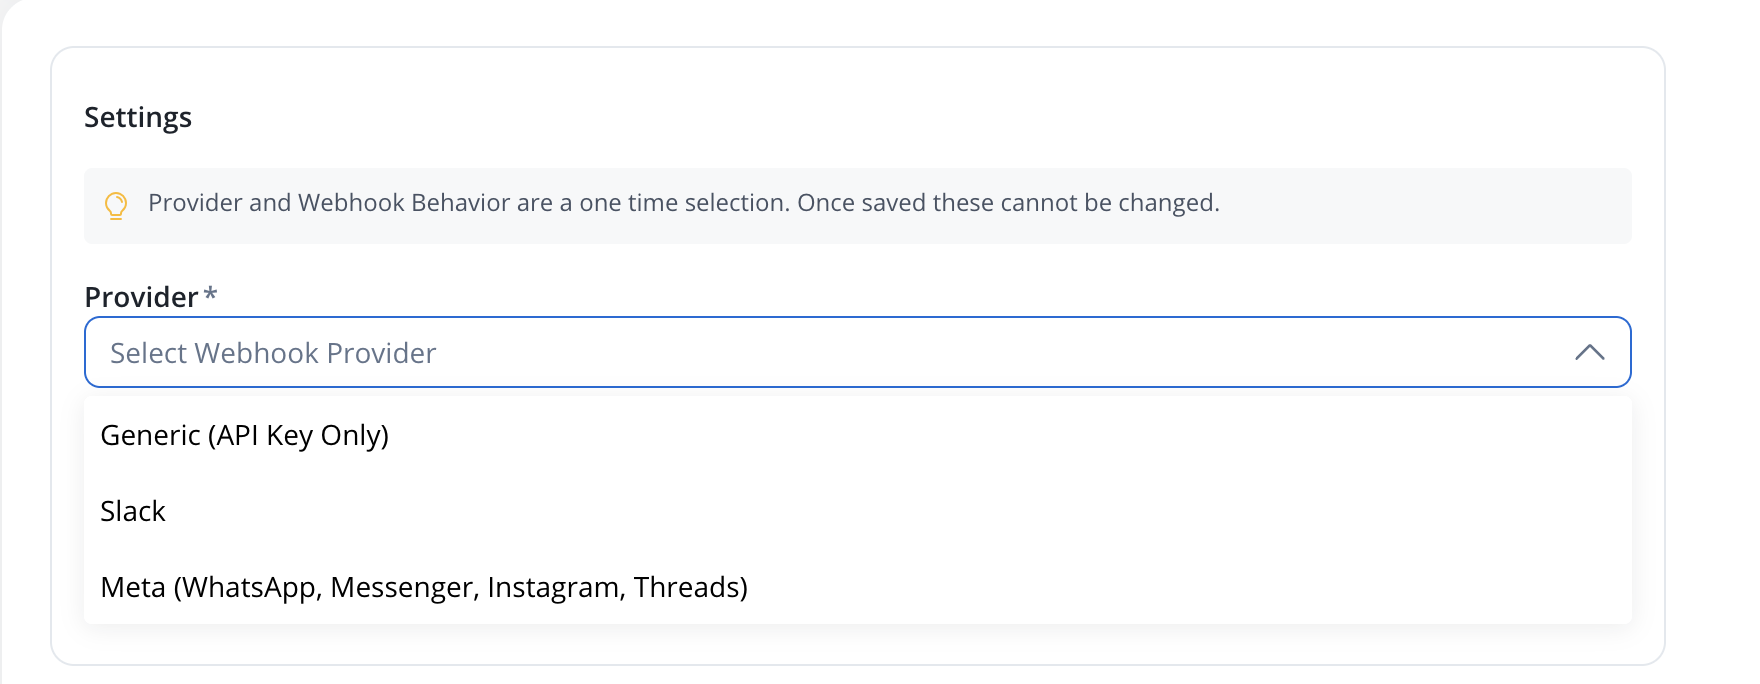
When a webhook is created in the Integration Designer, the Settings tab now exposes:-
Provider — the dropdown offers three options. Like Webhook Behavior, the provider is a one-time selection: once saved it becomes immutable, and you create a new webhook to switch.
-
Provider secret — the signing secret(s) obtained from the provider. Stored encrypted; can be rotated independently of the API key. The field is labelled per provider and only appears once a provider that needs it is selected: Signing Secret for Slack, Verify token plus App secret for Meta.
Generic (API Key Only)has no secret field.
${configParam.name} placeholder syntax — placeholders are resolved at registration time the same way LLM provider secrets are.
Generic provider
The default. No signature validation is performed; authentication relies on the FlowXflowxApiKey and HTTPS. Use GENERIC for systems that do not sign their webhooks, or where signature validation is handled inside the process via a business-rule action on the raw headers.
Slack and Meta are the only channels with dedicated adapters. Any other platform that can deliver an HTTPS POST — Microsoft Teams, Viber, Telegram, or an internal system — connects through the Generic provider; if that platform signs its requests, validate the signature inside the process from the raw headers.
Slack provider
Performs Slack’s standard signature check on every incoming request:
Requests that fail signature verification, that miss either header, or that arrive without a configured signing secret are rejected with
401 Unauthorized.
Slack’s URL-verification handshake is handled automatically — a url_verification POST with a challenge field receives the challenge value back as JSON, before the request is forwarded to the process. No process configuration is required for the handshake.
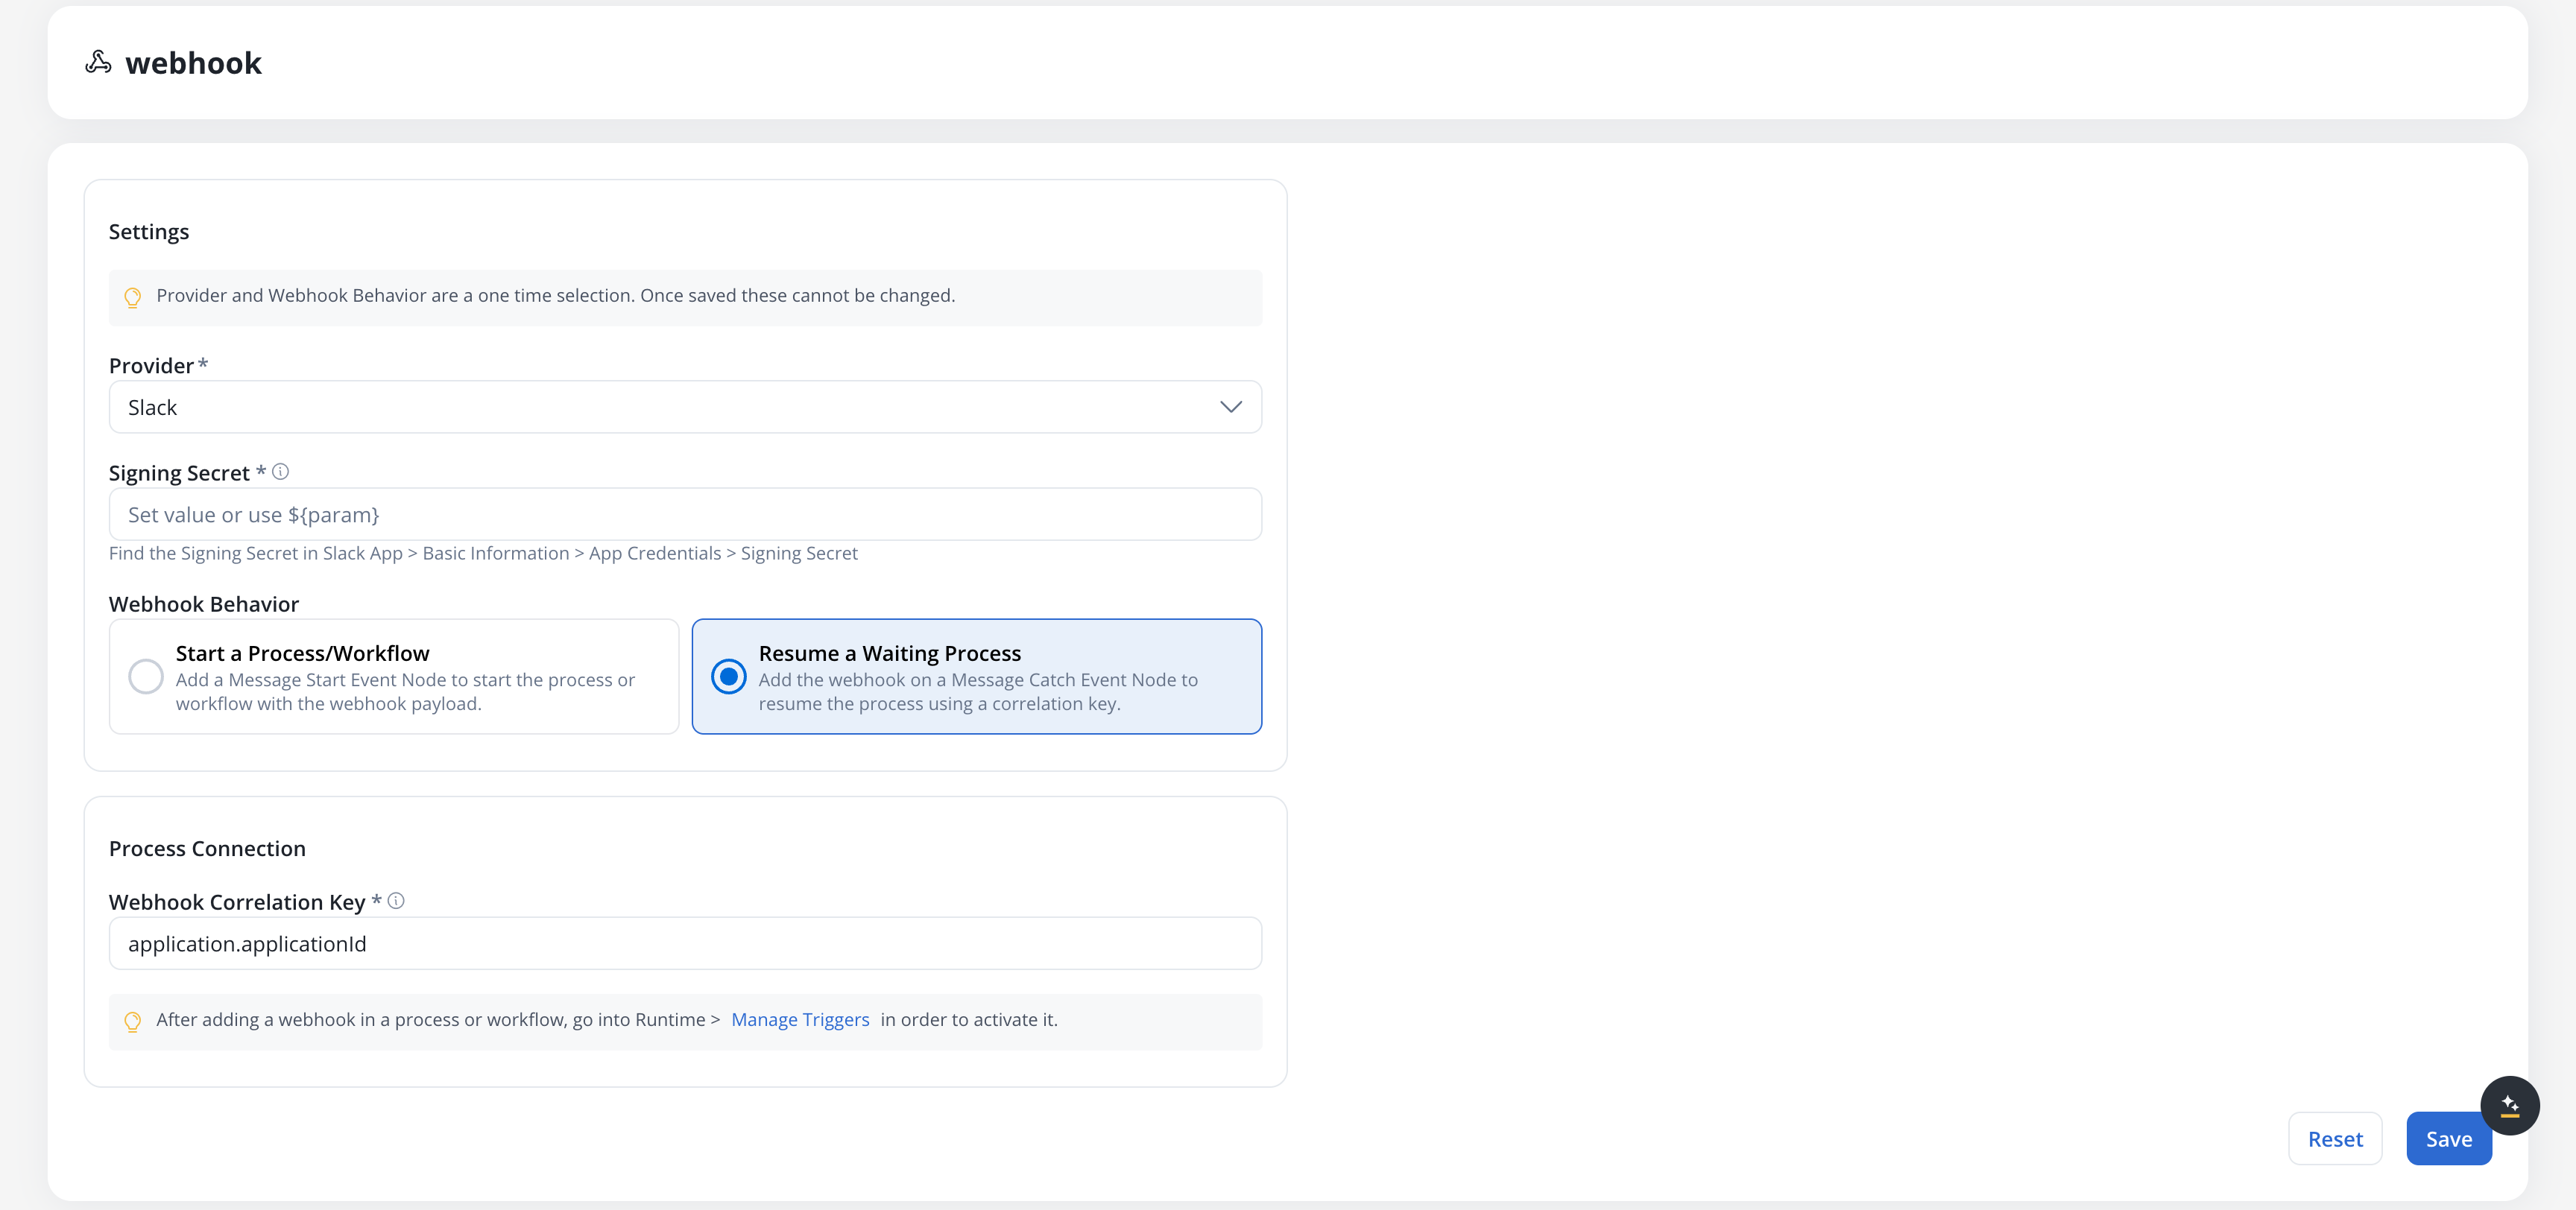
Selecting Slack adds a required Signing Secret field to the Settings tab. Find the value in your Slack app under Basic Information → App Credentials → Signing Secret. You can paste it directly or reference a config parameter.
Meta provider
Covers WhatsApp, Messenger, Instagram, and Threads. Meta-platform integrations share a common subscription model and signature scheme; theMETA adapter handles both.
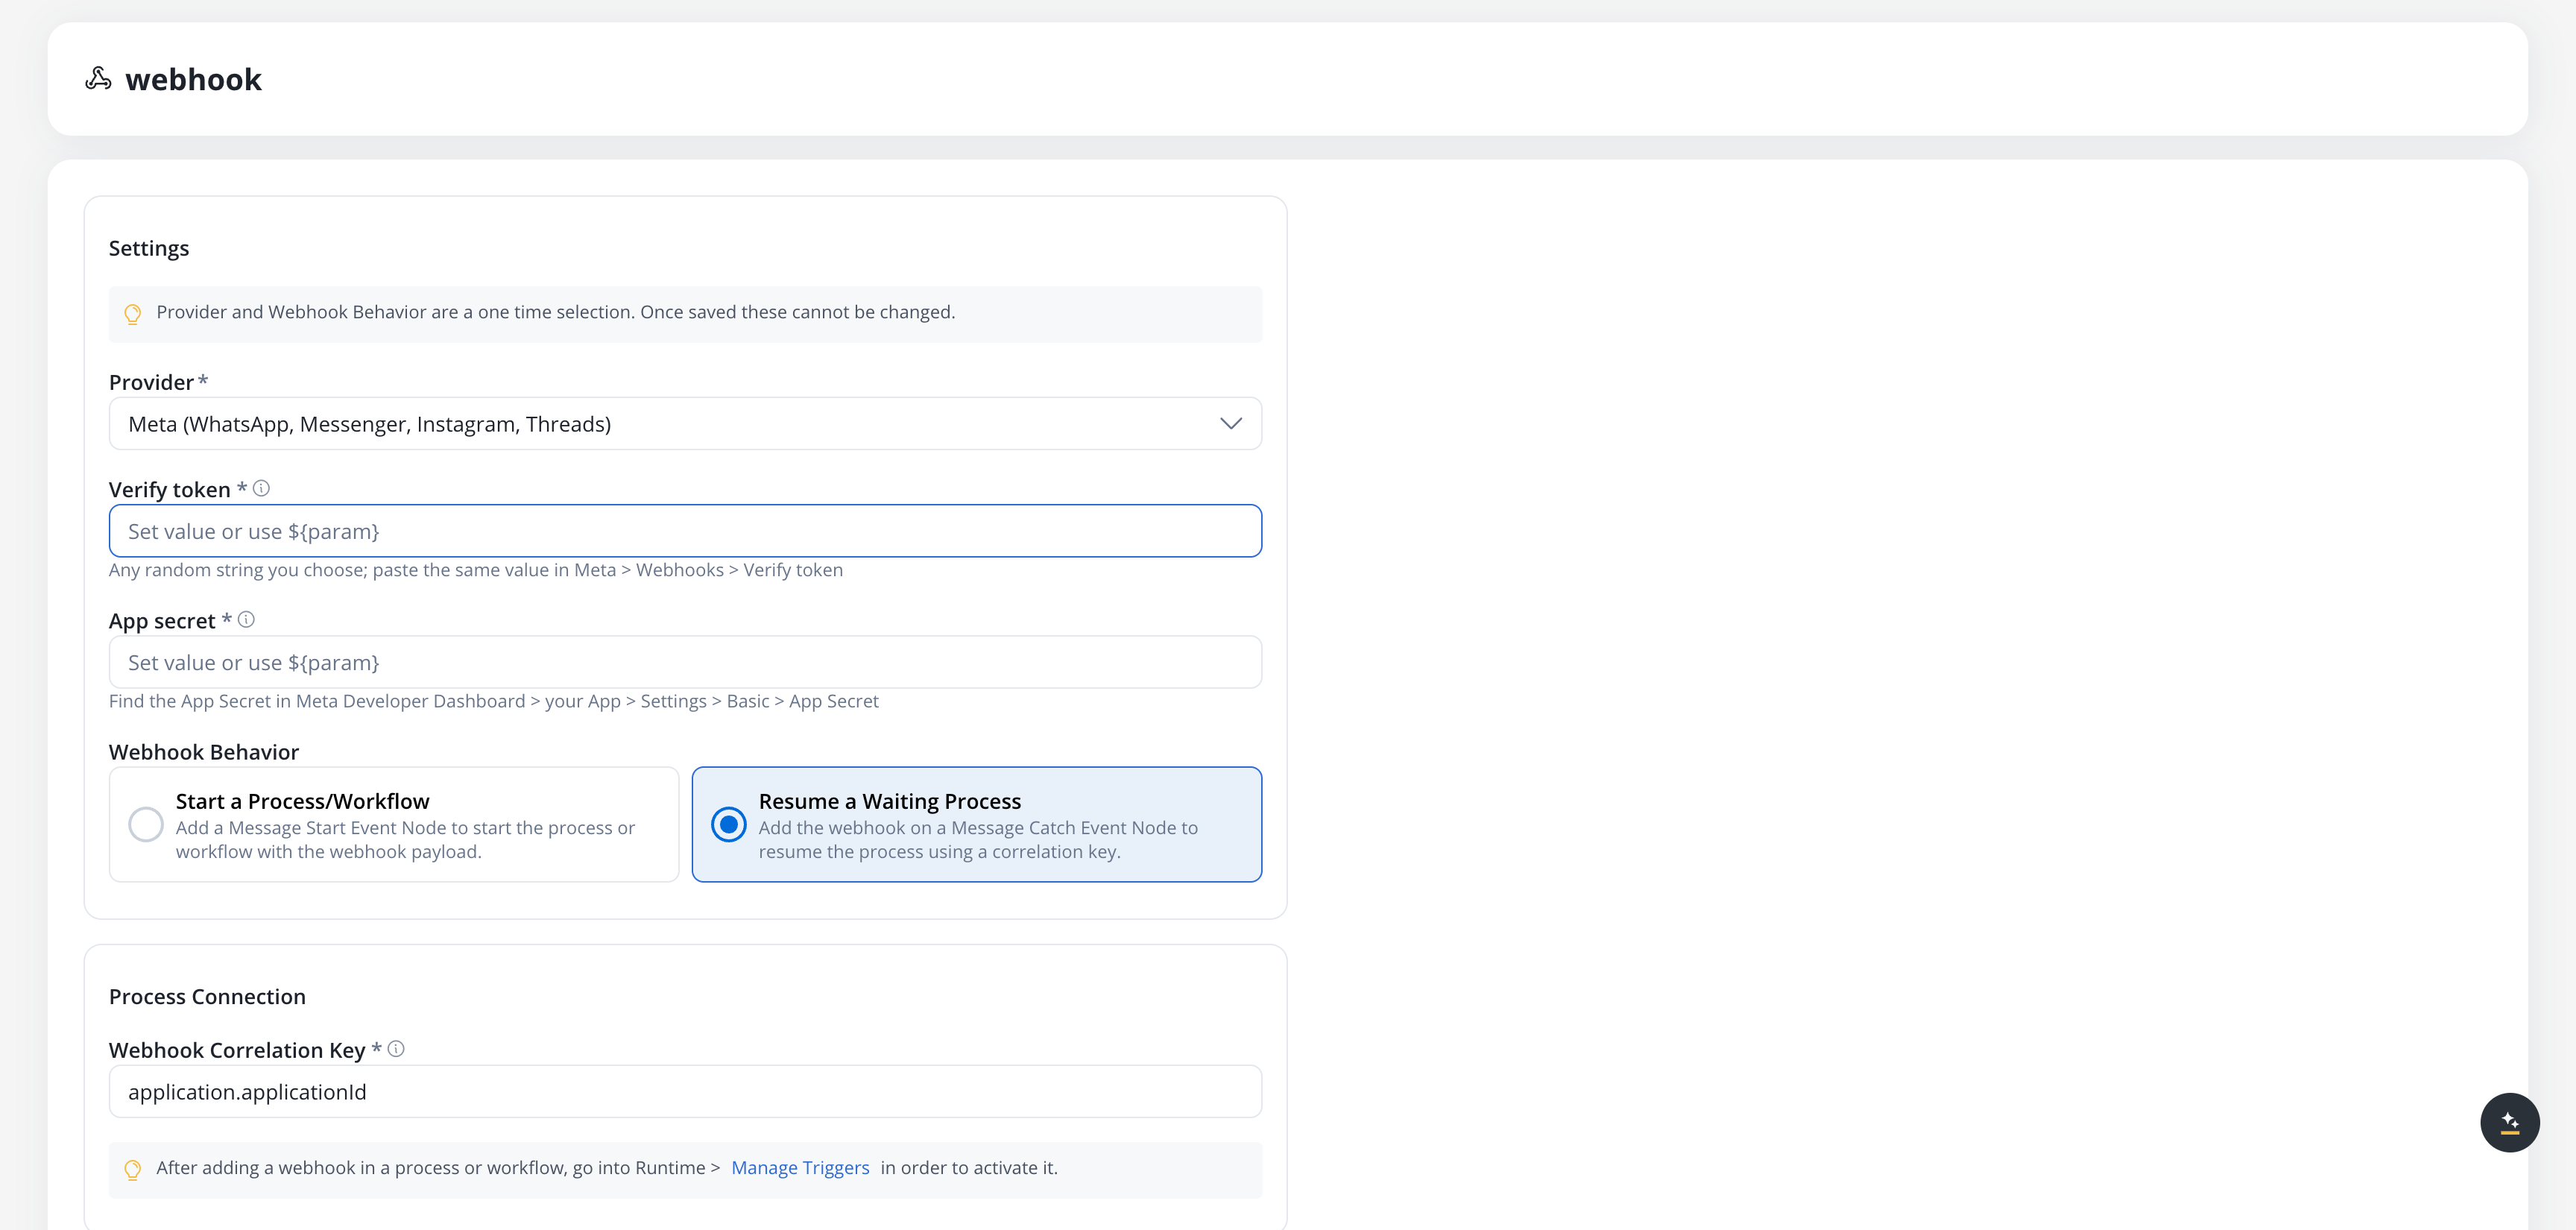
Meta webhooks require two secrets, configured as masked inputs in the Settings panel:
Both values are stored together as a JSON-packed pair in the existing webhook secret field, encrypted at rest. Both are required; saving without either returns
WEBHOOK_META_SECRETS_REQUIRED 400.
hub.mode=subscribe, hub.verify_token, and hub.challenge query parameters when you save the webhook in the Meta App configuration. The gateway:
- Confirms
hub.mode=subscribe. - Confirms
hub.challengeis present. - Compares the received
hub.verify_tokento the configured Verify token using a constant-time check. - Echoes the
hub.challengevalue back as plain text on success.
403 Forbidden — Meta does not finalise the subscription.
POST signature verification. Every POST is signed by Meta with an X-Hub-Signature-256 header (sha256=<hex>). The gateway recomputes the HMAC-SHA256 of the raw body with the configured App secret and rejects mismatches with 401 Unauthorized.
Path / provider mismatch
If a request hits the URL for one provider but the webhook registration is configured with a different provider, the gateway returns400 Bad Request. Always use the URL shown in the Get URL modal — it carries the correct provider segment for the registration.
Webhook payload
When an external system POSTs to the webhook URL, the following data is available in the process instance: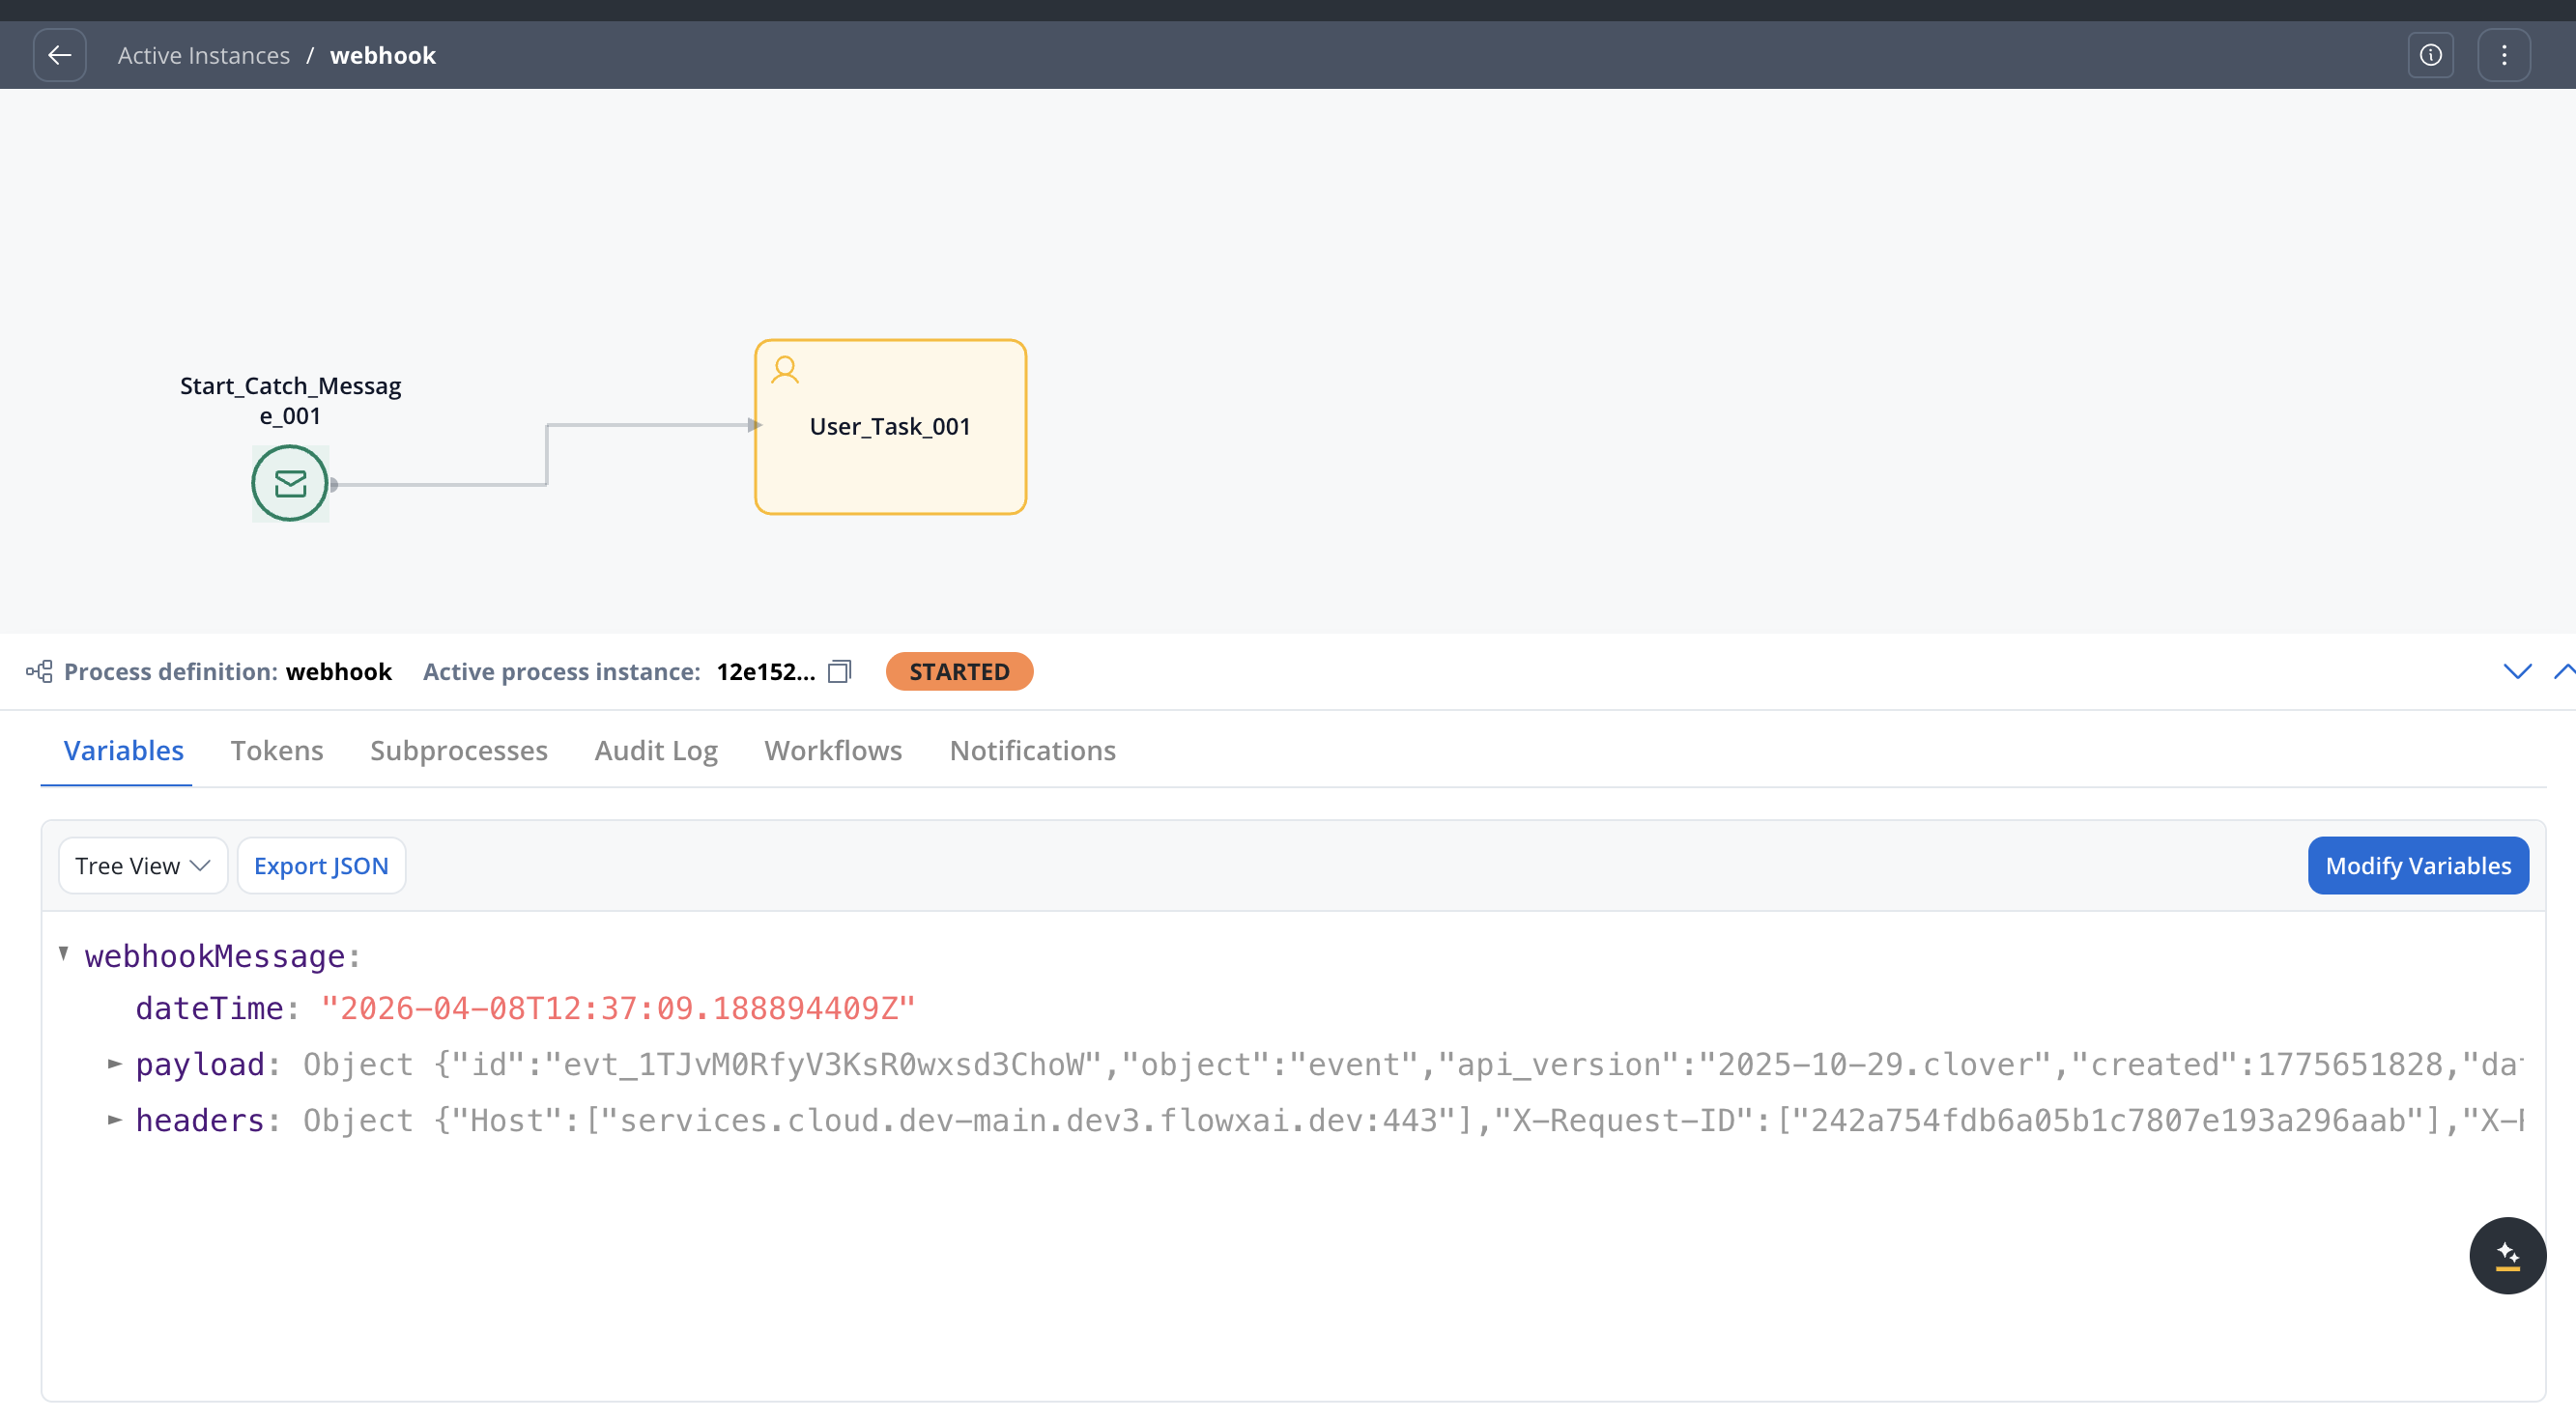
headers includes values added by the FlowX ingress in addition to what the caller sent — typically X-Forwarded-For, X-Real-IP, X-Request-ID, X-Forwarded-Host, X-Forwarded-Proto. These are useful for logging and tracing but should not be confused with provider-supplied headers.The maximum payload size is 1 MB. Requests exceeding this limit are rejected.
Authentication
Webhook authentication uses API keys:- Each webhook registration gets a unique 32-byte, base64-URL-encoded API key
- The key is passed as the
flowxApiKeyquery parameter in the webhook URL - Validation uses constant-time comparison to prevent timing attacks
- Invalid or missing keys return
401 Unauthorized - Inactive webhooks return
404 Not Found
Error handling
Failed webhook events appear in Runtime → Failed Triggers with details about the failure cause.
Best practices
Use HTTPS
Always use HTTPS URLs in production to protect the API key in transit
Validate payloads in your process
Add validation logic in your process to handle unexpected or malformed payloads gracefully
Monitor Failed Triggers
Regularly check the Failed Triggers section for webhook processing errors
Rotate keys periodically
Use the Reset API Key feature to rotate webhook credentials, then update the URL in external systems
Related resources
Message Start Event
Configure message-based and webhook process triggers
Message Catch Intermediate Event
Pause a process until an internal message or an external webhook resumes it
Email Trigger
Start processes from incoming emails via IMAP
Integration Designer
Build integration workflows and manage data sources
Webhook Gateway setup
Deploy and configure the webhook-gateway microservice