

Scope: This page covers Designer-side access to workspaces and projects. For runtime authorization — how end users access published solutions on 5.9.x — see Runtime authorization.
Key benefits
Faster Onboarding
Onboard new business verticals in days instead of weeks with shared platform capabilities
Data Isolation
Provide secure separation between different business contexts while allowing controlled resource sharing
Enhanced Access Control
Implement granular permissions with role-based access control (RBAC) and access control lists (ACLs)
Key concepts
Workspace
A workspace is a logical grouping of entities and assets defined in FlowX that are only available to a subset of users who are given explicit access. Each workspace operates independently, ensuring data and configuration separation between different business contexts.Multi-workspace user access
Users can be granted access to multiple workspaces and can switch between them as needed. When a user has access to multiple workspaces, they can select which workspace to enter after authentication.Data isolation
Workspaces provide logical data isolation, meaning that resources (projects, libraries, themes, etc.) are scoped to specific workspaces and cannot be accessed from other workspaces without explicit sharing configurations.Additional terminology
- Group: A collection of users who share common characteristics, responsibilities, or access needs within a system. Groups are used to simplify access control by managing permissions collectively rather than assigning them individually to each user.
- Permissions: Define what actions can be performed on resources. They are fine-grained access controls that specify privileges for a resource type, such as: read process, edit process, delete process.
- Roles: Collections of permissions grouped together based on job functions or responsibilities. They simplify permission management by assigning a set of permissions to users instead of managing them individually.
Role assignment rule: Roles are never assigned directly to users or groups. A user or group is assigned a role ONLY when given access to a workspace OR a project/library. Exception:
org_admin role is the only one assigned to users directly at the organization level.When a user has multiple roles assigned in the context of a workspace or project, their access level is the union of all permissions from all roles associated with the user.
Workspace use cases
Multiple Business Lines
Multiple Business Lines
Isolation Level: HighDifferent use cases, projects, permissions, and users between business verticals (e.g., retail vs. corporate vs. investment banking).Shared Resources:
- Shared users across business lines
- Shared library builds
- Shared themes (configurable)
Regional Separation
Regional Separation
Isolation Level: MediumSame business line across different regions, subject to local regulations.Shared Resources:
- Libraries and common processes
- Some shared users with multi-region access
Distinct Organizations
Distinct Organizations
Isolation Level: HighestComplete separation for different customers or organizations.Shared Resources: NoneExample: A consulting firm providing FlowX services to multiple clients, with completely isolated workspaces for each client organization.
How workspaces work
Authentication and access flow
1
User Authentication
User logs in using OAuth 2.0 through the configured identity provider (Keycloak or client’s existing provider). Authenticated users are saved with subject ID in FlowX database.
2
Permission Retrieval
System fetches the user’s workspace permissions and available workspaces
3
Workspace Selection
If user has access to multiple workspaces, they select which workspace to enter
4
Context Loading
FlowX Designer loads with workspace-specific content, projects, and permissions
Workspace selection experience
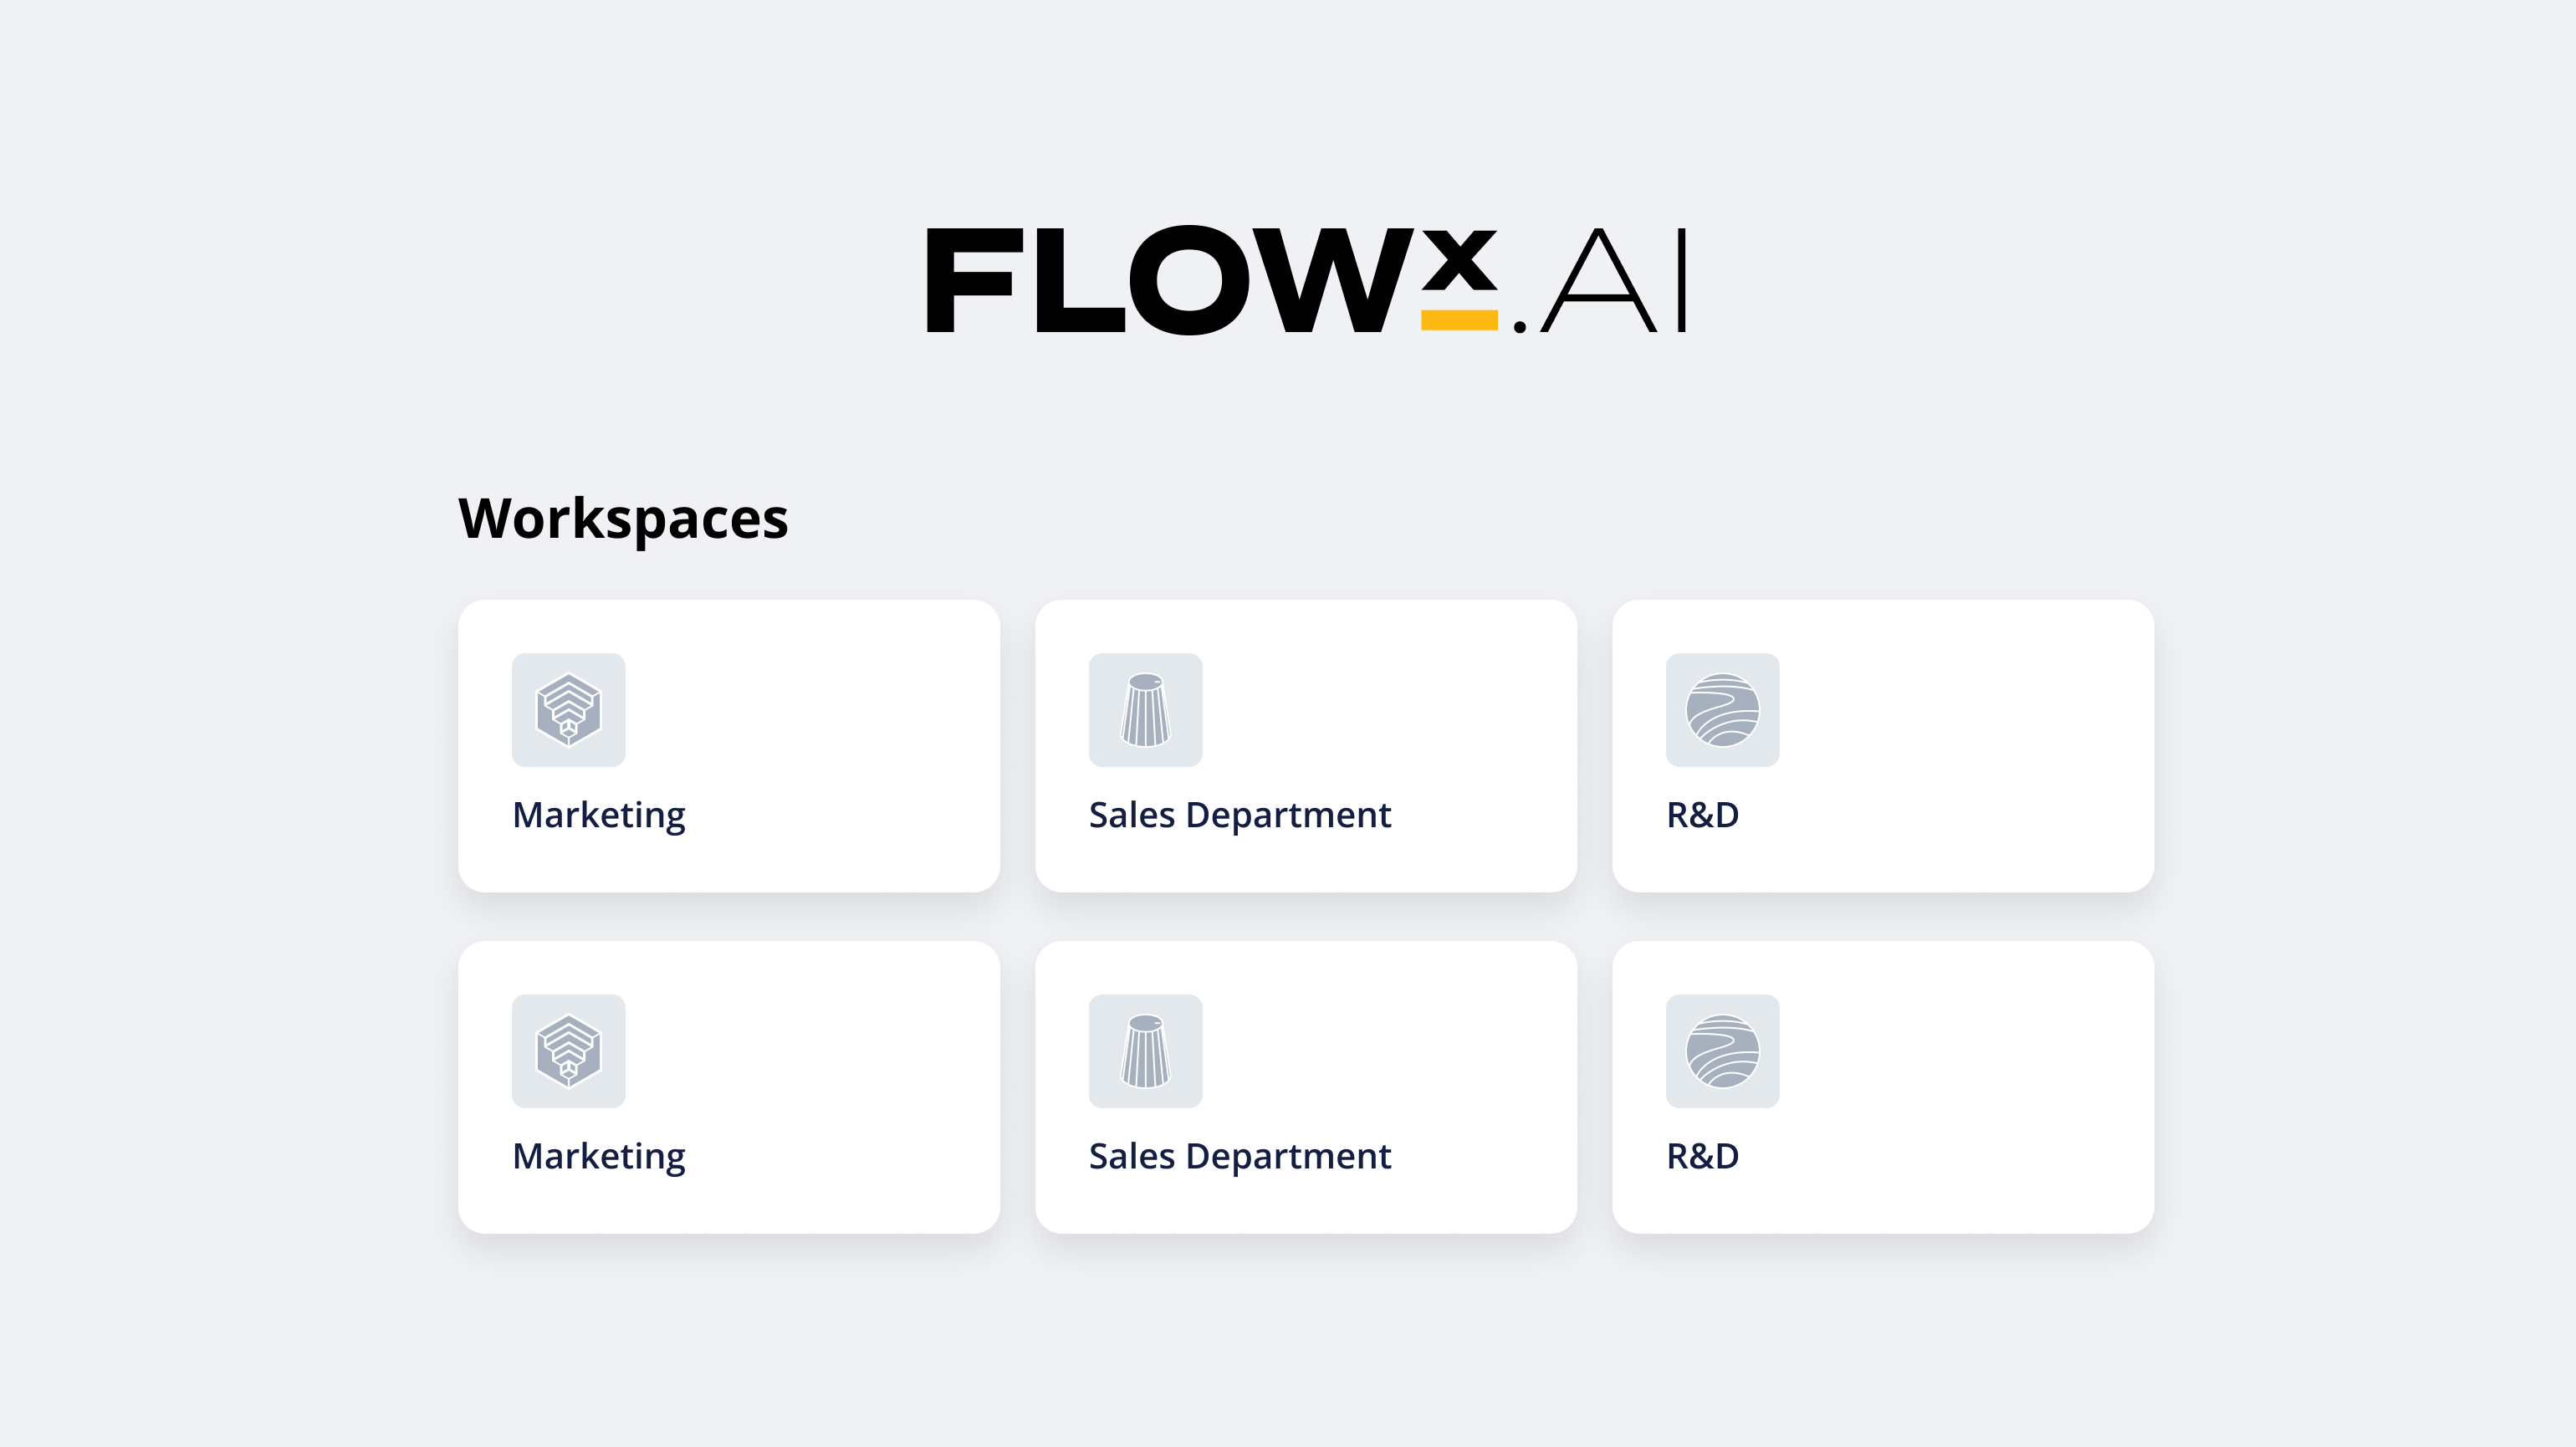
The workspace selection experience varies based on user access:- Single Workspace Access
- Multiple Workspace Access
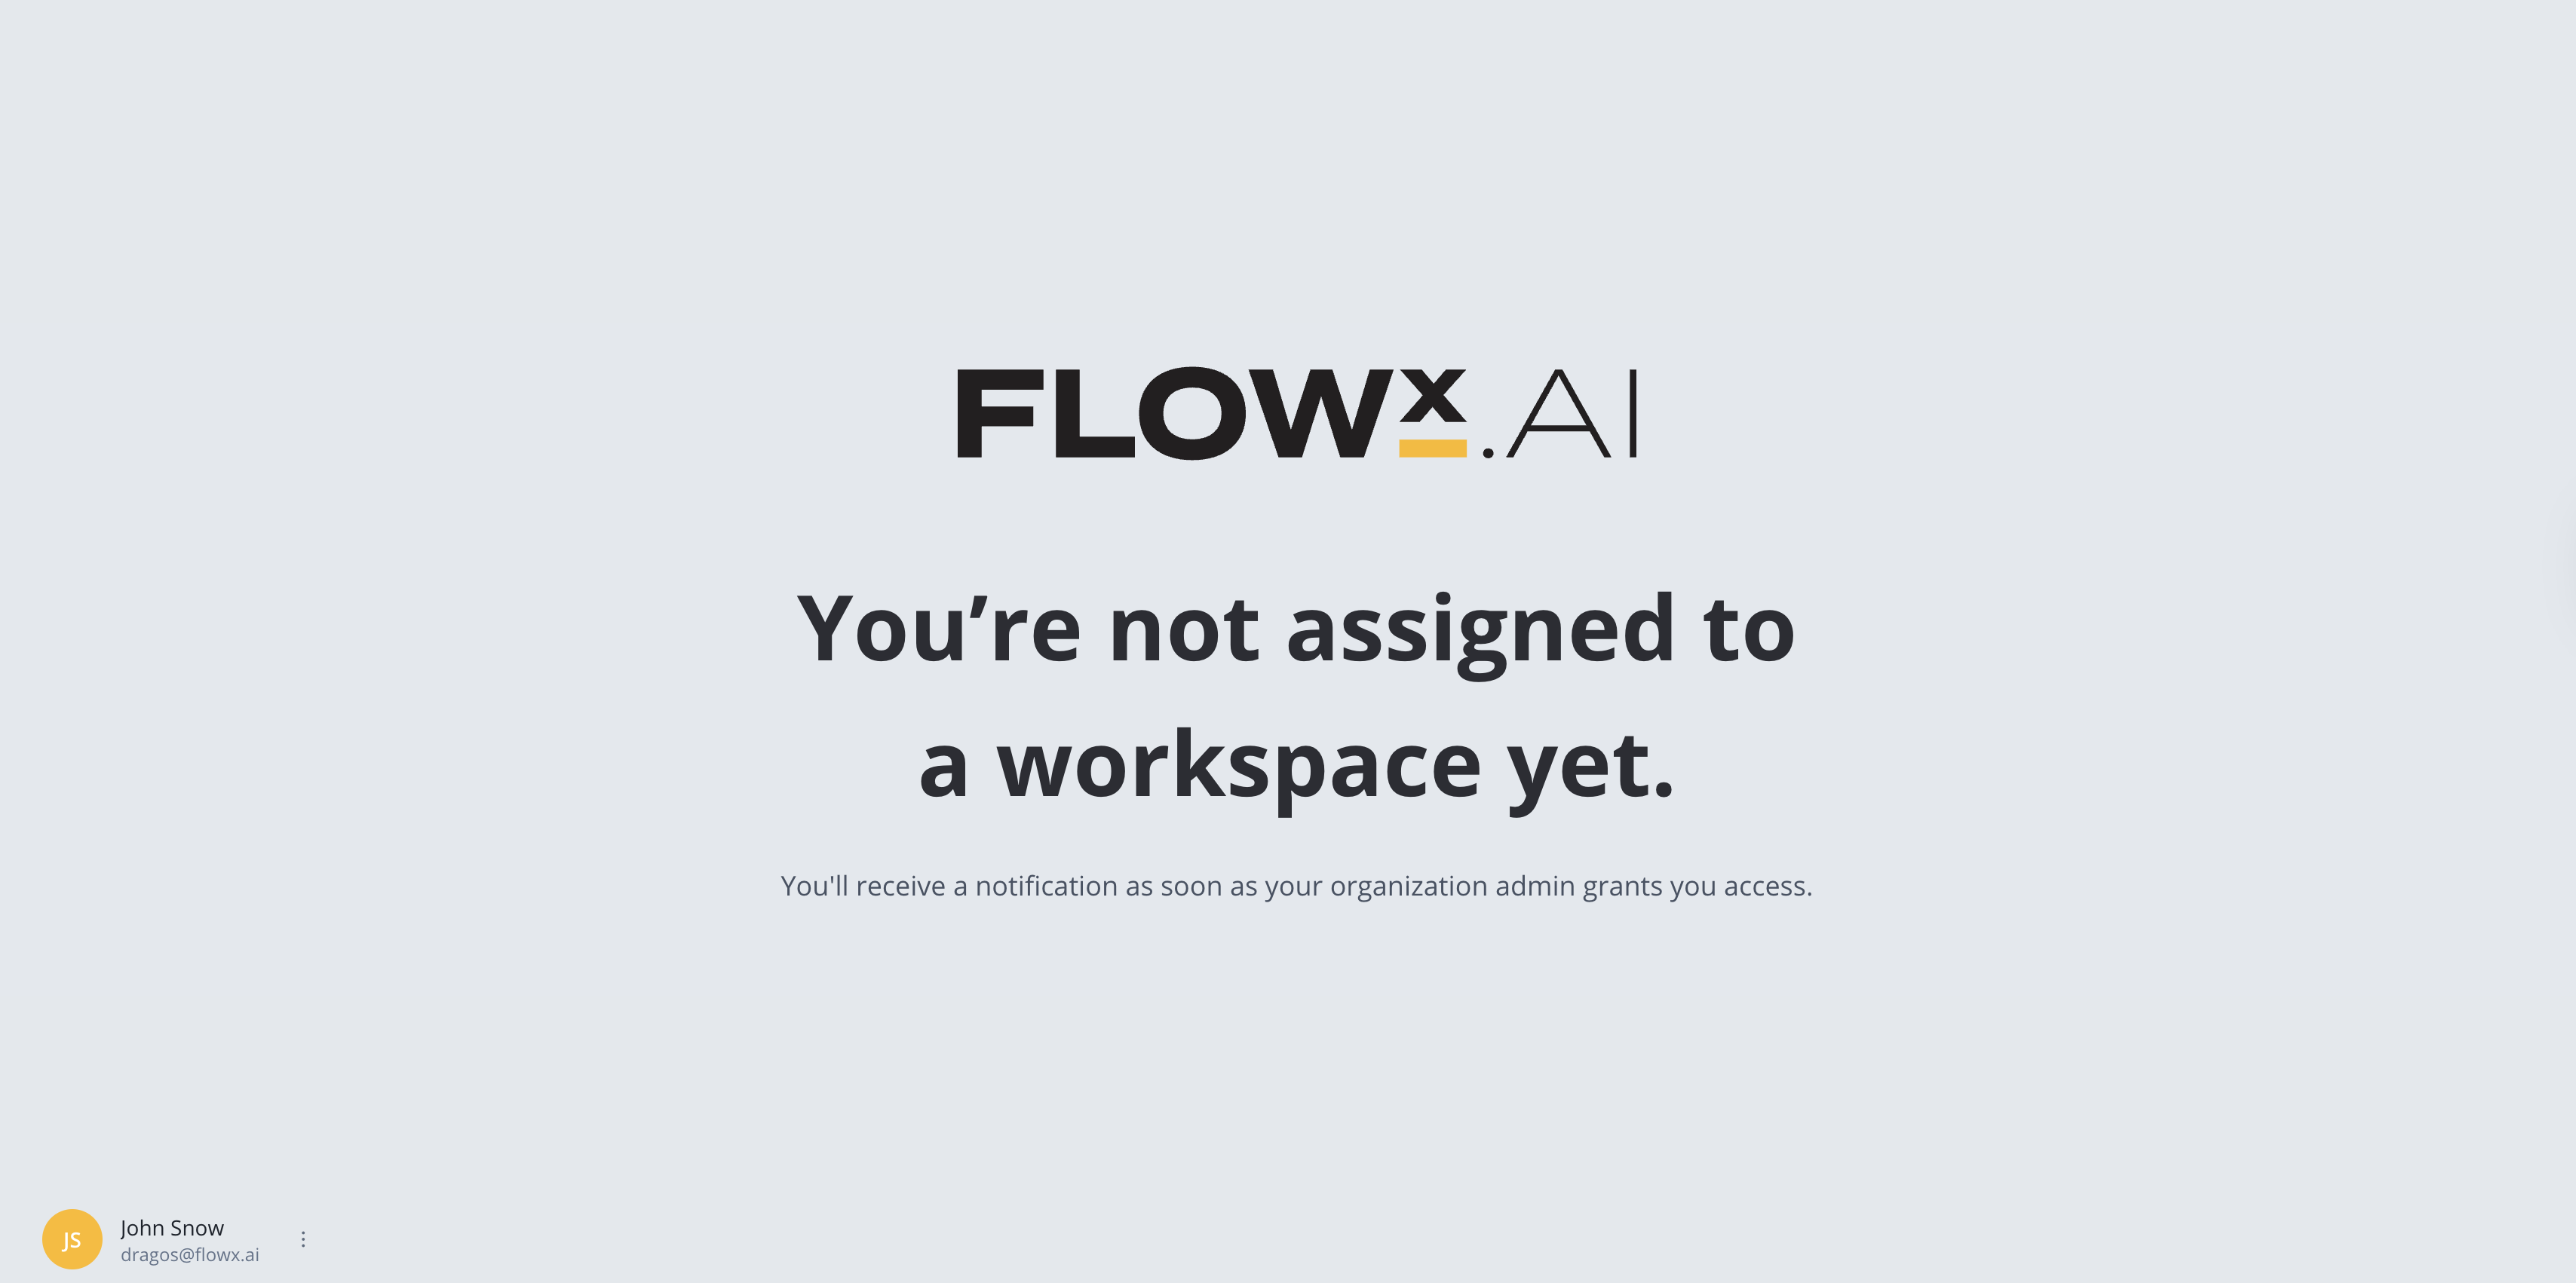
- No Workspace Access
Direct Navigation: Users with access to only one workspace are automatically redirected to the projects page within their workspace.UI Behavior: The workspace dropdown selector is disabled since no selection is needed.Session Flow: Simplified experience with no additional selection steps required.
Session management
Session Persistence: Workspace selection is saved for the user session. On subsequent visits within the same session, users are automatically redirected to their previously selected workspace.
Error handling and access denied scenarios
No Access to Selected Workspace
No Access to Selected Workspace
Trigger: User attempts to access a workspace they don’t have permissions for, or workspace ID is incorrectSystem Response: User is redirected to
workspace/403 error pageCommon Causes:- Workspace access was revoked
- User navigated to an invalid workspace ID
- Workspace was deleted or renamed
No Access to Resource
No Access to Resource
Trigger: User attempts to access a specific resource (project, library, etc.) they don’t have permissions forSystem Response: User is redirected to
403 error pageCommon Causes:- Insufficient project-level permissions
- Resource is restricted to specific roles or groups
- Project access was revoked
Resource management
- Project Isolation
- Library Sharing
- Theme Management
- Media Files & Fonts
Workspace Scoping: Each project is tagged with its workspace ID and only accessible within that workspaceIndependent Lifecycle: Projects in different workspaces can have the same names and follow independent versioningCross-Workspace Import: The same project can now be imported into multiple workspaces on the same environment. Each imported project maintains its own independent lifecycle with separate active policies and access controls.Import Behavior: Projects created from version or build import are created with access only for the currently logged in user with ‘Project Owner’ role. Workspace admins are also able to view projects. Access can be extended to required users subsequently.Runtime Permissions: Permissions for Runtime section are received by users with workspace role. Users inherit runtime permissions from workspace role for ALL projects/libraries they have access to.
Additional workspace features
Command Center (AI Agents)
AI Agents permission is a project-level permission. Consequence: Command center is available only on projects or libraries pages.
Audit Logs
Audit log entry in main menu for every workspace will be available only for users with Workspace Admin role. The reason for this is that global audit log includes all logs for all projects/libraries in workspace.Access control
Role-based access control (RBAC)
For detailed role permissions and setup instructions, see Workspaces Access Rights.
Predefined Roles
- Project editor - Can modify project content, processes, and configurations. Includes all Project Viewer permissions.
- Project viewer - Read-only access to project content and processes. Cannot make modifications.
- Workspace user - View only access to workspace entities. Can create projects, but only sees projects they have explicit access to.
- Owner - Automatically assigned to project creators. Full control over project settings, access management, and can delete the project.
- Theme editor - Extends workspace user role to include permissions to manage themes and associated resources (global media files).
- Workspace admin - Manages all workspace level resources including users, roles, themes. Can configure access and content, but cannot manage organization-wide settings.
- Runtime editor - Enables users to test runtime functionality and manage runtime policies without full configurator permissions. Commonly used by QA teams and testers who need to manage “change active policy” operations and test processes during runtime without broader editing capabilities.
Workspace-Specific
Roles are specific to each workspace - a user can have different roles in different workspaces
Only pre-defined roles are available for workspace and project/library access.
Detailed role permissions
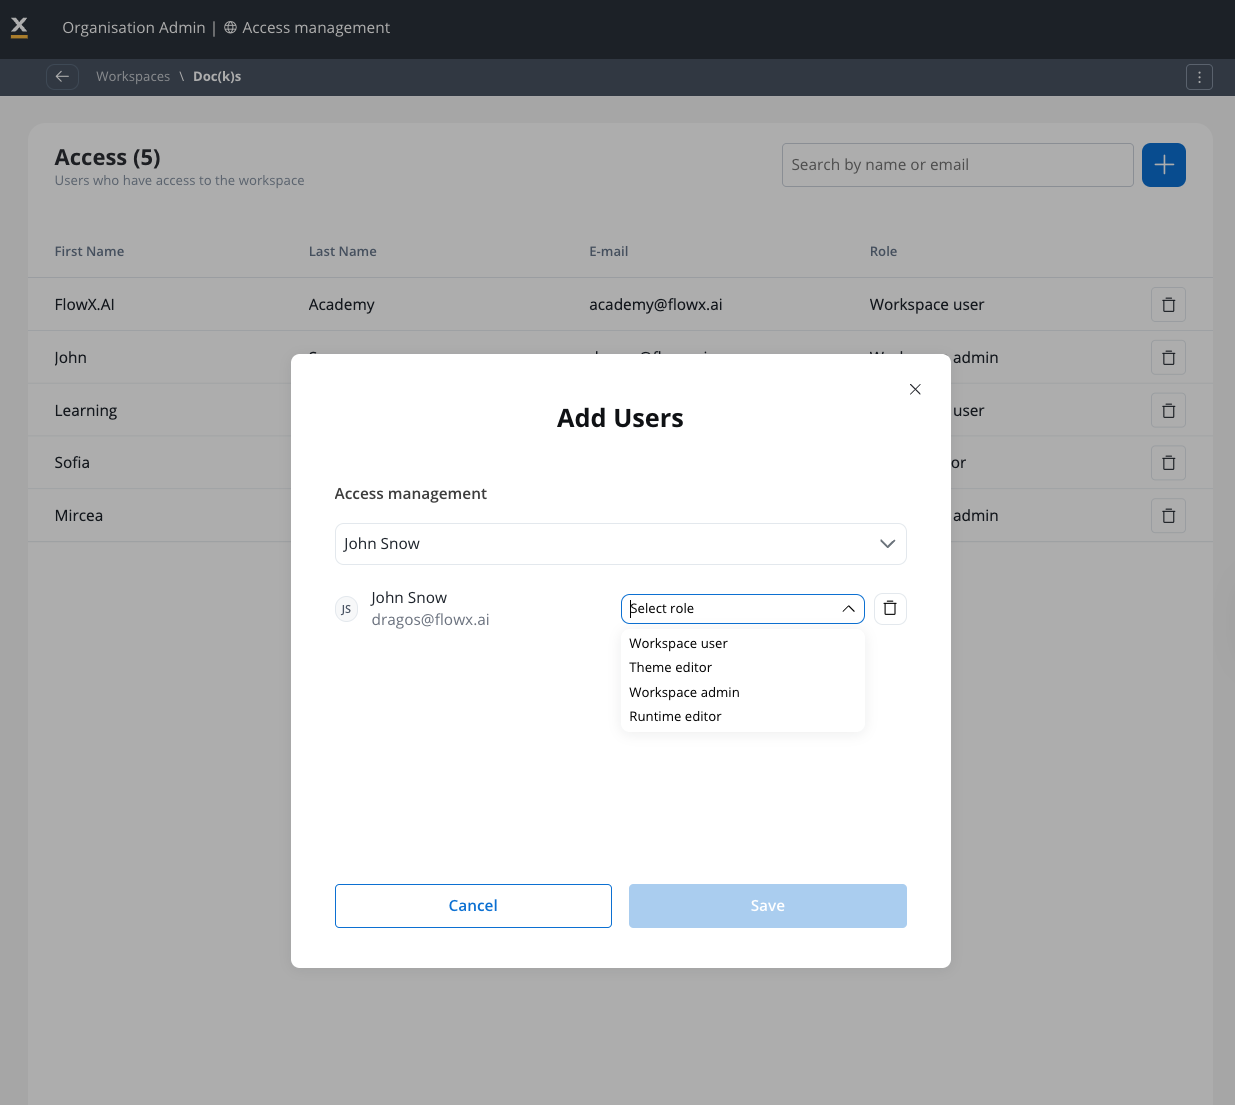
To add a user to a workspace, and to assign a role to the user, you need to go to Organization settings page and select your desired workspace, then add the user to the workspace and assign the role to the user.- Workspace admin: Manages all workspace level resources including users, roles, themes. Can configure access and content, but cannot manage organization-wide settings.
- Workspace user: View only access to workspace entities. Can create projects, but only sees projects they have explicit access to.
- Theme editor: Extends workspace user role to include permissions to manage themes and associated resources (global media files).
- Runtime editor: Enables users to test runtime functionality and manage runtime policies without full configurator permissions. Commonly used by QA teams and testers who need to manage “change active policy” operations and test processes during runtime without broader editing capabilities.
User groups
User groups simplify permission management by allowing you to assign permissions to groups rather than individual users.
- Default Groups: Each workspace includes an “Everyone in workspace” default group
- Custom Groups: Create groups based on teams, departments, or project requirements
- Inherited Permissions: Users automatically inherit permissions from their group memberships
Access control lists (ACLs)
Resource-Specific Permissions
Resource-Specific Permissions
Grant fine-grained control over individual resources within a workspace, allowing exceptions to general role permissions.Example: A user with
project_viewer role can be granted edit access to a specific project without becoming a full configurator.Exception-Based Access
Exception-Based Access
Provide specific users or groups access to individual resources without requiring full platform permissions.Use Case: External consultants can be given access to specific projects they’re working on without broader workspace access.
Owner Management
Owner Management
Resource creators can manage access to their specific resources without requiring full admin intervention.Benefit: Project owners can add team members to their projects without needing admin approval for each addition.
Project-level access control
Projects and libraries support fine-grained access control through dedicated project roles that work alongside workspace-level permissions.Project Owner
Automatically assigned to project creators. Full control over project settings, access management, and can delete the project.
Project Editor
Can modify project content, processes, and configurations. Includes all Project Viewer permissions.
Project Viewer
Read-only access to project content and processes. Cannot make modifications.
Creating a project
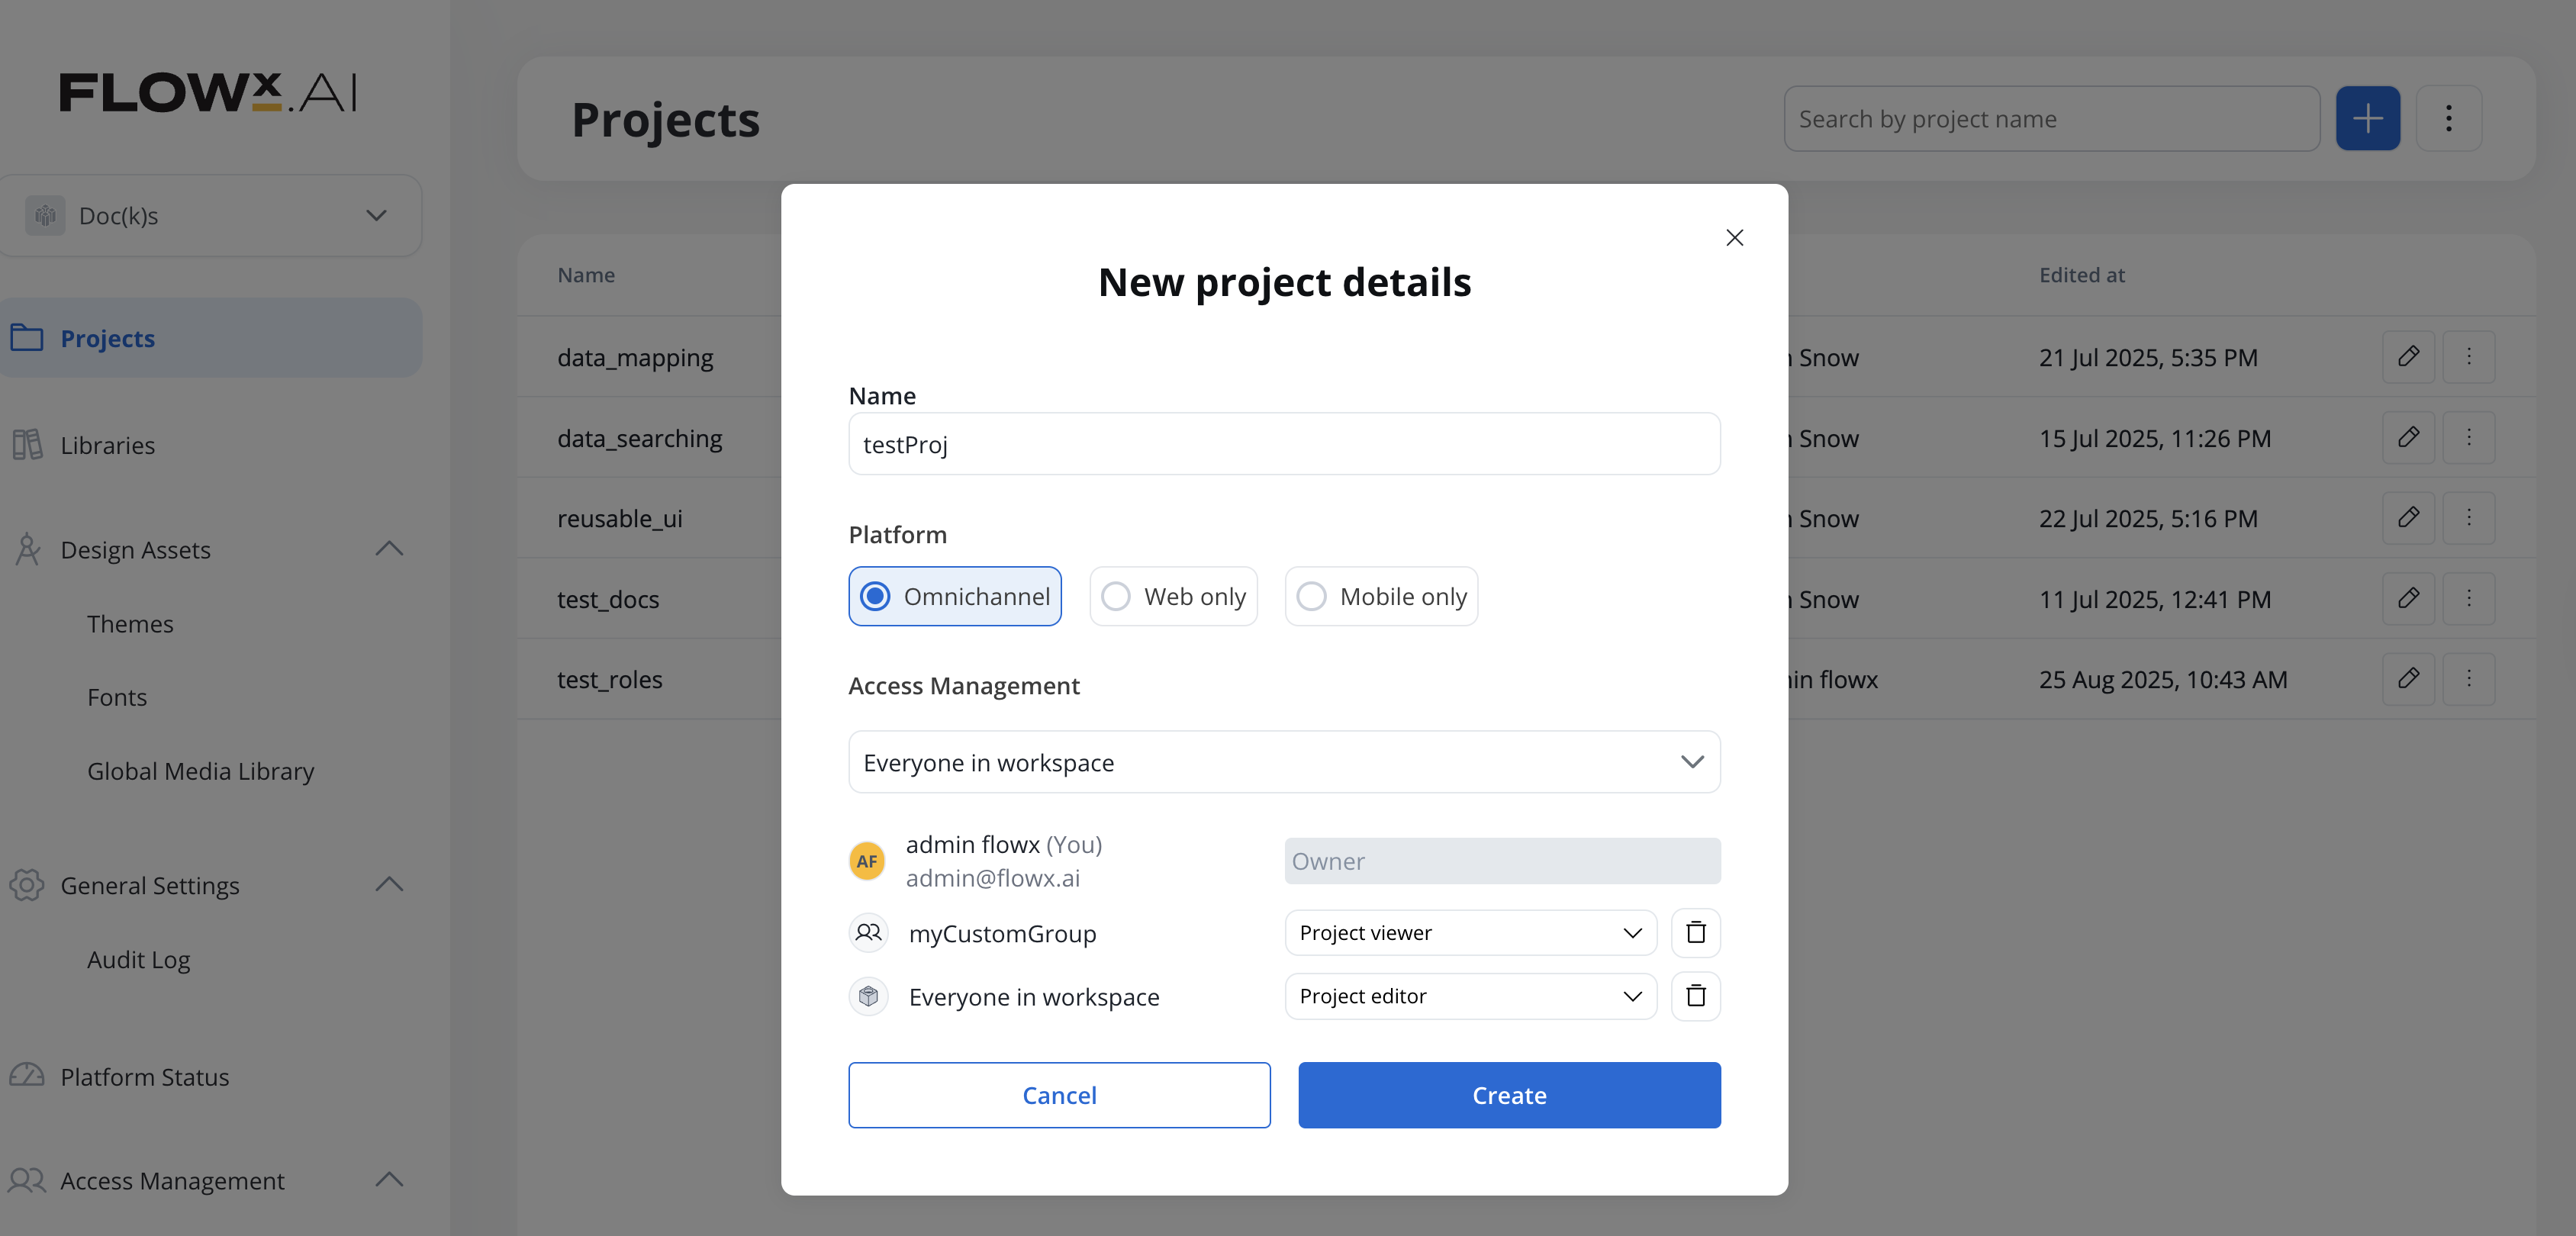
1
Create Project
Create a new project by clicking the + icon in the top-right corner of the Projects page.
2
Owner Assignment
The currently logged-in user is automatically assigned as Project Owner with full access rights.
3
Extend Access
Project owners can subsequently add users or groups with Project Editor or Project Viewer roles as needed.
Access management inheritance
- Project Editor role automatically includes Project Viewer permissions
- Multiple roles: Users can have both workspace-level and project-level roles simultaneously
- Permission union: When users have multiple roles, their access is the combination of all permissions from all assigned roles
Organization administration
Organization admin role
The
org_admin role is the only role assigned directly to users at the organization level, not workspace level.- Go to Organization Settings → Users.
- Find the user in the list and open their context menu (the three-dot menu).
- Select Set as ORG Admin.
Only an existing organization admin can promote another user. Use Set as ORG Admin directly — changing the role through the user’s Edit form is a different flow and is not how the organization admin role is assigned.
User management
The Organization Users page lists only Designer users — users who have logged into FlowX Designer at least once, or who were manually created by an organization admin. It does not list end users, who access published solutions at runtime. Designer users and end users are managed separately:- Designer users — managed in Organization Settings → Users. Control access to the FlowX Designer, workspaces, projects, and libraries.
- End users — managed in Organization Settings → Access Management (End-Users and End-Users Groups). Control access to published solutions at runtime (e.g., who can start or view a process). End-user roles are defined per project in Version Settings → End-User Roles.
End-user groups are managed inside FlowX (not in Keycloak), and a role grants access only on the solutions where it’s been explicitly shared from the Solutions page. See Runtime authorization.
User creation scenarios
- LDAP/Active Directory Users
- Direct FlowX Creation
- Invitation
Sync Behavior: Users from customer’s LDAP/Active Directory are not automatically created in FlowX.Onboarding Steps:
- User logs into FlowX Designer for the first time
- They are redirected to a “You’re not assigned to a workspace yet” message page
- User account is now created in FlowX and appears in the Users list in Organization Settings
- Organization admin assigns workspace access with appropriate role (Workspace User, Workspace Admin, Theme Editor, or Runtime Editor)
- On next login, user will have access to assigned workspaces
Users synced from LDAP will only appear in FlowX after their first login attempt.
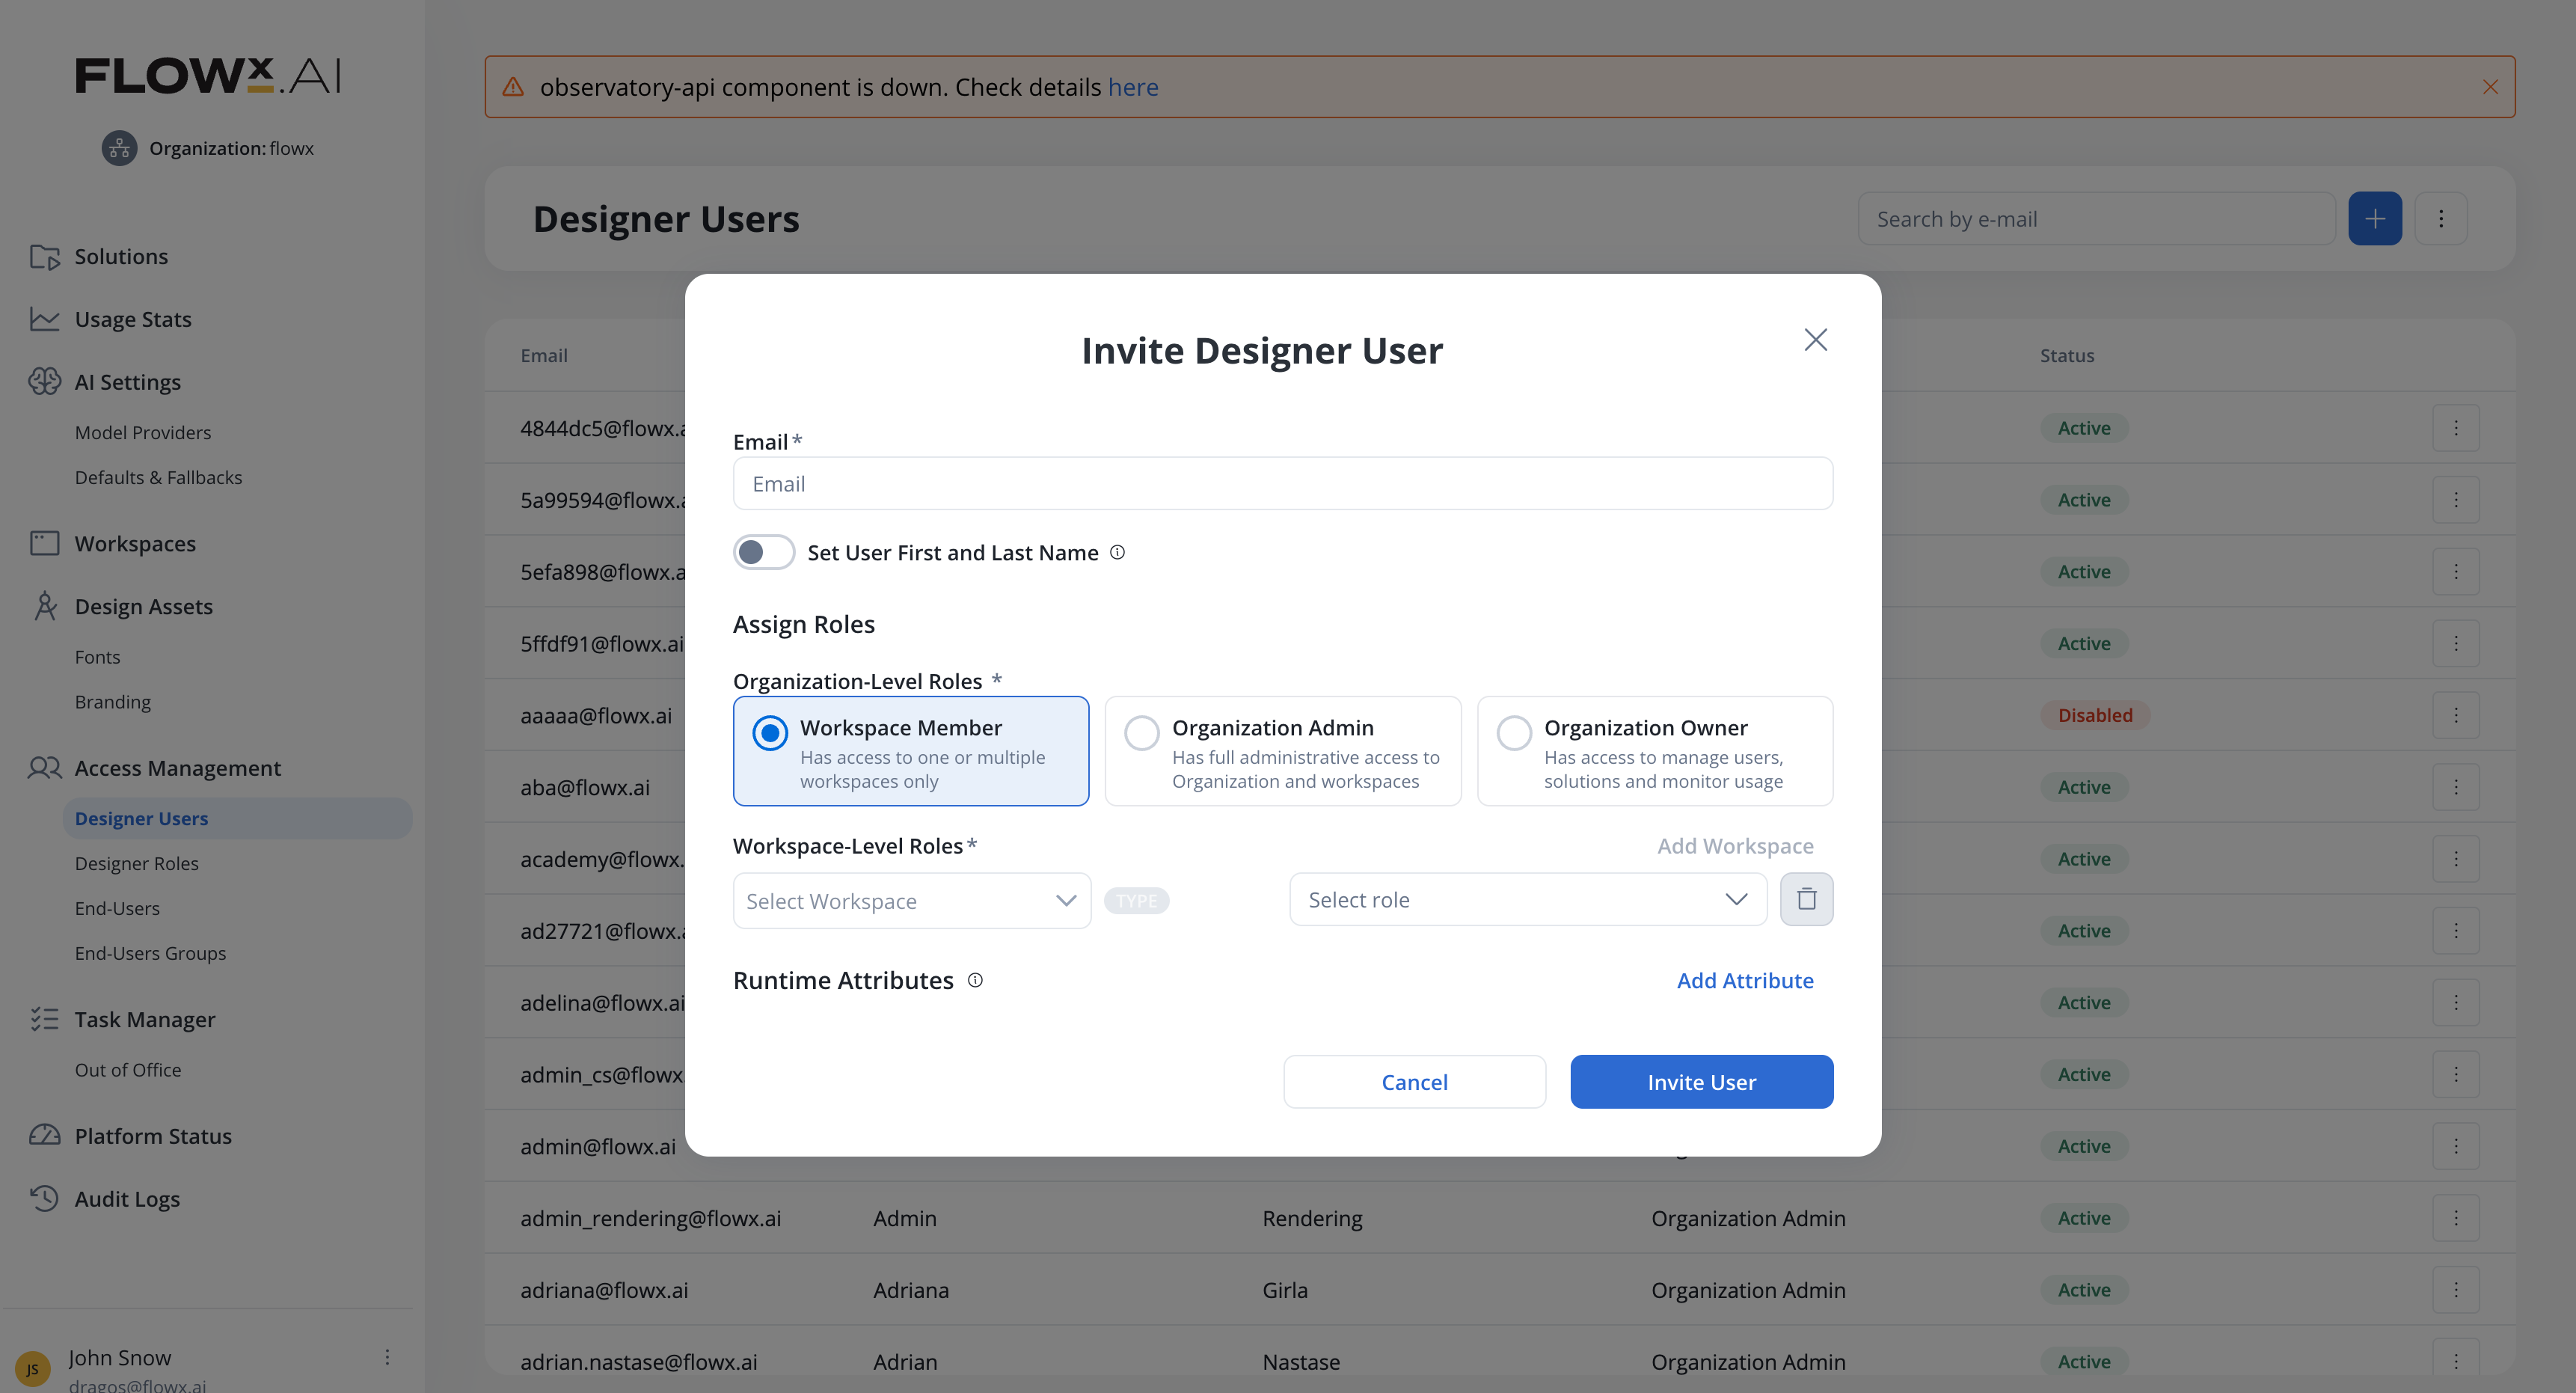
Assigning roles while inviting
SaaS ·Available on SaaS with FlowX.AI . This feature is live on managed (SaaS) deployments now. Self-hosted deployments will receive it with the next LTS release family.
Additional organization settings
Runtime roles and groups
Runtime roles and end-user groups are managed in FlowX (not in Keycloak). End users and end-user groups live under Organization Settings → Access Management (End-Users and End-Users Groups); runtime roles are defined per project in Version Settings → End-User Roles. Together they control the permissions end users hold on published solutions.Role assignment to a user or group is set per-solution from the Share modal on the Solutions page. See Runtime authorization.
Roles and groups are defined at organization level, so all workspaces share the same list.
Set environment info
Configuring client and environment information is available only in Organization settings section under Platform status page.Workspace management
Creating and managing workspaces
1
Admin Access Required
Only users with organization administrator permissions can create new workspaces
2
Workspace Configuration
Set workspace name, description, and basic settings during creation
3
User Assignment
Add initial users and assign appropriate roles to get started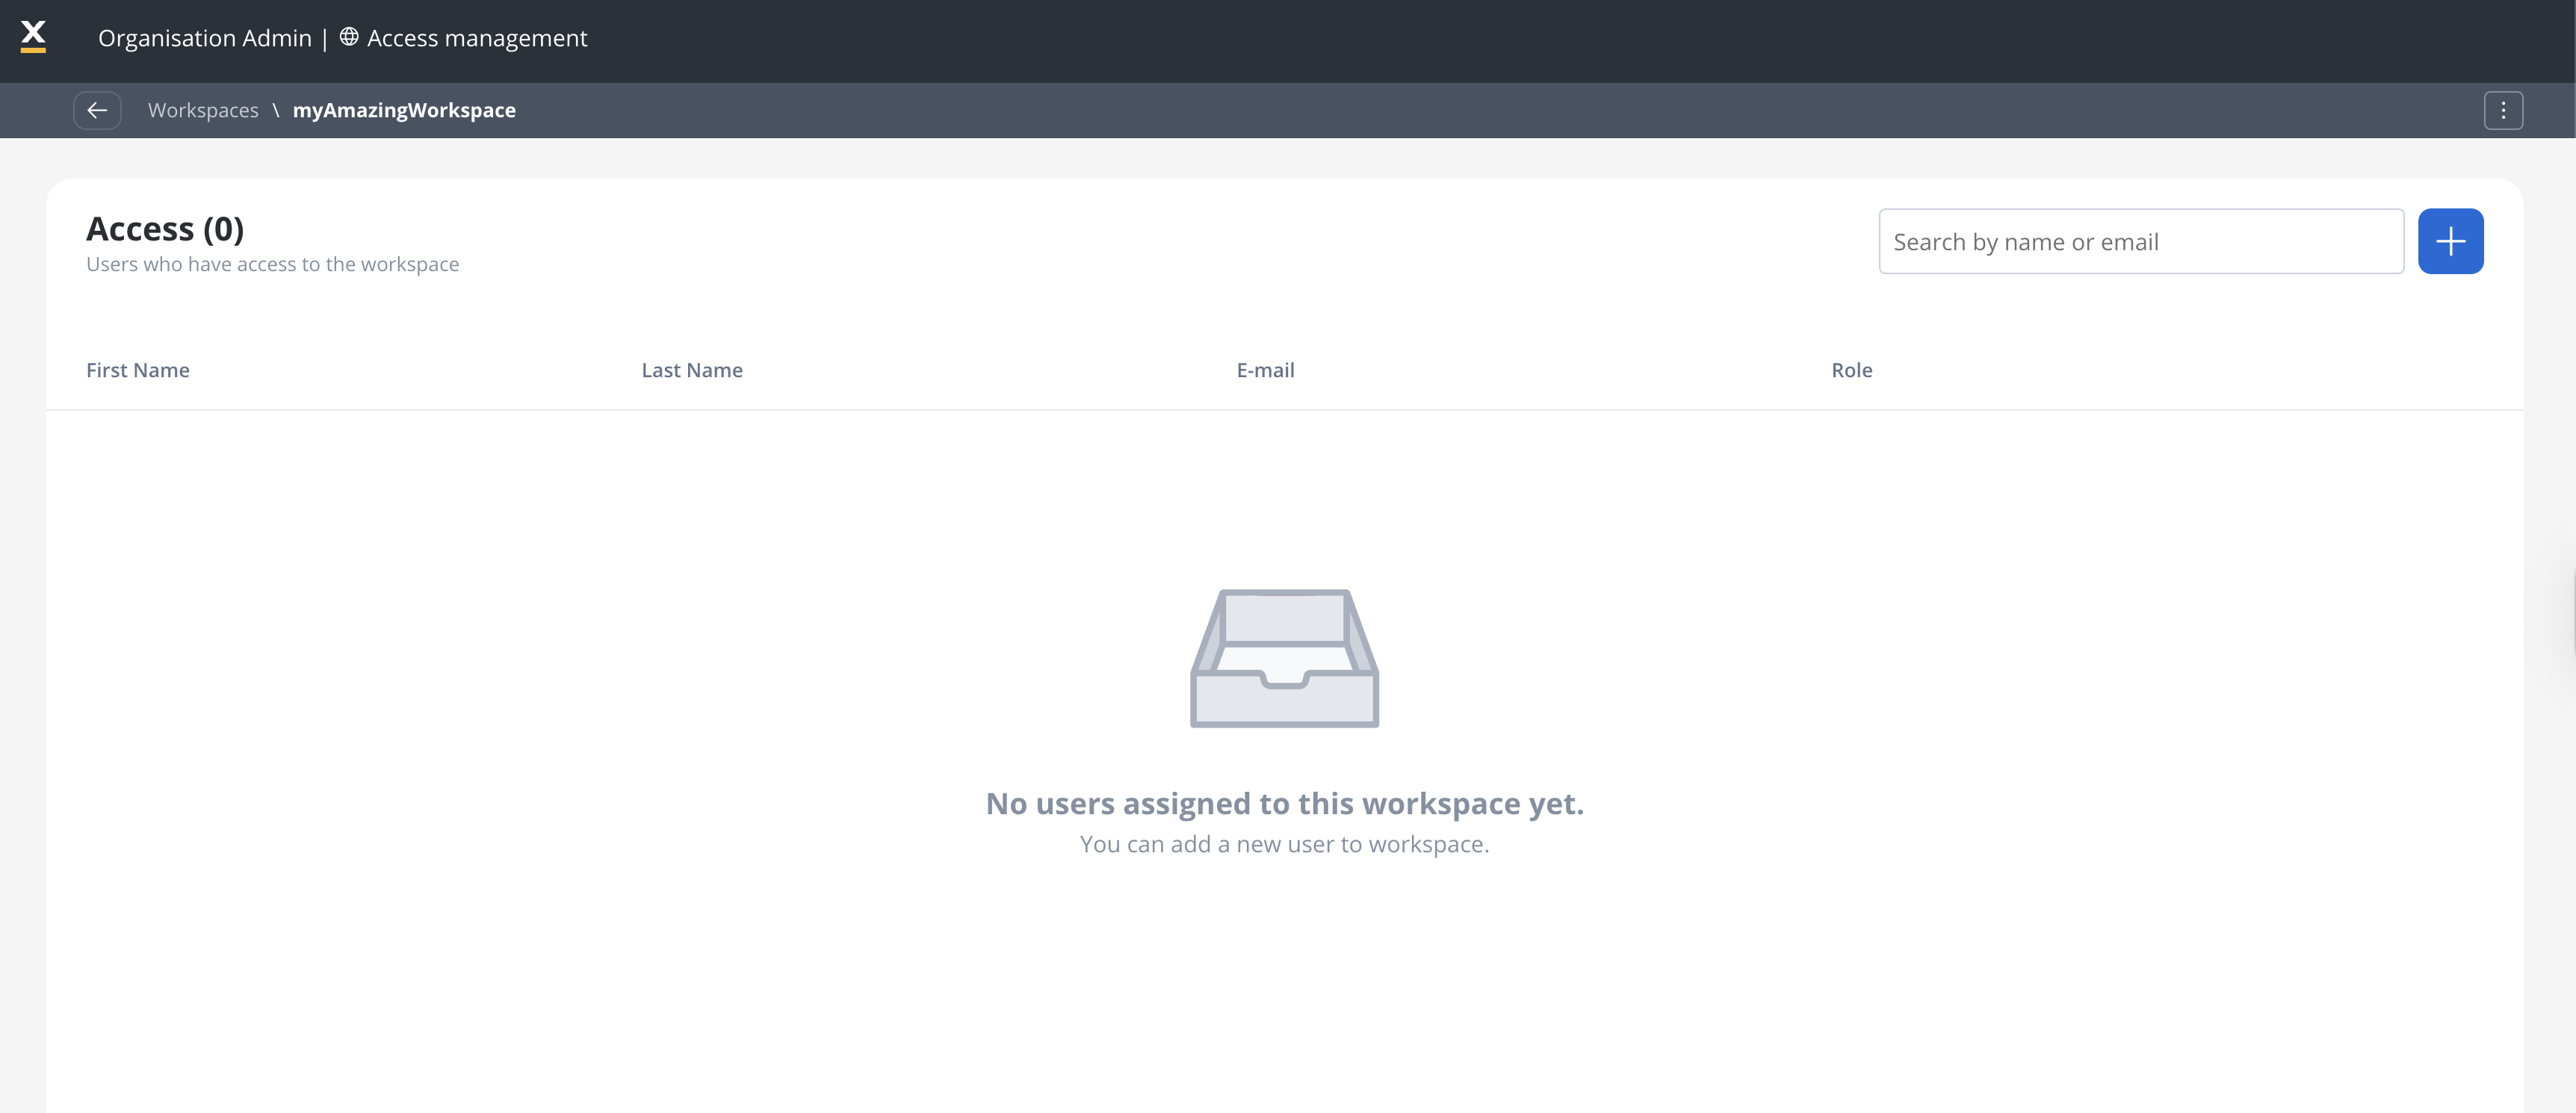
Workspace environment type
Workspaces are labeled with an Environment Type that indicates their purpose within your deployment. The label is visible in every workspace listing, so users can immediately tell whether they are working in development, testing, or live data — particularly important when the same project (by UUID) is imported into more than one workspace via cross-workspace project import.Available types
Setting the type
The Environment Type is set at workspace creation and can be changed later by a Workspace or Organization Admin:- At creation: the Create Workspace dialog includes an Environment Type dropdown. Pick the type that matches the workspace’s intended use.
- After creation: go to Organization Settings → select your workspace → adjust the Environment Type dropdown.
The selected type is displayed as a Type column in the Designer workspace list, so administrators and users can identify the environment without opening workspace settings.
Multi-workspace identification
Because the same FlowX environment can host multiple workspaces, and the same project (same UUID) can be imported into more than one workspace, the Environment Type label is the primary cue for where a user is working. Without it, a designer opening a project cannot tell at a glance whether they are about to edit a Sandbox copy or the Production copy of the same project. Recommended patterns:- On a non-production FlowX environment, label every workspace Sandbox — the environment itself is not customer-facing, regardless of how the workspaces are organized internally.
- On a production FlowX environment that hosts multiple workspaces (for example, UAT, Staging, and Production for the same project), use Staging for the validation workspace and Production for the live workspace. The Environment Type lets users distinguish them inside the same Designer.
- Avoid mixing labels arbitrarily across an environment — the value of the cue depends on the label matching the workspace’s role.
User management within workspaces
- Adding Users
- Role Assignment
- Access Matrix
- Direct Assignment: Add users directly to workspace with specific roles
- Group Membership: Add users to groups that inherit workspace permissions
- Multi-Workspace Access: Users can be members of multiple workspaces
Migration and compatibility
Initial setup requirements
Complete setup instructions are available in the Workspaces Setup Guide.
- To create the first user in FlowX Designer with organization admin role, an environment variable
SPRING_LIQUIBASE_PARAMETERS_DEFAULTORGADMINUSERNAMEneeds to be configured with the username of the user from Identity Store (Keycloak/ other Identity Store from where the users are used to login in FlowX.AI). - If request to Keycloak fails, the fallback is to use
SPRING_LIQUIBASE_PARAMETERS_DEFAULTORGADMINUSERSUBJECTIDto create the organization admin user. Value that must be set is the subject identifier. (sub in JWT token OR user’s id in Keycloak).
This step is important for creating any environment, no matter if there’s a pre-existing env or a newly created one.
For existing FlowX customers
For existing FlowX customers
Workspaces already exist in FlowX 5.1.x, so upgrading to 5.9.x does not create or restructure workspaces: your existing workspaces, projects, libraries, themes, and Designer users carry over unchanged.What does change in the upgrade is the runtime access model (end-user roles and groups move fully into FlowX, with per-solution role assignment). See the 5.1 to 5.9 migration guide for the complete upgrade impact.
For new FlowX 5.x installations
For new FlowX 5.x installations
Initial Setup Process:
- Configure the first workspace administrator user
- Create the initial workspace
- Set up users and role assignments
- Begin creating projects and processes
Best practices
Workspace design
Clear Boundaries
Define workspaces based on clear business, regulatory, or organizational boundaries
Naming Conventions
Use consistent naming conventions for workspaces, roles, and resources
Documentation
Document workspace purposes, user access patterns, and governance policies
Scalability Planning
Plan workspace structure to accommodate future growth and organizational changes
Permission management
- Principle of Least Privilege: Grant minimum necessary permissions
- Group-Based Management: Use groups for permission management rather than individual assignments
- Regular Audits: Periodically review and audit workspace permissions
- Clear Ownership: Establish clear ownership models for workspace resources
Resource sharing
- Controlled Sharing: Implement clear policies for resource sharing between workspaces
- Dependency Management: Track and manage dependencies between shared resources
- Version Control: Maintain version control for shared libraries and themes
Common use cases
Banking - Multi-Division Operations
Banking - Multi-Division Operations
Scenario: Large bank with retail, corporate, and investment banking divisionsWorkspace Structure:
- Retail Banking Workspace
- Corporate Banking Workspace
- Investment Banking Workspace
- Shared Compliance Workspace (for common libraries)
Insurance - Geographic Separation
Insurance - Geographic Separation
Scenario: Insurance company operating in multiple countriesWorkspace Structure:
- US Operations Workspace
- EU Operations Workspace
- APAC Operations Workspace
Cross-workspace project import
You can import the same project into multiple workspaces on the same environment. This feature enables organizations to use workspaces to represent different operational environments (such as UAT, staging, pre-production) on a single FlowX deployment, reducing operational costs.How it works
Import to Multiple Workspaces
Import a project build (and optionally a version) into different workspaces on the same environment
Independent Lifecycle
Each imported project maintains its own lifecycle with separate active policies and access controls
No Impact on Original
Importing to another workspace does not affect the original project’s settings, policies, or process instances
Separate Process Instances
Process instances are workspace-specific; imported projects have no instances initially until processes run in the new workspace
Import behavior
Limitations and considerations
Current limitations
- Resource Isolation: Direct access to resources from other workspaces is not possible
- Single Environment Sharing: Library sharing only works within the same FlowX environment
- Permission Inheritance: Workspace permissions don’t automatically inherit across workspace boundaries
Additional limitations
Planning considerations
- Change Management: Organizational alignment needed for governance models
- User Training: Users need to understand workspace selection and navigation
- Governance Policies: Clear policies needed for resource sharing and access management
- Migration Planning: Existing customers should plan workspace structure before creating additional workspaces