

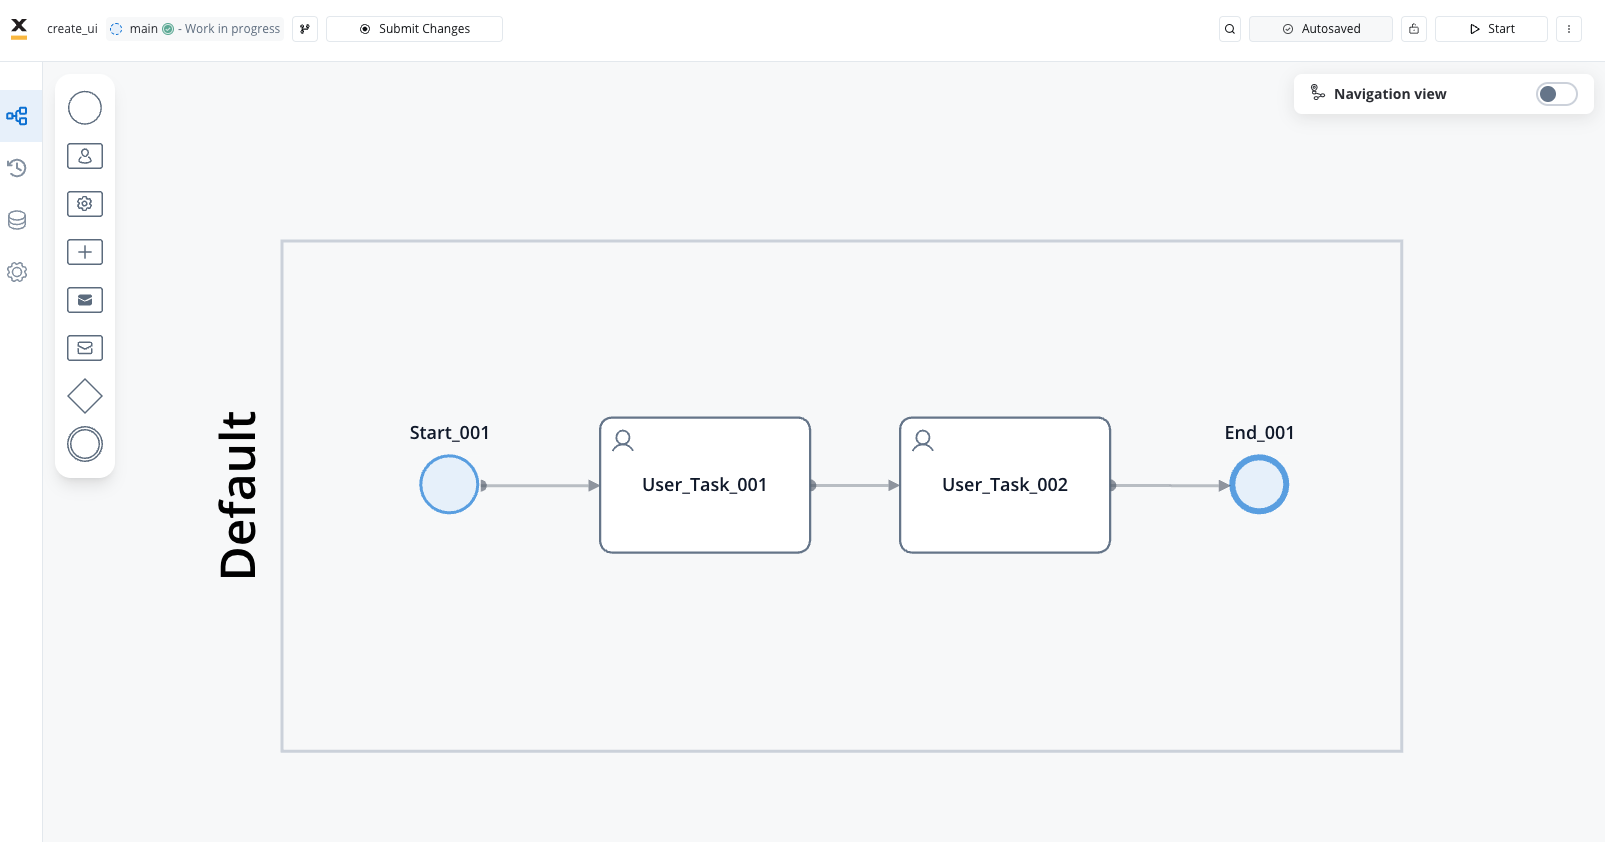
Process Flow with User Tasks
Understanding UI design in FlowX.AI
UI Design Concepts
In FlowX.AI, user interfaces are primarily associated with User Task nodes in your process flow. Each User Task can represent a screen or part of a screen in your app. The UI Designer provides a visual editor where you can add, arrange, and configure UI components to create your desired interface.
UI Designer Documentation
Comprehensive guide to the UI Designer and available components
Navigation Areas
Learn more about different navigation patterns and structures
Creating a process with user interfaces
1
Create a Process Definition
- Open FlowX.AI Designer and navigate to your project
- Go to the Processes section and click + New Process
- Give your process a descriptive name and click Create
2
Add Process Flow Nodes
- Add a Start Node to your process canvas
- Add User Task nodes for each screen in your app
- Connect the nodes in the sequence users will navigate through them
- Add an End Node to complete your process
Process Flow with User Tasks
Each User Task node represents a screen or a significant UI interaction in your app. Design your process flow to match your intended user journey.
3
Create a Navigation Area
- With your process open in edit mode, click the Navigation tab
- Click the + Add button to create a new navigation area
- Select Page as the navigation type (or another type based on your needs)
- Name your navigation area (e.g., “Main Application Page”)
- Assign the relevant User Task nodes to this navigation area
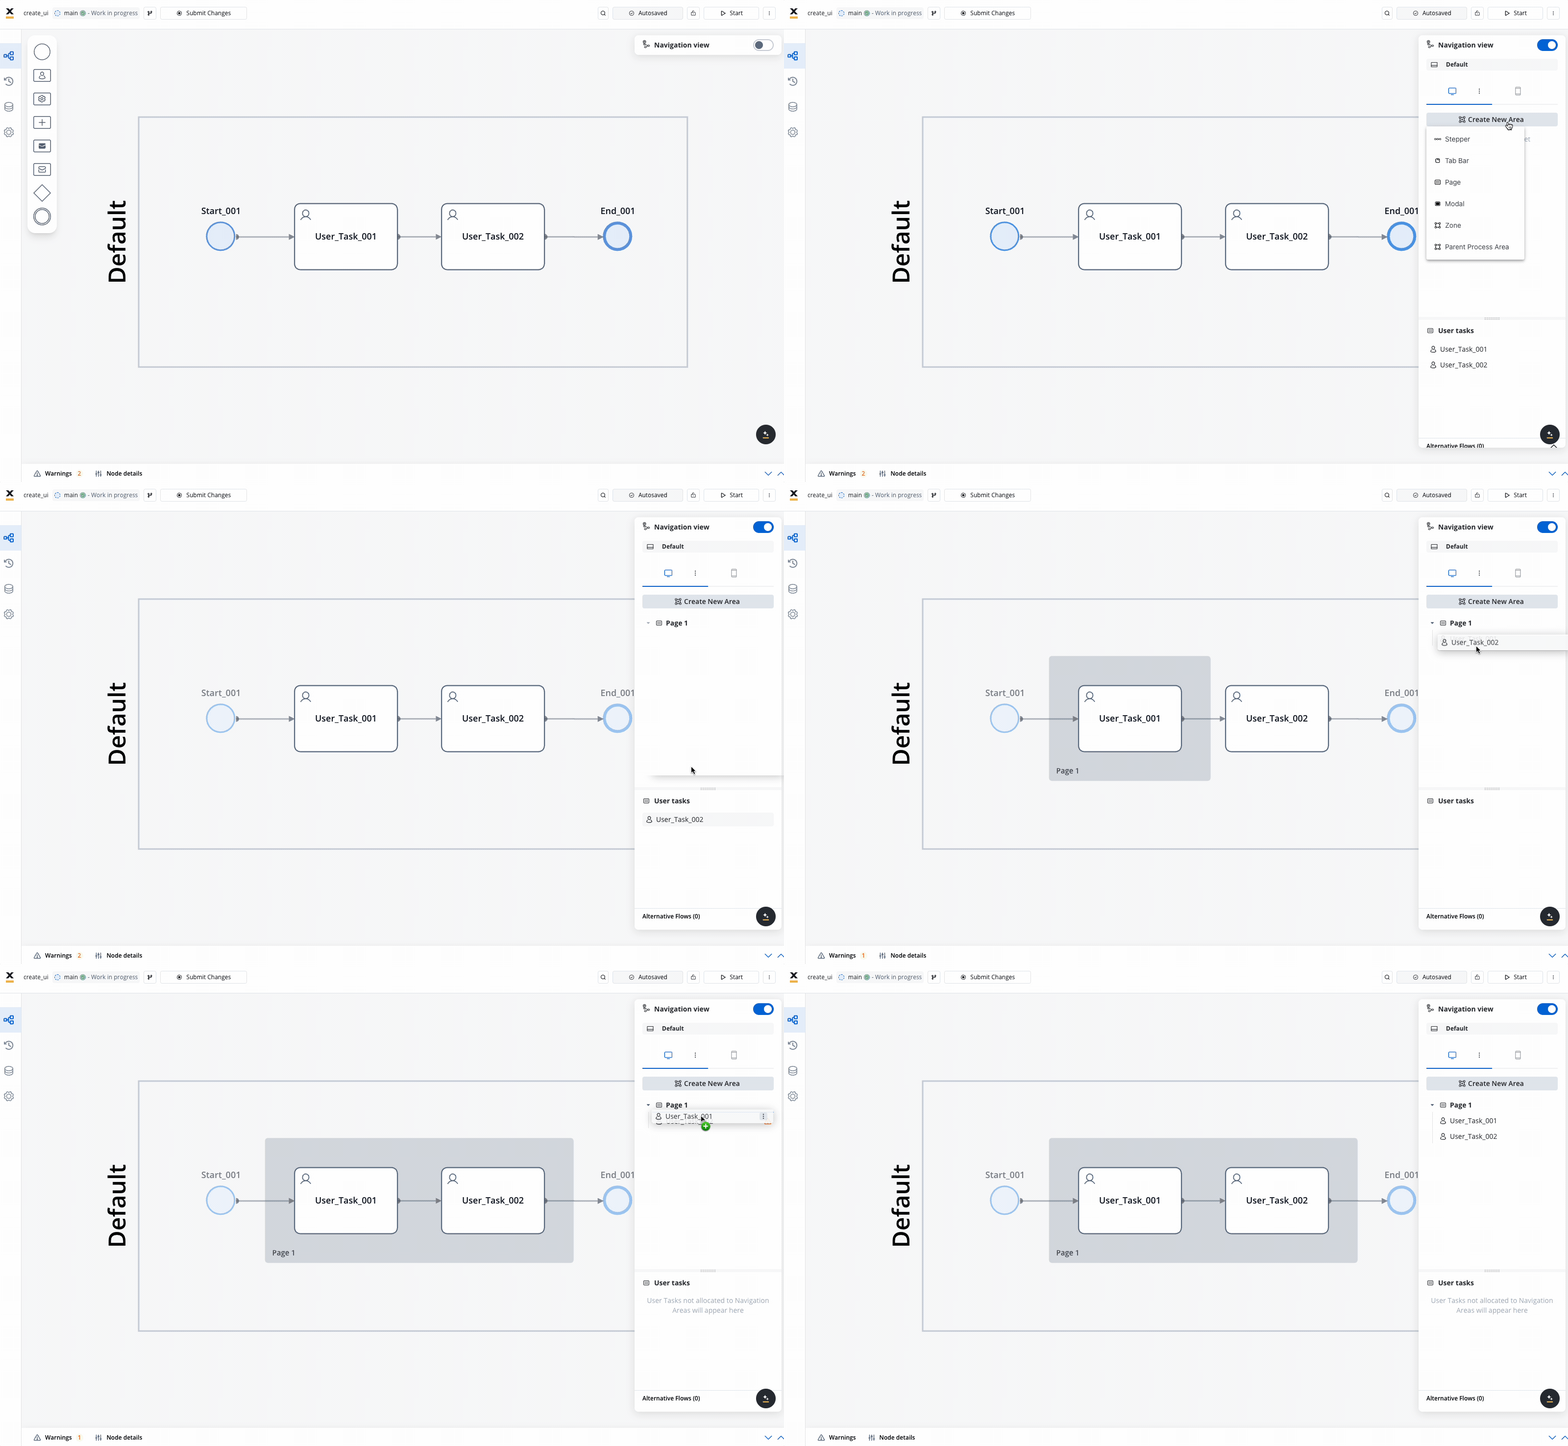
Creating a Navigation Area
Available Navigation Area Types:
- Stepper: Breaks progress into logical, numbered steps for intuitive navigation
- Tab Bar: Allows users to switch between different sections or views
- Page: Displays full-page content for an immersive experience
- Modal: Overlays that require user interaction before returning to the main interface
- Zone: Groups specific navigation areas or tasks, like headers and footers
- Parent Process Area: Supports subprocess design under a parent hierarchy
Configuring the UI
All visual properties of UI elements and navigation areas are configured using the FlowX.AI UI Designer, which provides a visual editor for building your interfaces.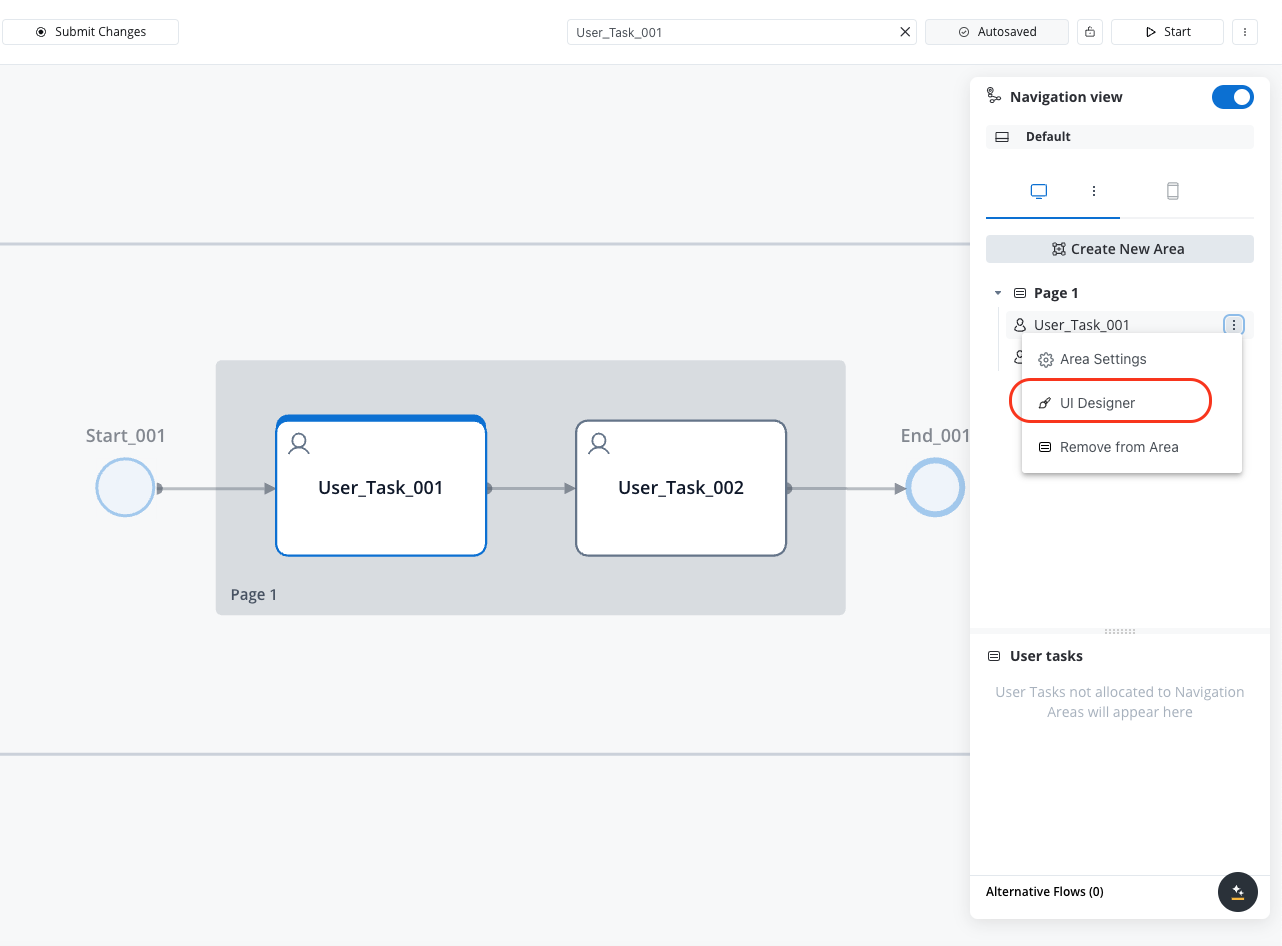
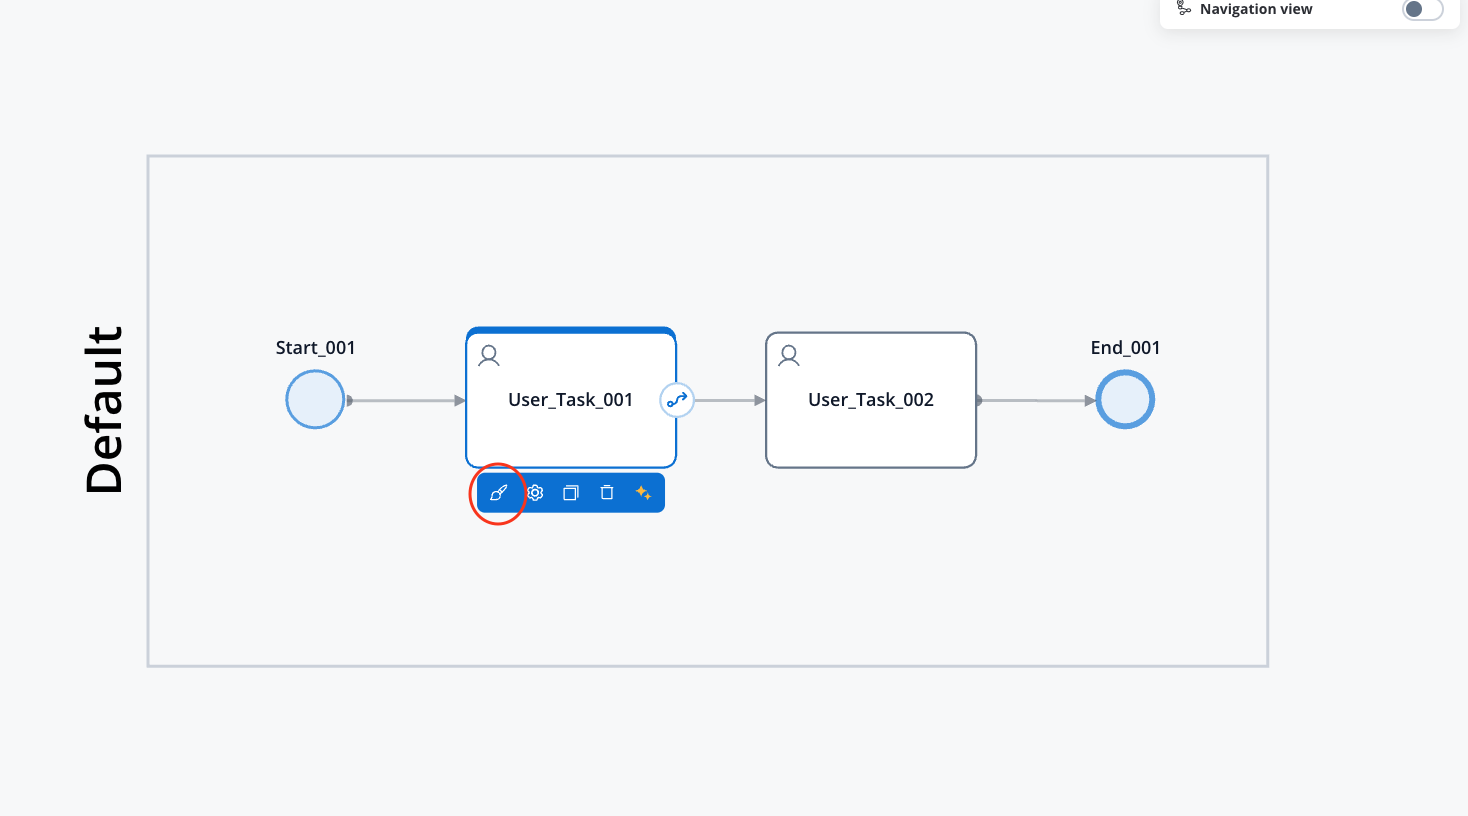
UI Designer Location
Selecting navigation type
To begin, you need to define the type of navigation for your app:1
Configure Navigation Type
- In the UI Designer, go to the navigation configuration section
- Select one of the following navigation types:
- Single page form: For simple, one-page applications
- Wizard: For multi-step processes with clear progression
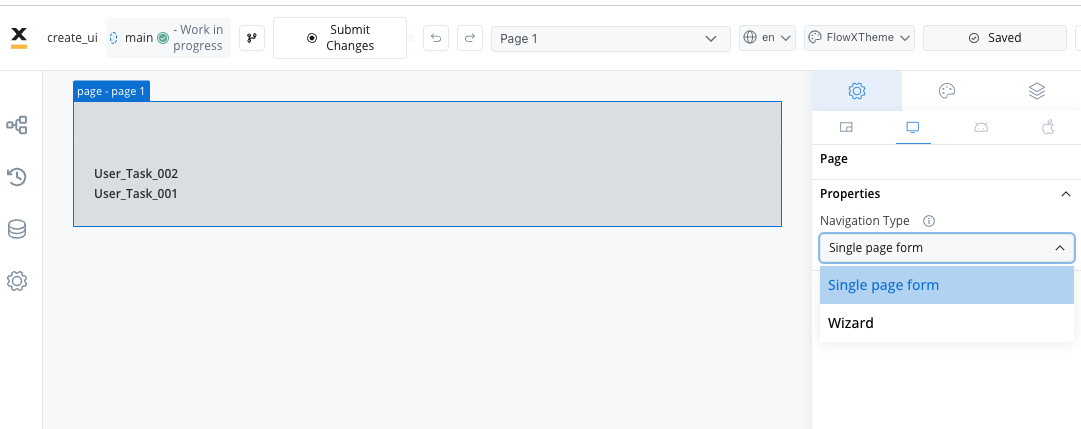
Navigation Type Selection
This example uses the Wizard type, which is ideal for multi-step processes like applications or onboarding flows.
Designing the first screen
Let’s configure the first User Task node to create an engaging and functional screen:1
Open the UI Designer
- In your process diagram, select the first User Task node
- Click the UI Designer button in the properties panel
- This will open the visual UI Designer for this specific node
2
Add a Card Component
- From the component palette, drag a Card component onto the canvas
- The Card component will serve as a container for your form elements
- Configure the card’s appearance using the properties panel (size, padding, etc.)
3
Add a Form Component
- Drag a Form component into the Card
- Forms help organize inputs and handle data binding
- Configure the form’s properties as needed
4
Add Input Fields
- Drag an Input component into the Form
- Configure the input’s properties:
- Set a label (e.g., “Full Name”)
- Choose the input type (text, number, email, etc.)
- Configure validation rules if needed
- Set the data binding to store user input
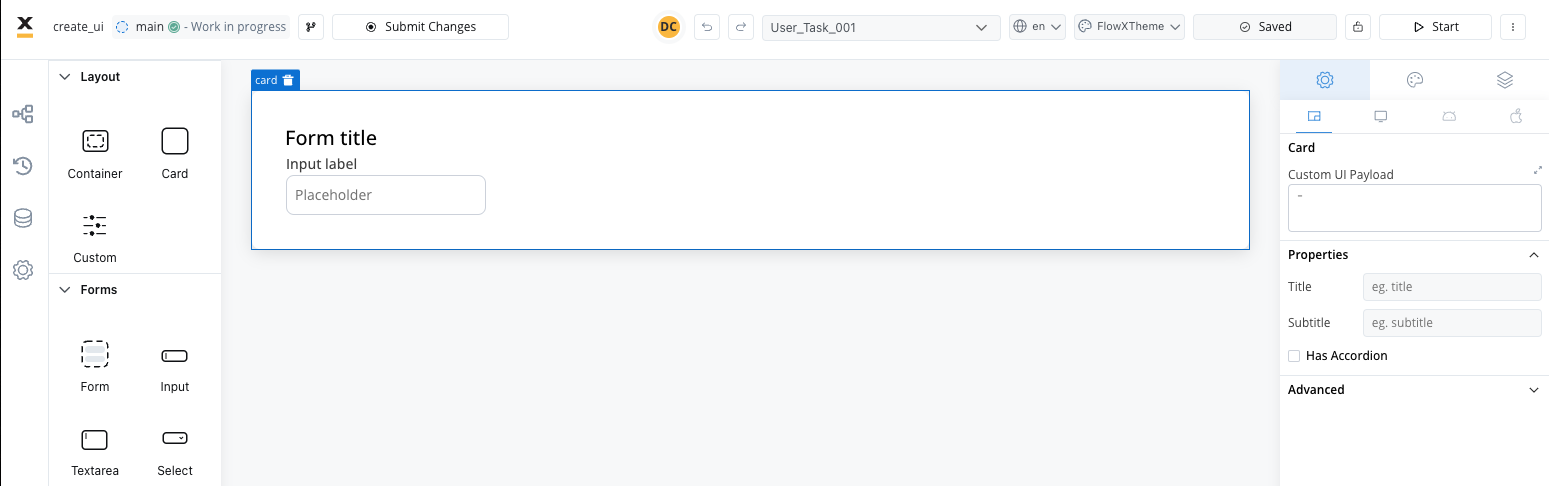
First Card Design
5
Add a Button with Action
- Drag a Button component into the Form
- Configure the button text (e.g., “Continue” or “Next”)
- Set up the button’s action to trigger process advancement
Before the button will work, you need to configure an action on the User Task node itself. This action will be triggered when the button is clicked.
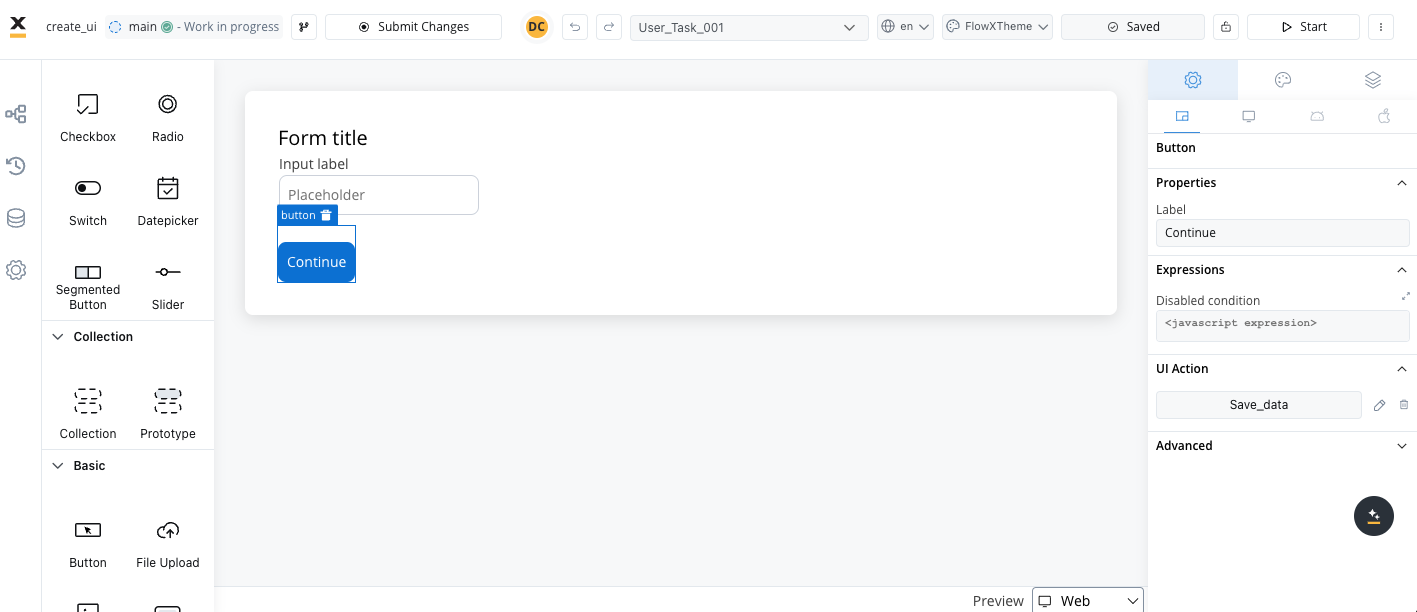
Save Data Action Configuration
Testing the first screen
1
Preview Your Screen
- Save your UI design
- Start the process to test the UI
- The Card with the Form and Input field should be displayed as configured
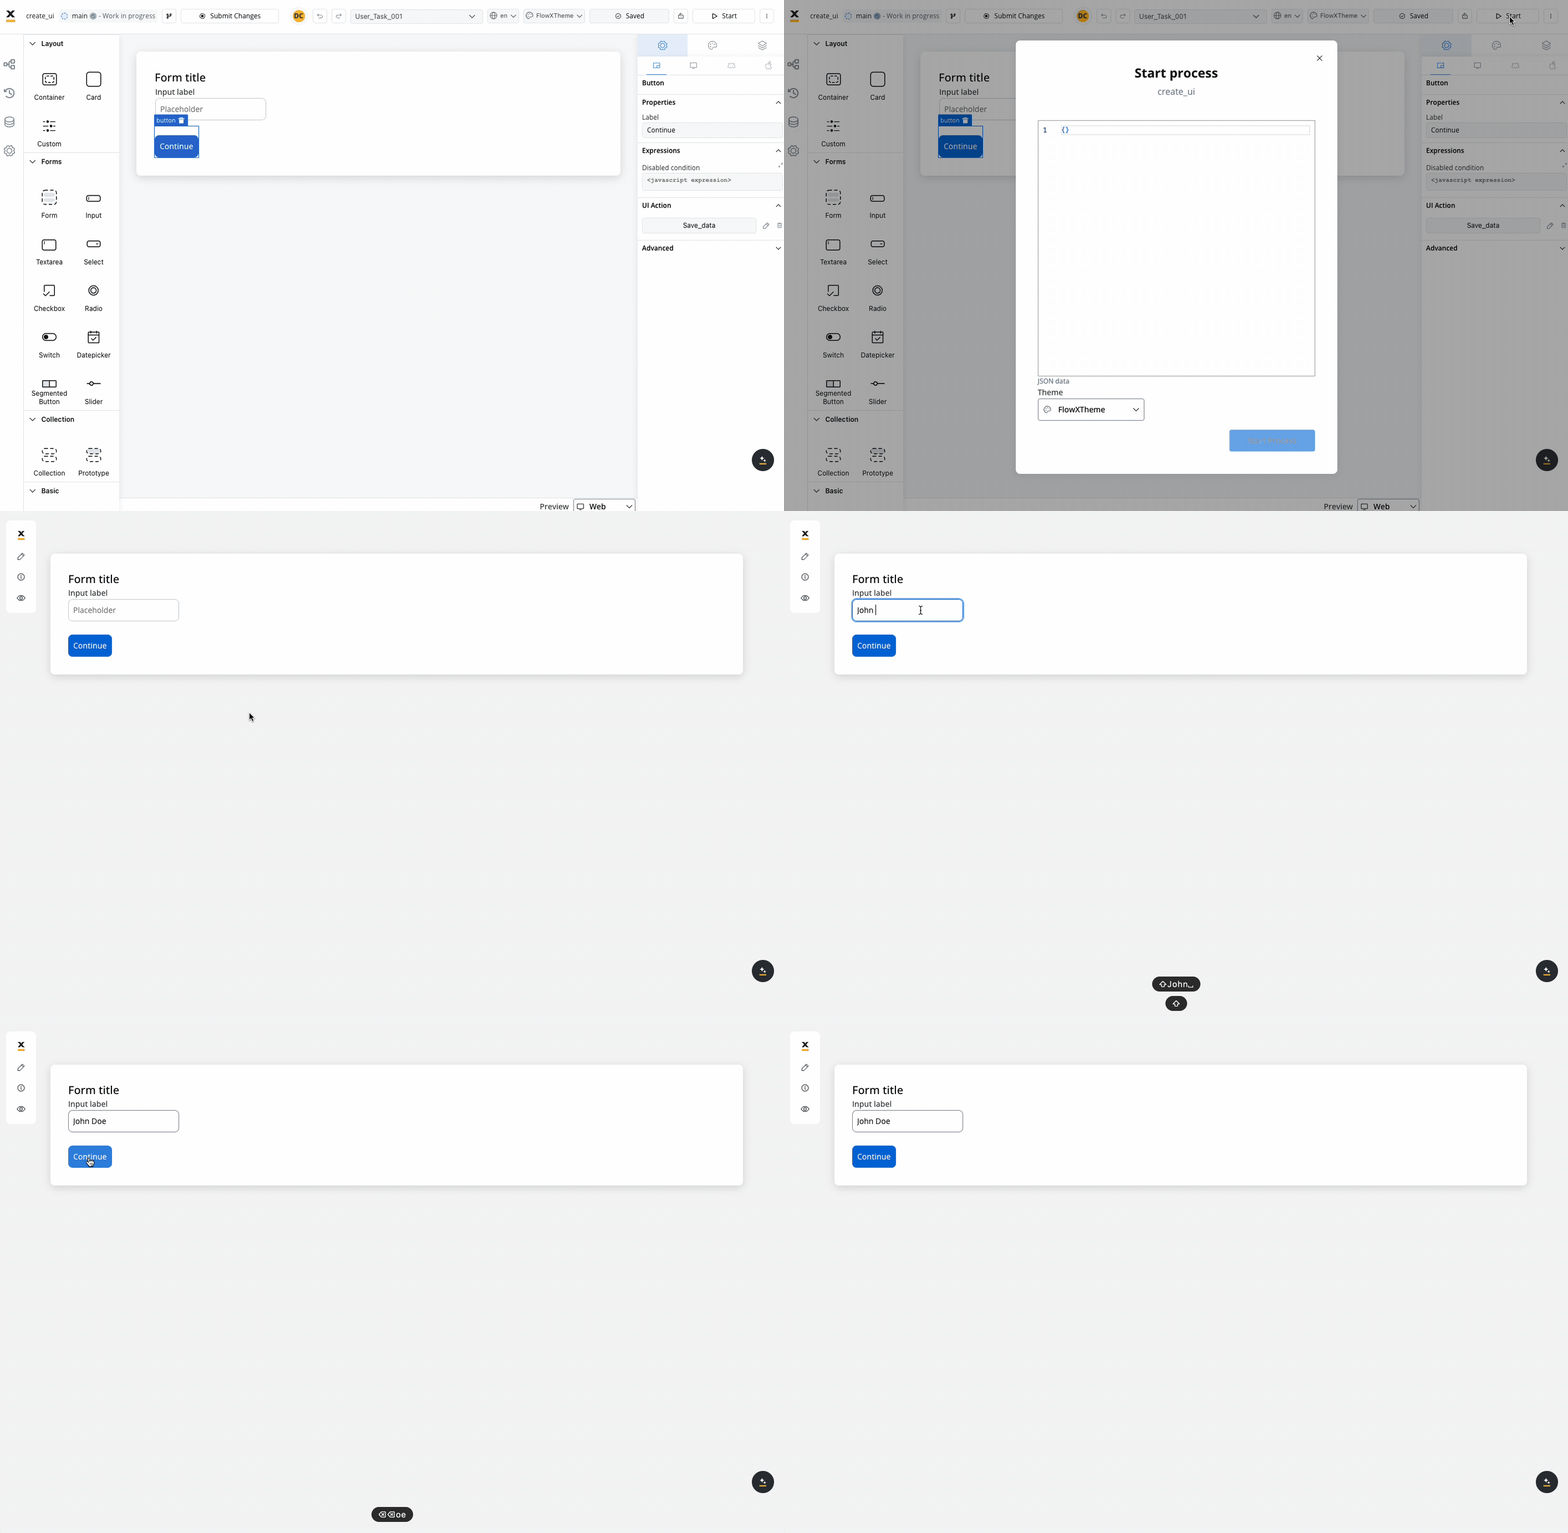
Testing the First Screen
Designing the second screen
Follow a similar process to design your second screen:1
Configure the Second User Task
- Select the second User Task node in your process
- Open the UI Designer
- Add a Card component
- Add other UI components as needed (text, inputs, buttons, etc.)
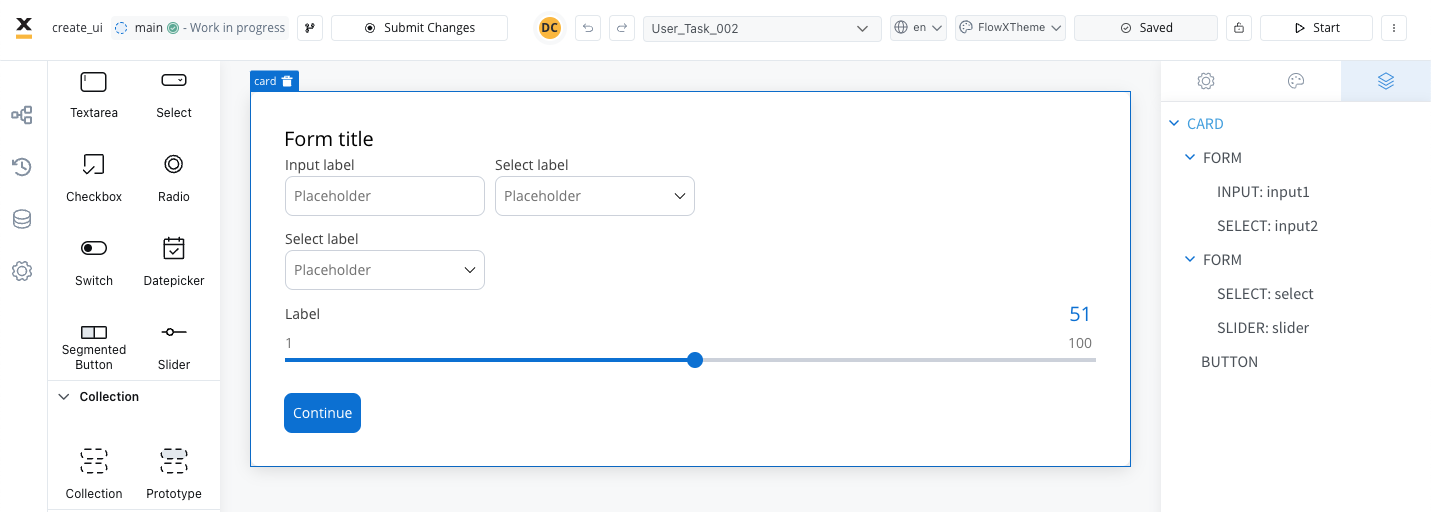
Second Card Design
2
Add Navigation Actions
- Add a button to submit the form or continue to the next step
- Configure actions on the User Task node as needed
- Consider adding a “Back” button if appropriate for your flow
Testing the complete flow
Once you’ve configured all your screens, test the complete process flow: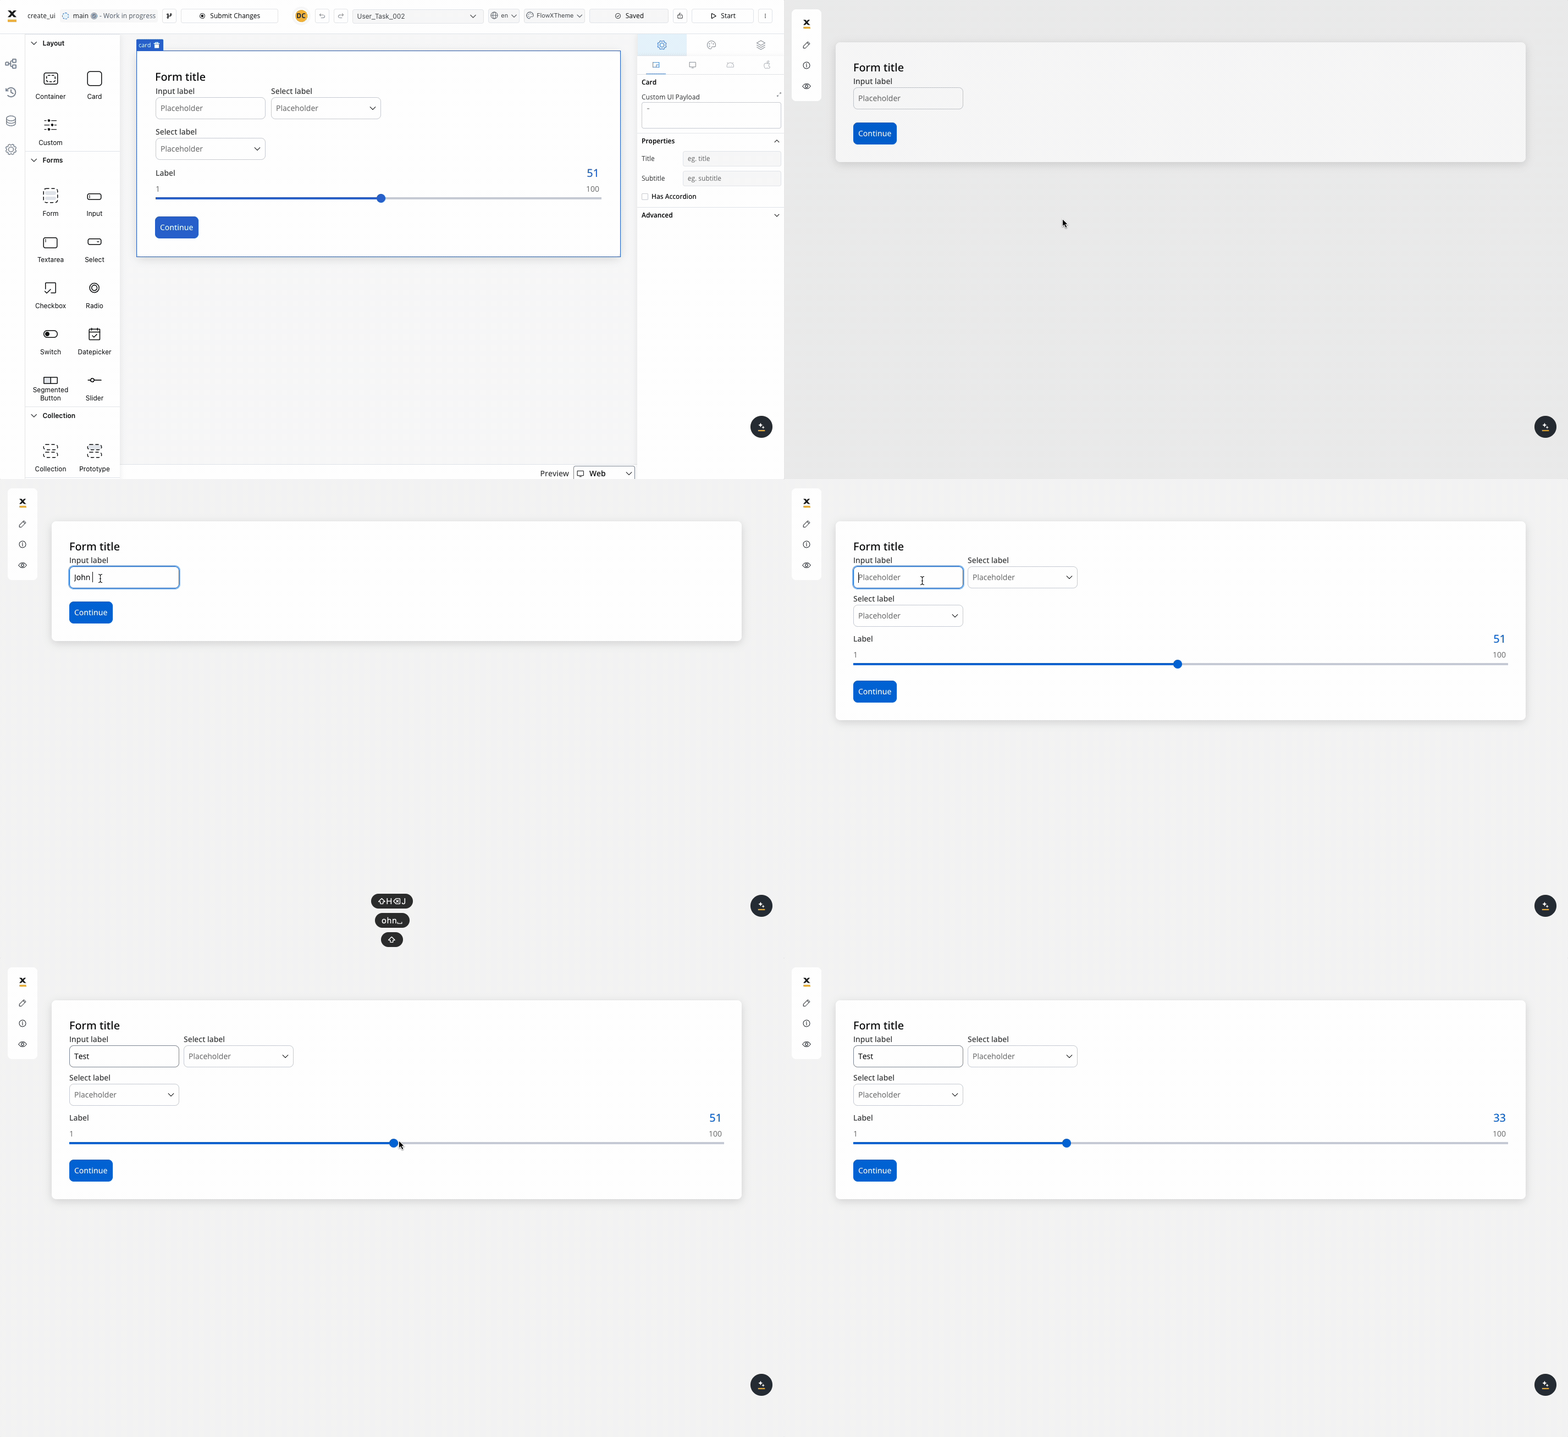
Testing the complete flow
Available UI components
FlowX.AI provides a rich set of UI components to create engaging interfaces:Layout Components
Cards, containers and grids for organizing content
Form Elements
Inputs, checkboxes, radio buttons, selects, switches, sliders, segmented buttons and date pickers
Interactive Elements
Buttons, links, tabs, and accordions for user interaction
Content Components
Text, images, icons, and media elements for displaying information
Data Display
Tables for showing structured data
Navigation
Steppers, and pagination controls
Other
Other components for building complex interfaces
Best practices
Next steps
After creating your user interface, you can:Moving a token backwards in the flow
Learn how to move a token backwards in the flow