Documentation Index
Fetch the complete documentation index at: https://docs.flowx.ai/llms.txt
Use this file to discover all available pages before exploring further.
Available starting with FlowX.AI 5.6.0This tutorial uses Chat Driven workflows with built-in session memory. For the pre-5.6 pattern that threaded sessions manually through an Output Focused workflow, see the git history of this page.
- A main Chat Driven workflow that uses an Intent Classification Agent to route messages
- Built-in session memory that carries financial data across conversation turns
- A knowledge base Q&A handler that answers mortgage questions from uploaded documents
- A data collection handler that extracts user financial data from free-text messages
- A personalized offer generator using hybrid AI extraction + business rule calculations
- A small talk responder and fallback handler
Architecture overview
The app is a Chat Driven workflow that uses an Intent Classification Agent to classify each user message and route it to the right handler. Each intent maps to a separate output branch on the node, eliminating the need for a Condition node. Each handler terminates in a Custom Agent node with Send as Chat Reply enabled, which delivers the response directly to the Chat component and updates session memory.In Chat Driven workflows, responses are delivered to the user by Custom Agent nodes with Send as Chat Reply enabled, not by the End Flow node. The End Flow node has no body configuration.
Data model
In a Chat Driven workflow, the Start node provides Chat Session ID, User Message, and an optional UI Flow Context as dedicated input fields — you reference them as${sessionId}, ${userMessage}, and ${context} in downstream nodes. These are not keys you declare in the data model.
mainChat data model
The mainChat workflow does not need any chat-specific keys in its data model — everything comes from the Start node fields and from handler subworkflow outputs.answerPersonalisedOffer data model
| Key | Type | Description |
|---|---|---|
clientProfile | OBJECT | Client financial data (extracted by AI from message) |
clientProfile.age | NUMBER | User age |
clientProfile.income | NUMBER | Monthly income |
clientProfile.loan_amount | NUMBER | Requested loan amount |
clientProfile.loan_duration | NUMBER | Loan term in years |
filteredProducts | OBJECT | Output from AI product filtering |
calculationResults | OBJECT | Output from business rule calculations (DTI, max loan, PMT) |
rankedProducts | OBJECT[] | Scored and ranked product recommendations |
reportText | STRING | Generated recommendation text consumed by the terminal Custom Agent |
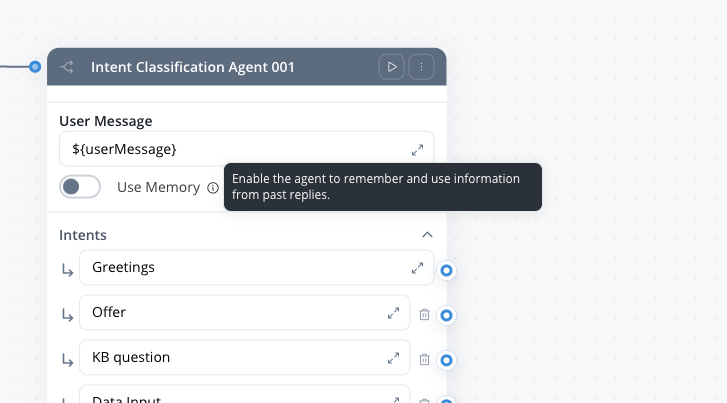
Built-in session memoryChat Driven workflows retrieve the latest 3 message turns plus a summary of earlier exchanges automatically. Any Custom Agent node with Use Memory enabled receives this history as LLM context, so data mentioned in earlier turns (age, income, loan amount) is available to later turns without manual persistence. See Session state management and Conversational workflows — Session memory.
Prerequisites
Before starting, make sure you have:- Access to a FlowX Designer workspace with AI Platform enabled
- Familiarity with creating workflows in FlowX
- A Knowledge Base data source with mortgage-related documents uploaded (see Step 3)
Step 1: Build the main orchestration workflow
Create a workflow namedmainChat and select Chat Driven as the workflow type.
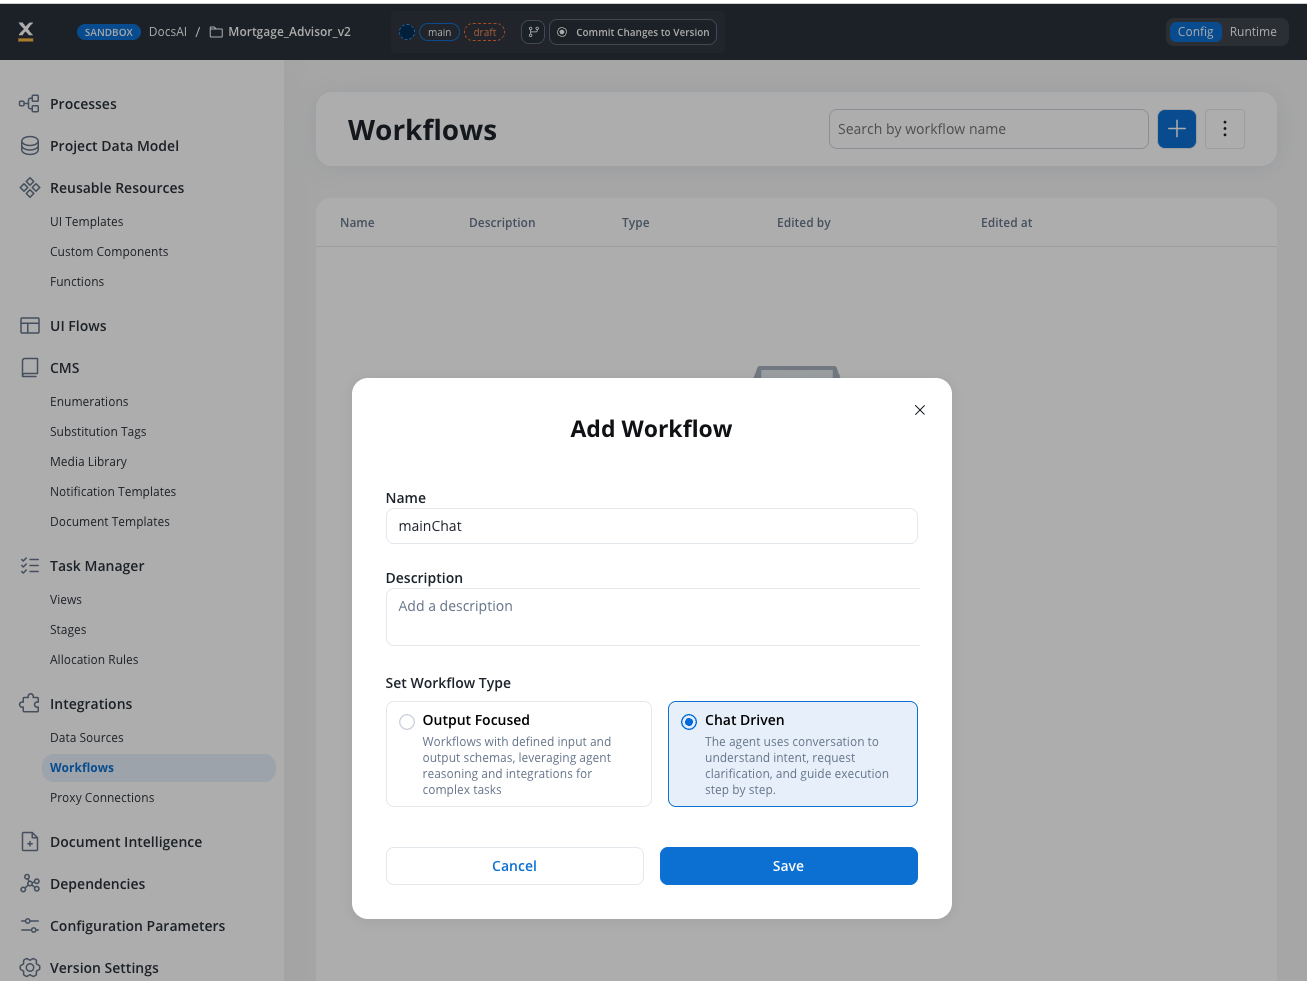
Review the Start node
The Start node is created automatically with three fields:- Chat Session ID — a UUID populated by the Chat component at runtime (referenced as
${sessionId}) - User Message — the user’s text message (referenced as
${userMessage}) - UI Flow Context — optional JSON object passed from the UI (referenced as
${context})
Add the Intent Classification Agent
From the node palette, drag an Intent Classification Agent node (under AI Agents) onto the canvas and connect it to the Start node. Configure the node: User Message:${userMessage}
Intents:
| # | Label | What it covers |
|---|---|---|
| 1 | Greetings | Greetings and small talk |
| 2 | Offer | The user asks for a product recommendation, a mortgage offer, product suggestions, or asks what mortgage fits them |
| 3 | KB question | Knowledge base questions about mortgage products or policies |
| 4 | Data Input | User providing or updating personal data like income, age, or loan details |
intentResult
The If No Intent Matches branch is a default output port that fires when the classifier can’t confidently match any intent. It’s always present on the node — you just need to connect it to the fallback handler in Step 2.
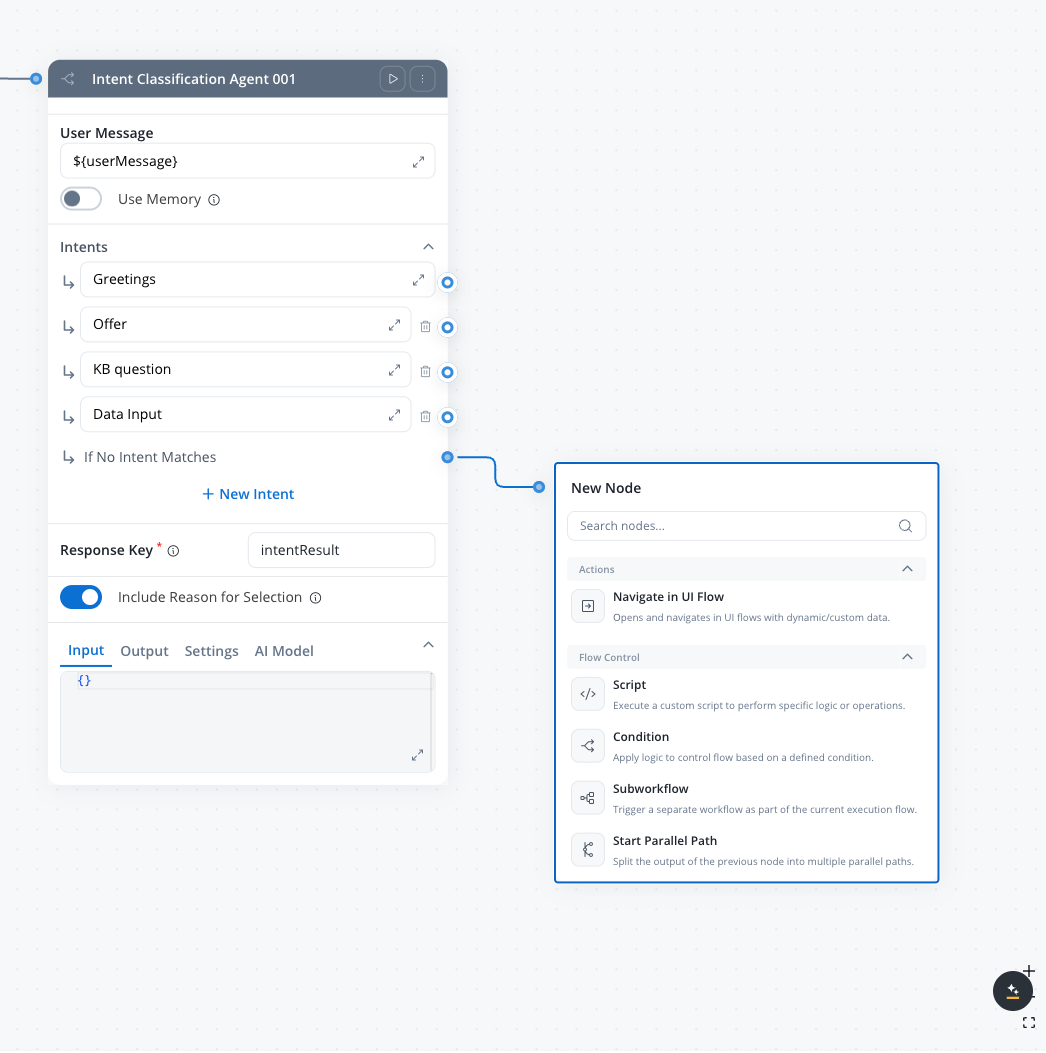
Each intent creates a separate output port on the node. When the agent classifies a message, the workflow continues along the matching branch — no Condition node needed.
Connect handler nodes to each branch
Add the following nodes and connect each to its corresponding intent output:| Intent branch | Handler node | Type |
|---|---|---|
| Intent 1 (Greetings) | answerSmalltalk | Custom Agent (inline, Send as Chat Reply) |
| Intent 2 (Offer) | answerPersonalisedOffer | Subworkflow with terminal Custom Agent (Send as Chat Reply) |
| Intent 3 (Knowledge QA) | knowledgeBaseQA | Custom Agent (inline, Knowledge Base + Send as Chat Reply) |
| Intent 4 (Data Input) | handleDataInput | Script node → Custom Agent (Send as Chat Reply) |
| No Match | fallback | Custom Agent (inline, Send as Chat Reply) |
Each branch delivers its response directly via a Custom Agent node with Send as Chat Reply enabled. No response-normalizer script is needed — the Chat component receives each reply as Markdown and persists it to session memory automatically.
Add the End Flow node
Add an End Flow node from the palette (it is not auto-created for Chat Driven workflows) and connect every handler branch to it. The End Flow node has no body configuration — responses are already delivered by the Custom Agent nodes upstream.Step 2: Build the inline handlers
The Greetings and No Match branches are handled by Custom Agent nodes placed directly in themainChat workflow — no subworkflow needed.
Shared Custom Agent settings for this tutorialEvery Custom Agent in
mainChat uses the same two defaults:- Use only prompt references as context: ON — keeps each call scoped to the values referenced with
${...}and reduces token usage. See Custom Agent node for details. - Include Task for Prompt Suggestions: OFF — turn ON only if you want AI-generated follow-up prompts shown in the Chat component (5.7.0+). See Custom Agent node.
answerSmalltalk (Custom Agent)
Add a Custom Agent node namedanswerSmalltalk to the Greetings branch.
Operation Prompt:
With Use Memory enabled, you do not need to interpolate conversation history into the prompt manually. FlowX retrieves the latest 3 user/agent turns plus a summary and attaches them to the LLM call automatically.
fallback (Custom Agent)
Add a Custom Agent node namedfallback on the No Match branch.
Operation Prompt:
Step 3: Build the data input handler
The Intent 4 branch combines a Script node (for deterministic data extraction) followed by a Custom Agent node (to confirm what was captured and send the chat reply). Script nodes cannot send chat replies on their own — only Custom Agent nodes can.3a: handleDataInput Script
Add a Script node namedhandleDataInput on the Intent 4 branch. Since the Intent Classification Agent already routed the message here, the script can assume the user is providing personal data and uses simple string matching to extract values.
The FlowX script runtime uses a subset of Python. Avoid
enumerate(), .get() with defaults, and import statements — use basic loops and in checks instead.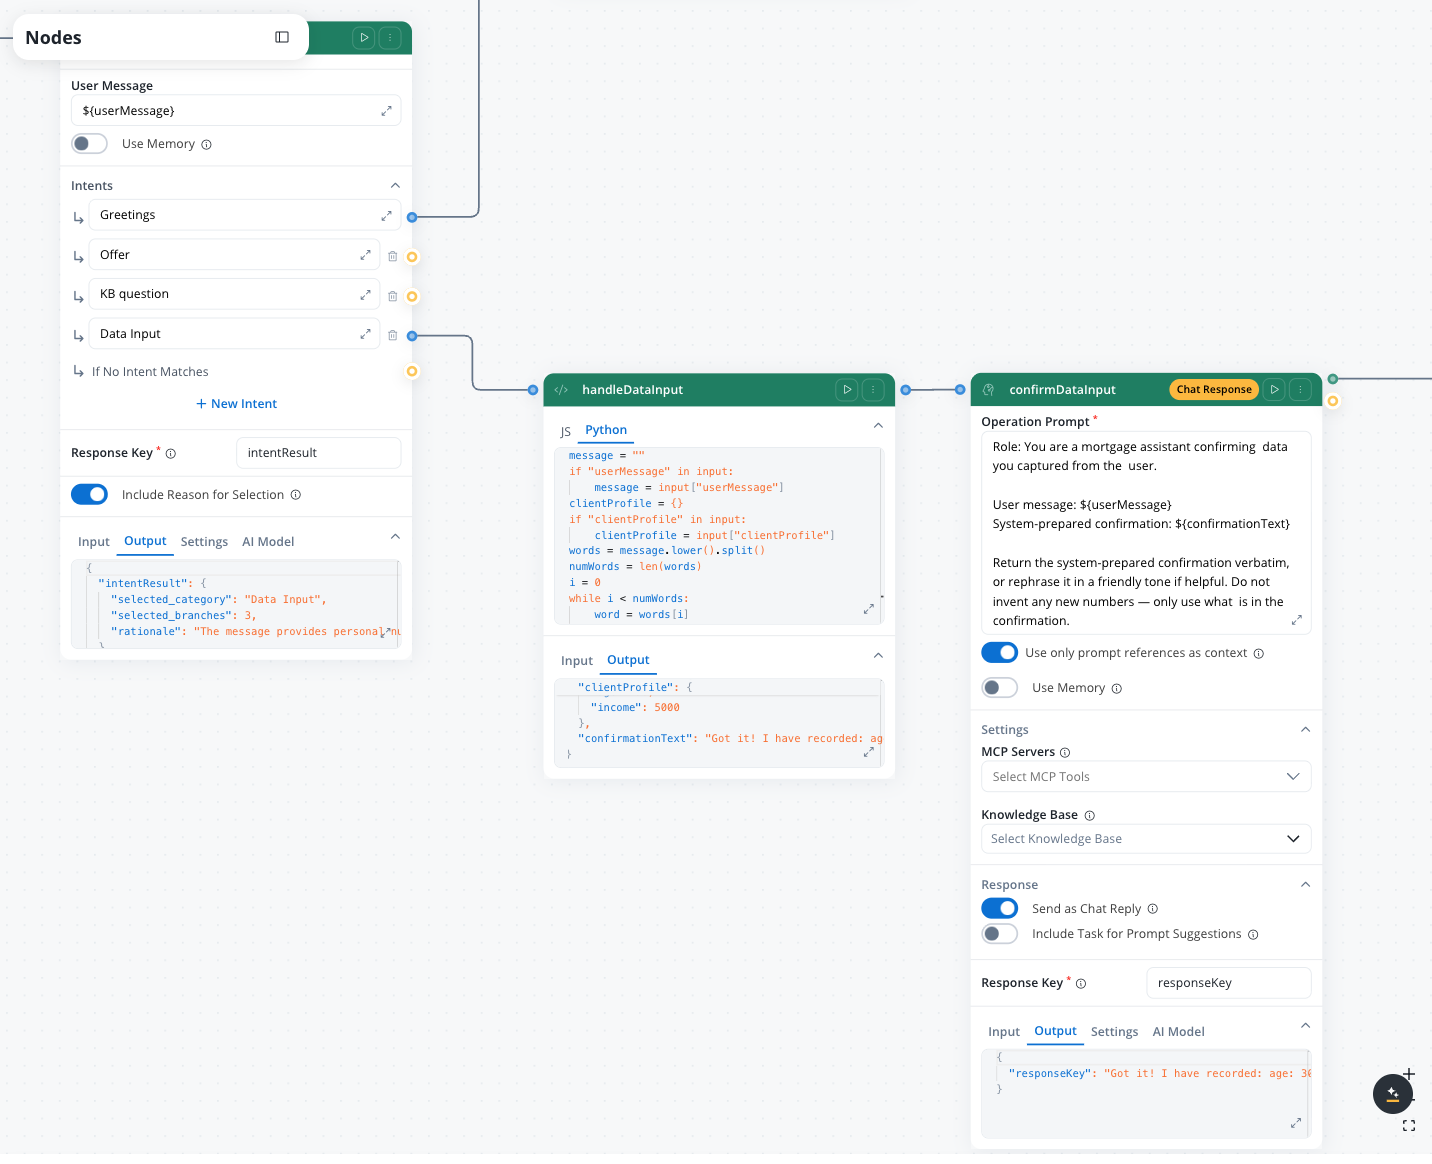
The age/duration disambiguation checks whether the word after a number + “years” is “old”. For example, “30 years old” sets
age = 30, while “25 years” sets loan_duration = 25.3b: Confirmation Custom Agent
Add a Custom Agent node afterhandleDataInput to deliver the confirmation as a chat reply.
Operation Prompt:
Step 4: Build the knowledge base Q&A handler
The Knowledge QA branch is a single Custom Agent node placed inline in themainChat workflow (on the Intent 3 branch) with a Knowledge Base attached and Send as Chat Reply enabled.
Set up the Knowledge Base
Create a Knowledge Base data source
In the Integration Designer, add a new Knowledge Base data source. Name it something descriptive like
MortgageKnowledgeBase.Upload mortgage documents
Upload PDF documents covering:
- Mortgage product sheets (rates, terms, eligibility criteria)
- FAQ documents (common questions about mortgages, DTI, LTV)
- Regulatory guides (required documents, application process)
For detailed Knowledge Base setup, see the Knowledge Base integration documentation.
Configure the Custom Agent node
Add a Custom Agent node namedknowledgeBaseQA on the Intent 3 branch. Enable the Knowledge Base setting and select your MortgageKnowledgeBase data source.
Retrieval parameters:
| Parameter | Value |
|---|---|
| Max. Number of Results | 4 |
| Min. Relevance Score | 50 |
| Metadata Filters | No filters (search all stores) |
| Search Type | hybrid (5.7.0+) |
| Re-rank | ON (5.7.0+) |
Available starting with FlowX.AI 5.7.0Custom Agent nodes expose Search Type (vector, keyword, hybrid) and Re-rank options for knowledge base retrieval. Hybrid search with re-ranking generally improves answer quality on mortgage-domain queries that mix numeric terms (rates, LTV) with natural language.
Step 5: Build the personalized offer handler
This is the most complex handler. It implements the Hybrid AI + business rules pattern — alternating between AI nodes and deterministic Script nodes. Because this branch benefits from structured intermediate data (calculation results, ranked products) that the other branches do not need, implement it as an Output Focused subworkflow called frommainChat, which returns a reportText string.
Create a workflow named answerPersonalisedOffer with Output Focused as the workflow type.

mainChat, connect a Subworkflow node on the Intent 2 branch that calls answerPersonalisedOffer, with Response Key offerOutput. Pass ${userMessage} as the userMessage input. Then add a Custom Agent after the Subworkflow node to deliver the chat reply — see Step 5e below.
Step 5a: AI understanding (extract and filter)
Add a Text Understanding node that extracts the client’s financial profile from their message and filters the product catalog. Operation Prompt:filteredProducts
Step 5b: Business rules (financial calculations)
Add a Script node (JavaScript) for deterministic financial calculations. These must be auditable and reproducible.The alternating AI-then-rules structure creates a natural audit trail. For any final recommendation, you can trace exactly which AI filtered the products and which formula computed the financial results.
Step 5c: Business rules (scoring, ranking, and report)
Add a second Script node (JavaScript) that scores products, ranks them, and generates the recommendation report text. The script writes the report toreportText, which the terminal Custom Agent node reads.
The report is generated as plain text in the Script node rather than fully inside an LLM node. This keeps the numbers deterministic and auditable. The terminal Custom Agent (Step 5d) rephrases the report into a friendly chat reply.
Step 5d: End Flow (output the report)
Add an End Flow node after the scoring Script. Configure the End Flow body to exposereportText as a workflow output:
answerPersonalisedOffer.
Step 5e: Terminal Custom Agent in mainChat (Send as Chat Reply)
Switch back tomainChat. On the Offer branch, after the Subworkflow node, add a Custom Agent node. This is where the chat reply is delivered.
Operation Prompt:
mainChat.
Step 6: Connect to the chat UI
You have two options for wiringmainChat to a UI. Pick one.
Option A: Chat-Based UI Flow (recommended, 5.7.0+)
Available starting with FlowX.AI 5.7.0Chat-Based UI Flows let you set one conversational workflow for the entire UI Flow, so every Chat component in the flow uses it automatically.
Create a Chat-Based UI Flow
Go to UI Flows and create a new UI Flow, selecting Chat-Based as the experience type. Set 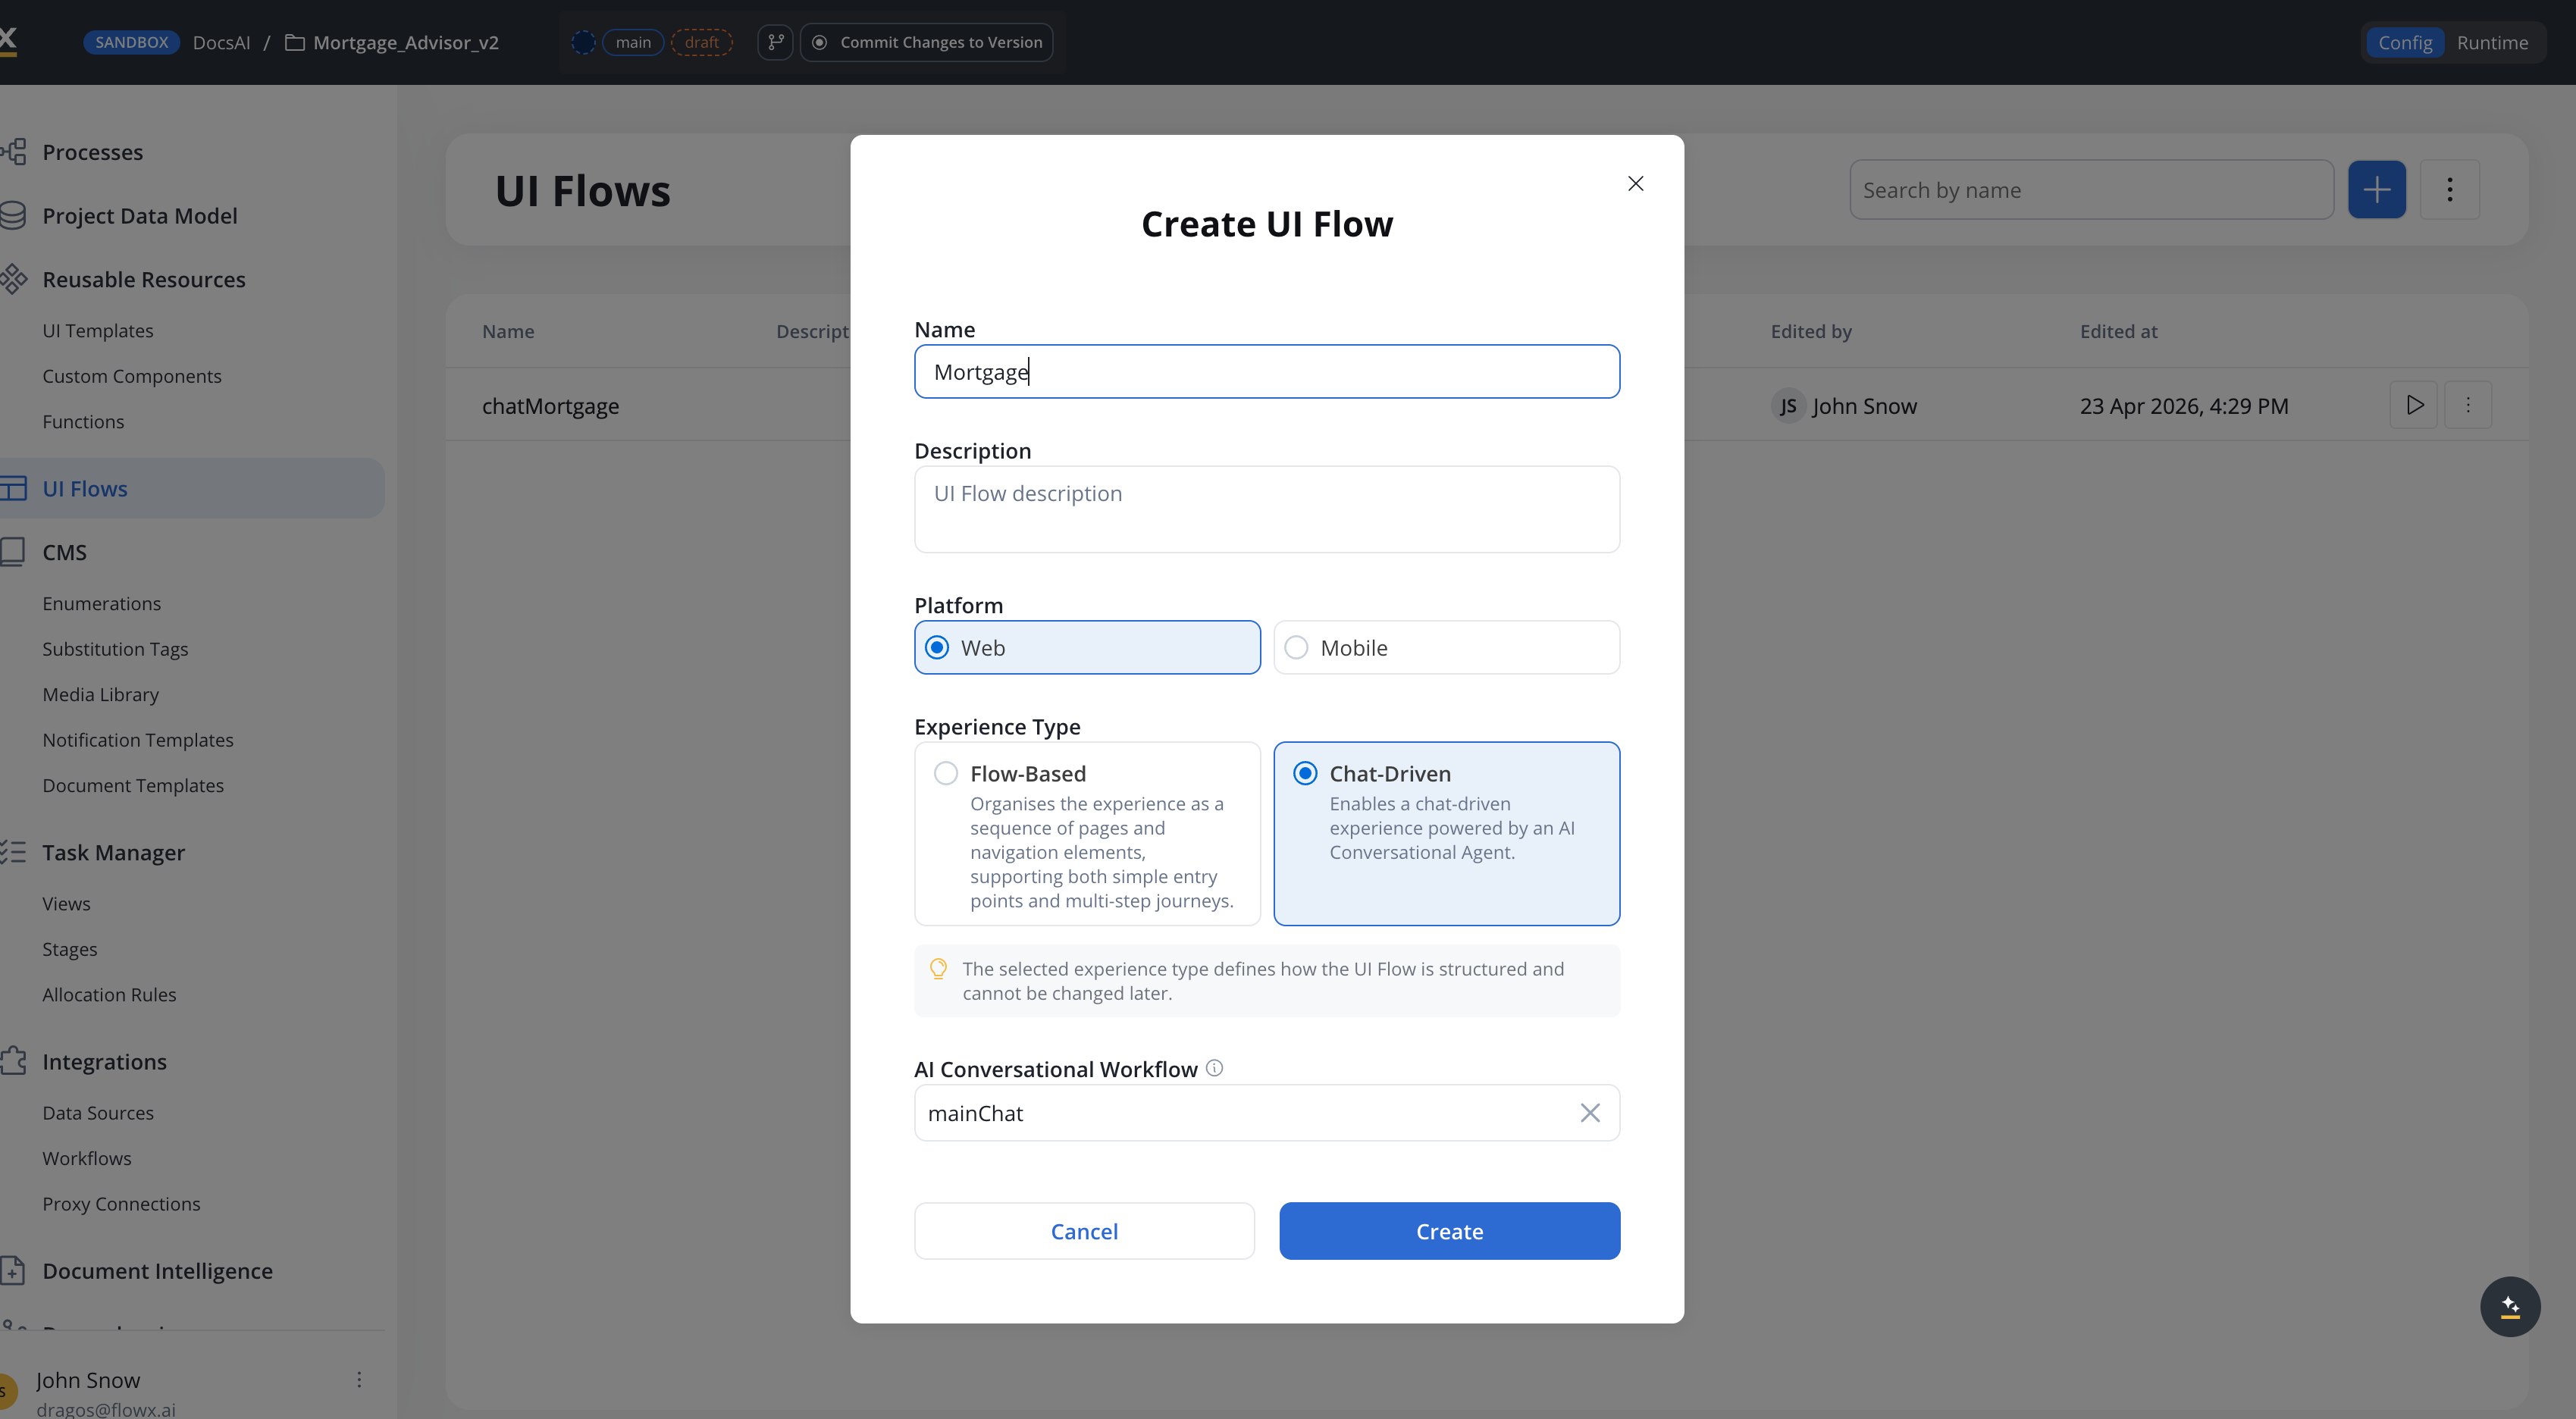
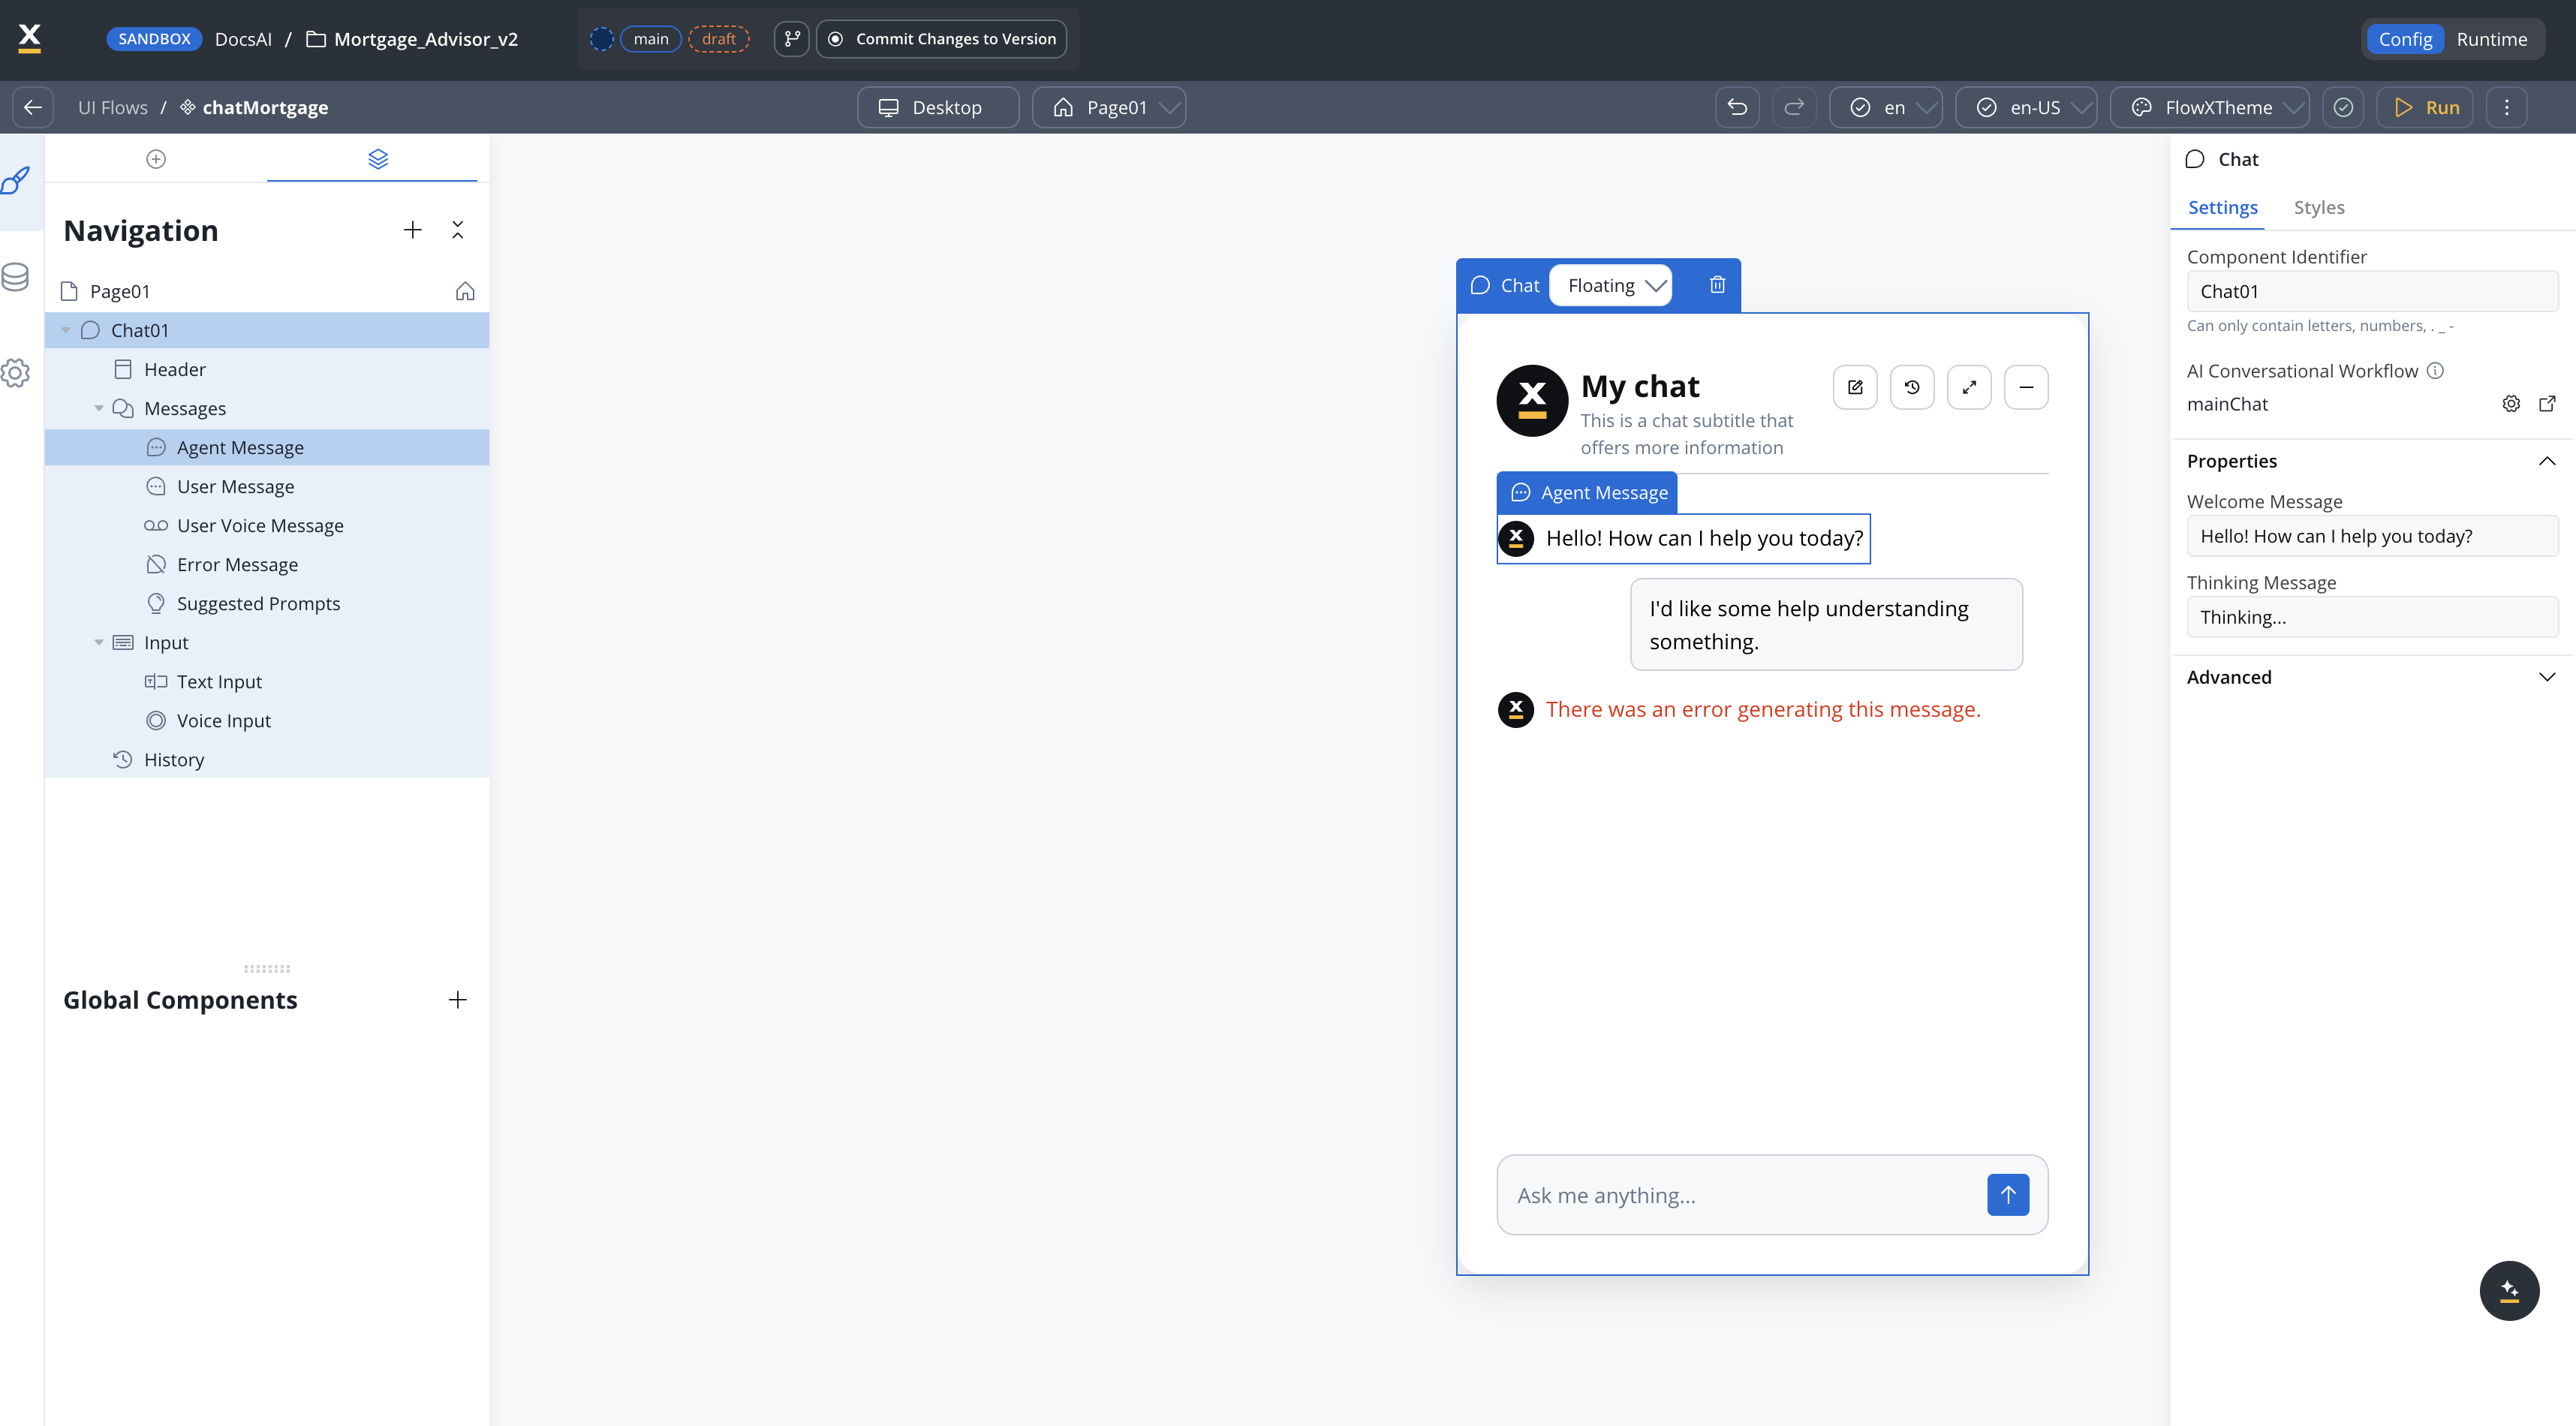
mainChat as the default conversational workflow.Add a Chat component
Any Chat component added to this UI Flow uses
mainChat by default — no per-component configuration needed.Option B: Chat component per UI Flow page
Add a Chat component
Drag a Chat component onto the page. In the component settings, set the Workflow property to
mainChat.For details on configuring chat experiences with built-in session memory, see Conversational workflows. For the Chat component reference, see Chat component.
Step 7 (optional): Share captured data across turns
By default, theanswerPersonalisedOffer subworkflow re-extracts all financial data from the current user message — it does not see conversation memory (memory is a Chat Driven feature, and the subworkflow is Output Focused). This means users must provide age, income, loan amount, and duration in a single Offer request.
If you want the subworkflow to reuse data the user shared in earlier turns (captured by handleDataInput), pass clientProfile from mainChat into the subworkflow.
Declare clientProfile as an input on the subworkflow
In
answerPersonalisedOffer, open the Data Model panel. Add clientProfile (OBJECT) if not already there, and toggle Input Parameter ON.Map clientProfile on the Subworkflow node in mainChat
In
mainChat, open the Subworkflow node on the Offer branch. Map the clientProfile input: clientProfile ← ${clientProfile}. The clientProfile key on the Chat Driven workflow is populated by handleDataInput on previous Data Input turns.Update the Text Understanding prompt to prefer existing data
In the subworkflow’s Step 5a prompt, reference
${clientProfile} as prior context. Modify the extraction instruction:This extension trades simplicity for multi-turn robustness. The base tutorial keeps the subworkflow stateless on purpose — it’s easier to reason about and easier to test in isolation. Add this extension only when your users consistently spread financial data across multiple turns.
Testing
Test the mainChat workflow directly
Open
mainChat and click Run Workflow. In the test modal, provide:- Chat Session ID — any valid UUID (e.g.,
550e8400-e29b-41d4-a716-446655440000). Reuse the same UUID across test runs to verify multi-turn memory. - User Message — the message to test (e.g.,
What is a debt-to-income ratio?).
Test the full chat flow
Run the UI Flow that embeds the Chat component. With built-in session memory, financial details captured in earlier turns are available to later turns — the user can spread data across messages:
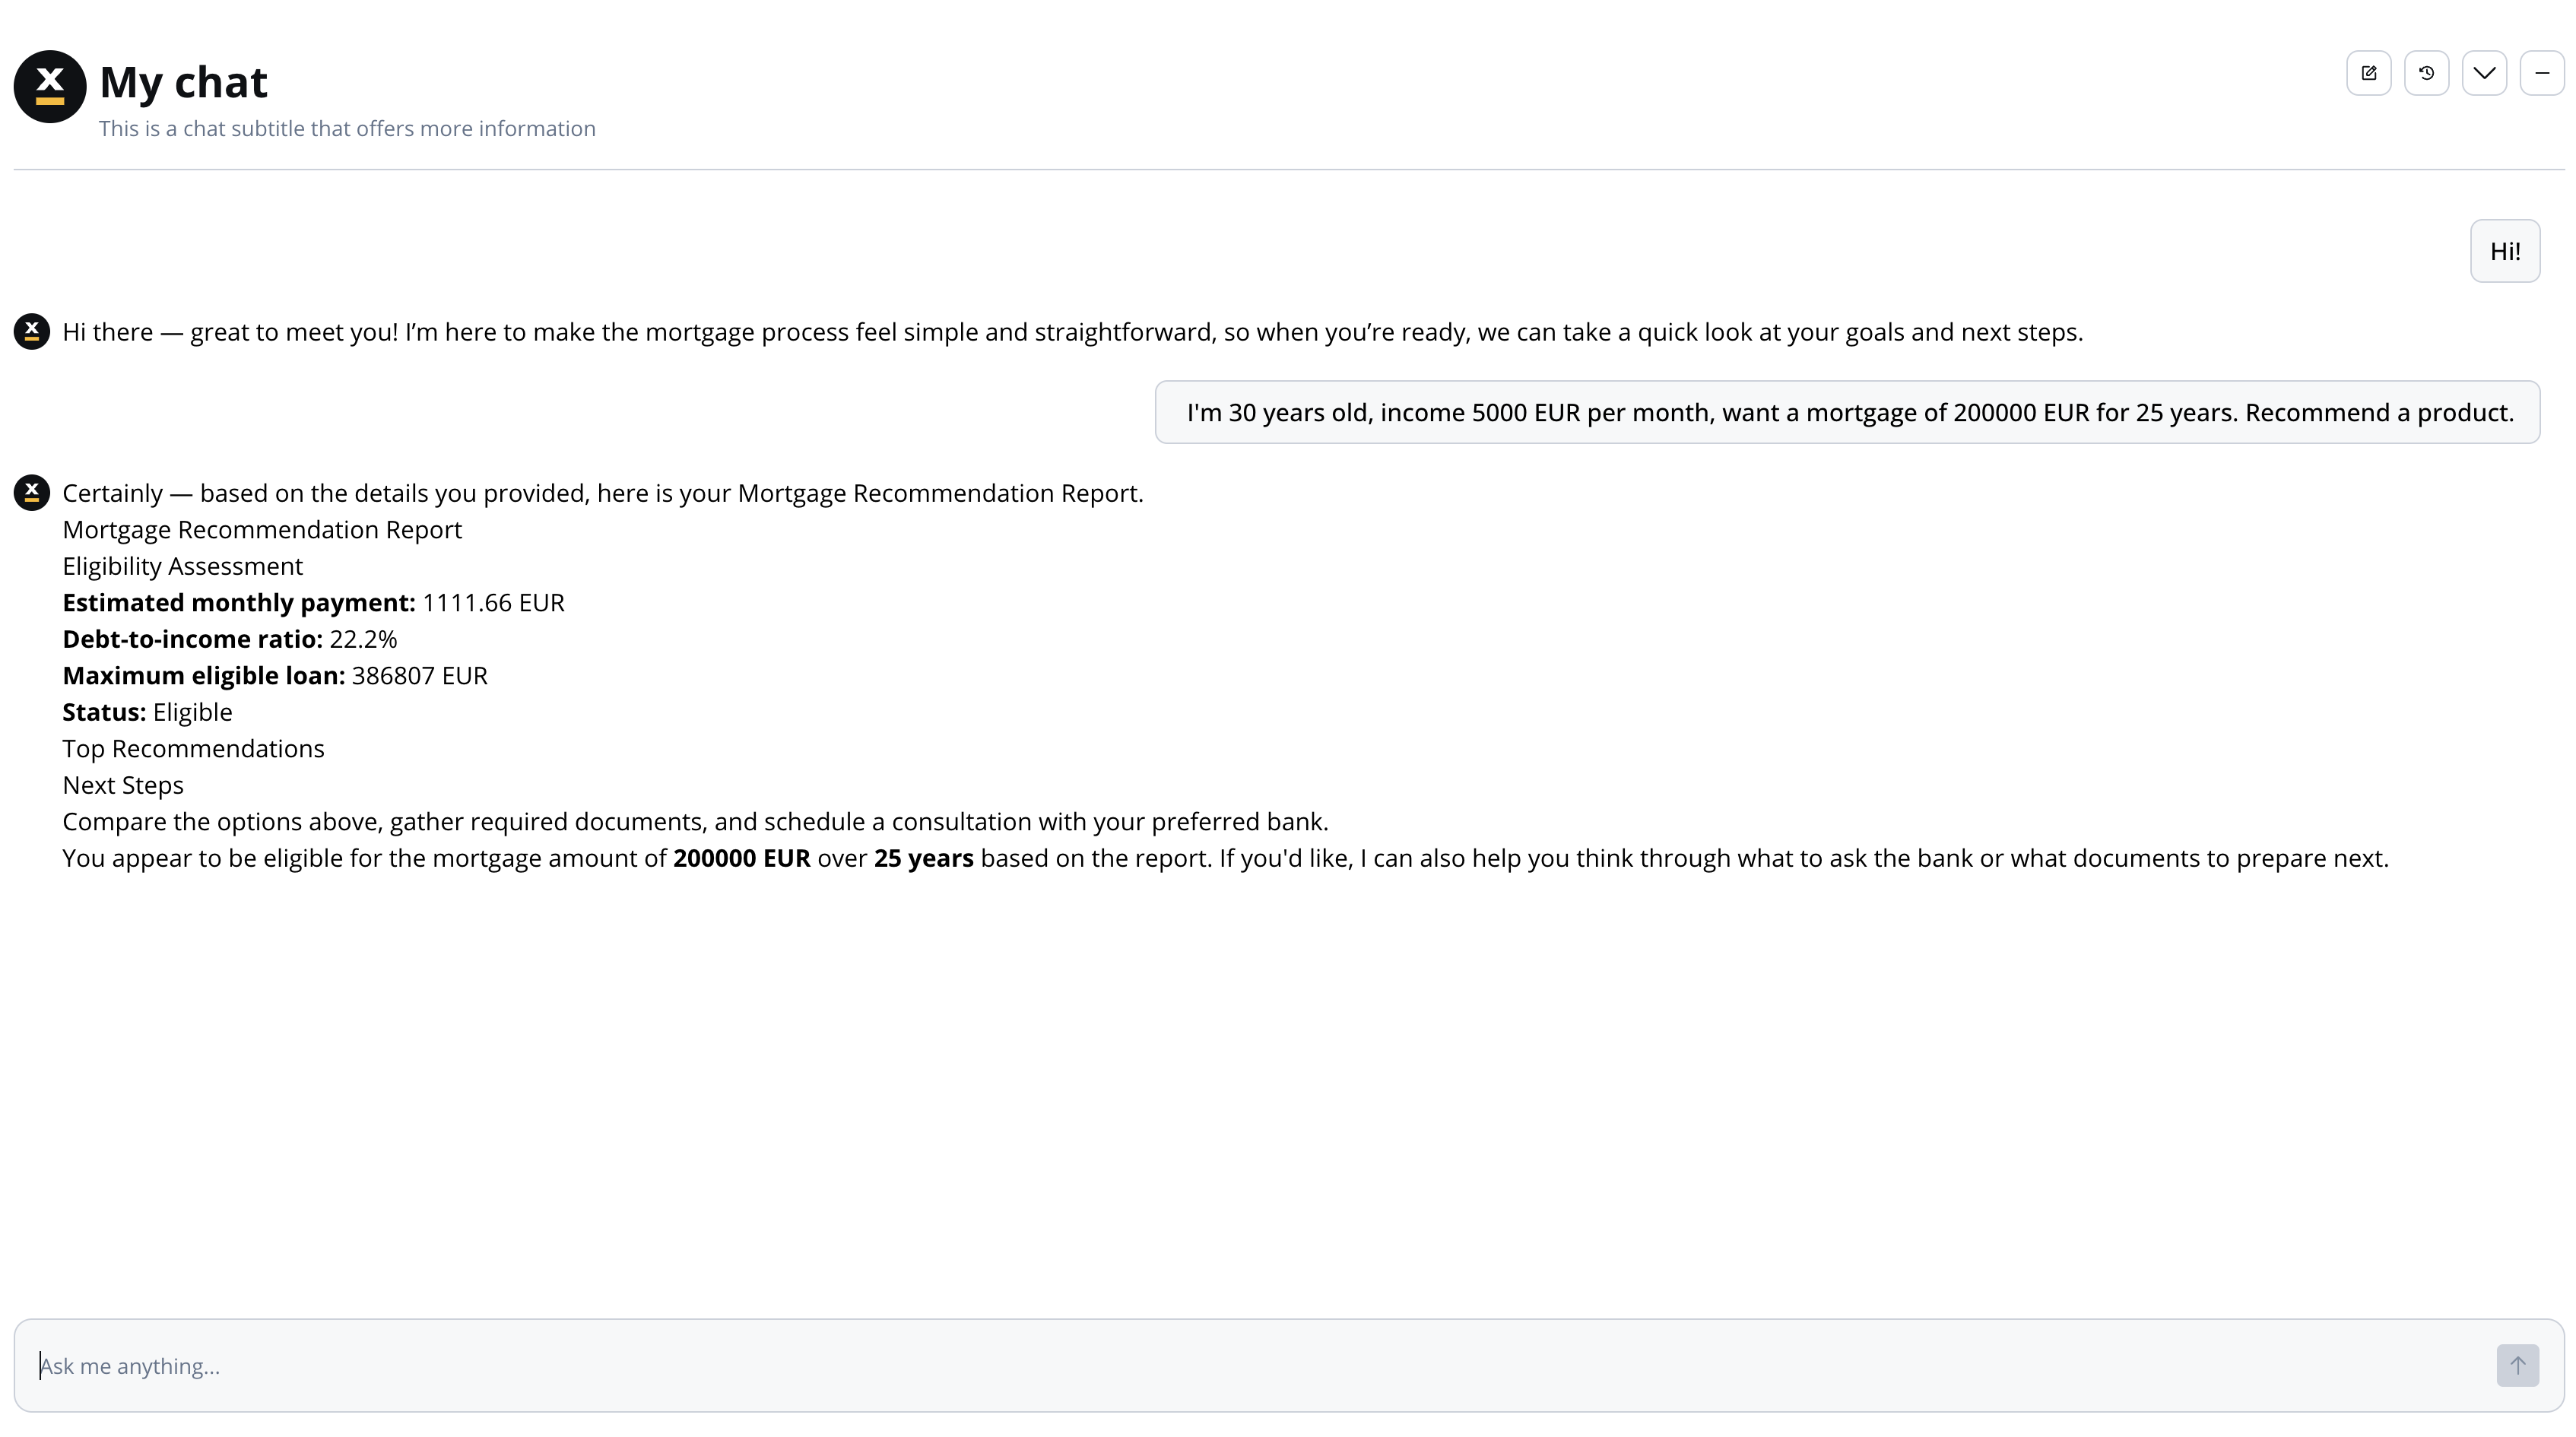
| Turn | Message | Expected behavior |
|---|---|---|
| 1 | ”Hi there!” | Greeting response, nudge toward mortgage |
| 2 | ”I am 30 years old and my income is 5000” | Acknowledges data (age, income recorded) |
| 3 | ”Loan of 200000 EUR for 25 years” | Acknowledges additional data (loan_amount, loan_duration recorded) |
| 4 | ”Give me product recommendations.” | Recommendation report using data from turns 2 and 3 (memory makes the prior values available) |
What you learned
In this tutorial, you built a full-featured Chat Driven app that demonstrates:- Chat Driven workflow basics — dedicated Start node fields,
${userMessage}interpolation, simplified End Flow (guide) - Built-in session memory — multi-turn context without manually persisting conversation history
- Intent classification and routing — using an Intent Classification Agent to classify messages and route to handler branches automatically (pattern)
- Send as Chat Reply — delivering responses to the Chat component directly from Custom Agent nodes
- Knowledge base RAG with re-ranking — grounding answers in uploaded documents using a Custom Agent with Knowledge Base, hybrid search, and re-rank (pattern)
- Hybrid AI + business rules — combining AI qualitative filtering with deterministic financial calculations for auditable recommendations (pattern)
Extending the chatbot
Once the base app works, these Chat Driven features can add polish and context-awareness:- AI Triggers (5.7.0+) — let different UI Flow pages launch
mainChatwith parameterized starting messages, e.g., “Help me refinance order $” from an account page - Navigate in UI Flow node — add an action branch that opens a mortgage application form with pre-filled data when the user accepts a recommendation
- Conversation Context (5.7.0+) — pass UI state (active customer ID, current page) to the workflow via the Start node’s UI Flow Context field
- Knowledge Base metadata filters — as the KB grows beyond a handful of documents, tag each store (e.g.,
topic: basics | application | faq) and pass metadata filters to the KB Q&A Custom Agent to scope retrieval to the right subset. The 5.7.0 query builder supports typed operators and AND/OR grouping.
Next steps
Conversational workflows
Full reference for Chat Driven workflows, AI Triggers, and session memory
AI patterns
Deep-dive into the patterns used in this tutorial
Node types reference
Detailed configuration reference for all AI node types
Knowledge Base integration
Create and manage Knowledge Bases for RAG