

Overview
Stores are the building blocks of a Knowledge Base. Each store represents a collection of related information that has been ingested, processed, and indexed for semantic search.Store types
There are two types of stores:Manual
Files uploaded directly through the Knowledge Base admin interface
Workflow
Content added from a workflow through the Update Knowledge Base node: a file path or a pasted payload
Viewing stores
Navigate to your Knowledge Base to see all stores. The Stores tab displays: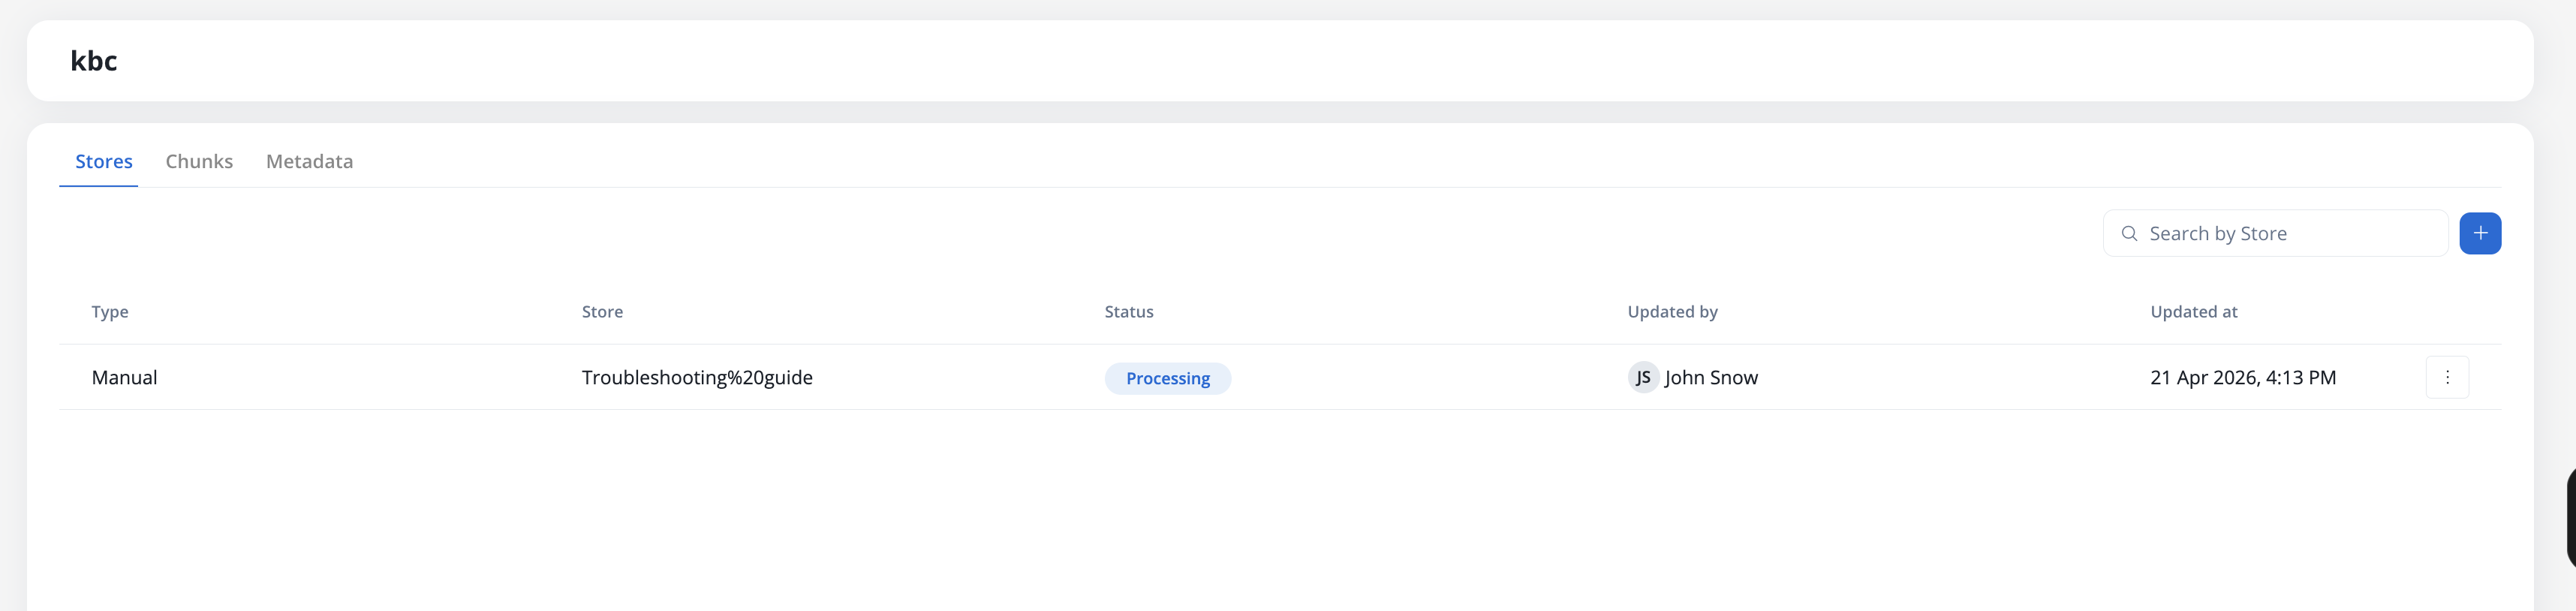
Store information
Each row shows:string
- Manual: Files uploaded in the Knowledge Base page
- Workflow: Content added from a workflow through the Update Knowledge Base node
- Test Operation: Content created from the Test Knowledge Base modal
string
The unique name of the store within the Knowledge Base
string
Current processing state:
- New: Store created, awaiting content upload
- Processing: Content is being uploaded, chunked, and indexed
- Ready: Content is fully processed and available for queries
- Failed: An error occurred during processing, or content is partially degraded
string
- Username: For files uploaded in the Knowledge Base page
- Workflow name: For content ingested through workflows
timestamp
Timestamp of the last upload or workflow operation execution
Uploading documents
1
Navigate to Knowledge Base
Open your Knowledge Base in FlowX Designer and select the Stores tab.
2
Open the upload dialog
Click the + button in the top-right of the Stores tab. A file picker opens.
3
Select file
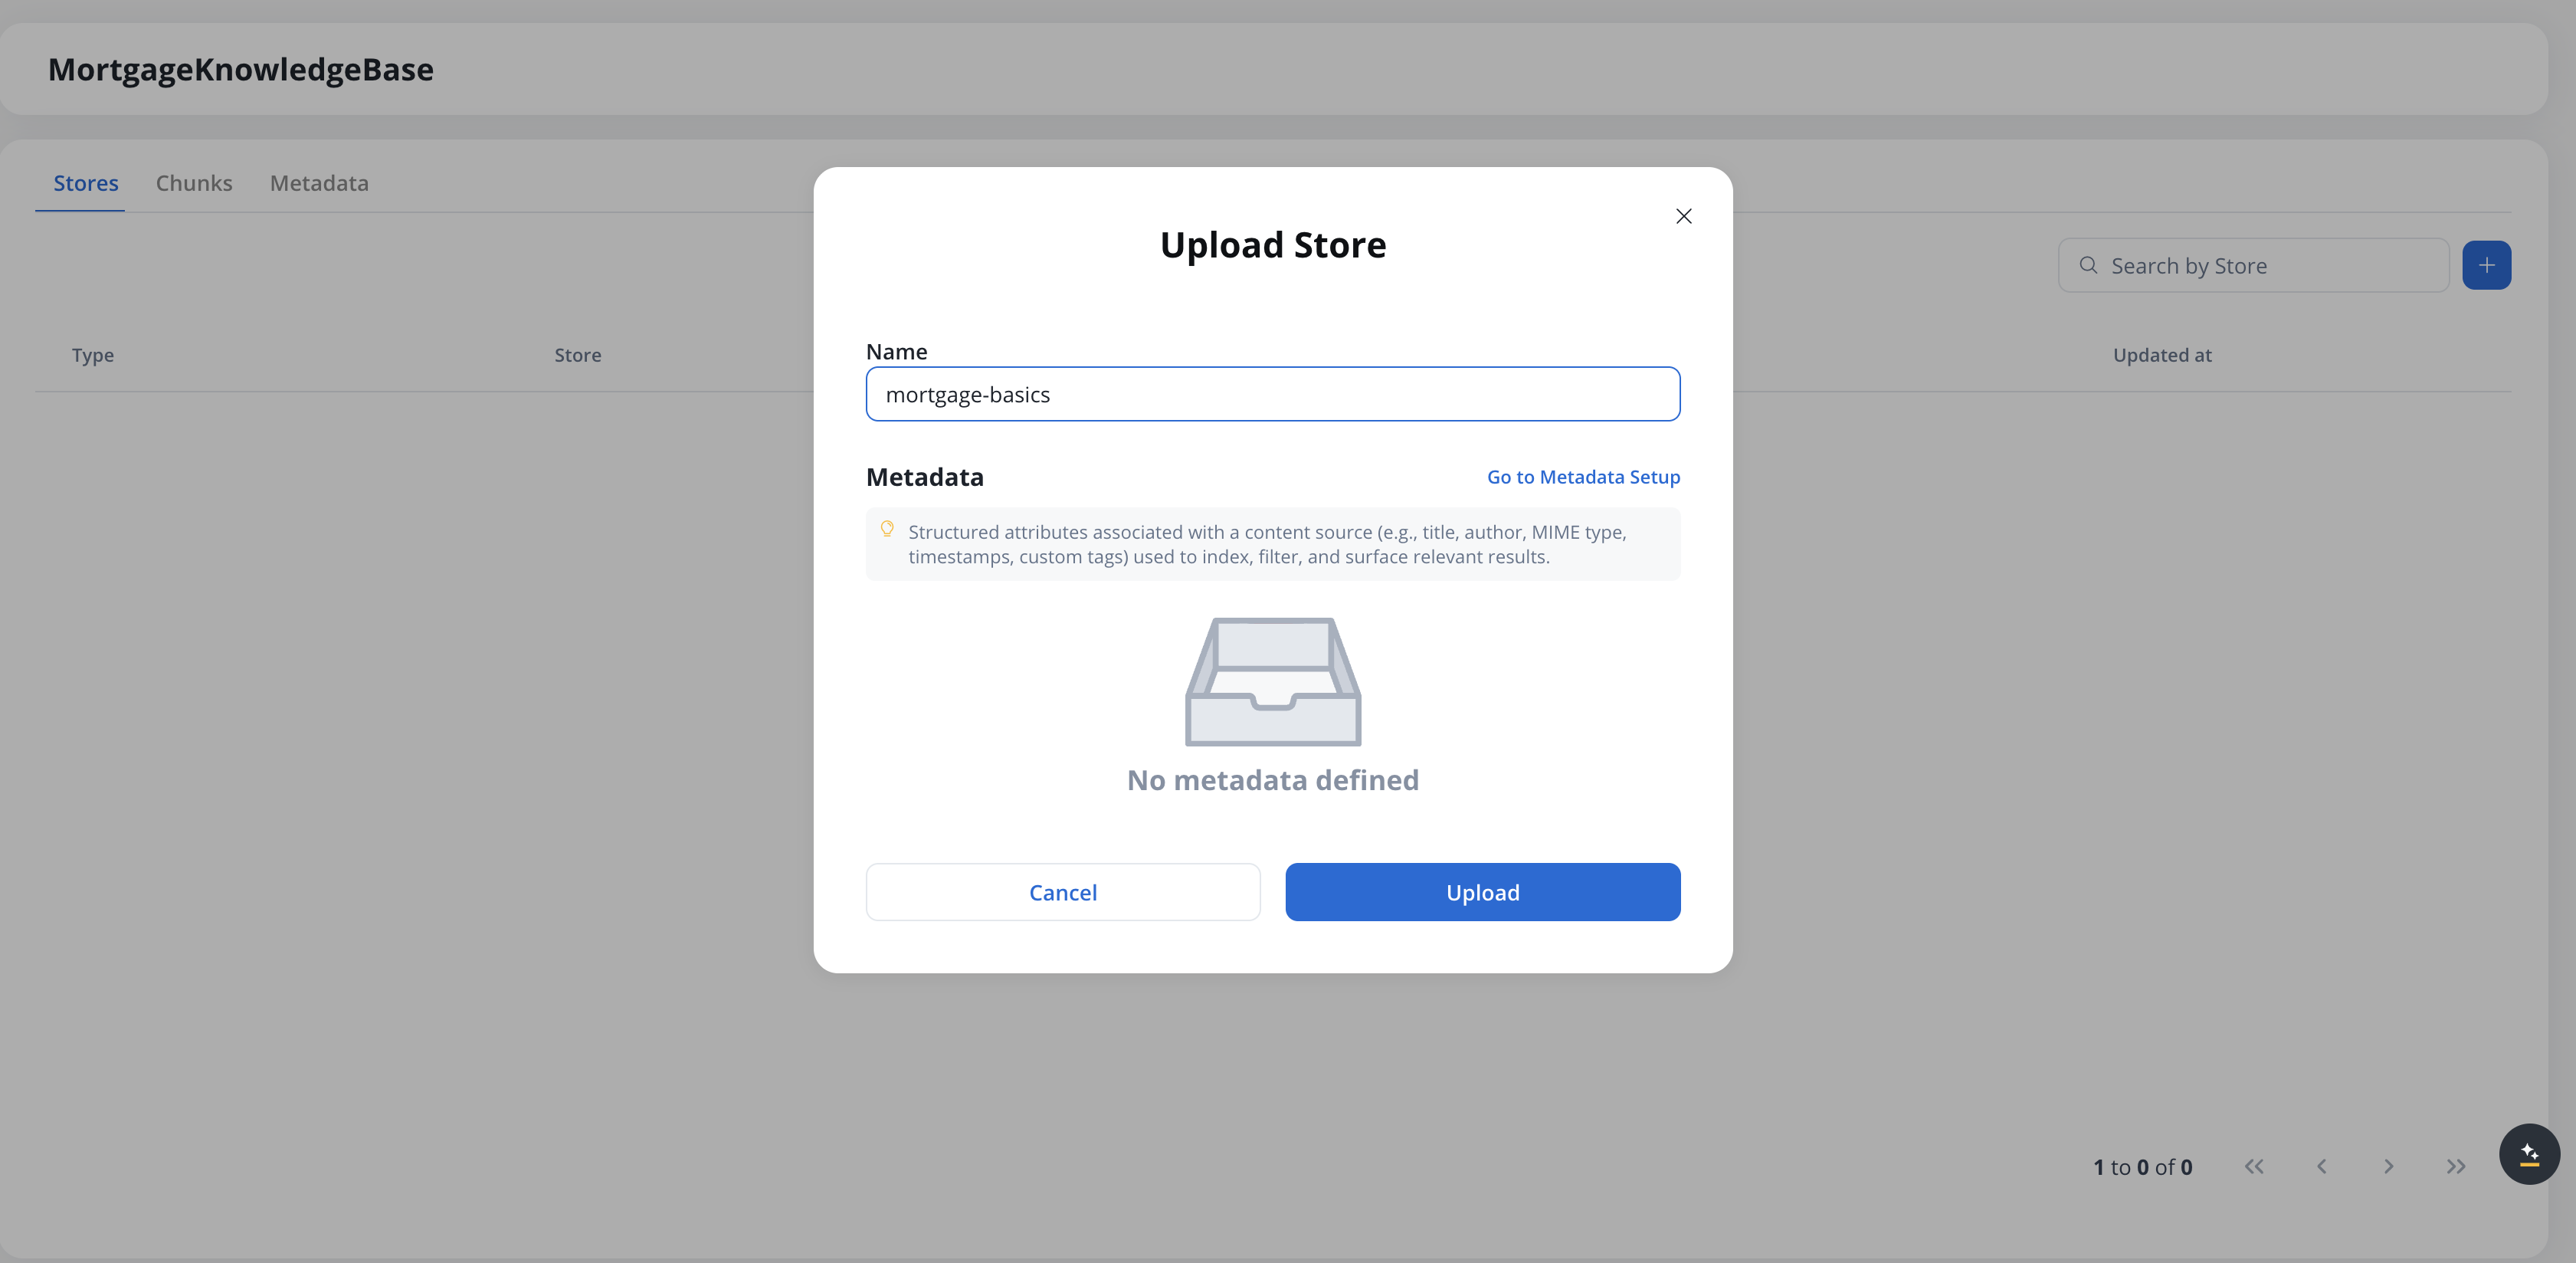
Choose a PDF file from your computer and click Open. The Upload Store modal appears.
4
Set the store name
The Name field is pre-filled with the file name (without extension). Edit it if needed — the name must be unique within the Knowledge Base.
5
Review metadata (optional)
The Metadata section shows the metadata schema defined for this Knowledge Base. If no metadata is defined, a “No metadata defined” placeholder appears — click Go to Metadata Setup to configure a schema on the Metadata tab before uploading. See User-defined metadata for details.
6
Upload
Click Upload to start the ingestion process. The store appears in the list with status Processing, and transitions to Ready once chunking and indexing complete.
File requirements
Word document support
SaaS ·Available on SaaS with FlowX.AI . This feature is live on managed (SaaS) deployments now. Self-hosted deployments will receive it with the next LTS release family.
.docx) can also be uploaded as stores, and are chunked and indexed the same way as PDFs. This applies to store uploads in the Designer; the Test Knowledge Base modal accepts PDF only — see Testing the Knowledge Base.
Each store operation takes one document or one payload. There is no multi-file selector and no folder-based ingestion, in the upload dialog or on the Update Knowledge Base node.To load a set of documents in one pass, see Ingesting many documents.
Store naming
When uploading a document, you must provide a unique store name:Duplicate stores
If you select a file with the same name as an existing store, you’ll see a warning:- Append Content: Add the new document’s content to the existing store
- Replace Content: Replace the existing content with the new document
- Cancel: Choose a different name or file
Adding content from a payload
SaaS ·Available on SaaS with FlowX.AI . This feature is live on managed (SaaS) deployments now. Self-hosted deployments will receive it with the next LTS release family.
- Document (default) — upload a file, as described in Uploading documents.
- Payload — paste content into the editor.
1
Switch Source to Payload
In the store’s add or update flow, set the Source toggle to Payload.
2
Paste the content
Enter text, Markdown, or JSON. JSON is not validated — content is accepted as-is.
3
Name the store (create only)
When creating a store, type a unique name. Append and replace derive the entry name automatically.
4
Submit
Content is processed and indexed asynchronously — the store shows Processing until Ready. Replacing a populated store asks for confirmation first, since it deletes existing content.
A payload is stored as plain text — wrapped into a text file and chunked like a document. JSON is kept as an opaque text blob, so it is not stored or queried field by field.
Managing stores
Once content is uploaded and processed, you can perform the following operations: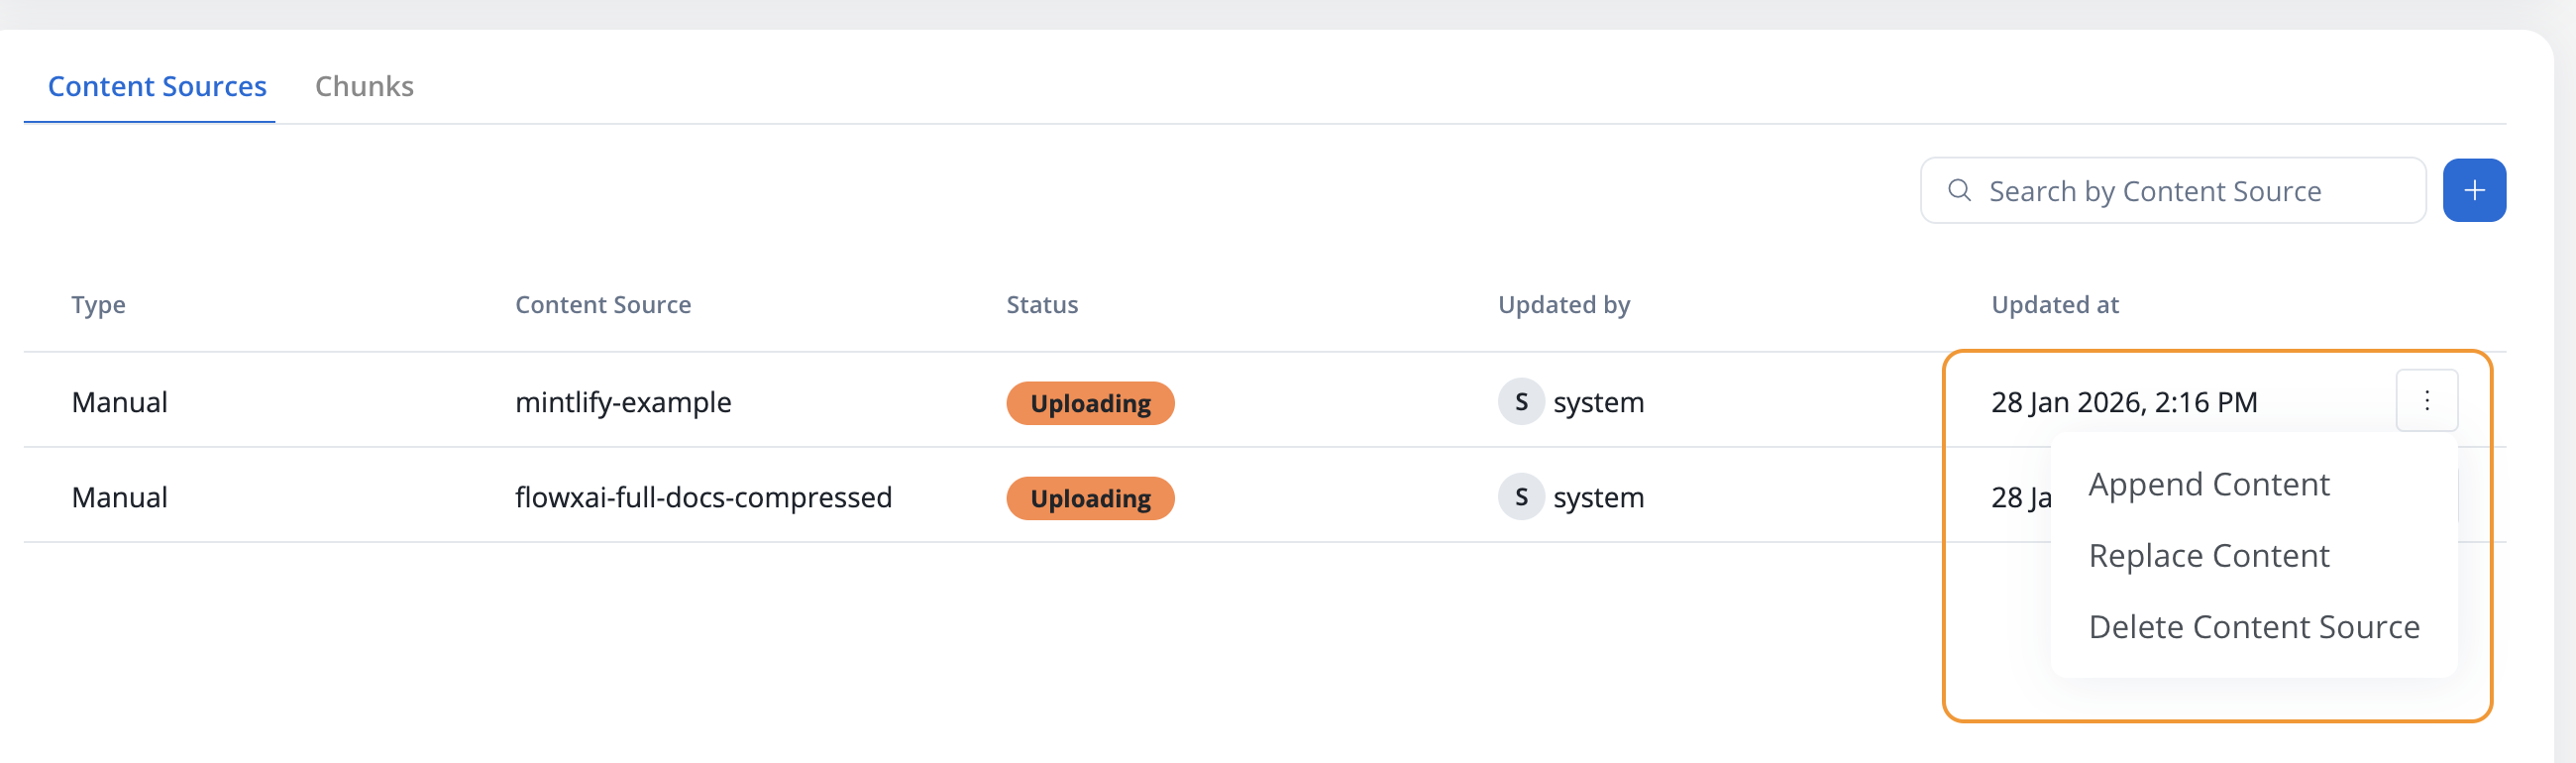
Append content
Add new content to an existing store without removing the existing chunks.1
Select store
Click on the store you want to update
2
Choose Append Content
Select the Append Content operation
3
Upload new file
Select a new PDF file with additional content
4
Confirm
The new content will be processed and added to the existing chunks
Replace content
Replace all existing content in a store with new content.1
Select store
Click on the store you want to replace
2
Choose Replace Content
Select the Replace Content operation
3
Upload new file
Select a new PDF file that will replace the existing content
4
Confirm
All existing chunks will be deleted and new chunks will be created from the new content
Delete store
Remove a store and all its associated chunks from the Knowledge Base.1
Select store
Click on the store you want to delete
2
Choose Delete
Select the Delete Store operation
3
Confirm deletion
Confirm that you want to permanently delete the store
Delete entries
SaaS ·Available on SaaS with FlowX.AI . This feature is live on managed (SaaS) deployments now. Self-hosted deployments will receive it with the next LTS release family.
1
Add an Update Knowledge Base node
In your workflow, add an Update Knowledge Base node and select the target Knowledge Base and store.
2
Choose Delete entries
Set the operation to Delete entries.
3
Build the metadata filter
Define a metadata filter that matches the entries you want to remove. The filter uses the same query builder as chunk search (field / operator / value, grouped with AND / OR). See Filtering by metadata for the operator list.
4
Confirm
Matching entries and their chunks are soft-deleted from the store. Removal from the vector database is asynchronous and may take a few moments to complete.
Update Knowledge Base node failure handling
SaaS ·Available on SaaS with FlowX.AI . This feature is live on managed (SaaS) deployments now. Self-hosted deployments will receive it with the next LTS release family.
paramValues) and in the workflow run console. It carries the following keys:
Use
errorReason to branch your workflow’s error handling:
When an operation is automatically retried, the console shows a retry notification with the original error and a “Retrying [<operation>] on store [<store>].” message.
Retryable reasons (
extraction_failed, chunking_failed, unknown) are retried automatically before the node fails. Non-retryable reasons (size_exceeded, timeout) route to the FAIL branch immediately.Ingesting many documents
Each Update Knowledge Base execution ingests a single document or payload, so loading a set of documents means running the node once per file. Collect the files first, then fan out.1
Collect the files in one action
Add a Multiple File Upload component to the screen where the documents are submitted. It uploads the whole selection in a single request and writes the per-file results back as a list.
2
Fan out over the list
Add a Call Activity node in parallel multi-instance mode and set that list as its input array. One subprocess instance starts per element.The input array must be an array of objects — the per-file result list qualifies, a plain list of path strings does not, and only arrays of objects appear in the Input Array picker. Map the fields you need into the subprocess in the node’s Data Mapping section: a child that receives no mapping knows only its position in the collection, not which file it is handling.
3
Ingest one file per instance
In the subprocess, call the workflow that holds the Update Knowledge Base node and pass it the single file path from
item. Use Append Content so every instance adds to the same store.Emptying a knowledge base
Stores are the unit of deletion: there is no bulk operation that clears all content from a Knowledge Base at once. To empty a Knowledge Base while keeping it available for re-ingestion, delete each of its stores individually. You can automate this from a workflow with the Update Knowledge Base node using the Delete operation.Stores and version export
Store contents stay on the workspace where they were ingested. A project version export carries the Knowledge Base data-source definition (system, endpoints, metadata keys), but not the stores’ documents or their indexed embeddings. After importing the version on another workspace or environment, the Knowledge Base appears with empty stores — upload the content again there to rebuild the index. See Export/import a project for the full export behavior.Store states
Stores progress through different states during their lifecycle. Status badges update in real-time — you don’t need to refresh the page to see transitions.New
The initial state after content is uploaded to the Knowledge Base. What’s happening:- File has been transferred to the FlowX platform
- Content is being validated and queued for processing
Processing
Content is being chunked, embedded, and indexed in the vector database. What’s happening:- Content is being extracted from the document
- Text is being split into semantically meaningful chunks
- Chunks are being embedded and indexed in the vector database
Ready
Store is fully processed and available for queries. What you can do:- Query the store in AI agents
- View individual chunks
- Append or replace content
- Delete the store
Failed
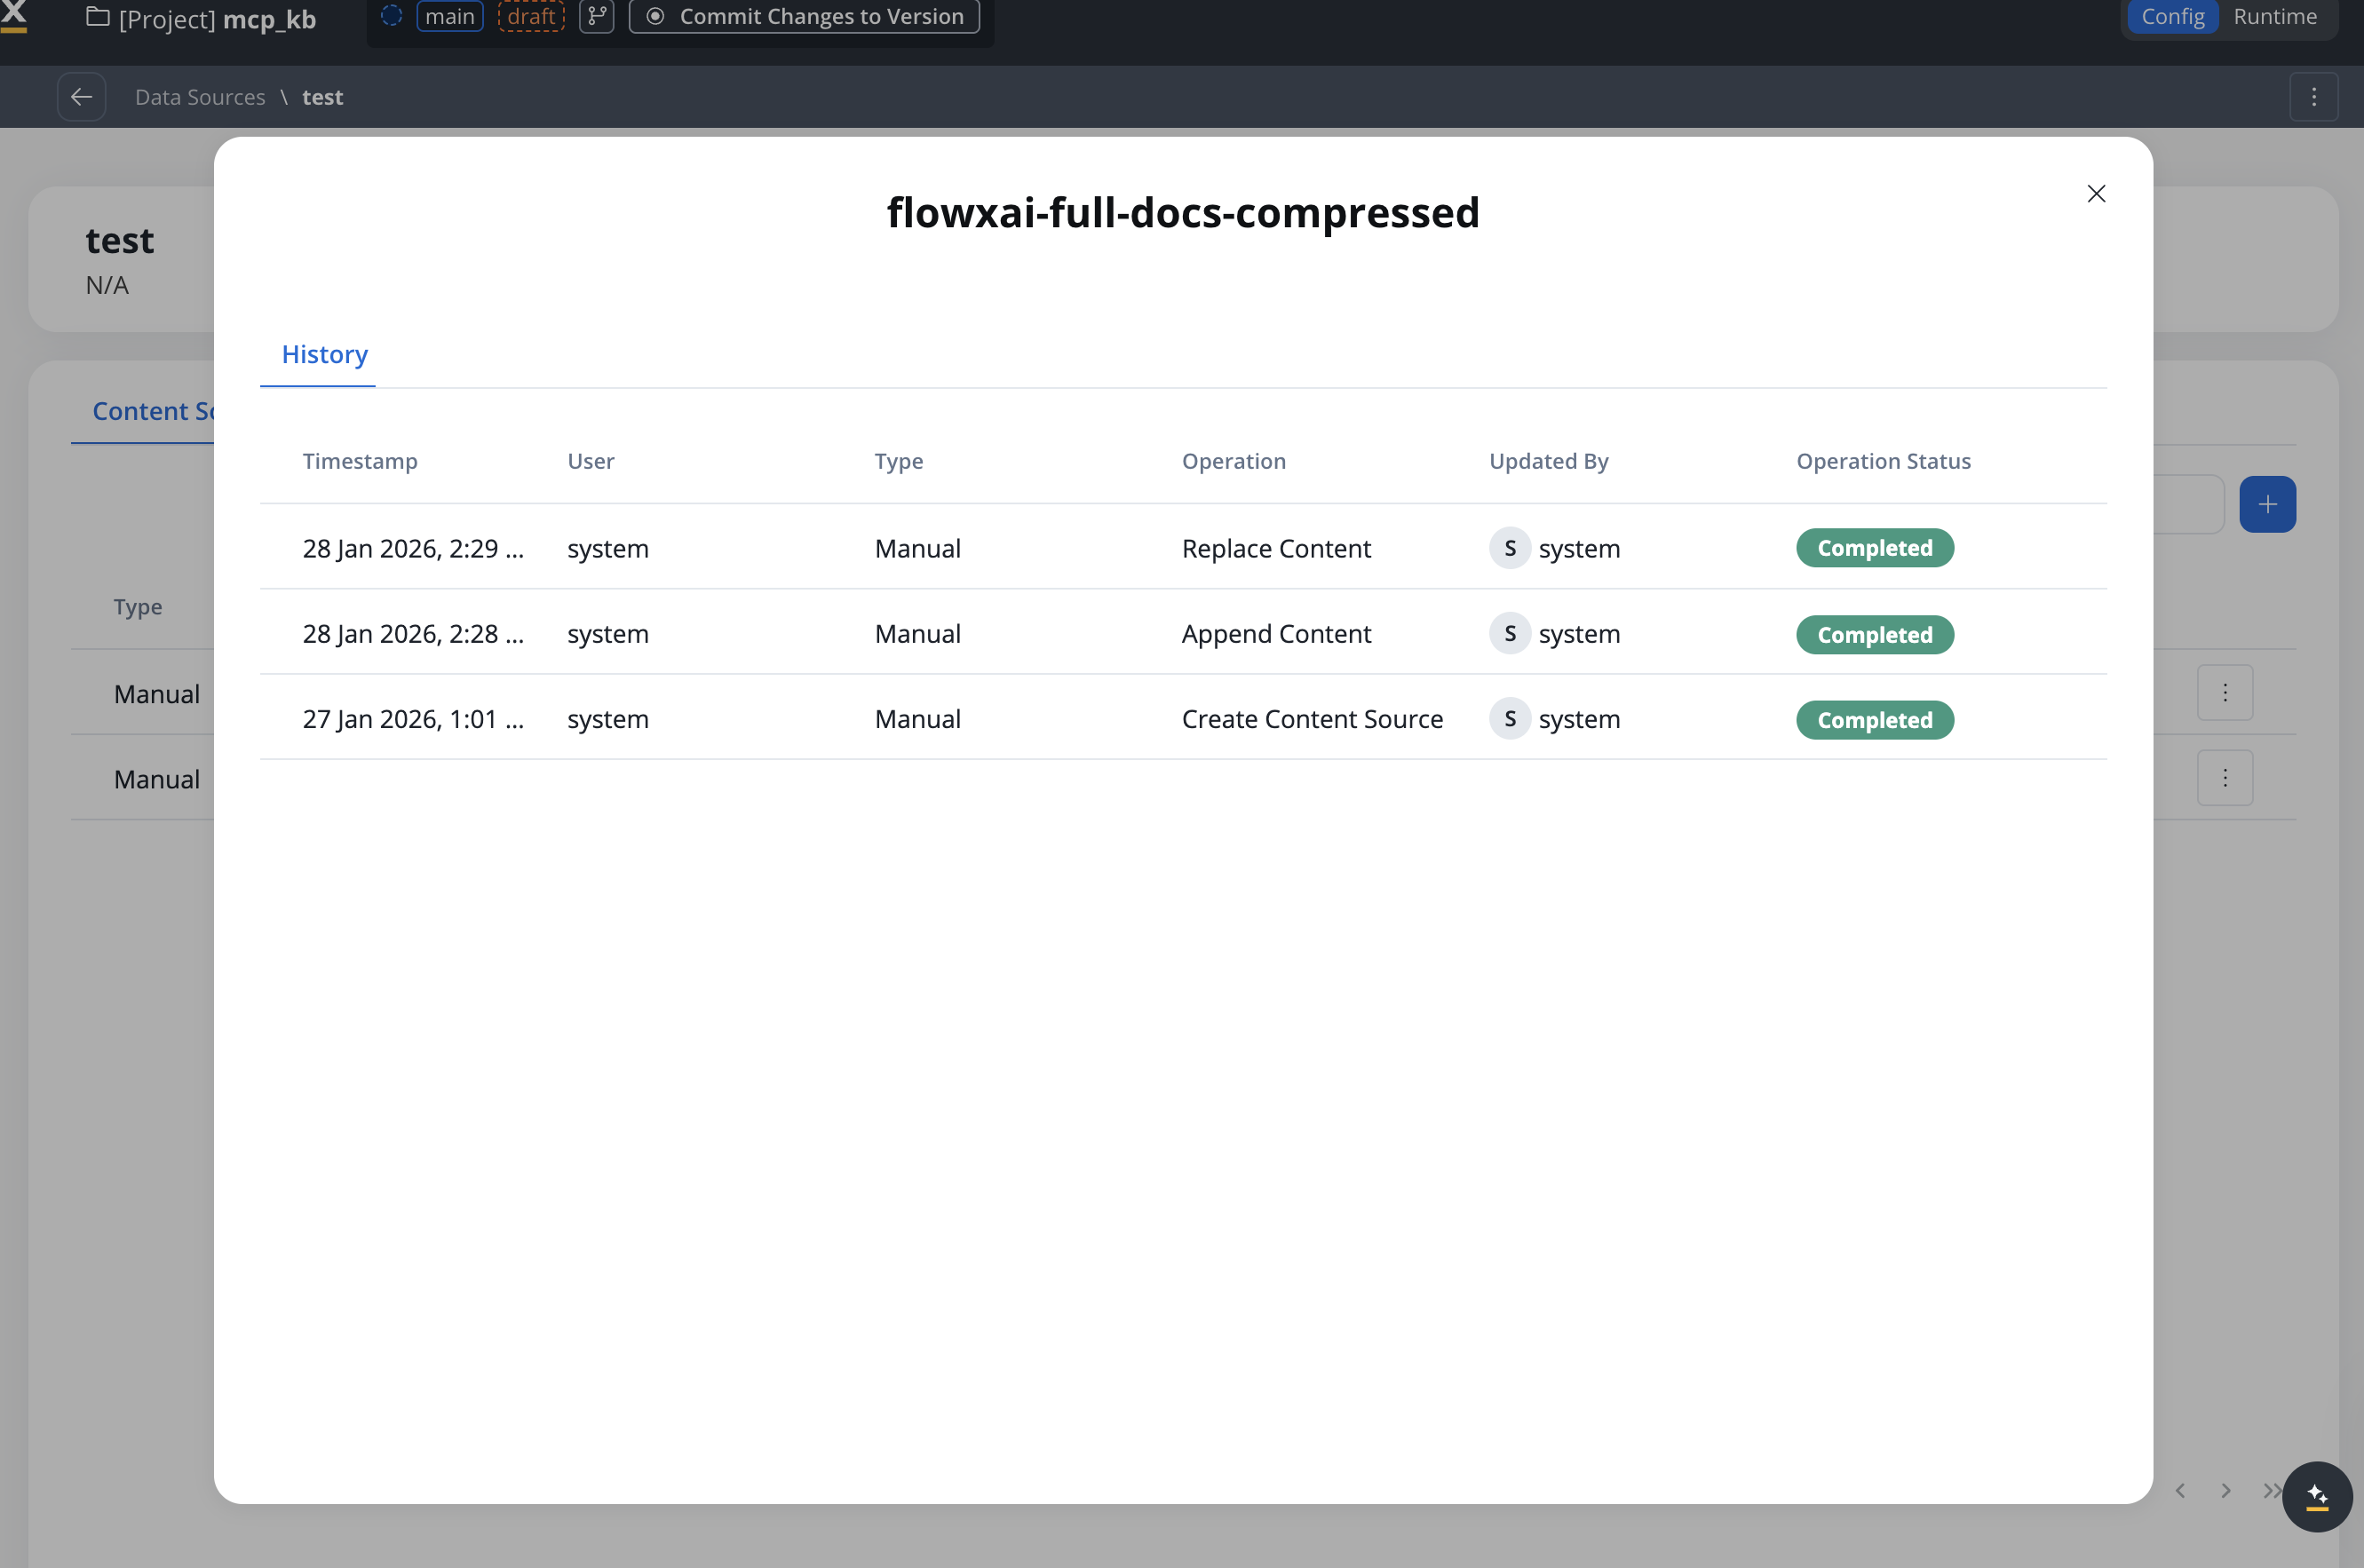
An error occurred during processing, or the store is partially degraded. What to do:- Check the error message in the Store History modal
- Verify the file format and content
- Retry the operation
Error handling
When processing fails, the store will show a warning indicator.Error states and recovery
Upload failed
Upload failed
Cause: File upload was interrupted or the file format is invalidSolution:
- Verify the file format is supported — see File requirements
- Check your network connection
- Try uploading again
Chunking failed
Chunking failed
Cause: Error occurred while processing the contentSolution:
- Check the Store History for specific error details
- Verify the file is not corrupted
- Contact support if the issue persists
Retry behavior
Retry behavior
When retrying a failed operation:
- Any chunks already created will be deleted
- The content will be processed entirely from the beginning
- No duplicate chunks will be created
Warning indicators
When a store has a failed update:- Yellow warning icon appears on the store row
- Tooltip message: “Last Store update failed. Check history.”
- Dismiss trigger: The warning is automatically dismissed after a successful update
Viewing store history
Store History lists every operation performed on a store. Open it from the store’s actions menu with View History.
Each history entry includes:
- Timestamp
- User
- Type (Manual/Workflow/Test Operation)
- Operation performed
- Updated By (user or workflow name)
- Operation Status
Working with chunks
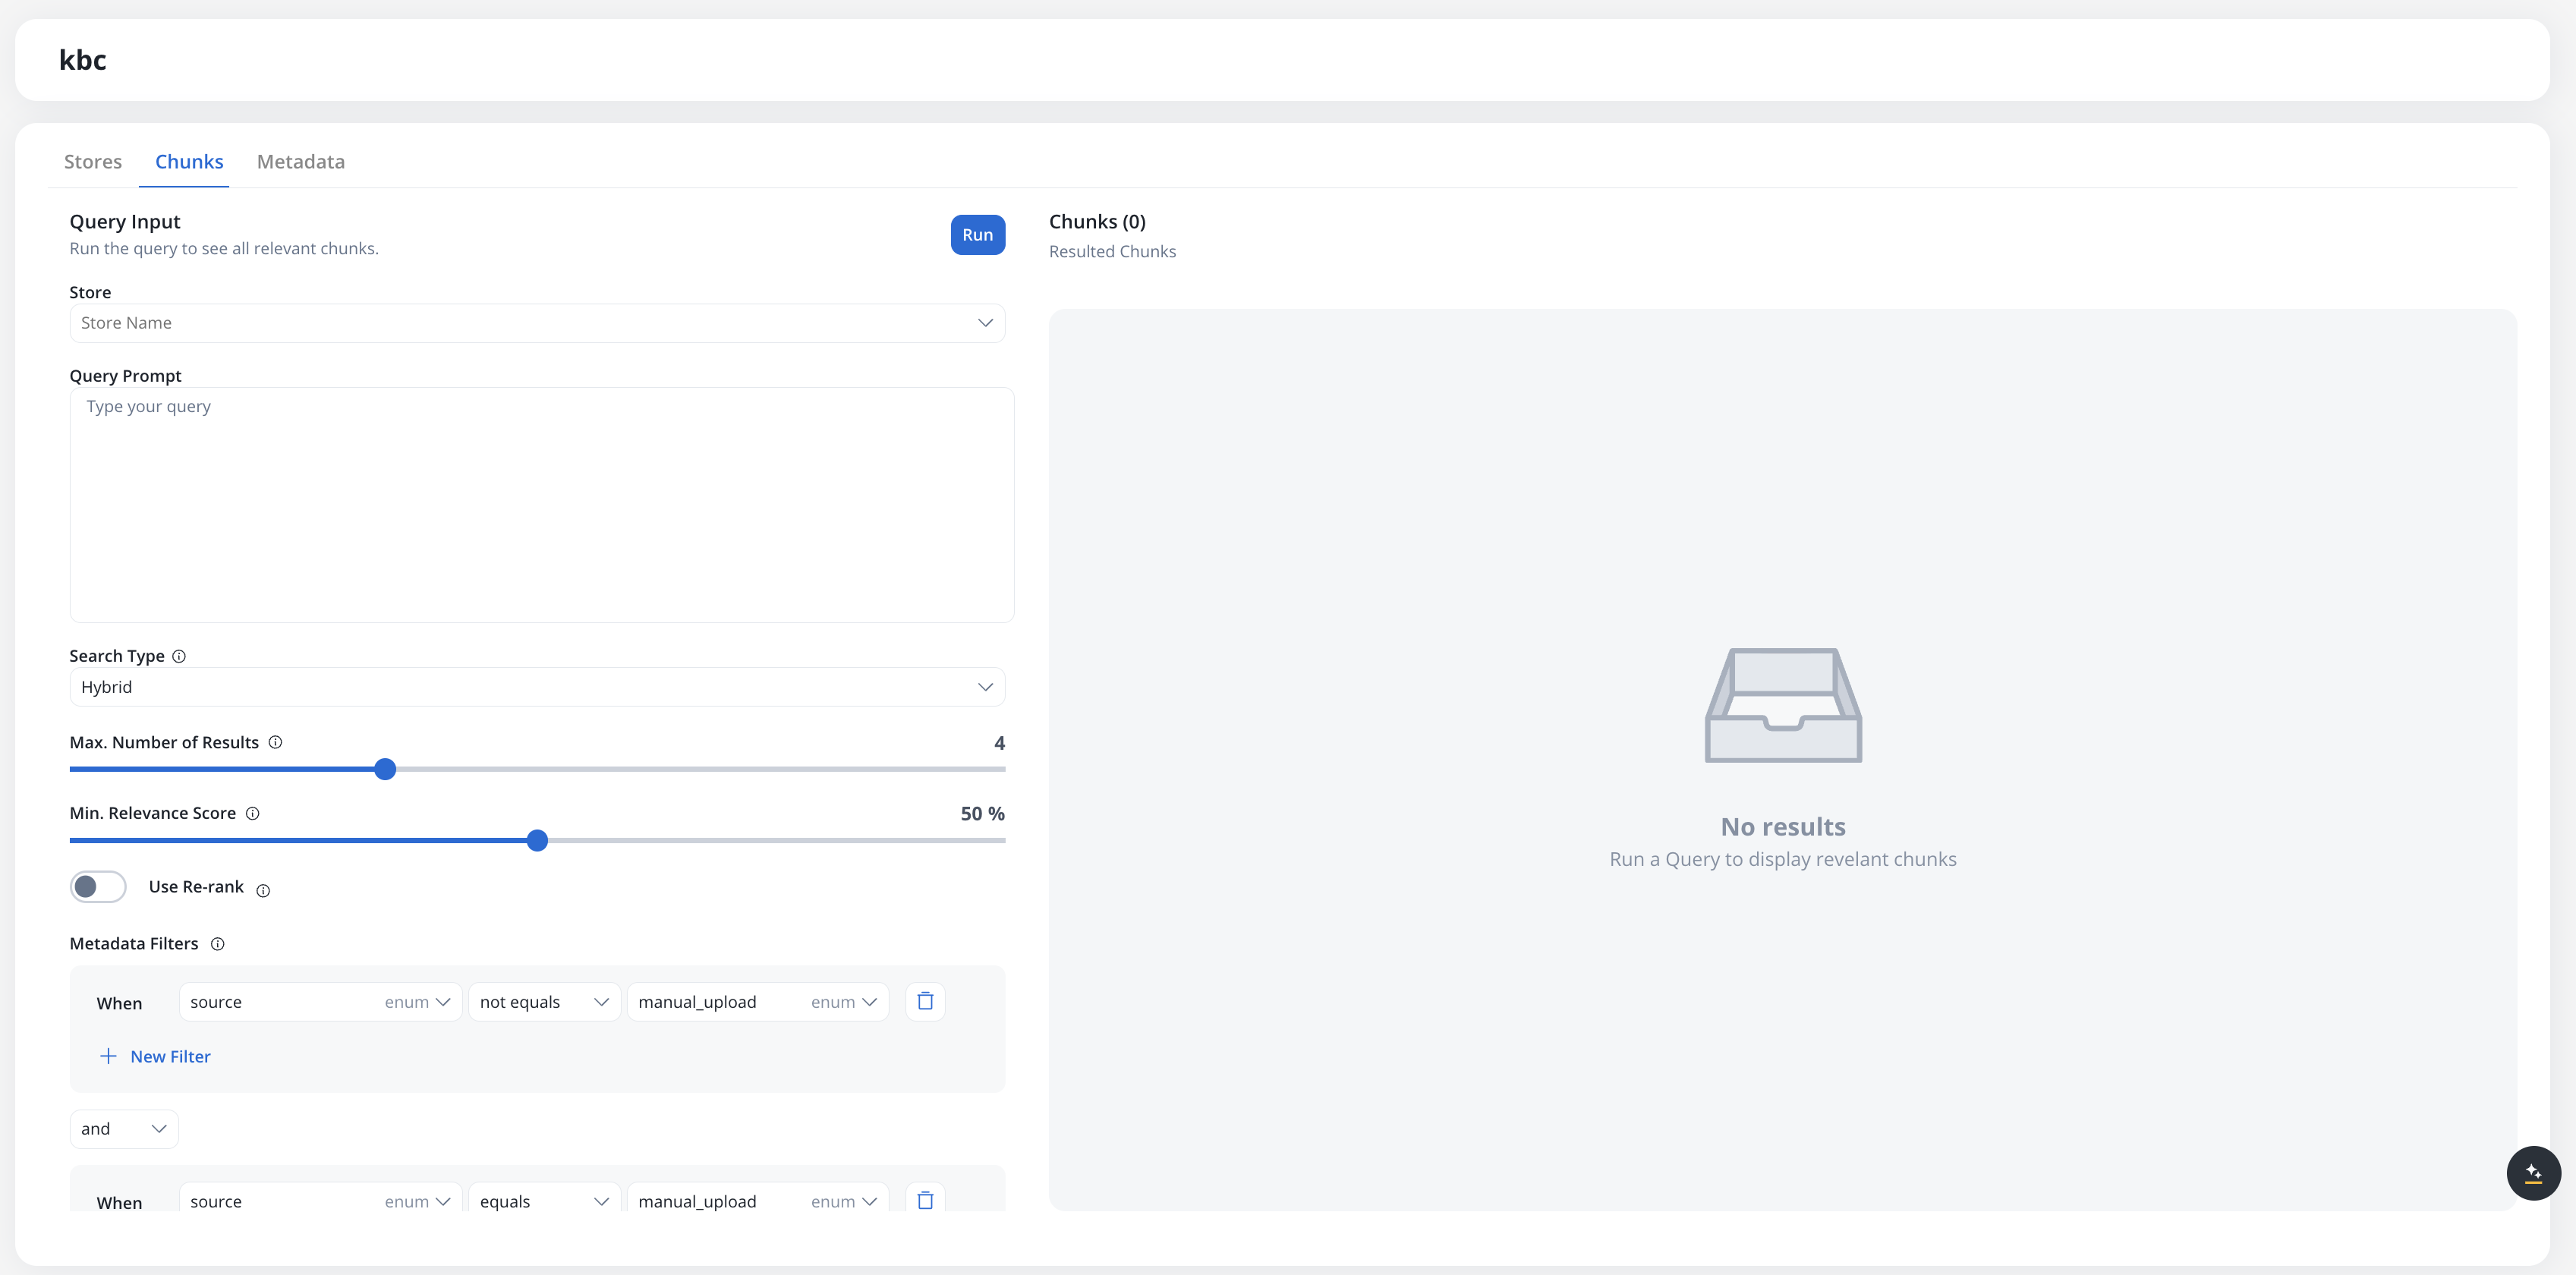
Chunks are the individual pieces of content that AI agents query. To view and test chunks:1
Navigate to Chunks tab
Click the Chunks tab in your Knowledge Base
2
Search chunks
Enter a query to search for relevant chunks
3
Filter results
Apply filters to refine the search results
4
Review chunks
Examine the returned chunks, their relevance scores, and metadata
Chunk information
Each chunk displays:percentage
How relevant the chunk is to your query (0-100%)
string
The store that generated this chunk (clickable link)
link
Link to the original document or JSON payload that created this chunk
text
The actual text content of the chunk
object
System metadata associated with the chunk:
source: manual_upload or from_workflowpath: Document filepath or JSON payloadchunk_id: UUID from the vector databaseknowledge_base: Knowledge Base ID
User-defined metadata
You can define custom metadata keys on a Knowledge Base and assign values to stores. User-defined metadata enables filtering and scoping when searching chunks — for example, filtering by department, document version, or region.Defining metadata keys
Metadata keys are managed on the Metadata tab of the Knowledge Base data source.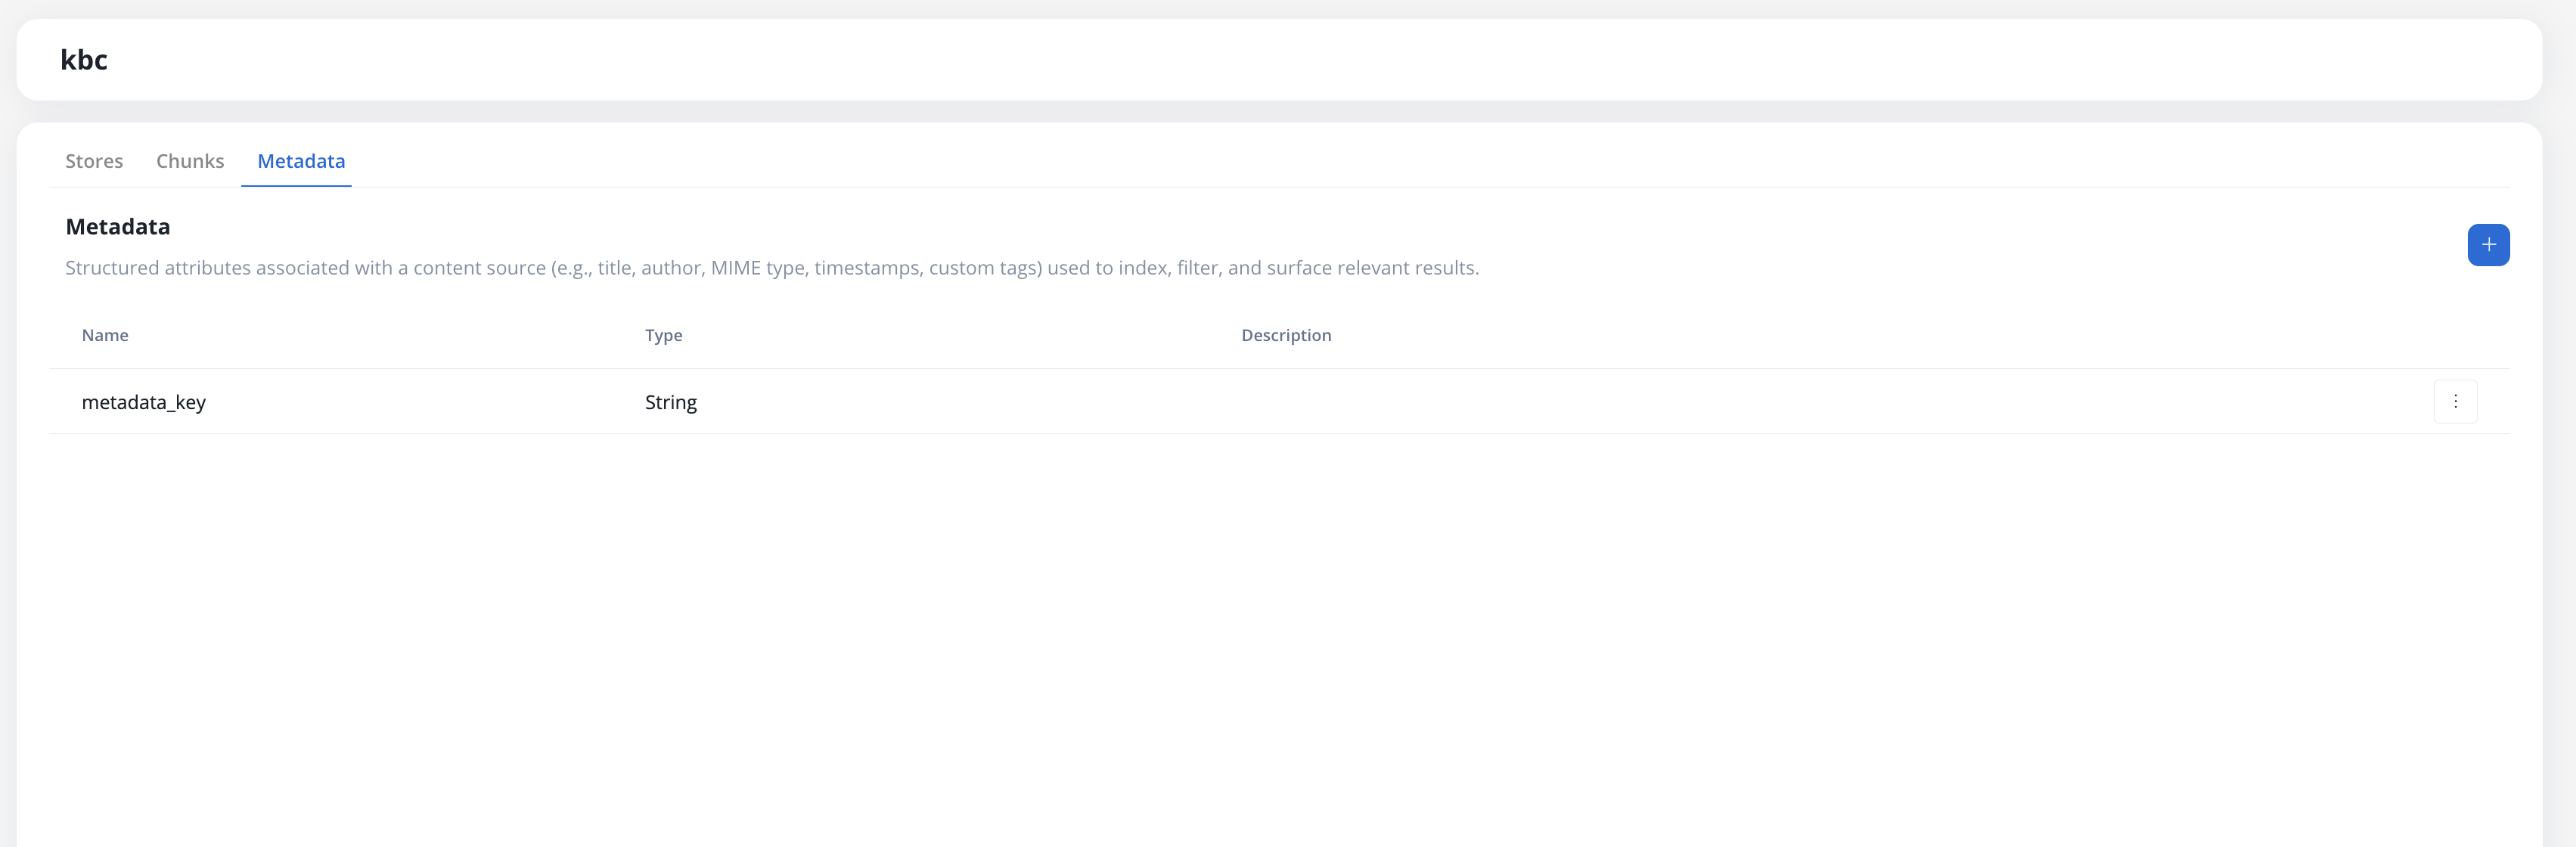
Assigning metadata values
When uploading or appending a store (manually or through the Update Knowledge Base workflow node), a Metadata section appears in the upload modal listing all defined keys for the Knowledge Base. Assign a value to each relevant key before uploading. The values are stored alongside the content and propagated to the vector database.Filtering by metadata
When searching chunks (in the Chunks tab or through the Context Retrieval workflow node), you can add metadata filters using the query builder. System metadata keys are always available as filter options alongside any user-defined keys.The metadata filter UI is a full query builder with typed operators, AND/OR logic, and grouping.
System metadata keys
System metadata keys are reserved names populated automatically by the platform. They are listed in the filter picker with human-readable labels and can be combined with user-defined keys.If a user-defined metadata key collides with a reserved system name, it is automatically renamed to
<name>_user on upgrade. Wire-level identifiers stay plain; the filter picker shows human labels (for example, Doc type for docType).
Conditions are organized in groups. Within a group, conditions can be combined with
and or or. Groups themselves are also combined with and or or, which lets you express non-trivial logic such as (region = "EU" AND tier IN ["gold", "platinum"]) OR priority >= 5.
Use New Filter to add a condition and New Group to add a nested group.
Searching chunks
Use the Chunks tab to test how chunks will be retrieved by AI agents:string
Filter by a specific store. Default: all stores
string
Enter a natural language question or search query
select
Strategy used for retrieving context:
- Hybrid (default) — combines semantic and keyword search
- Semantic — vector similarity only
- Keywords — lexical match only (hides Min. Relevance Score)
number
Maximum number of chunks to return. Range: 1-10. Default: 4.
percentage
Only return chunks with relevance score above this threshold. Range: 0-100%. Hidden when Search Type is Keywords.
boolean
Reorders results to surface the best matches. Improves quality but takes slightly longer.
object
Refine results using the query builder (see Filtering by metadata)
Best practices
Content organization
Content updates
Error prevention
Next steps
Using in Workflows
Learn how to query Knowledge Bases from workflows
Related resources
Knowledge Base Overview
Understanding Knowledge Base capabilities