Overview
The Speech to Text node is a workflow node that transcribes audio files into text. It reads audio from a configured source, sends it to the speech-to-text service, and returns the transcript along with language detection and confidence metadata. The node works in both standard and chat-driven workflows, and integrates with the FlowX Document Plugin for file storage.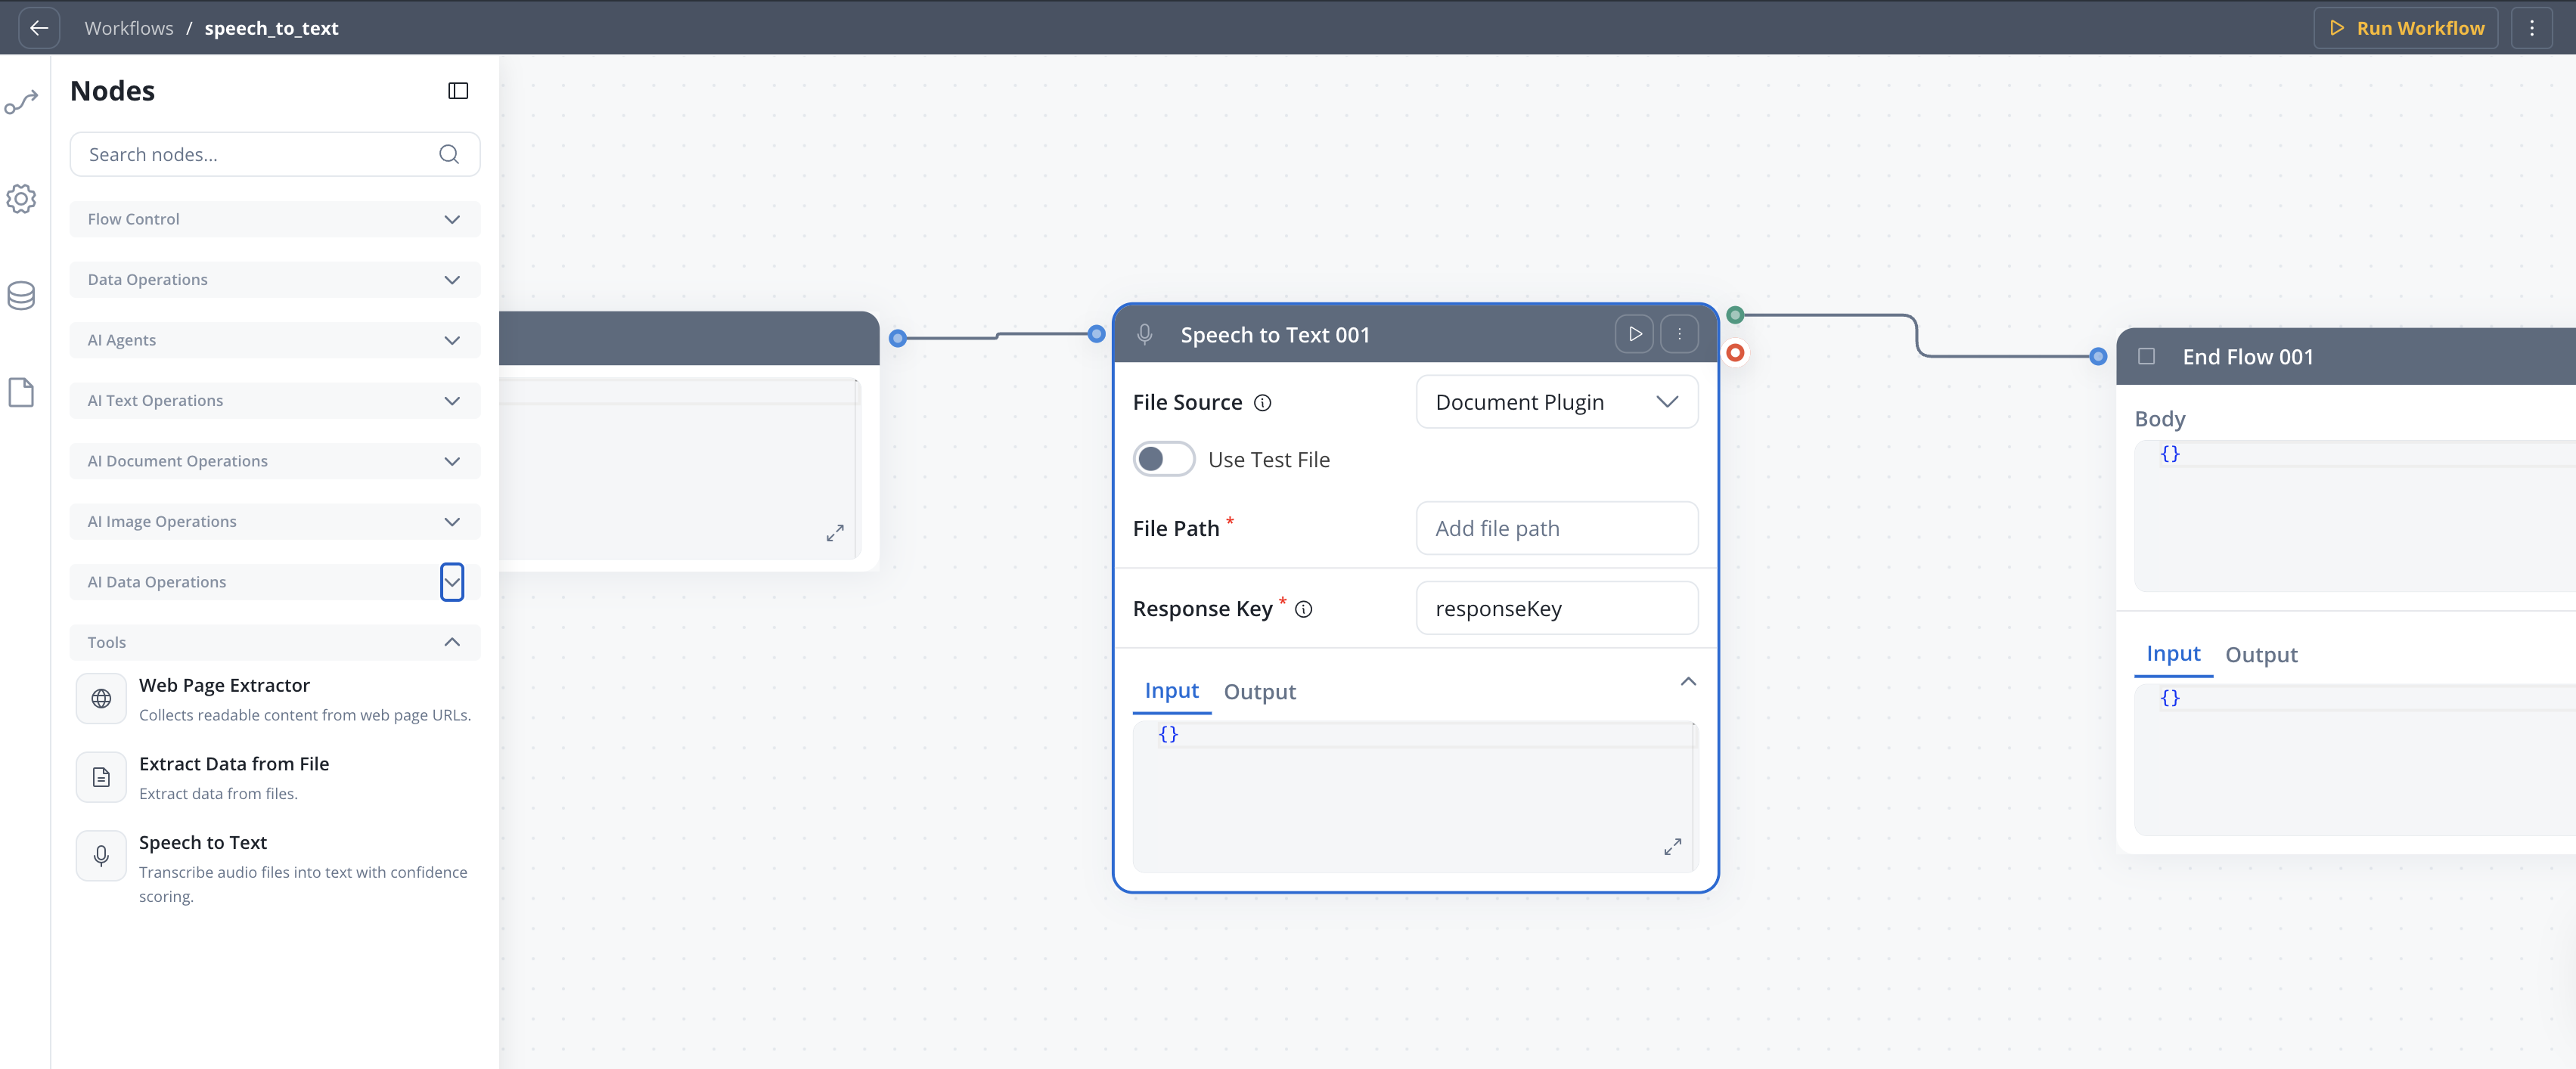
Transcribe audio
Convert audio recordings to text with language detection and confidence scores
Multiple file sources
Read audio from Document Plugin, S3, or directly from chat voice input
Chat integration
Automatically processes voice messages in chat-driven workflows
Test files for development
Upload sample audio to validate your workflow before connecting a live source
Configuration
1
Open your workflow
Open your workflow in Integration Designer.
2
Add the node
Add a Speech to Text node from the node palette.
3
Configure the settings
Configure the settings described below.
File Source
Where the audio file is located.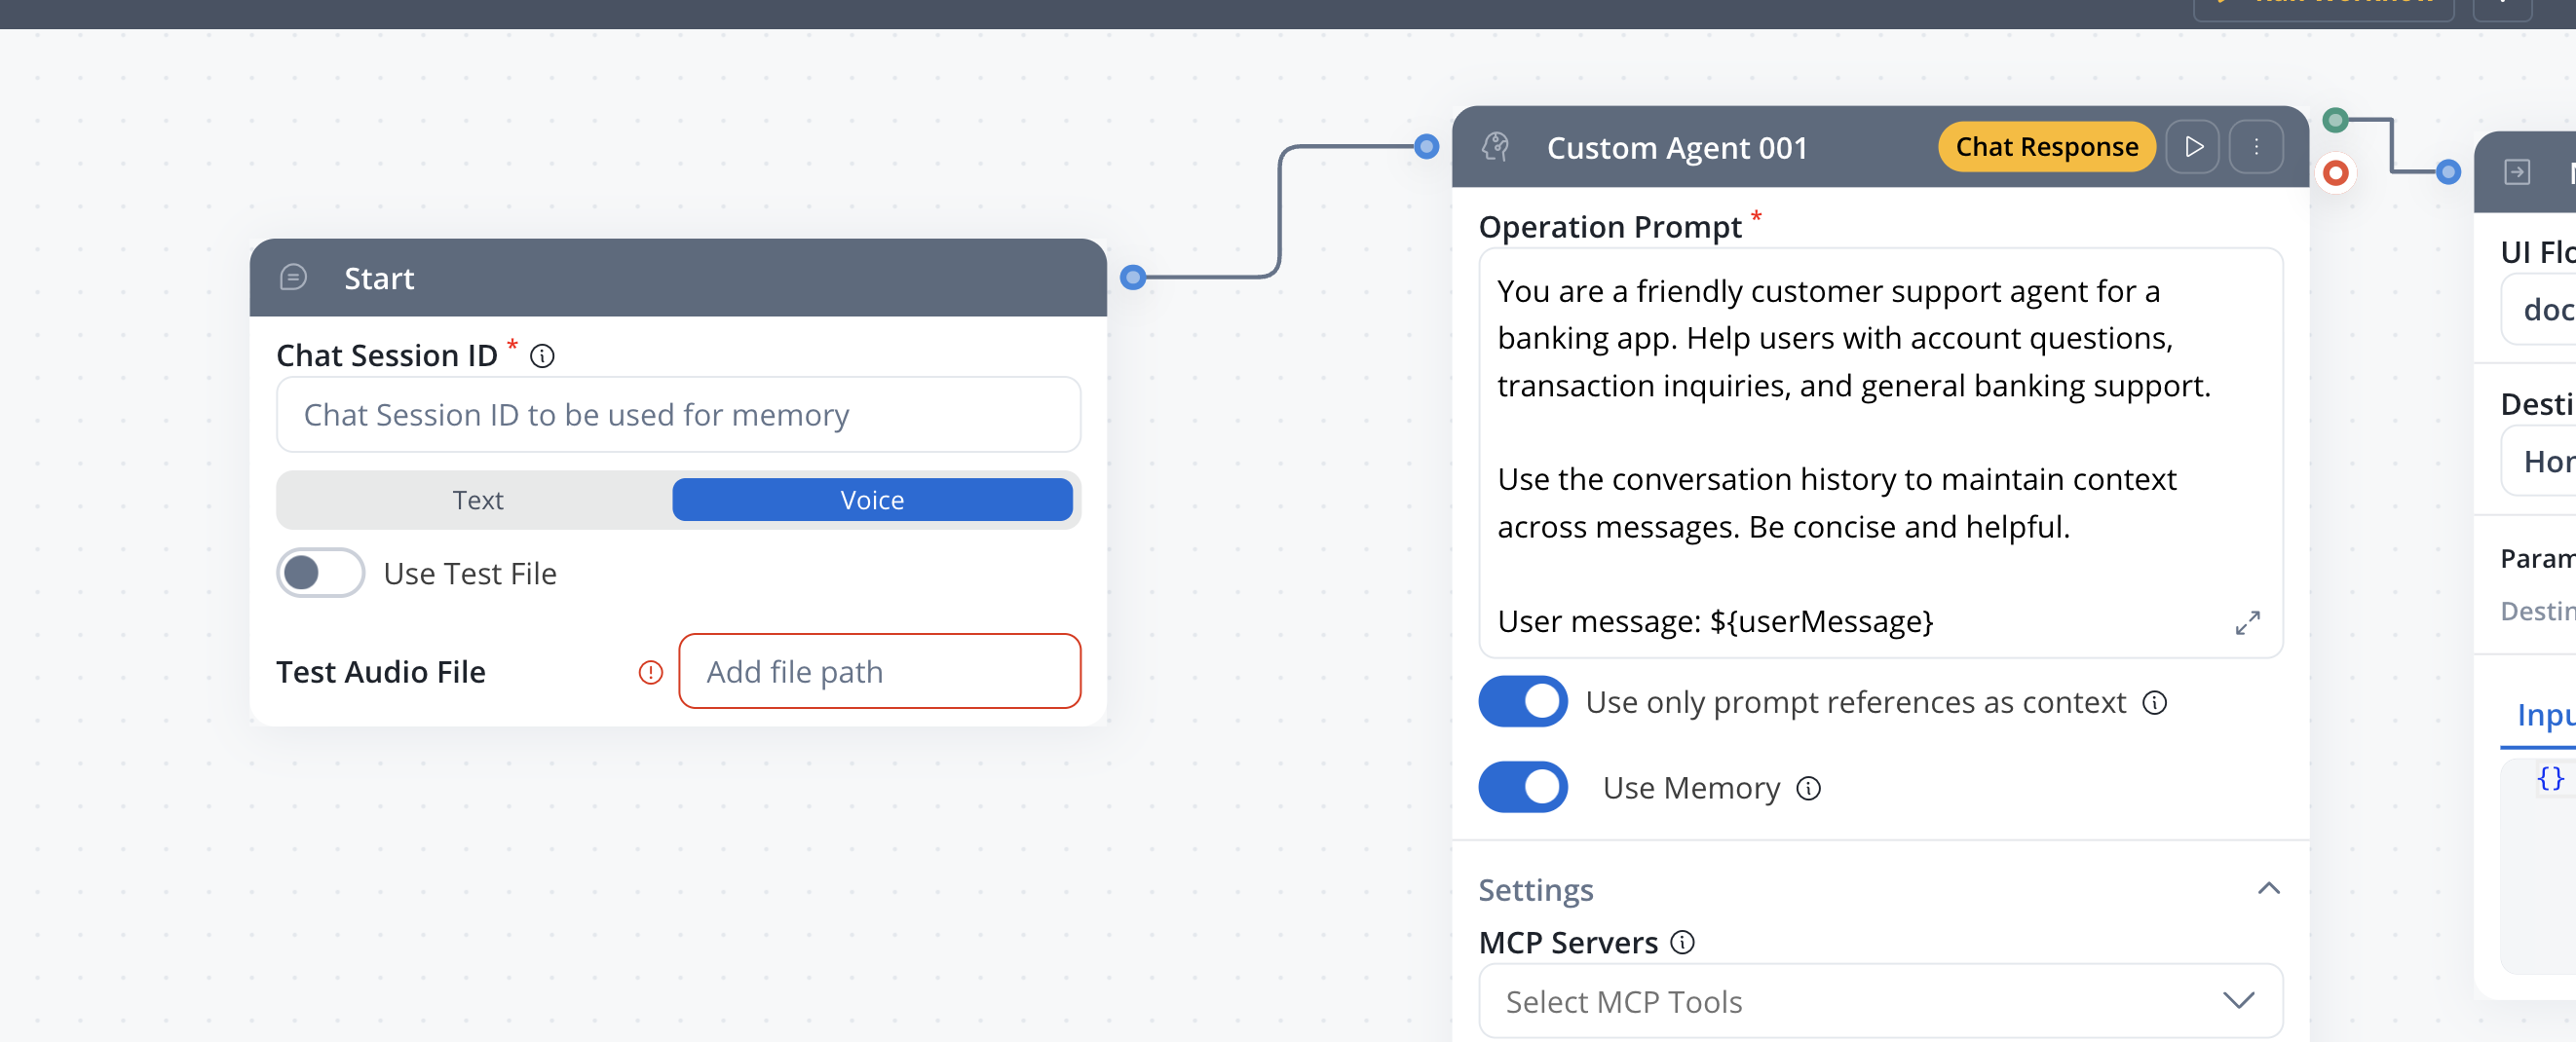
In chat-driven workflows, the file source is set to Chat Input automatically.
Upload and use a sample audio file for testing without connecting a live source. When turned on, File Path becomes a dropdown of available test files instead of a free-text input.Default: OFF
Path to the audio file. The control changes based on Use Test File:
- Use Test File OFF — free-text input. Supports
${expression}placeholders for dynamic values from workflow data. Only meaningful when File Source isDocument PluginorS3 Protocol. - Use Test File ON — dropdown labelled Select Test File, listing the test files uploaded to this node.
${inputData.audioFilePath}The key under which the transcript and metadata are stored in the workflow data.Example:
speechResultSupported audio formats
File size limits
Test files support the same audio formats listed above, with a maximum size of 15 MB.
Output
The node writes the transcript and metadata under the configured Response Key. Standard workflows output nested under the response key:Chat-driven workflow integration
In chat-driven workflows, the Speech to Text node works with the Chat component voice input feature:- A user records a voice message in the chat UI
- The audio file is sent to the workflow as a chat input
- The Speech to Text node (with Chat Input file source) transcribes the audio
- The transcript is set as the
userMessage, making it available to downstream nodes (Custom Agent, Intent Classification) as if the user had typed it
When processing chat voice input, the audio file metadata is preserved in the conversation context. This allows conversation history to reference which messages originated from voice input.
Node connections
The Speech to Text node has two output handles:
Connect downstream nodes to the appropriate handle to manage both successful and failed transcription scenarios.
Best practices
Match file source to workflow type
Use Chat Input for chat-driven workflows and Document Plugin or S3 for standard workflows.
Keep audio files within size limits
Audio files exceeding the size limit (5 MB conversational, 10 MB standard) will fail. Validate file size before reaching the node if the source is user-provided.
Use test files during development
Upload a sample audio file to validate your workflow configuration before connecting to a live source.
Handle failures
Always connect the Fail handle to a fallback path, especially when processing user-uploaded audio that may be in an unsupported format.
Related resources
Chat component
Voice input and conversational UI for chat-based workflows
Chat-driven workflows
Build multi-turn conversations with AI Triggers and context
AI node types
Overview of all AI workflow node types
Integration Designer
Build and manage integration workflows