User Interface
The most common way to start processes through user interaction
Kafka Messages
Start processes through Kafka events from other systems
Timer Events
Schedule processes to start automatically at specific times
Message Events
Trigger processes through message events from other processes
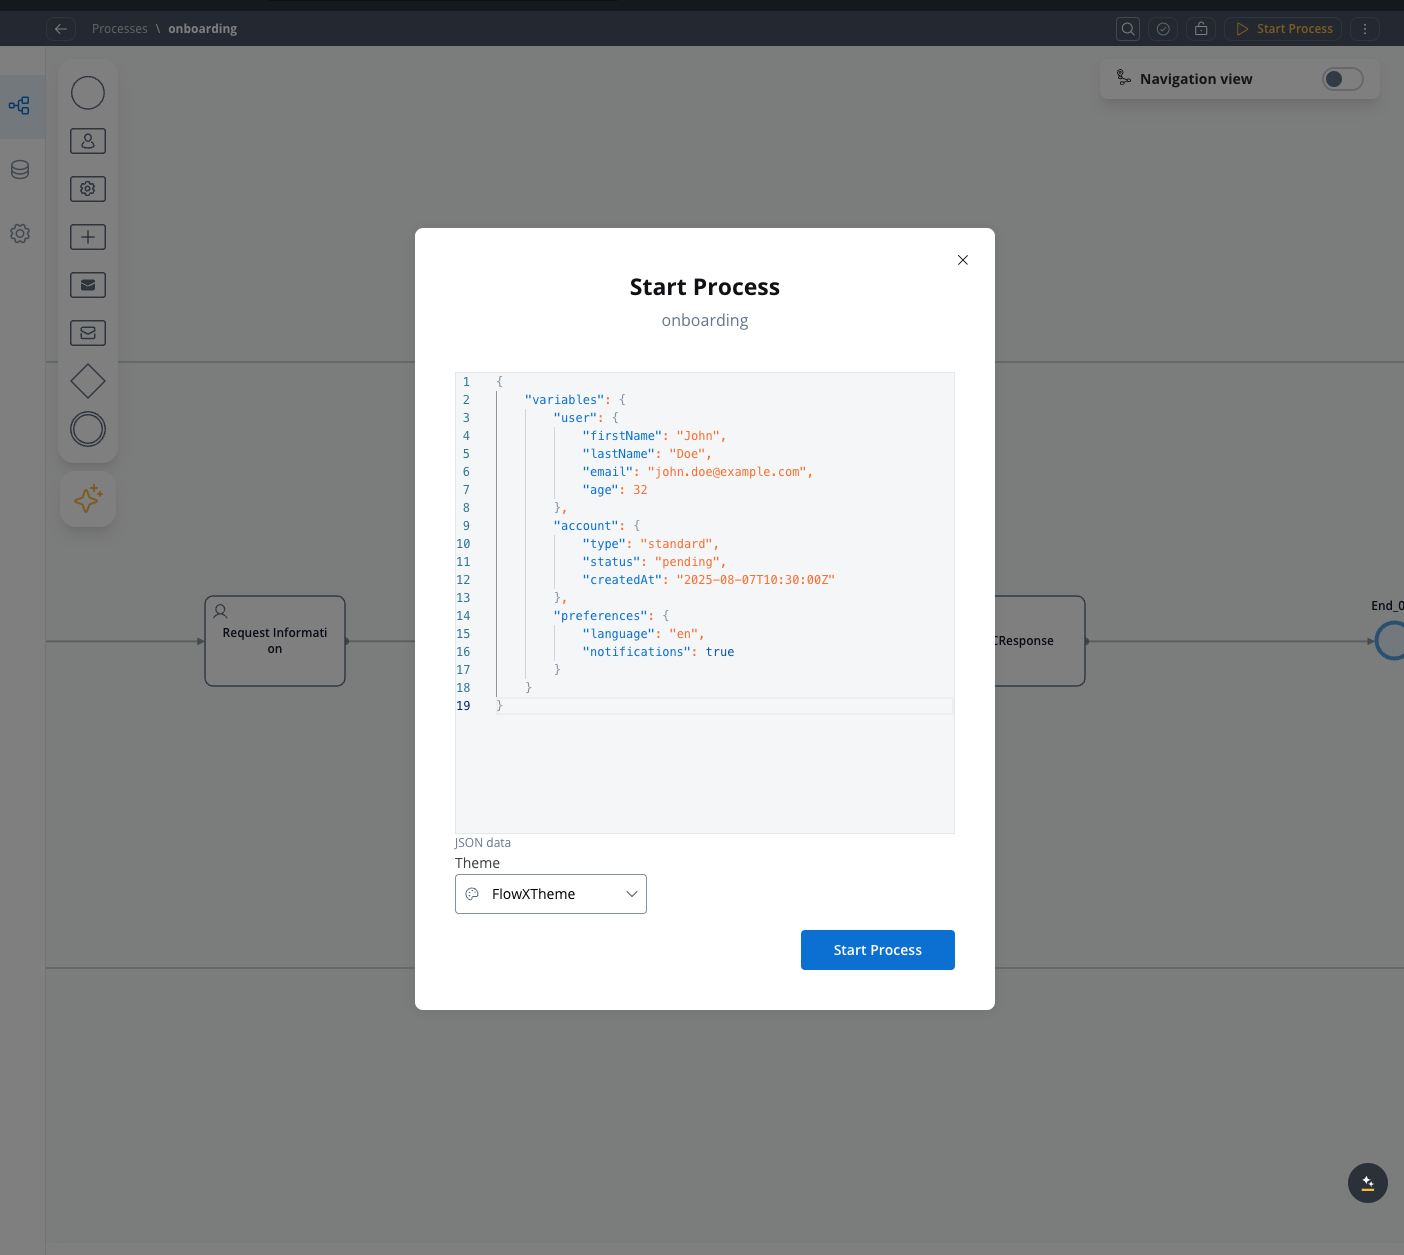
Starting a process via user interface
When starting a process manually via the FlowX Designer UI, you’ll be prompted to enter a JSON payload (in the “JSON Object” editor). This is subject to the same infrastructure limits as any other process start.- Payloads must be under 1MB total
-
If exceeded, the request will fail with:
Affected Layers
| Layer | Limit | Notes |
|---|---|---|
| NGINX/Ingress | 1MB (default if not configured) | client_max_body_size |
| Runtime Manager (Undertow) | 1MB (default if not configured) | max-http-post-size |
| Kafka → Runtime bridge | ~1MB total (default if not configured) | Applies when starting via Kafka too |
Tips
For larger inputs, consider (as last resort, not recommended) increasing the limits for the affected layers.Starting a process via Kafka
One of the most powerful ways to initiate processes is through Kafka messaging, which allows systems to communicate and trigger processes without direct user interaction.Access Your Project
- Open FlowX.AI Designer and navigate to your project
- Select an existing process definition or create a new one that will send the Kafka message
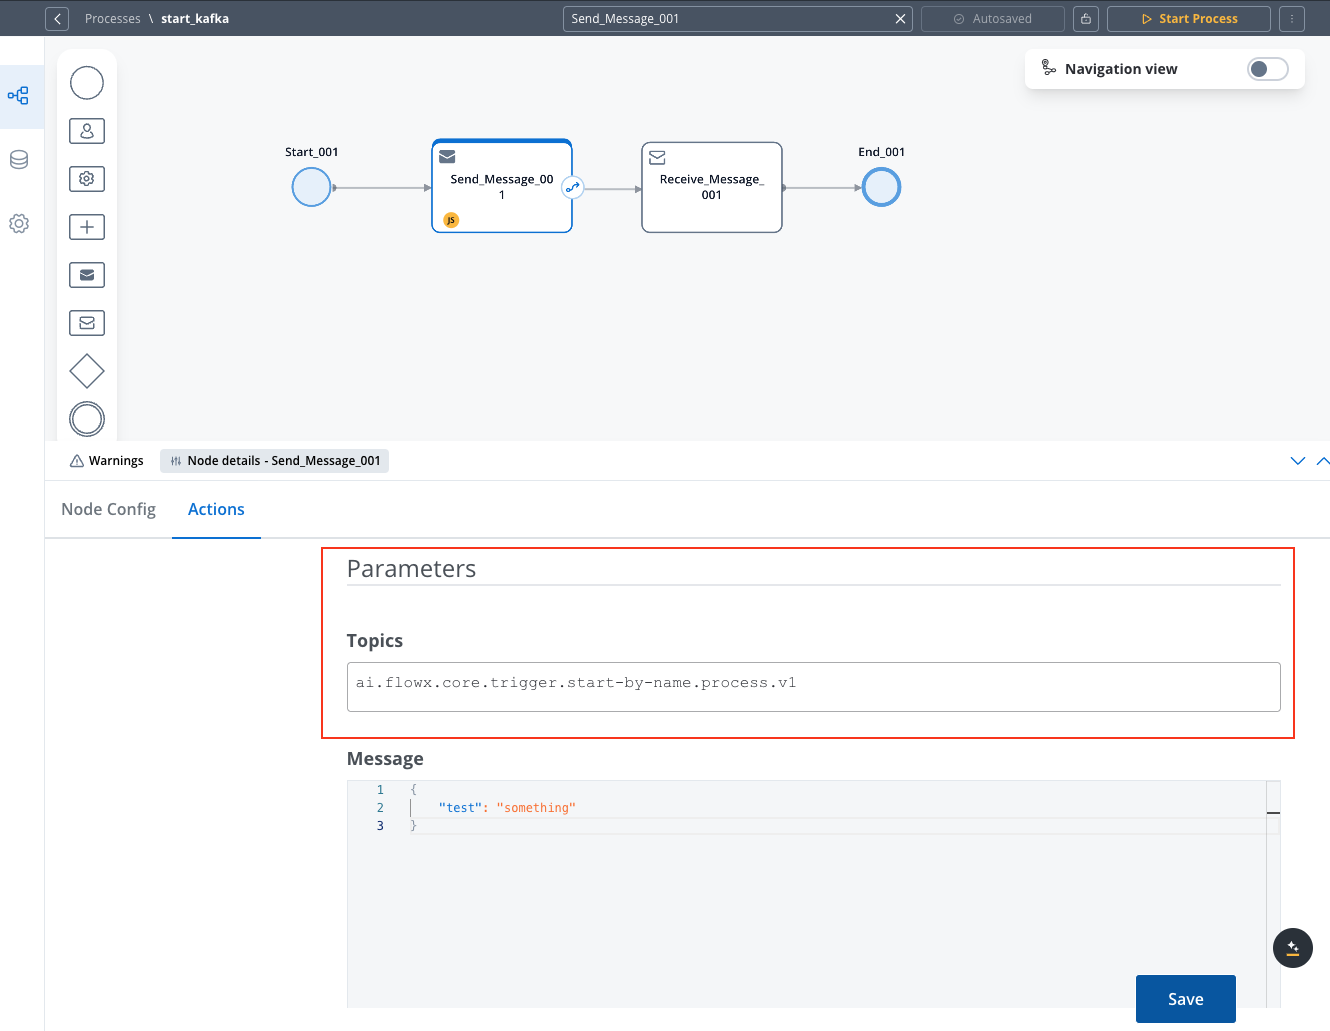
Add a Send Message Task
- Add a Send Message Task node to your process flow
- Attach a Kafka Send Action to this node
Configure the Kafka Topic
- In the Kafka Send Action configuration, specify the topic linked to the
KAFKA_TOPIC_PROCESS_START_BY_NAMEenvironment variable - This variable is shared between the application-manager and runtime-manager deployments
To verify the topic in FlowX Designer, navigate to: Platform status → FlowX Components → application-manager-mngt -> kafkaTopicHealthCheckIndicator → details → configuration → topic → process → start-by-name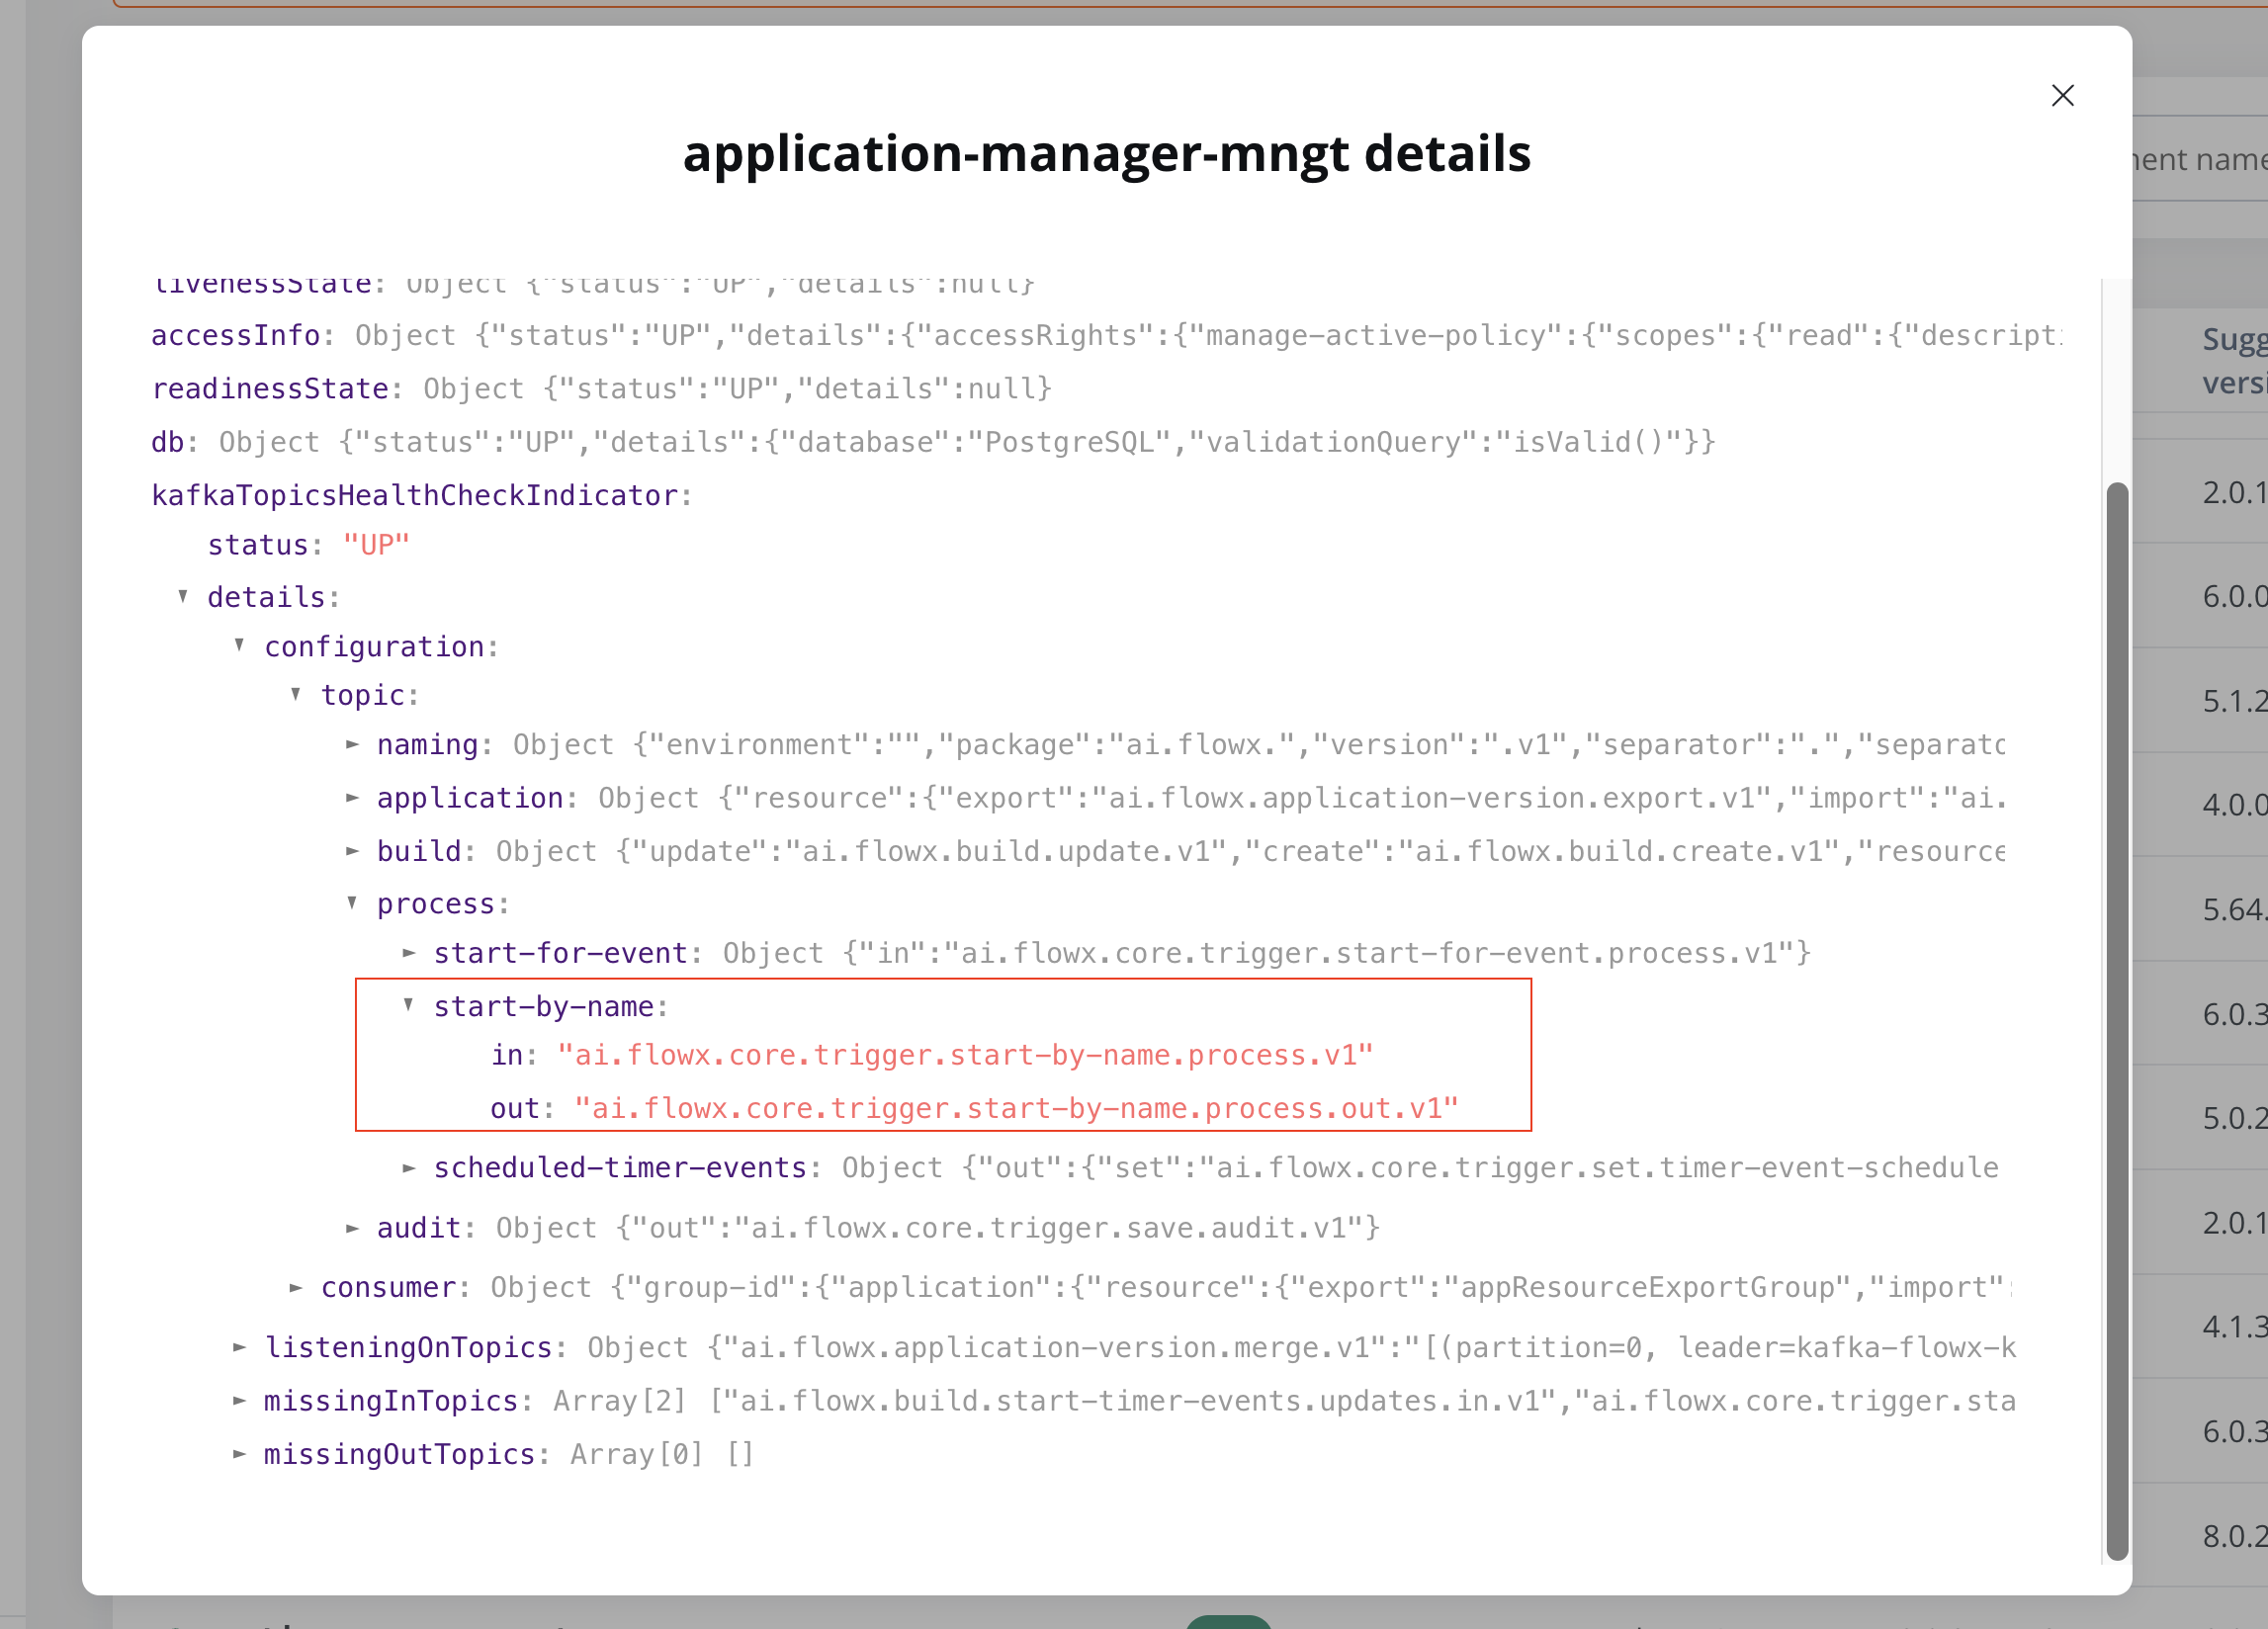
Add Message Content
Add any required data in the message body that should be passed to the new process:
This data will be available to the process being started, providing it with initial context or parameters.
Configure Required Headers
- Expand the Advanced Configuration section
- In the headers section, add these required headers:
Fx-ProcessName: The name of the process you want to startFx-AppId: The ID of the project (application) where the process residesjwt: Your JWT token for authentication

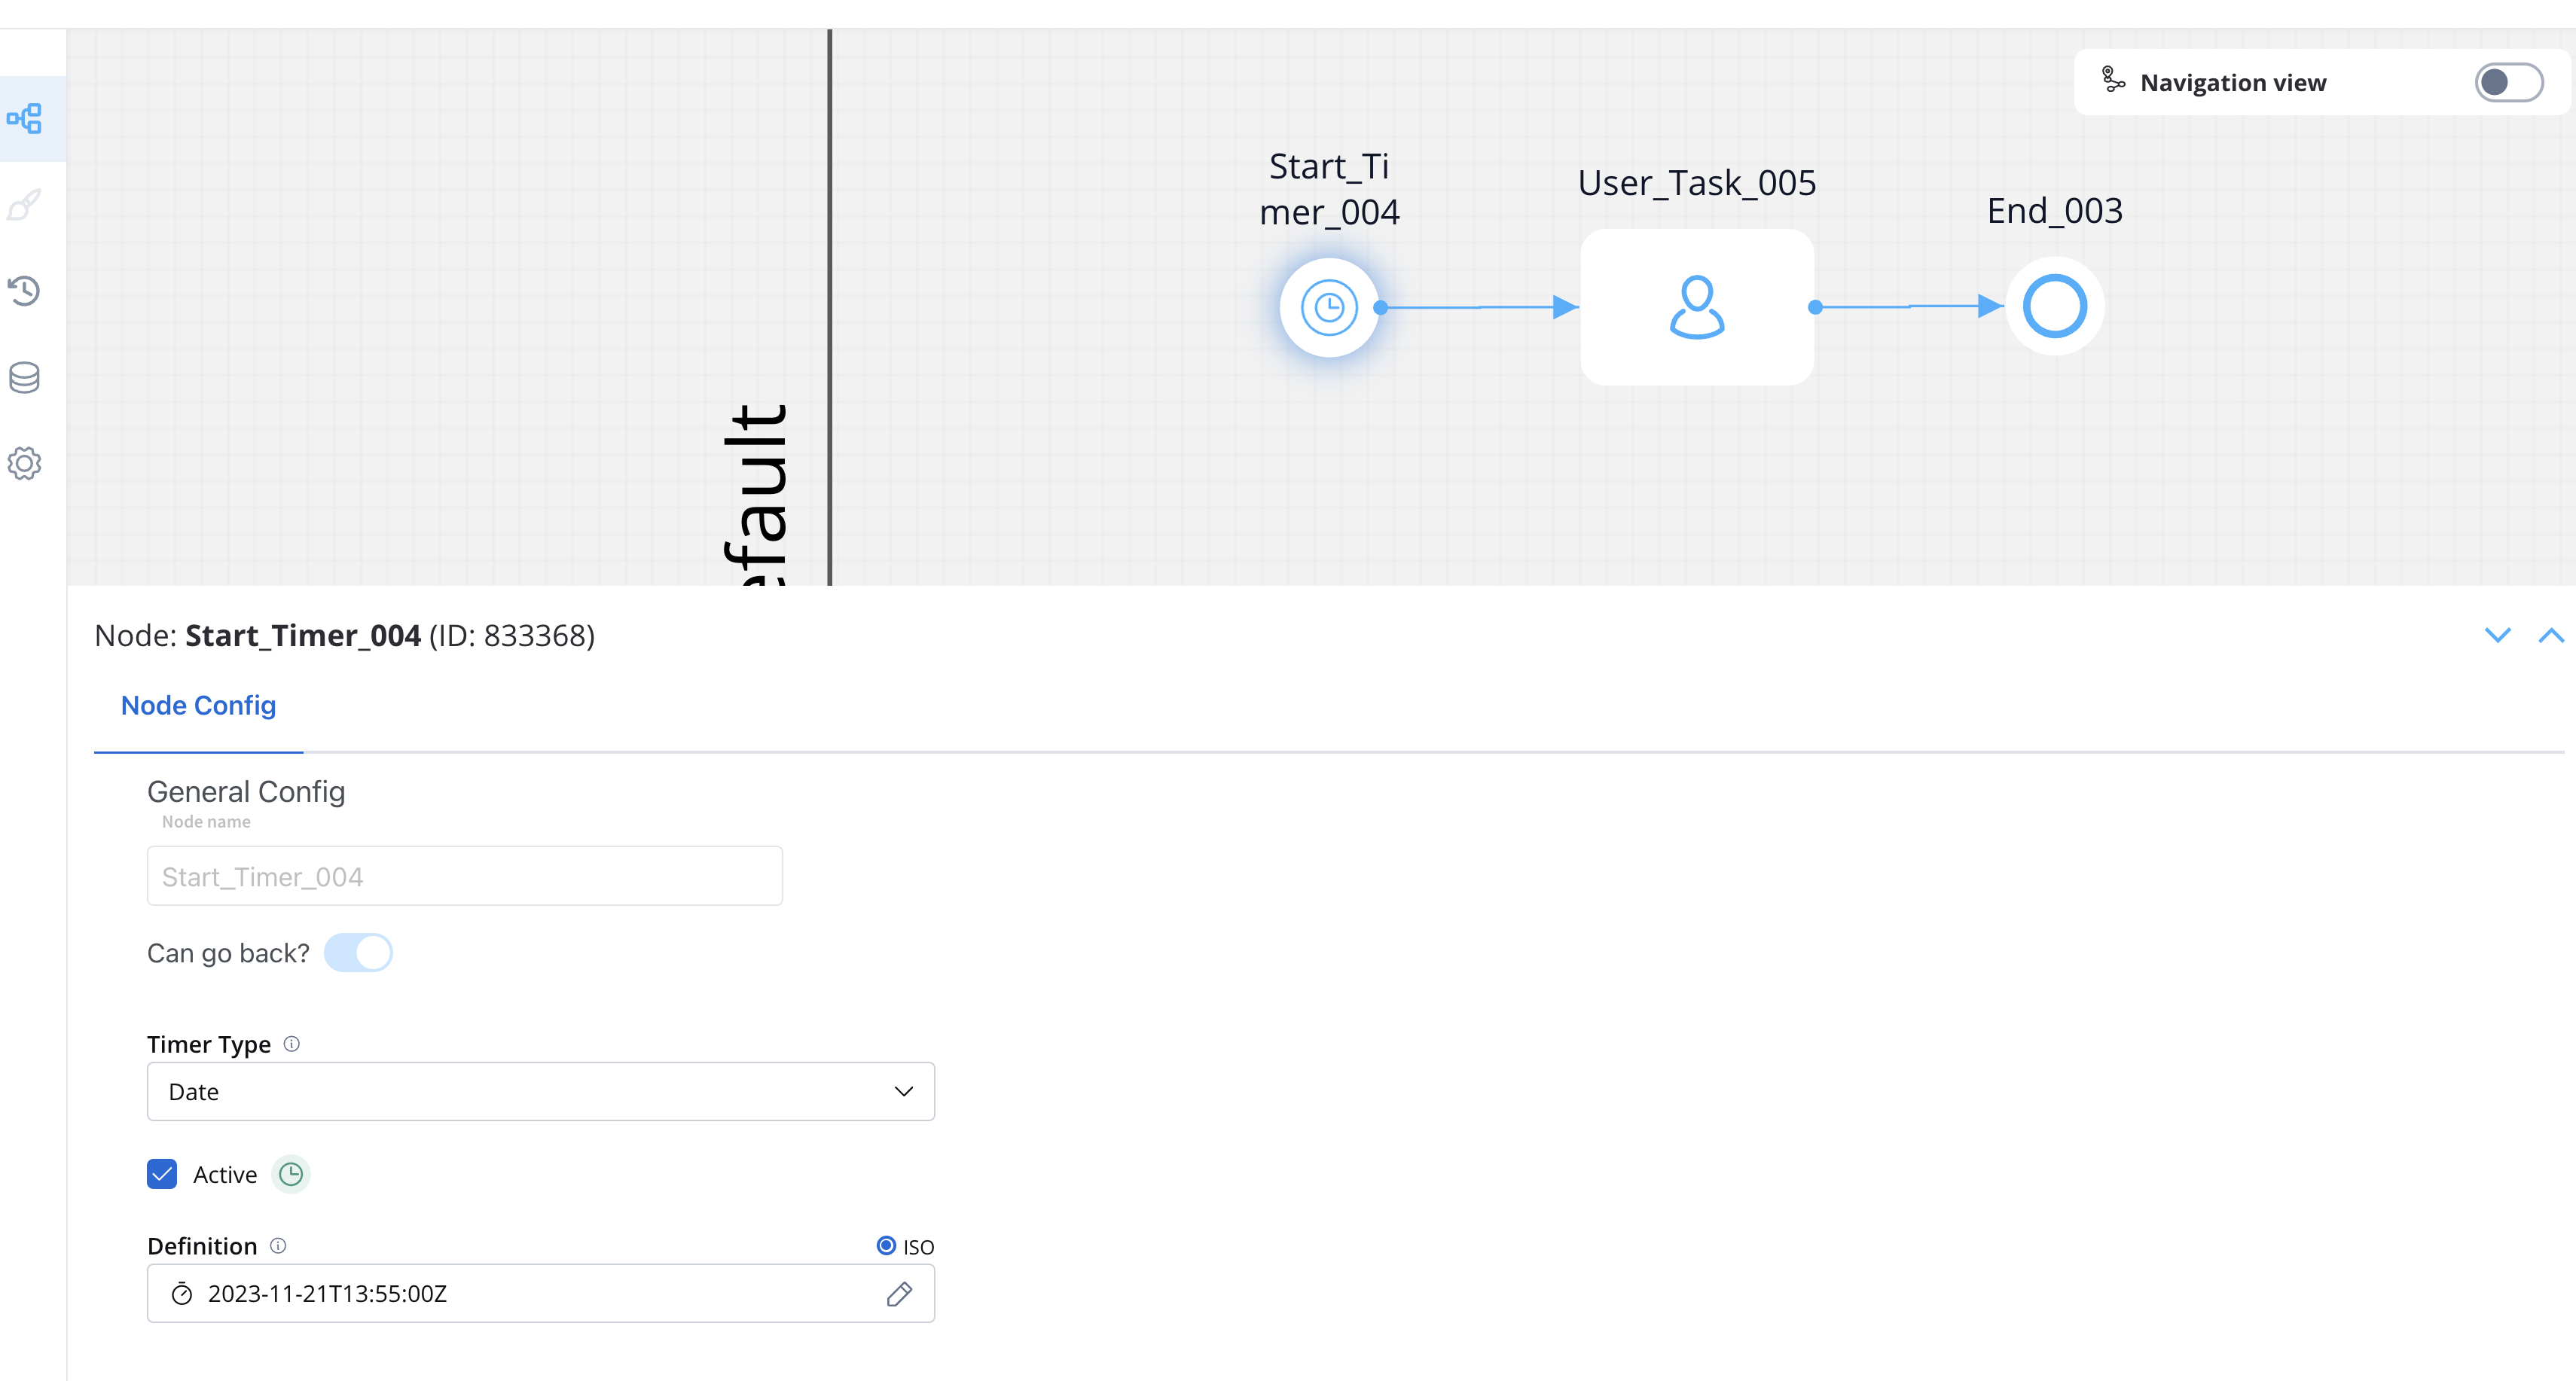
Timer start event
Timer Start Events allow you to schedule processes to start automatically at defined times or intervals, enabling automated workflows without manual intervention.Configure a Process with Timer Start
- Open FlowX.AI Designer and navigate to your project
- Select an existing process definition or create a new one
- Add a Start Timer Event to your process instead of a regular Start node
Message catch start event
Message Catch Start Events allow one process to initiate another through message-based communication, creating dependencies and workflows between processes.Configure the Sender Process
- Open FlowX.AI Designer and create or edit the process that will send the message
- Add a Message Throw Intermediate Event node at the point where you want to trigger the other process
- Configure data that will be used for correlation (e.g., a key value like ‘key1’)
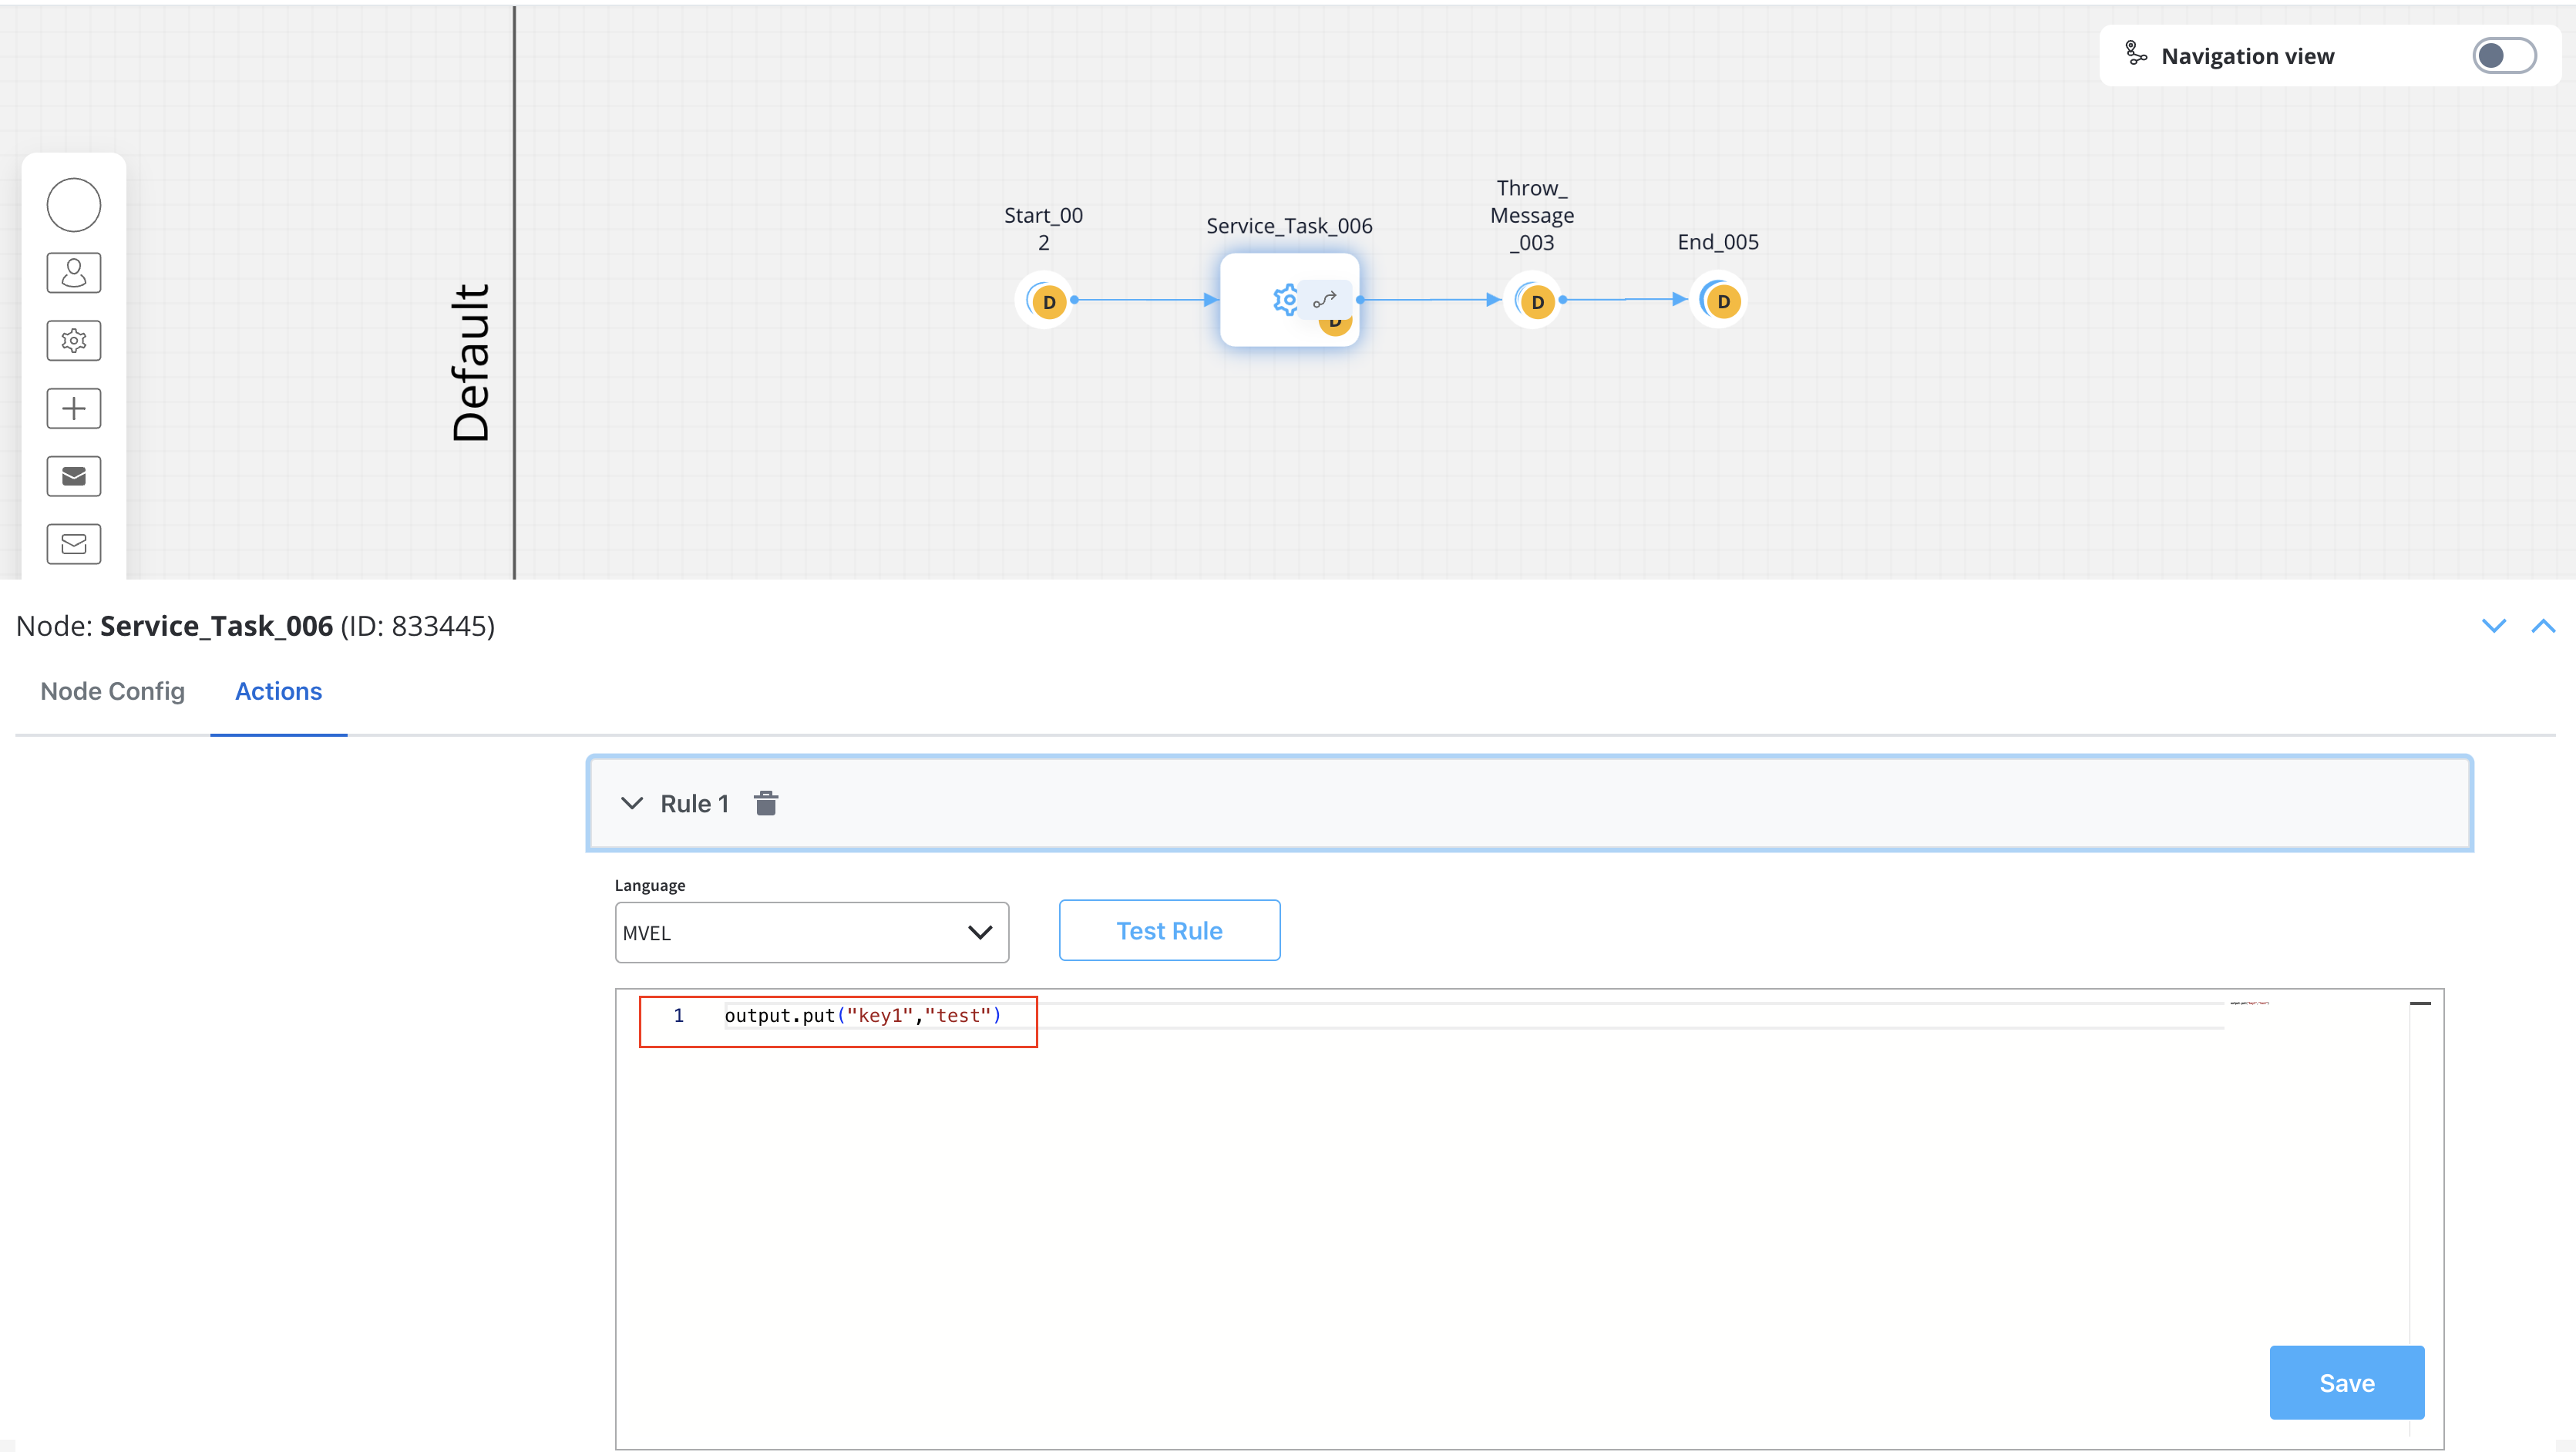
- Configure the message correlation in the node properties:
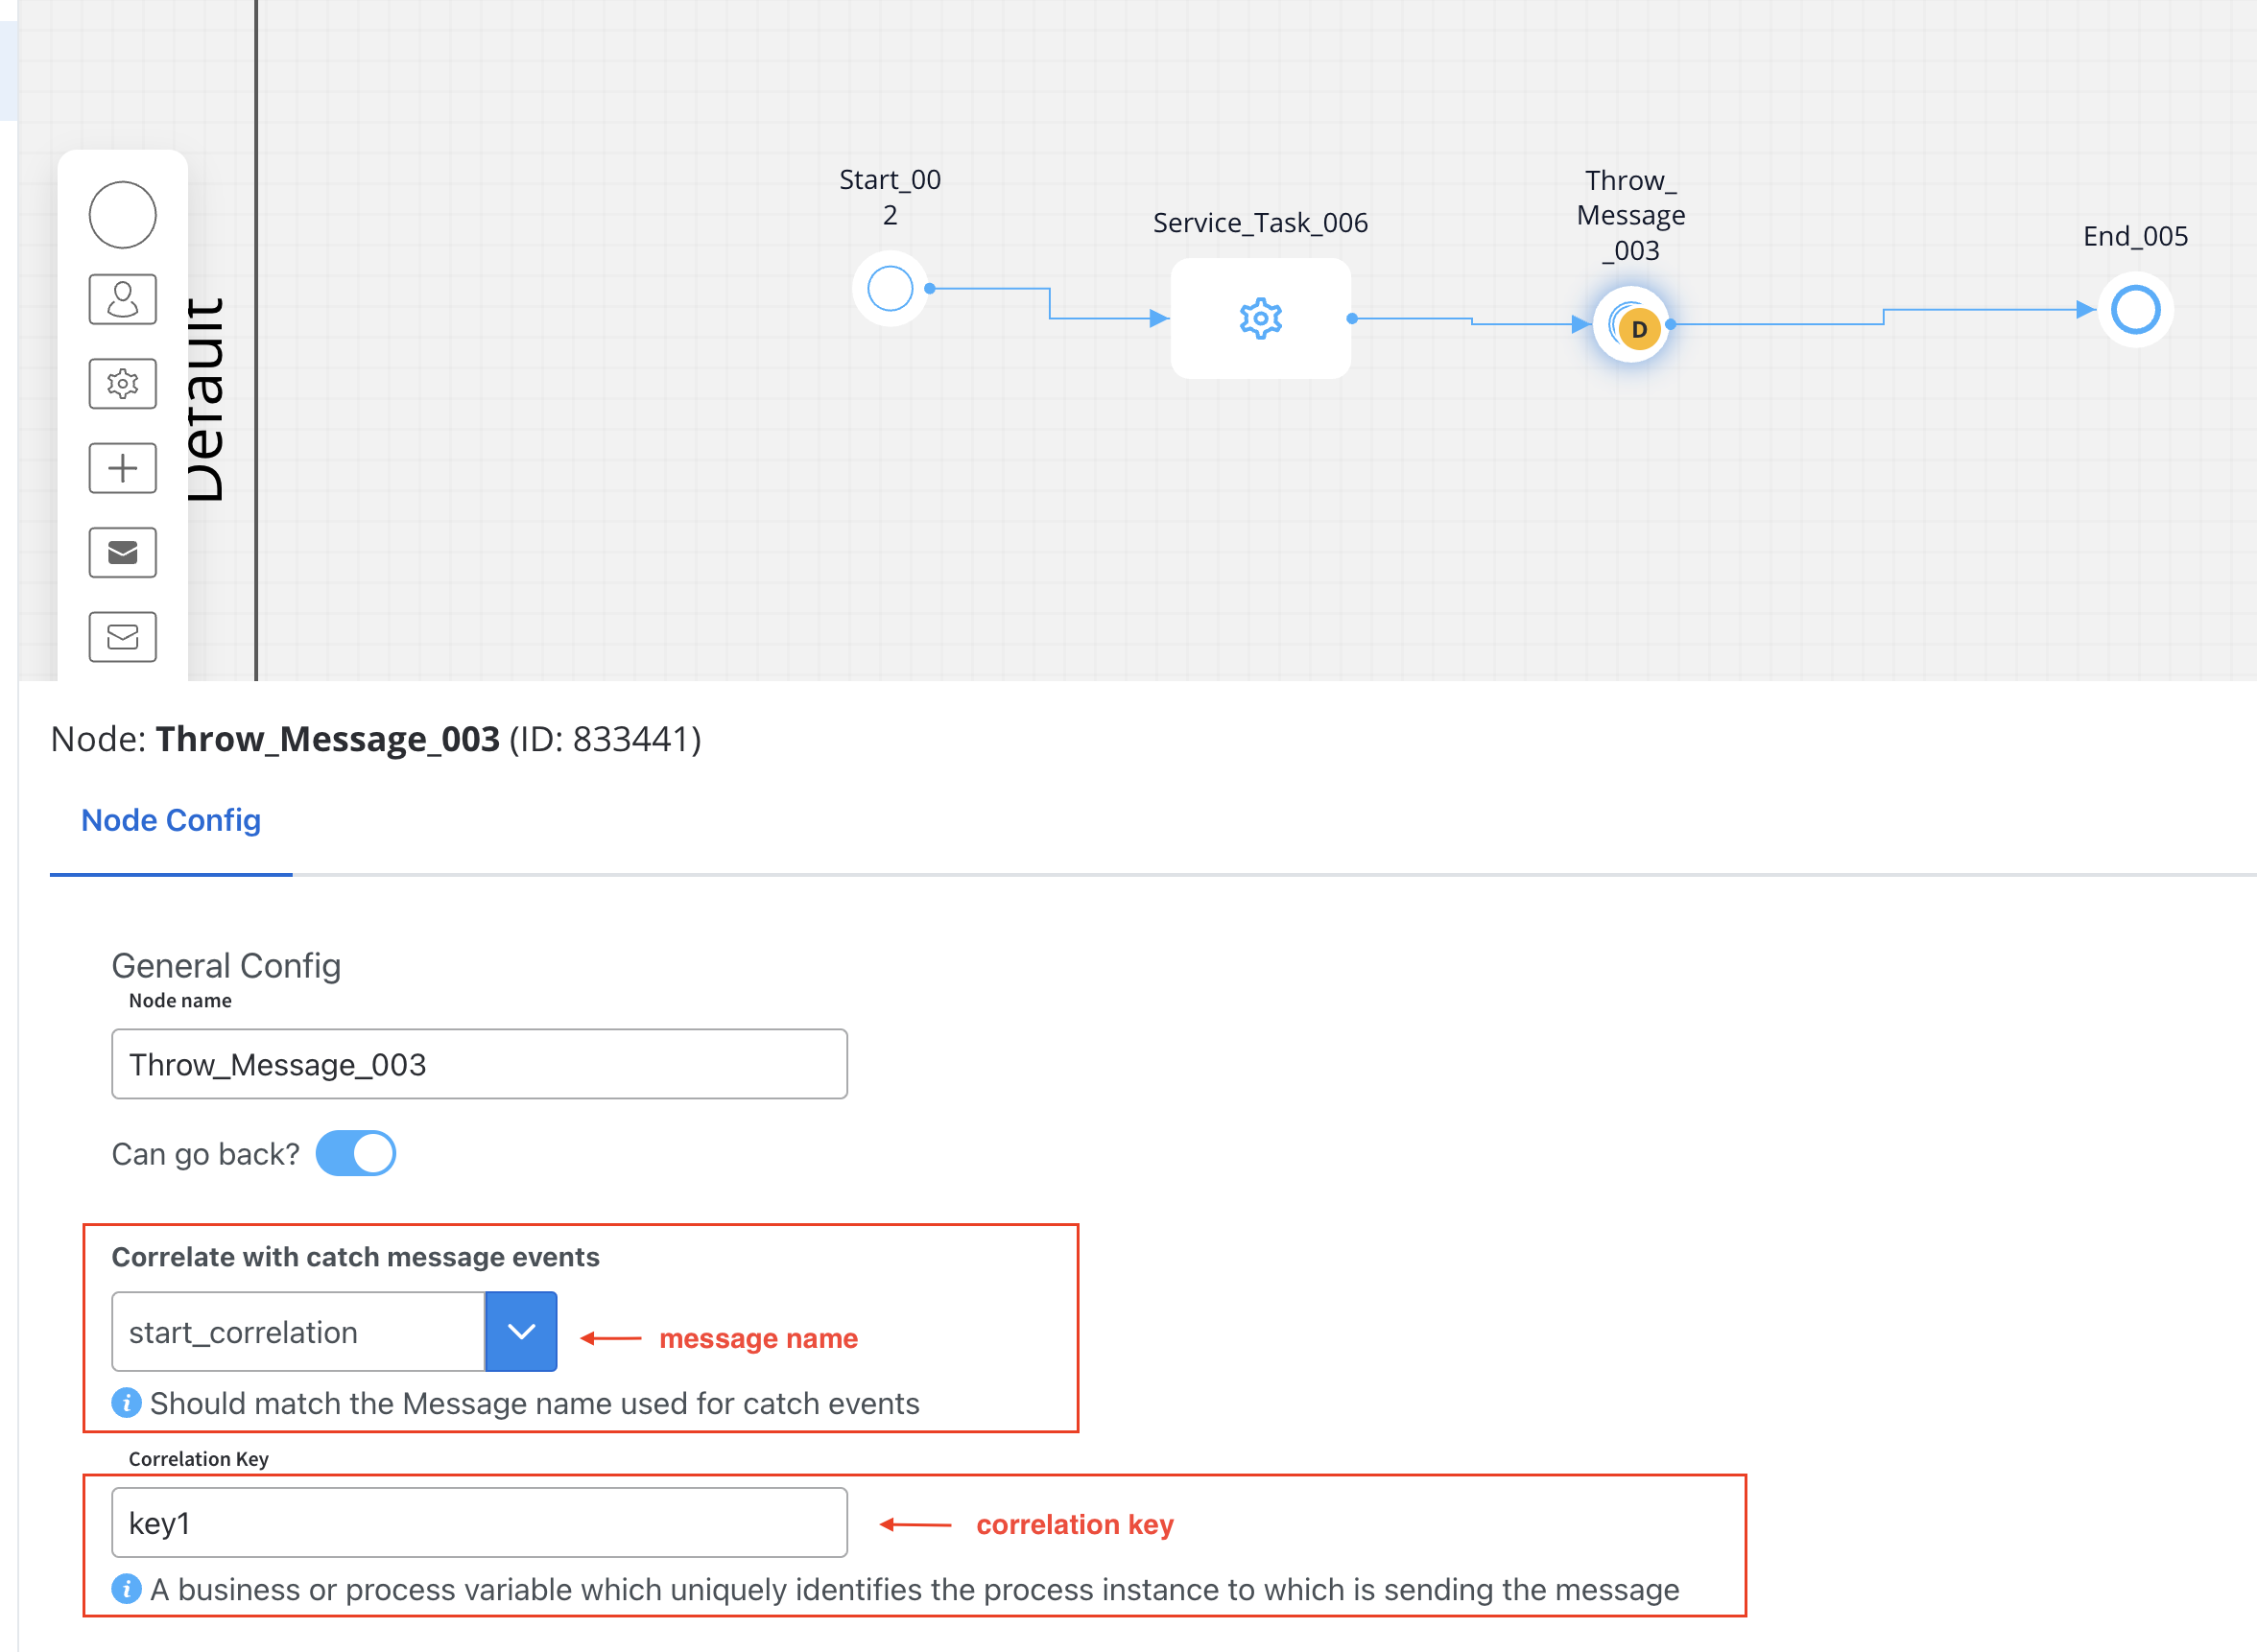
Configure the Receiver Process
- Create or edit the process that should be started by the message
- Add a Start Message Catch Event node as the starting point
- Configure the node with:
- The same message name used in the throw event (e.g., ‘start_correlation’)
- The correlation key in the Receive data tab (e.g., ‘key1’)
Message correlation is essential for message-based communication between processes. It’s achieved through the message name (which must be identical in both throw and catch events) and the correlation key (or value).
Best Practices
Next Steps
After setting up your process initiation methods, you can:Configure Process Data Models
Define the data structure for your process instances
Set Up User Interfaces
Create user interfaces for human-interactive processes
Implement Business Rules
Add decision logic to your processes
Configure Integrations
Connect your processes to external systems