
What is an exclusive gateway?
Exclusive Gateway
An exclusive gateway (also known as an XOR gateway) creates conditional branches in your process flow. It directs the process token to exactly one of the outgoing paths based on evaluated conditions. Think of it as an “if-then-else” decision point in your process.
Exclusive Gateway Documentation
Complete reference for exclusive gateway configuration
Business Rules
Learn more about implementing decision logic
How exclusive gateways work
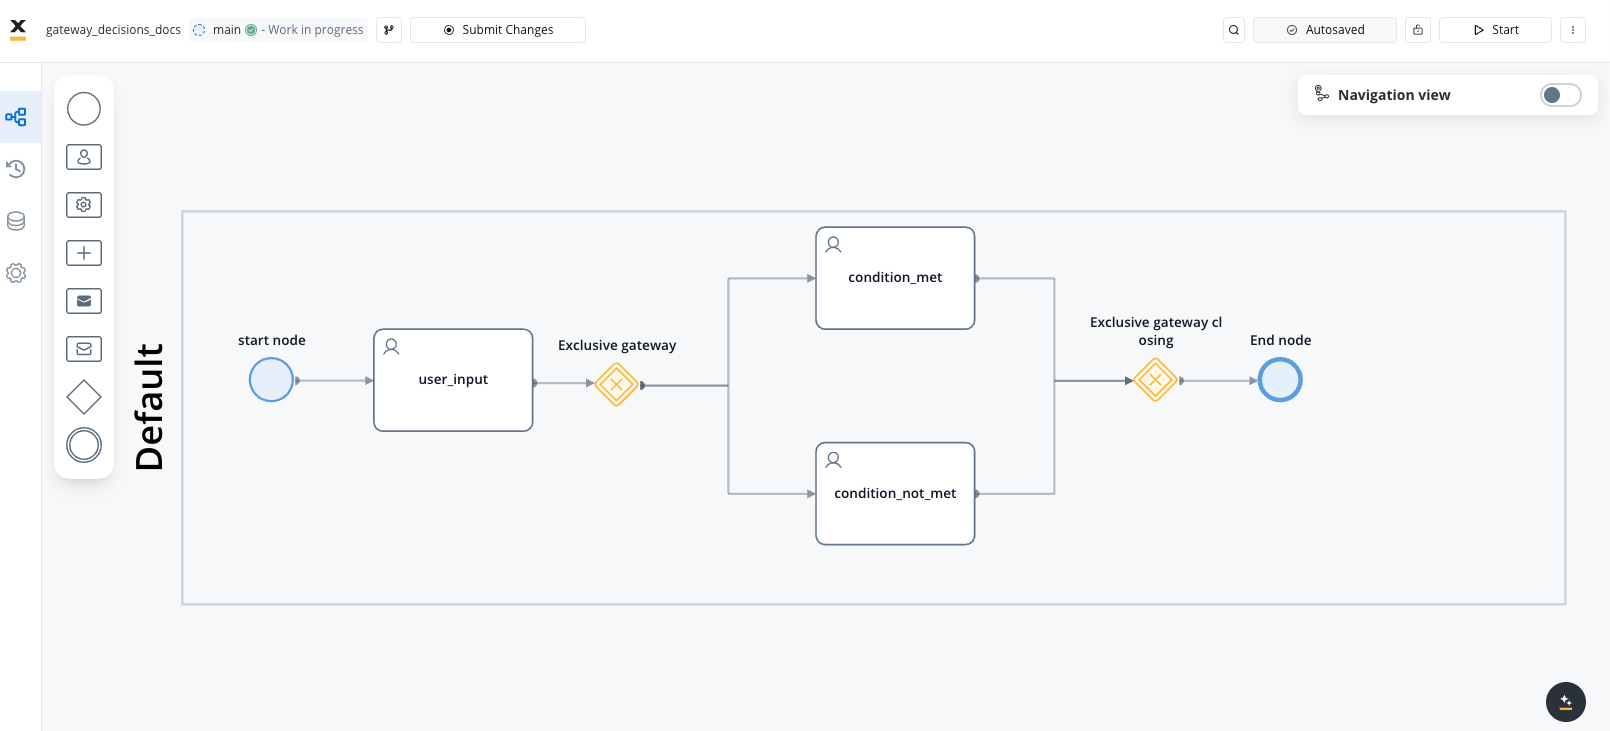
- When the process flow reaches an exclusive gateway, it evaluates conditions associated with each outgoing path
- The first condition that evaluates to
truedetermines which path is taken - Only one path is followed, even if multiple conditions could evaluate to
true - A default path can be specified to be taken if no conditions are met
Best practice is to always provide a default path to ensure your process doesn’t get stuck if none of the specified conditions are met.
Creating a flow with exclusive branches
Create or Open a Process Definition
- Open FlowX.AI Designer and navigate to your project
- Go to the Processes section and select your process or create a new one
- Click the Edit Process button to open the Process Designer
Add Basic Flow Elements
- Add a Start Node to your process canvas (if creating a new process)
- Add a node before your decision point (typically a task or user task node)
- Ensure the necessary data for your decision is available in the process at this point
Add the Decision Gateway
- From the node palette, drag an Exclusive Gateway node onto your canvas
- Connect your previous node to this gateway
- Give your gateway a descriptive name that indicates its decision purpose (e.g., “Evaluate Credit Score”)
Create Outgoing Paths
- Add the task nodes that will be the targets for each decision branch
- Connect the exclusive gateway to each of these nodes using sequence flows
- Name each sequence flow to indicate the condition (e.g., “Premium Card Path”, “Standard Card Path”)
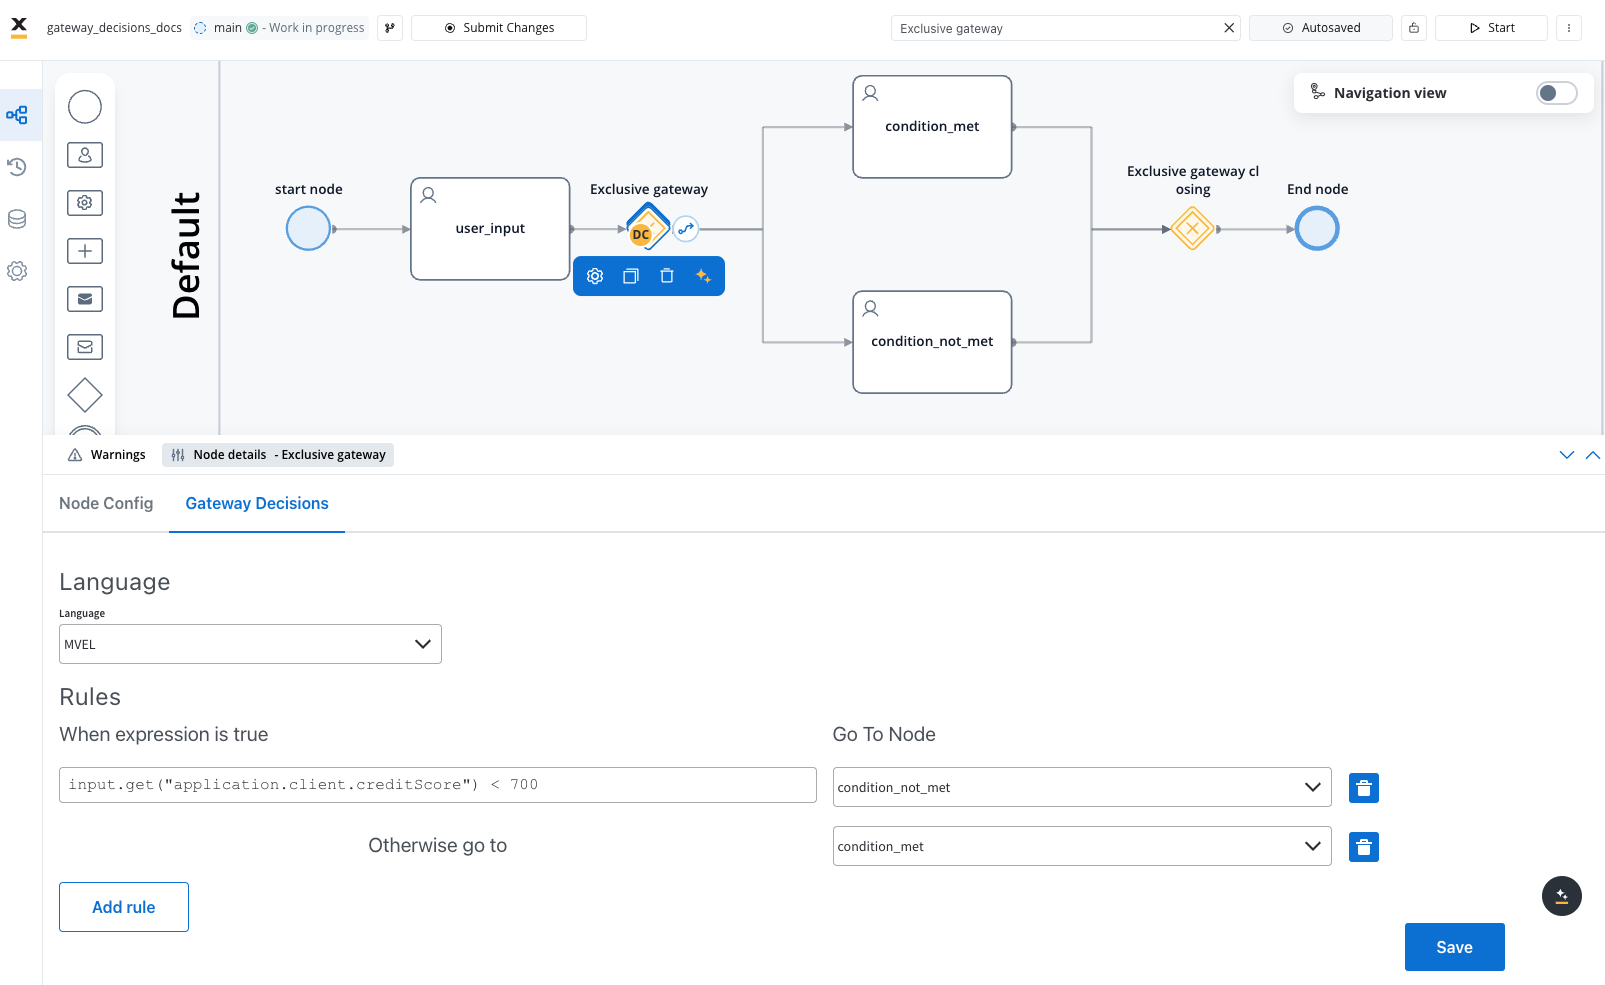
Configure Decision Conditions
- Select one of the sequence flows (arrows) from the gateway
- In the properties panel, navigate to the Condition section
- Select a scripting language from the dropdown (e.g., MVEL, JavaScript)
- Enter your condition expression, for example:
- Repeat for each outgoing path with the appropriate condition:
Conditions are evaluated in the order they appear in the Designer. The first condition that evaluates to
true determines the path taken, so order matters!Add Converging Gateway (Optional)
If your branches need to converge back to a single flow:
- Add another Exclusive Gateway after your branch tasks
- Connect each branch endpoint to this converging gateway
- Continue the process flow from this gateway
A converging exclusive gateway doesn’t require conditions since it’s merely joining paths rather than splitting them.
Condition expression examples
Here are some example condition expressions for different decision scenarios:Numeric Comparisons
Numeric Comparisons
String Comparisons
String Comparisons
Boolean logic
Boolean logic
Date Comparisons
Date Comparisons
Best practices
Common patterns
If-Then-Else
The simplest decision pattern with two outcomes - a condition is either met or not met
Multi-Choice
Multiple conditions evaluated in sequence, with one path chosen based on the first match
Approval Flow
Branching based on approval status, typically with approve/reject/review paths
Eligibility Check
Evaluation of multiple criteria to determine if a process can proceed
Next steps
After implementing decision logic in your process, you can:Implement Parallel Processing
Learn how to create parallel process branches with parallel gateways