Currently, the supported conversion method is limited to transforming PDF files into JPEG format.
Prerequisites
- Access Permissions: Ensure that you have the necessary permissions to use the Documents Plugin. The user account used for these operations should have the required access rights.
- Kafka Configuration: Verify that the Kafka messaging system is properly configured and accessible. The Documents Plugin relies on Kafka for communication between nodes.
- Kafka Topics: Familiarize yourself with the Kafka topics used for these operations (later in this section)
- Before initiating the conversion process, it is essential to identify the file in the storage solution using its unique ID. This ensures that the conversion is performed on an already uploaded file.
- Extract the file ID from a Response Message of an upload file request. For more details, refer to the upload process documentation.
- Extract the file ID from a Response Message of a generate from template request. For more details, refer to the document generation reply documentation
In the following example, we will use the
fileId generated for Uploading a New Document scenario.Configuring the process
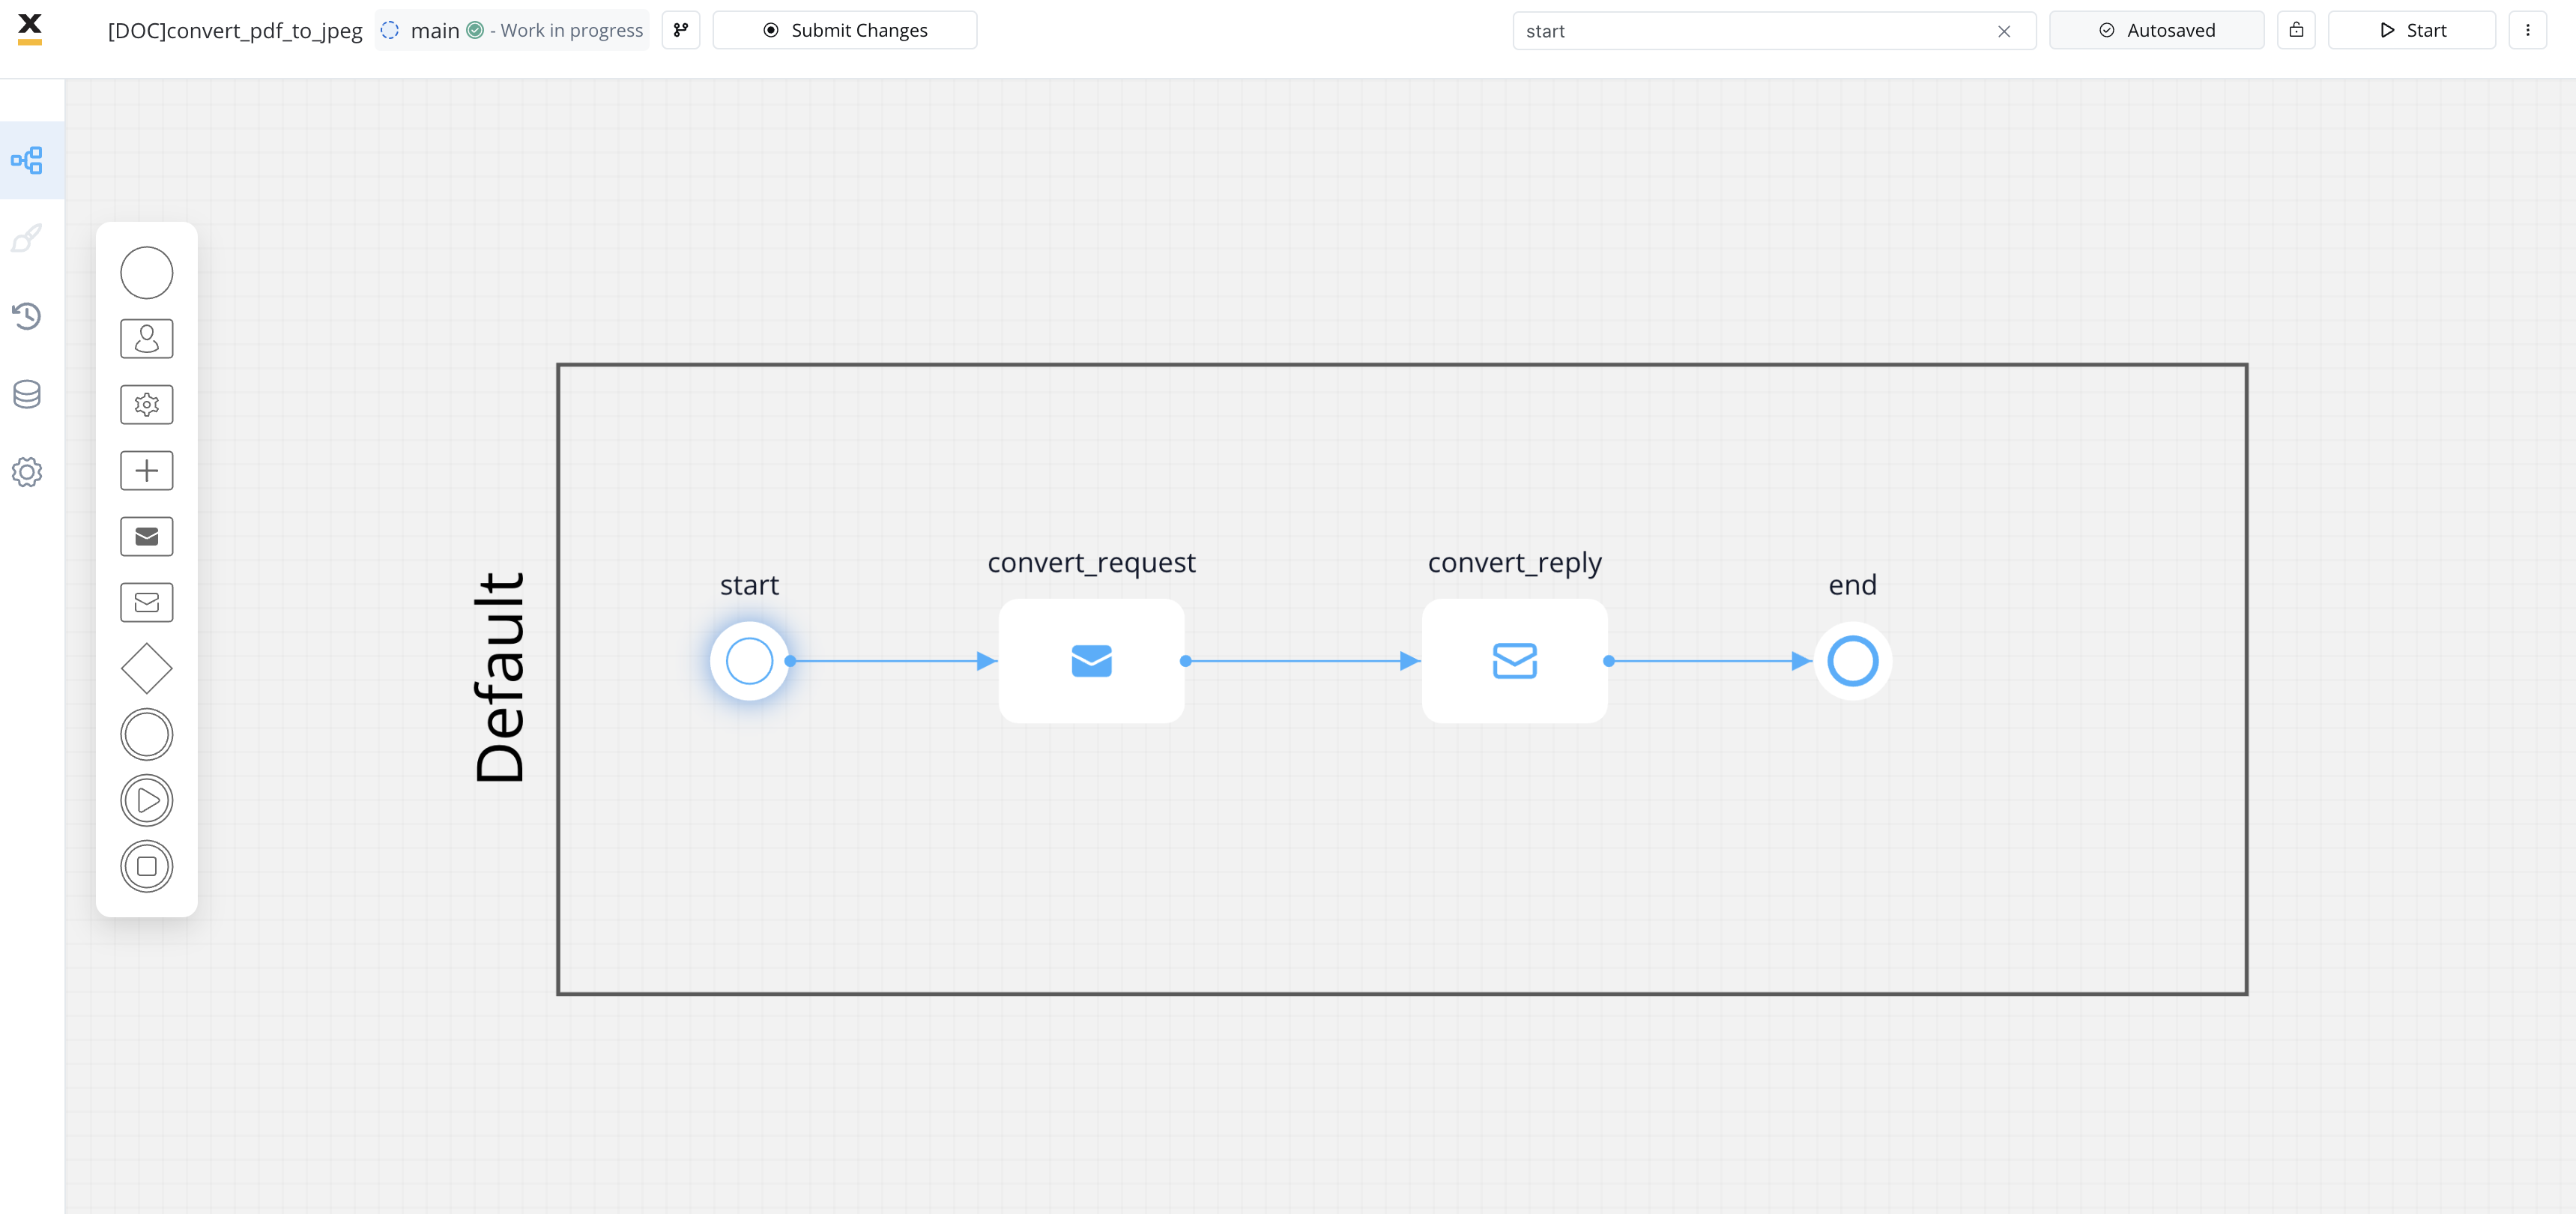 To create a process that converts a document from PDF to JPEG format, follow these steps:
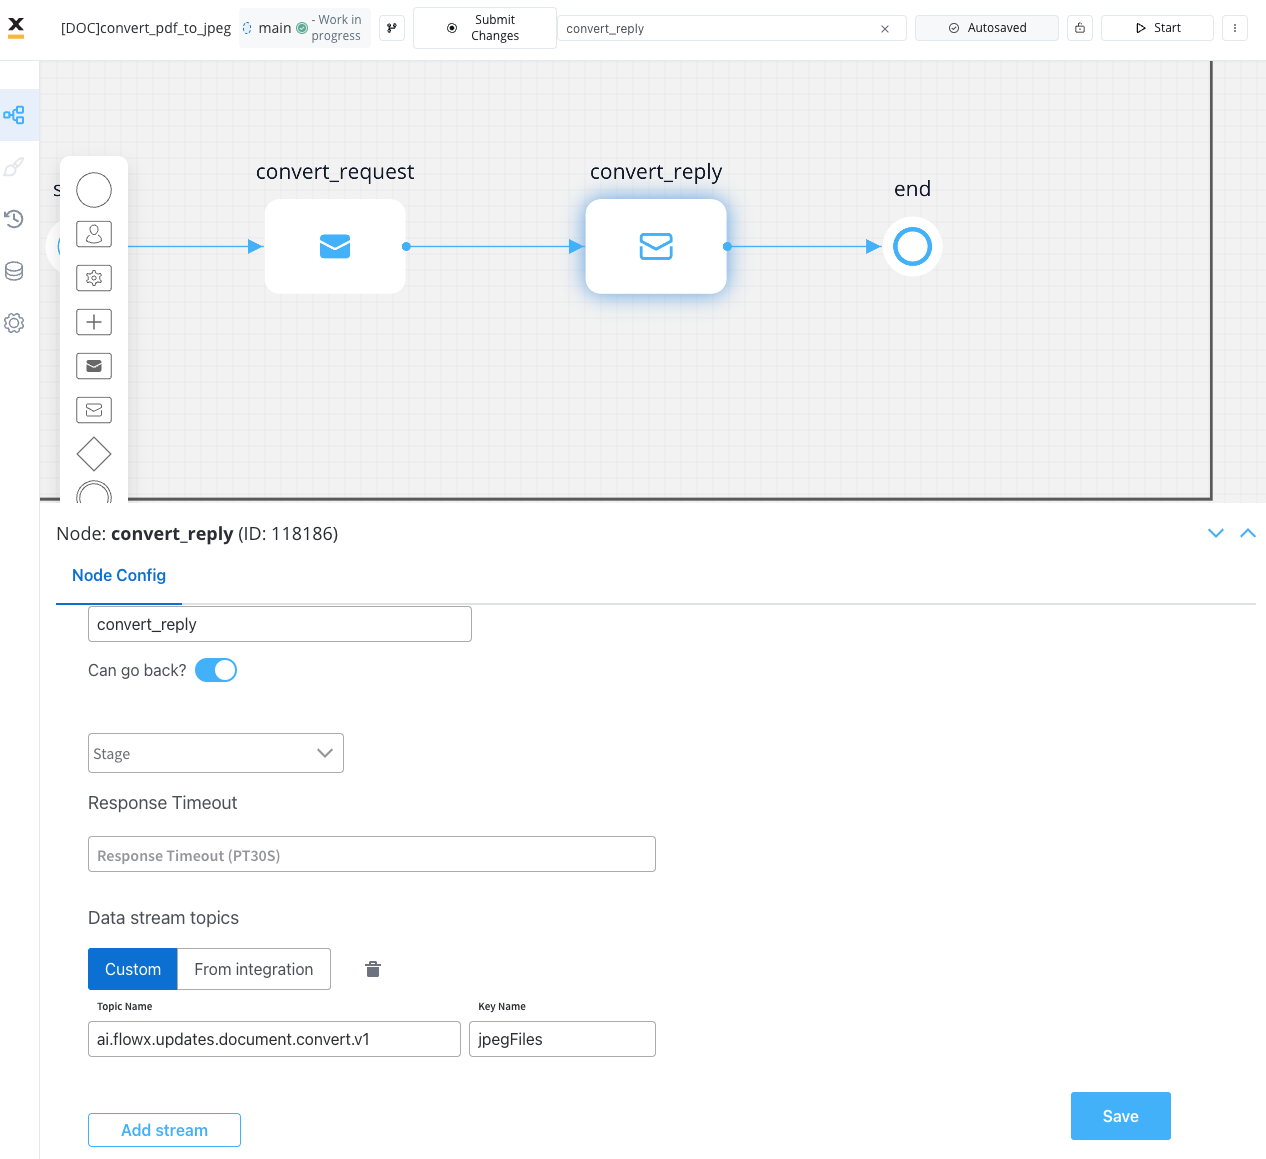
- Create a process that includes a Send Message Task (Kafka) node and a Receive Message Task (Kafka):
- Use the Send Message Task node to send the conversion request.
- Use the Receive Message Task node to receive the reply.
- Configure the first node (Send Message Task) by adding a Kafka send action.
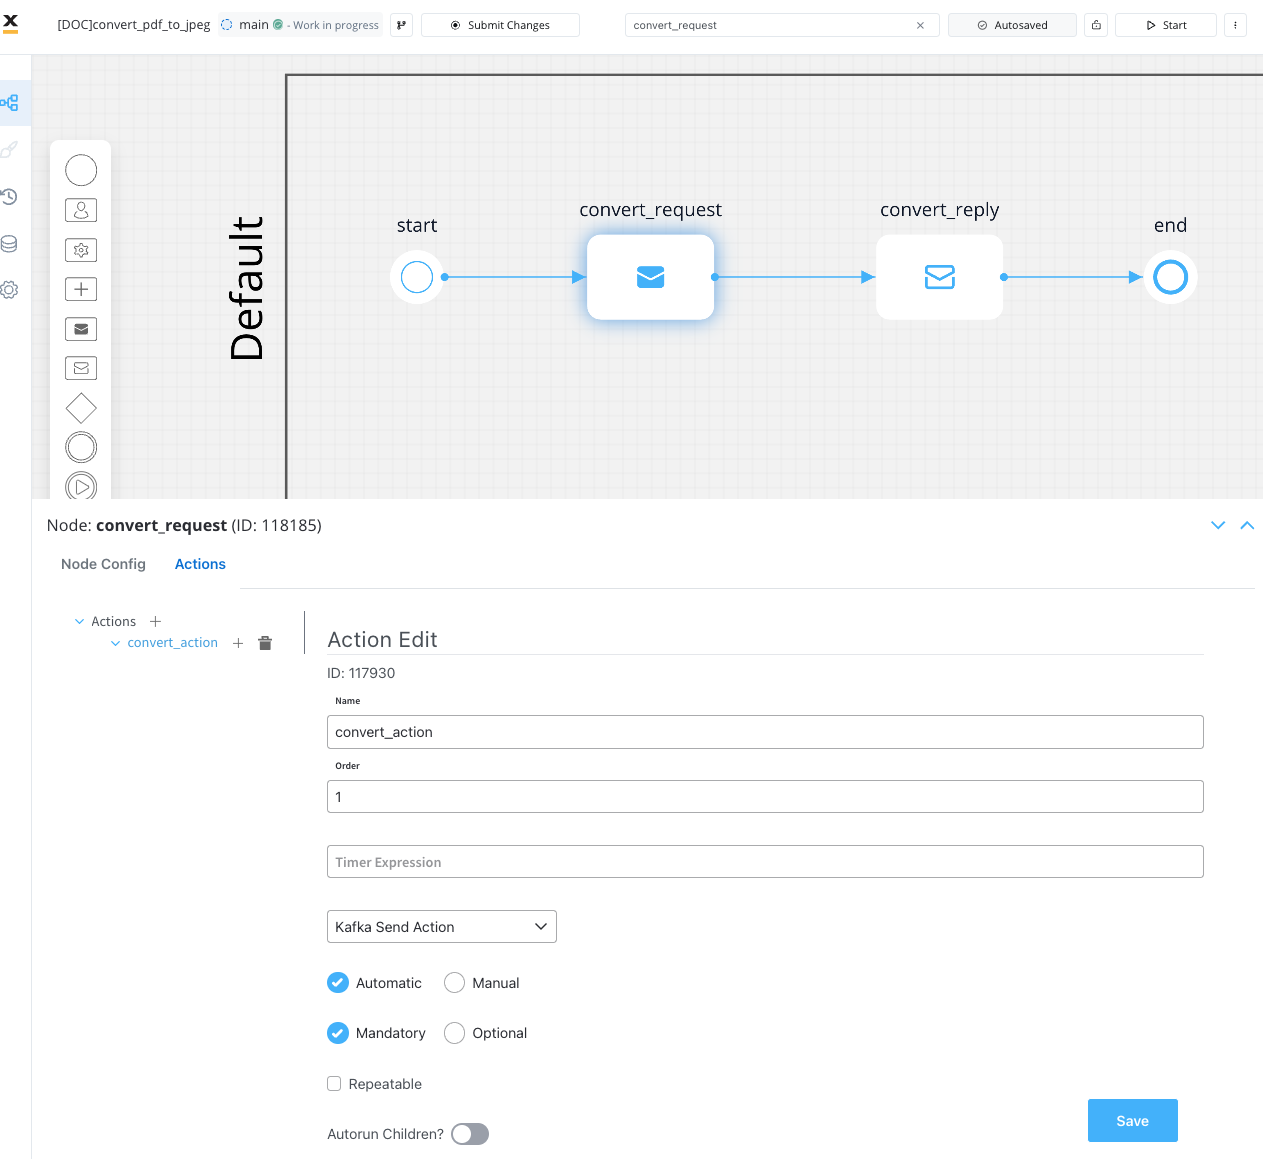
- Specify the Kafka topic where you send the conversion request.
To identify your defined topics in your current environment, follow the next steps: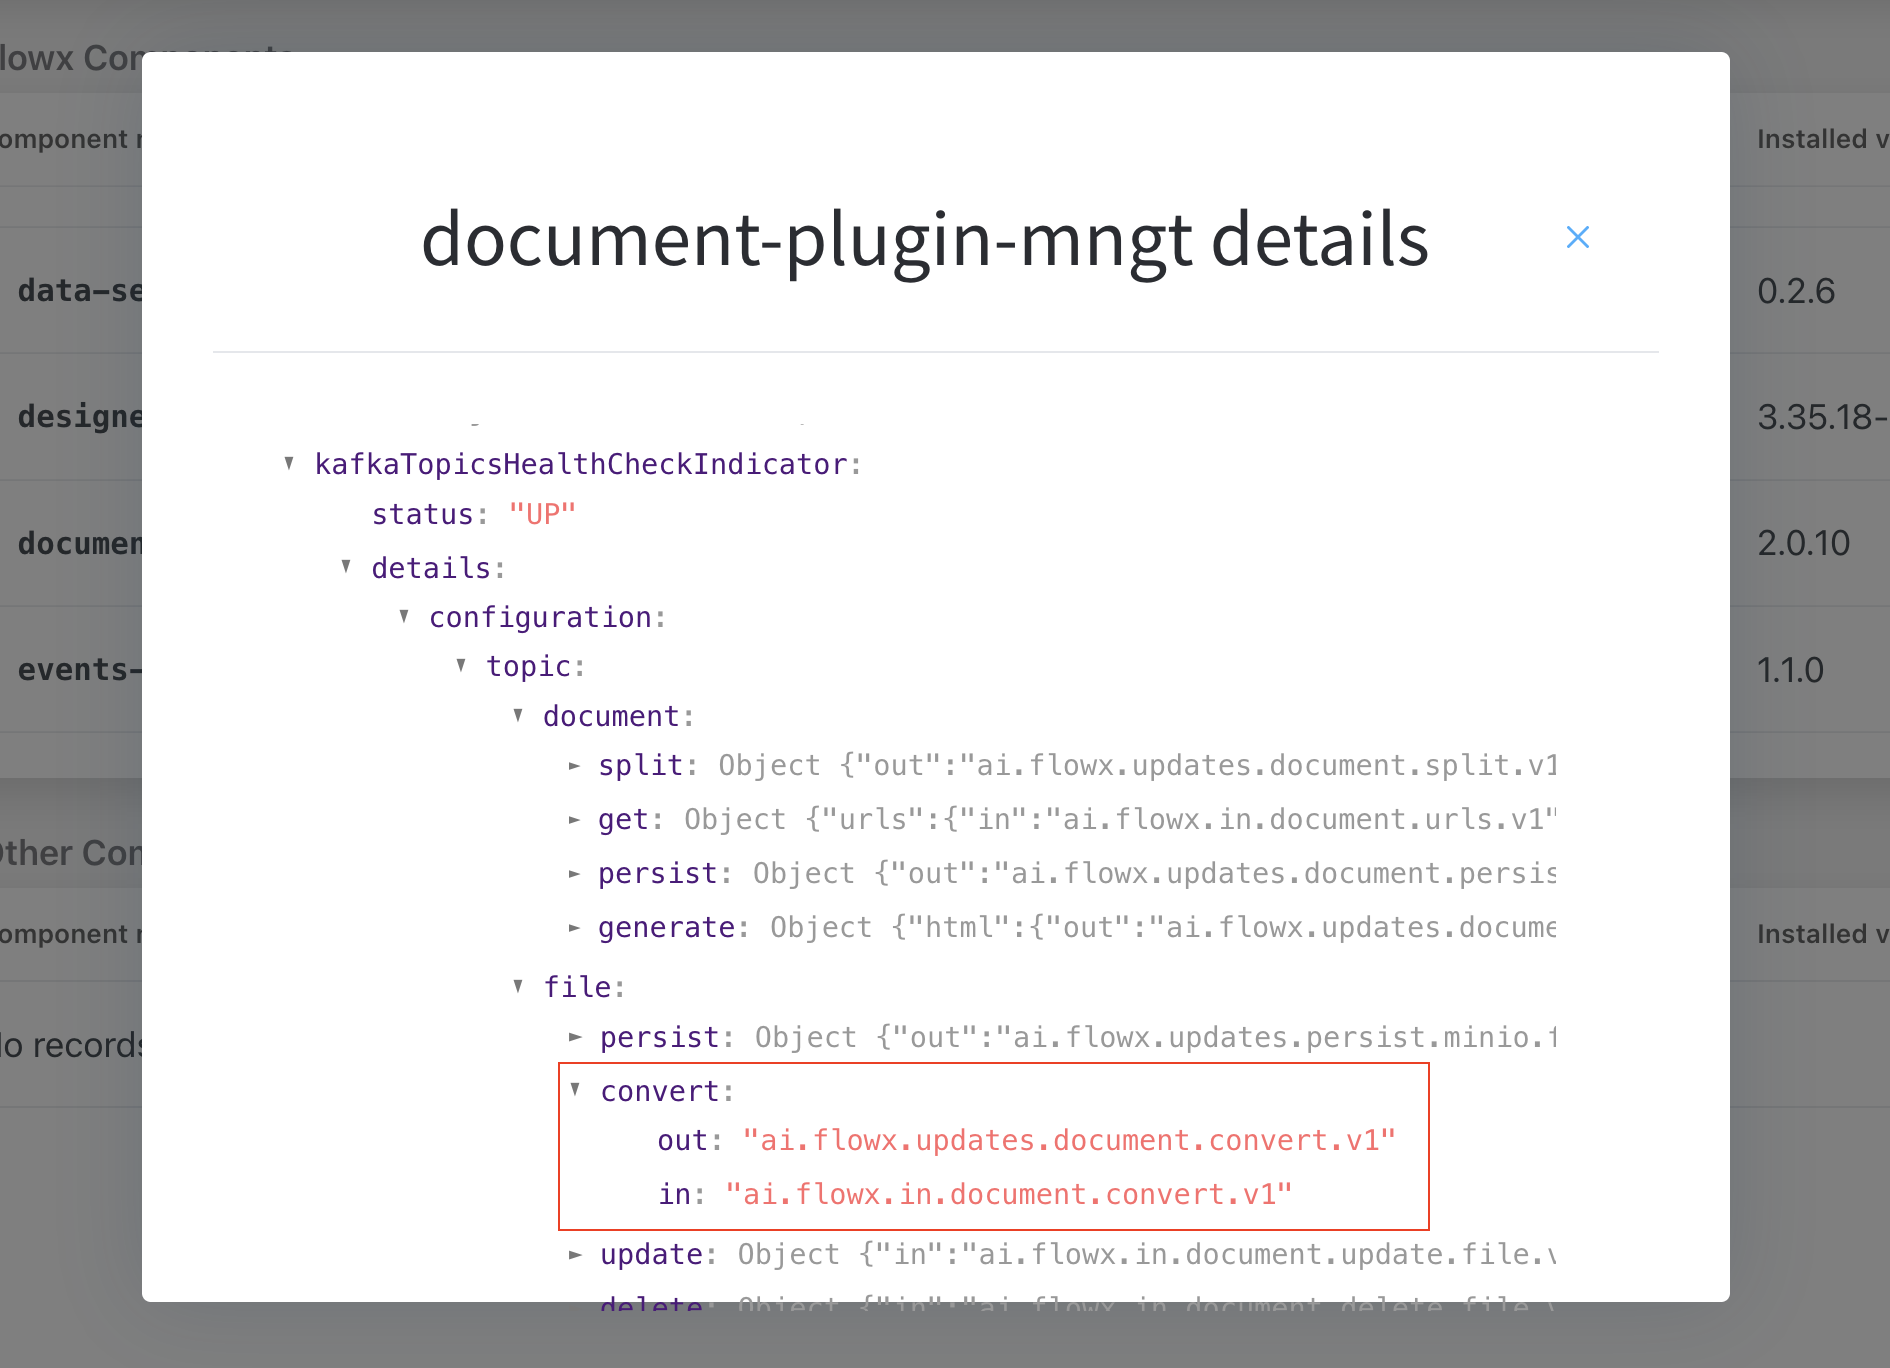
- From the FLOWX.AI main screen, navigate to the Platform Status menu at the bottom of the left sidebar.
- In the FLOWX Components list, scroll to the document-plugin-mngt line and press the eye icon on the right side.
- In the details screen, expand the
KafkaTopicsHealthCheckIndicatorline and then details → configuration → topic → file → convert. Here will find the in and out topics for converting files.
- Fill in the body of the message request.
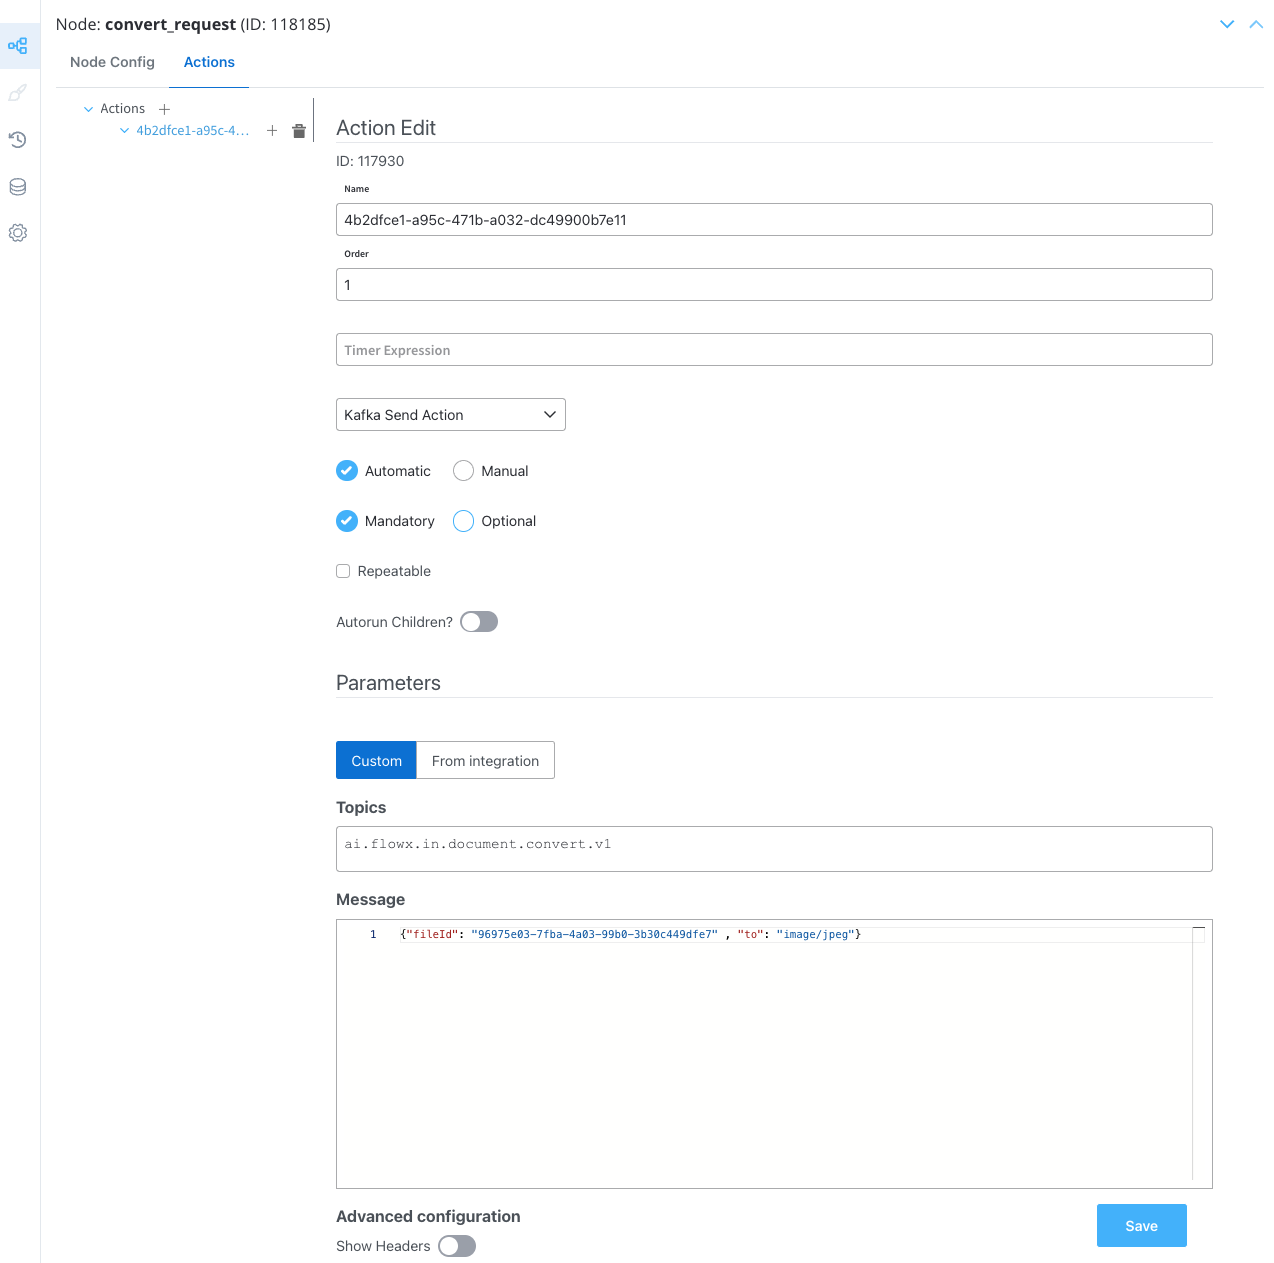
Message request example
This is an example of a message that follows the custom integration data model.
fileId: The file ID that will be convertedto: The file extension to convert to (in this case, “JPEG”)
- Configure the second node (Receive Message Task) by adding a Data stream topic:
The response will be sent to this
..out Kafka topic.Receiving the reply
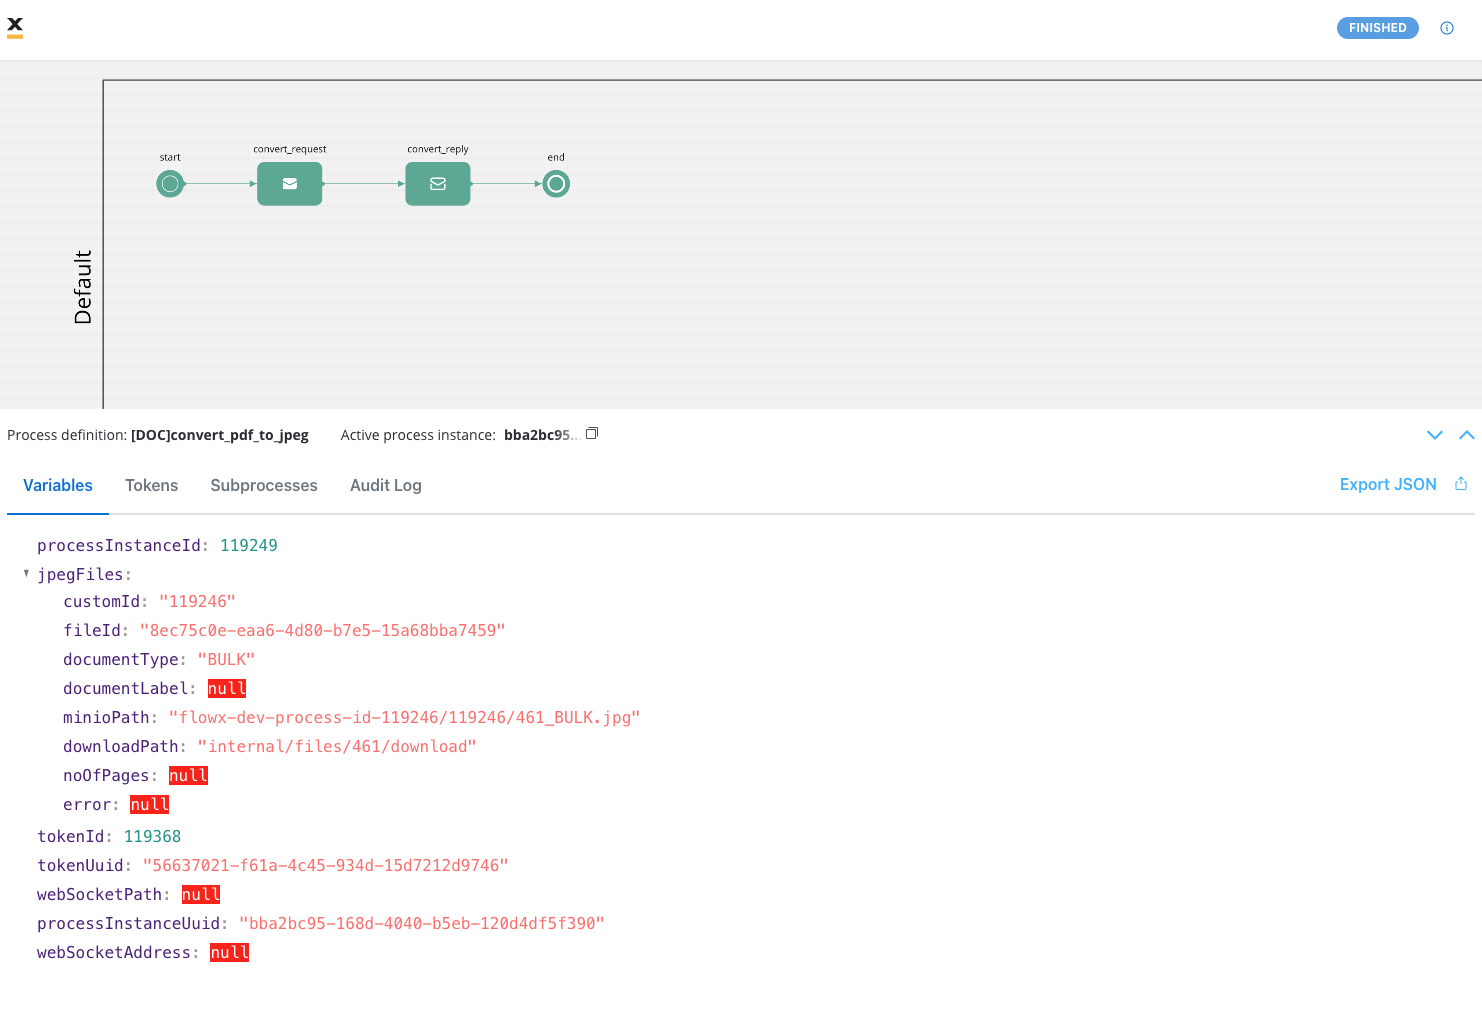 The following values are expected in the reply body:
- customId: The unique identifier for your document (it could be for example the ID of a client)
- fileId: The file ID
- documentType: The document type
- documentLabel: The document label (if available)
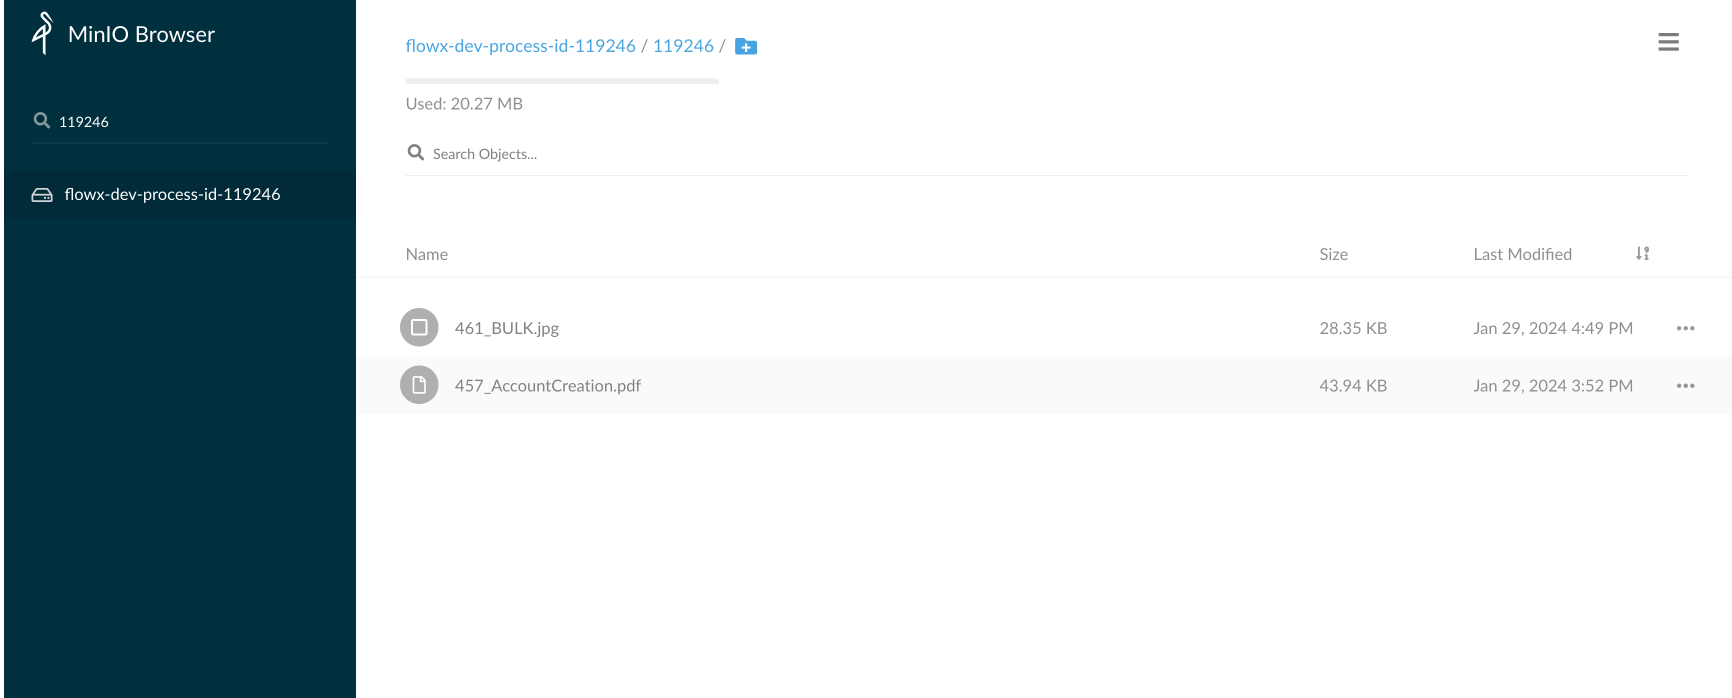
- minioPath: The path where the converted file is saved. It represents the location of the file in the storage system, whether it’s a MinIO path or an S3 path, depending on the specific storage solution
- downloadPath: The download path for the converted file
- noOfPages: If applicable
- error: Any error message in case of an error during the conversion process
Message response example
Note that the actual values in the response will depend on the specific conversion request and the document being converted.