Overview
Use Data Mappers to define how data flows between components. Add JavaScript transformations for complex scenarios.Key concepts
Source Components
- Parent processes
- Integration flows
- Business rules
Destination Components
- Subprocesses
- Workflows
- Business rules
Parameters & variables
Configure parameters and variables on the Data Model tab at process level.- Input Parameters
- Output Parameters
Parameter types by origin
Predefined Parameters
Predefined Parameters
Flexible Parameters
Flexible Parameters
Prerequisites
Data Model hierarchy
Understand the data model hierarchy to implement Data Mappers effectively:Project Data Model
Library Data Model
Process Data Model
Setup requirements
Define Project Data Model First
- Reusability across processes and workflows
- Consistent data structures
- Improved error prevention
- Enhanced mapping experience
Include Example Values
- Visualize attribute meaning and expected values
- Test without separate mock data
- Improve your configuration experience
Plan for Reusability
- Customer information structures
- Common business entities
- Standardized response formats
Configuration
Setting up process parameters
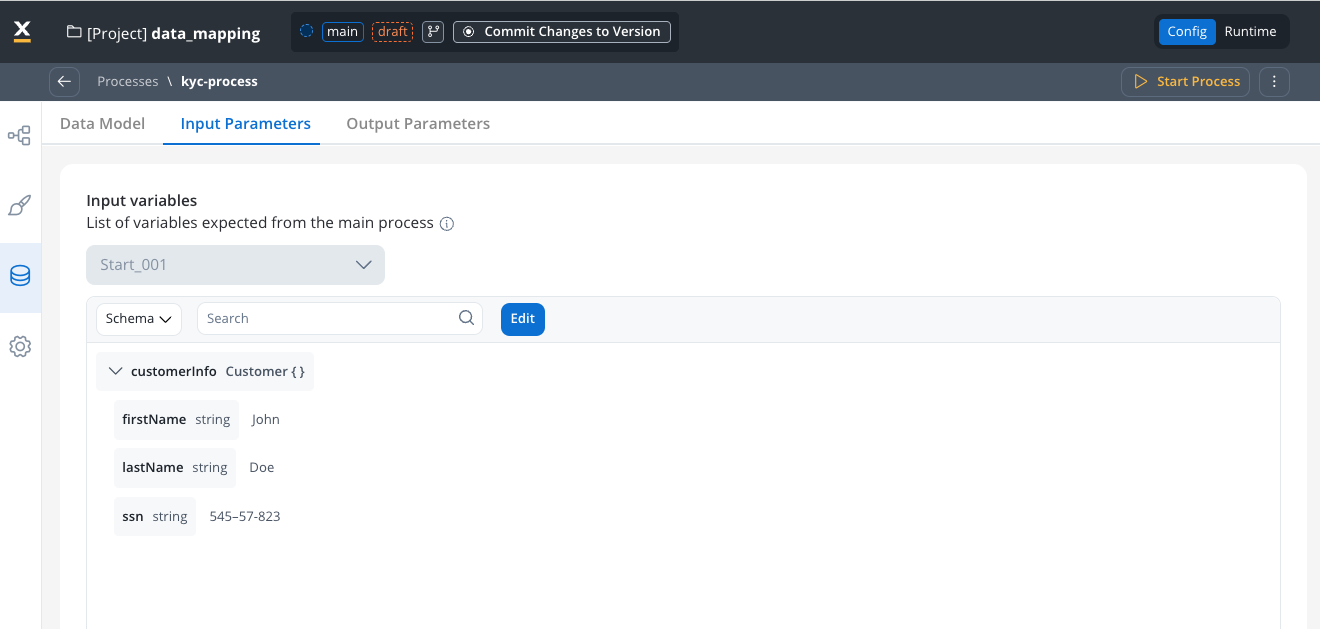
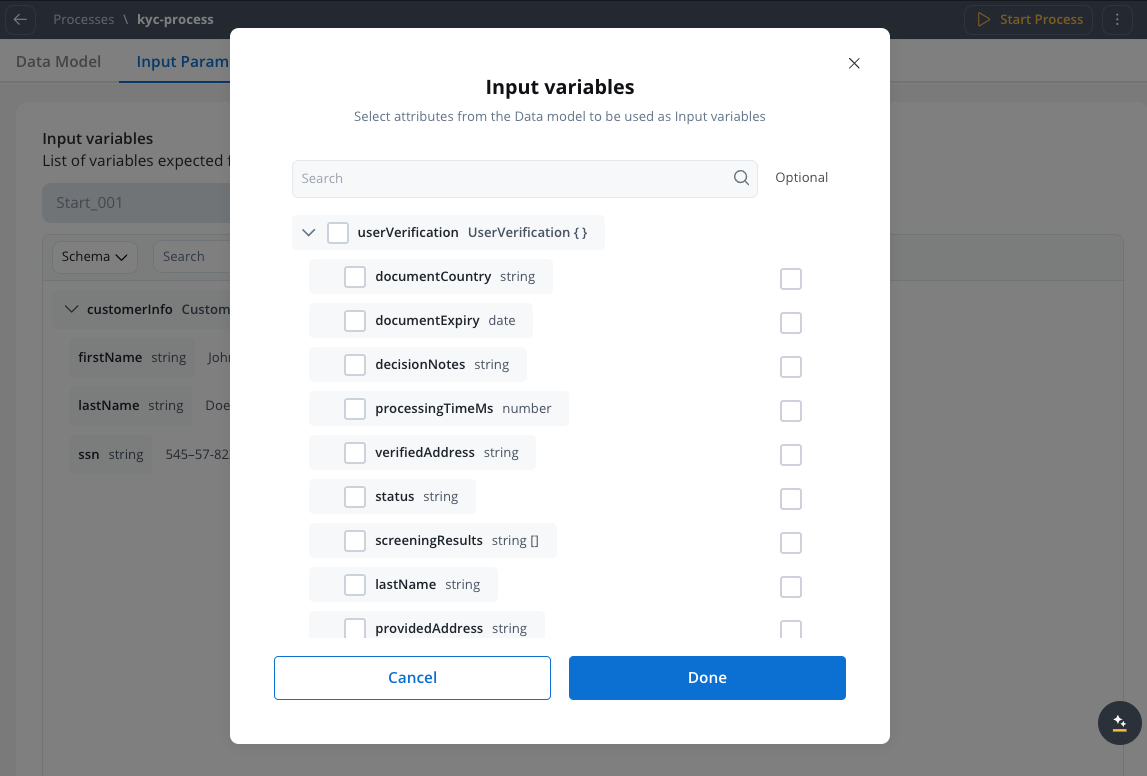
Configure Input Parameters
- Open the process you want to configure
- Navigate to the Data Model
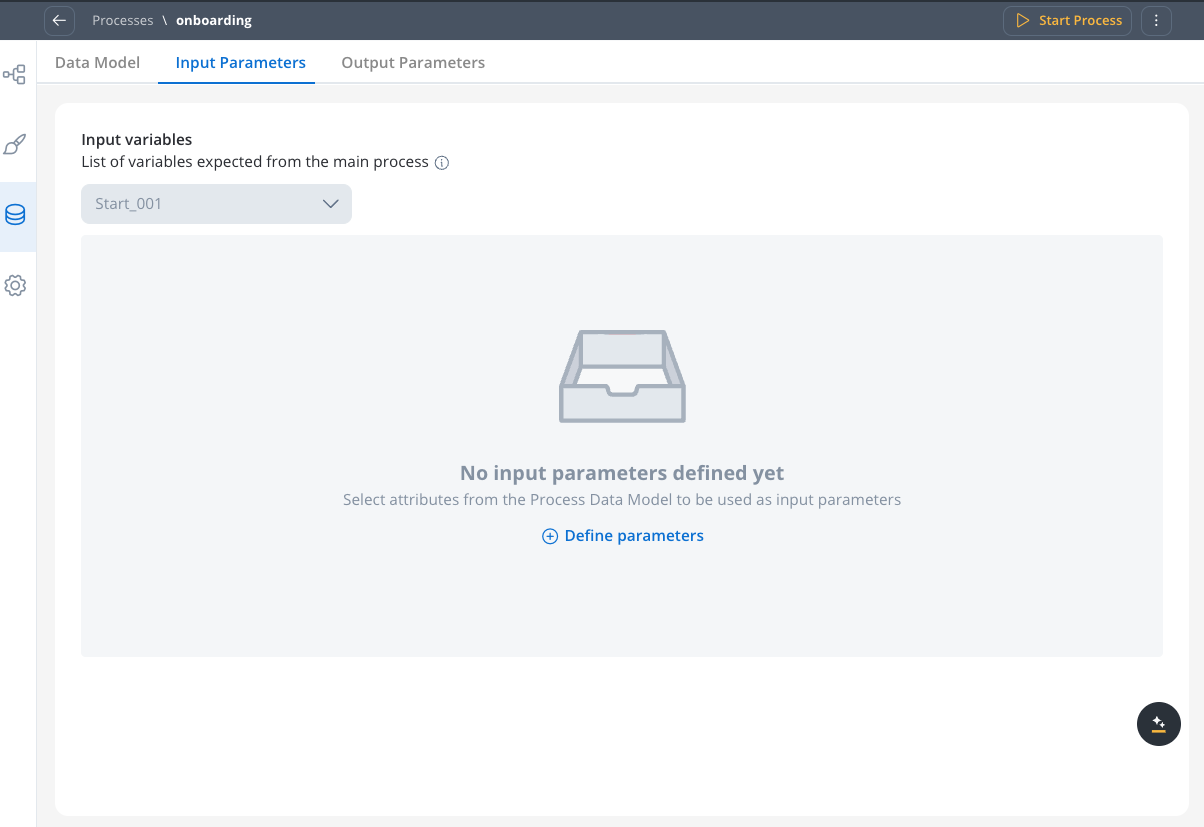
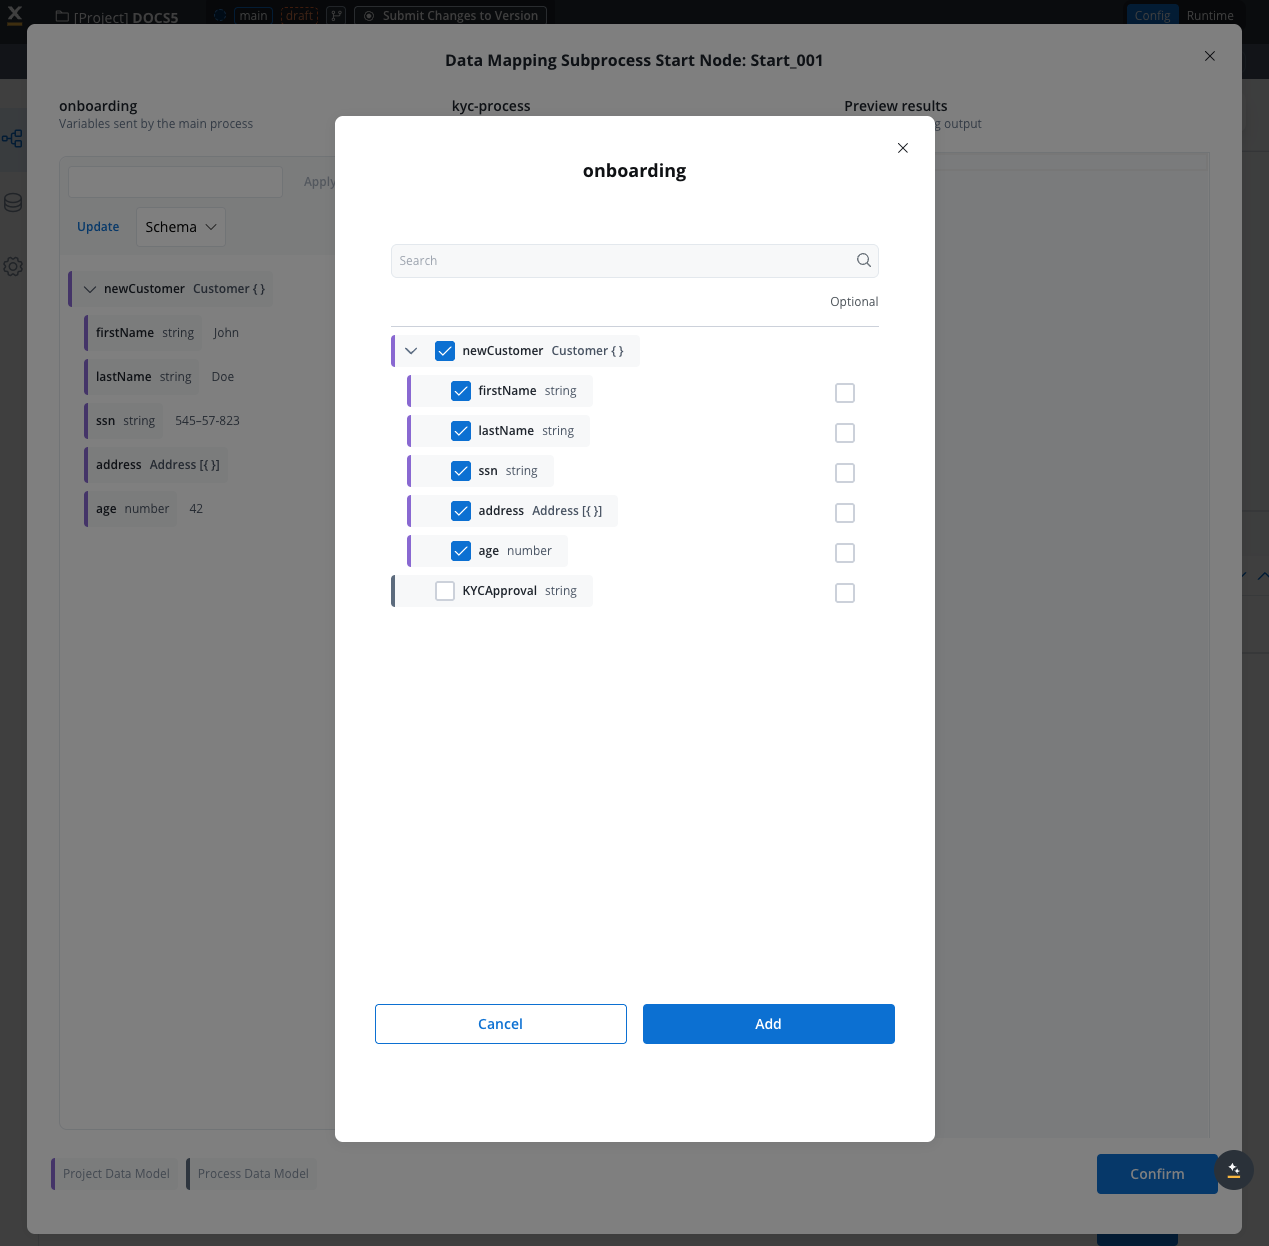
- Select the Input parameters tab and click “Define parameters”
- Define the schema based on the process’s Data Model
- Mark fields as optional if your component can function without those parameters. The optional flag indicates your component can operate without these parameters throughout its entire operation, not just during mapping.
- Note: This centralizes input definition at the subprocess level, replacing the previous “data to send” configuration on the parent process
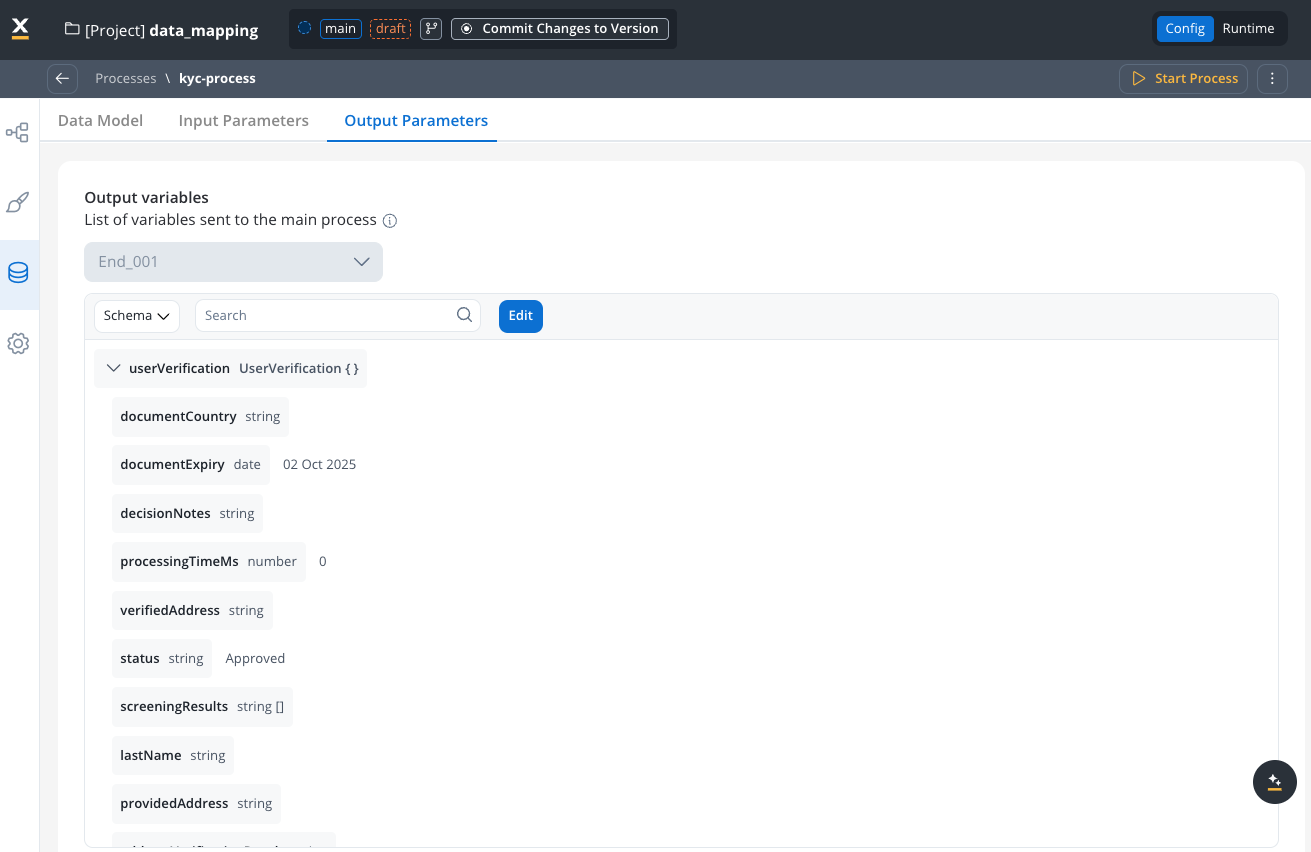
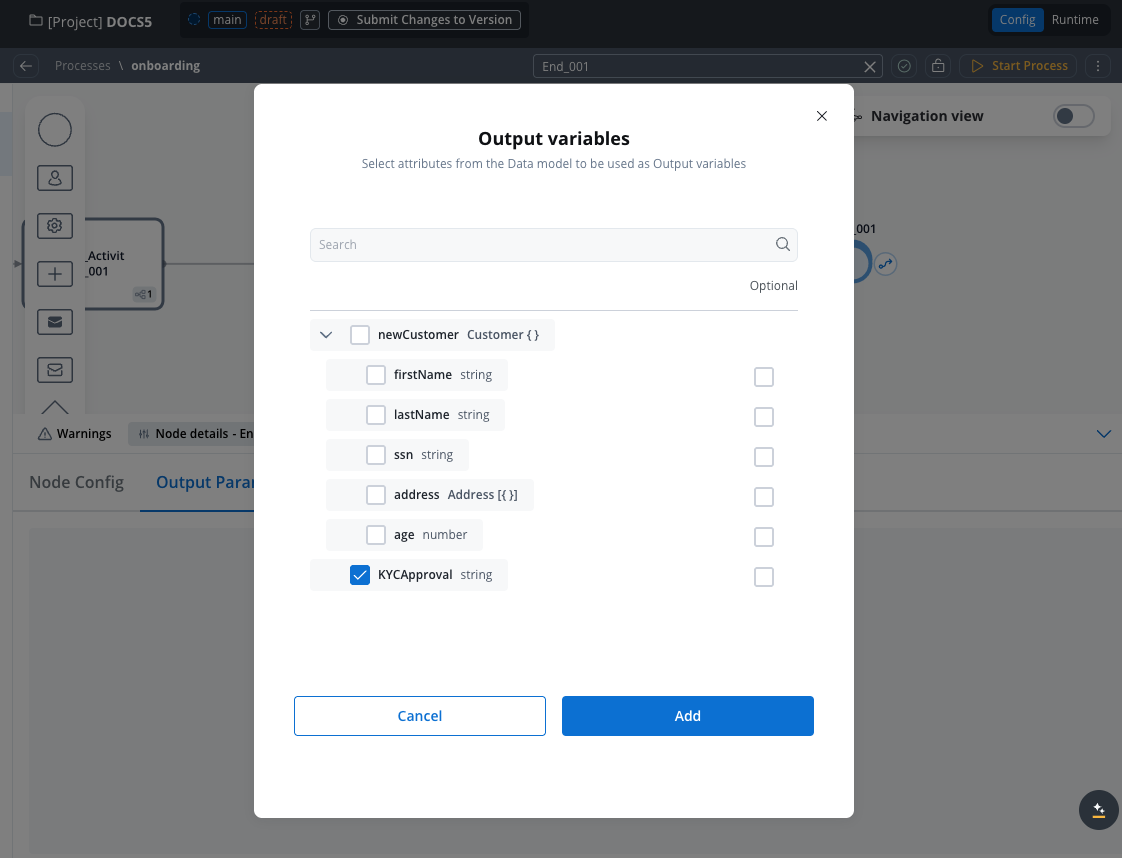
Configure Output Parameters
- Navigate to the Data Model
- Select the Output parameters tab
- Define the schema based on the process’s Data Model
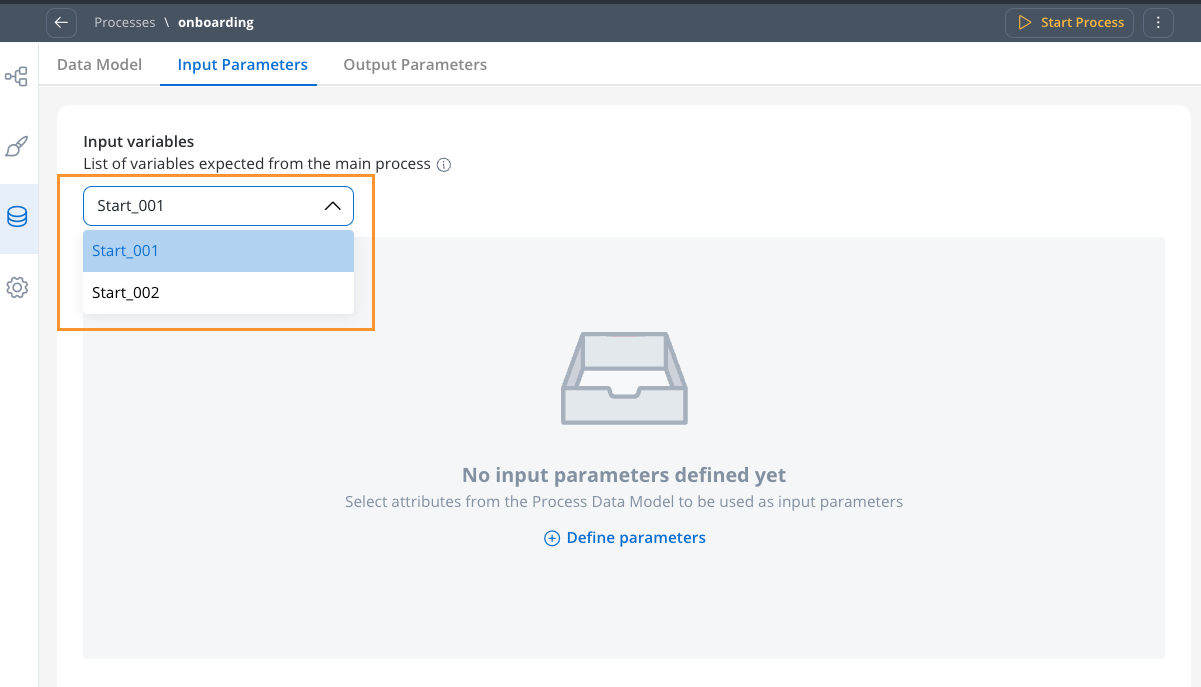
Handle Multiple Start/End Nodes
- View all start or end nodes when your subprocess has multiple nodes
- Use this for scenarios with exclusive gateways
- Configure parameters independently for each node
Mapping scenarios
Call activity mapping
Synchronous call activity
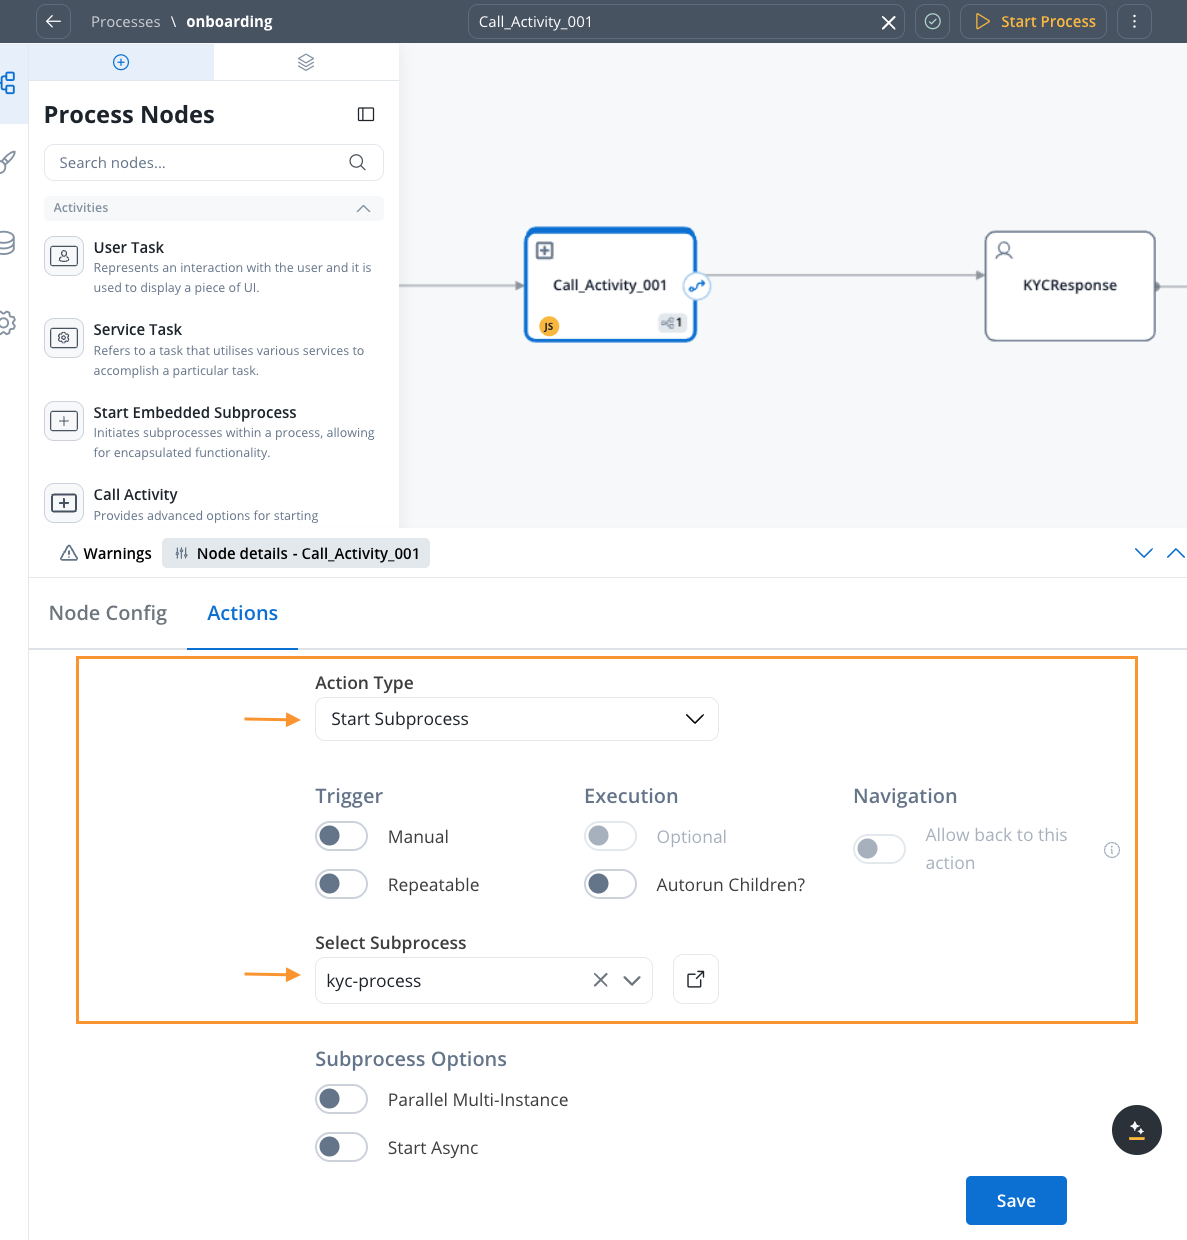
Set Up Call Activity
- In a process, define a call-activity type node
- Select the subprocess to be called
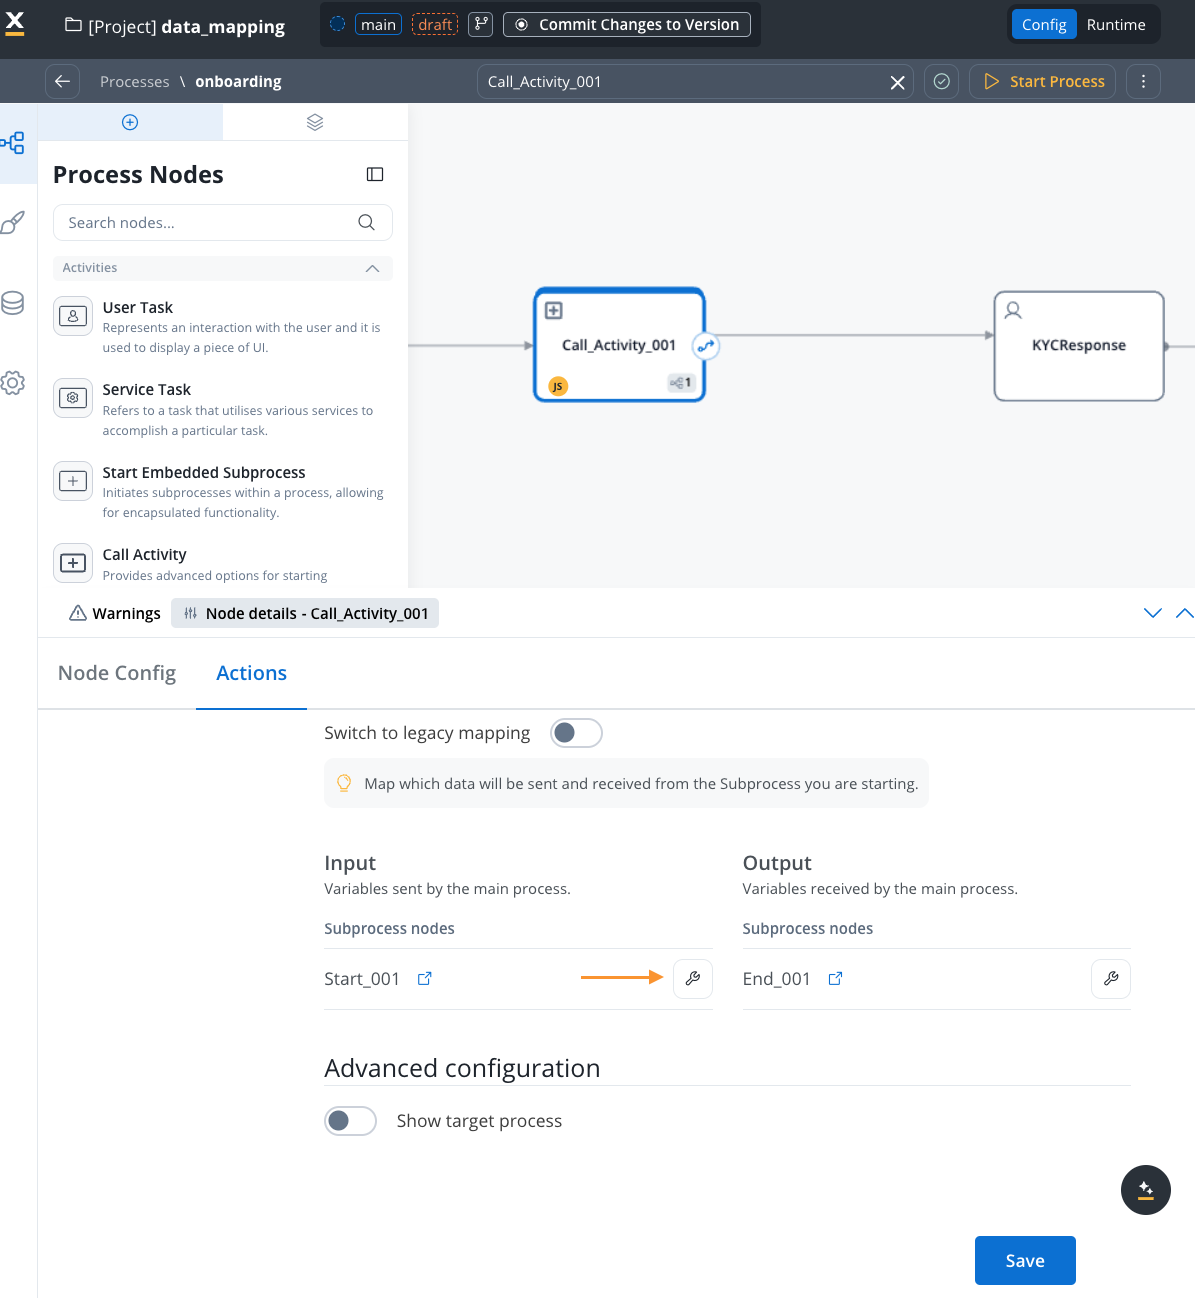
- Data Mapping is now the default option
- Toggle to “Switch to legacy mapping” if needed for backward compatibility
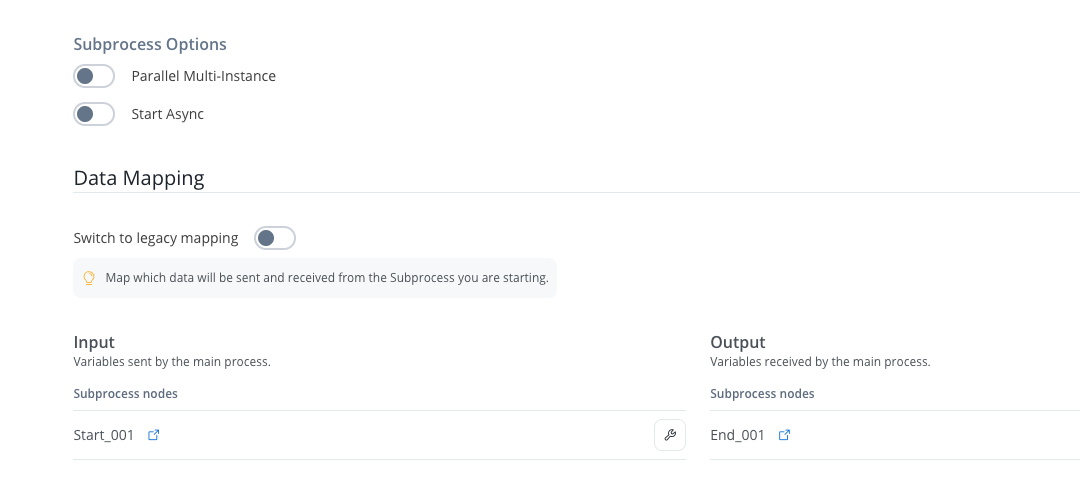
Map Input Parameters
- View the subprocess’s input parameters
- Click the “key icon” next to the parameter
- Source Component: Current process (parent)
- Destination Component: Subprocess input parameters
- Mapping Options:
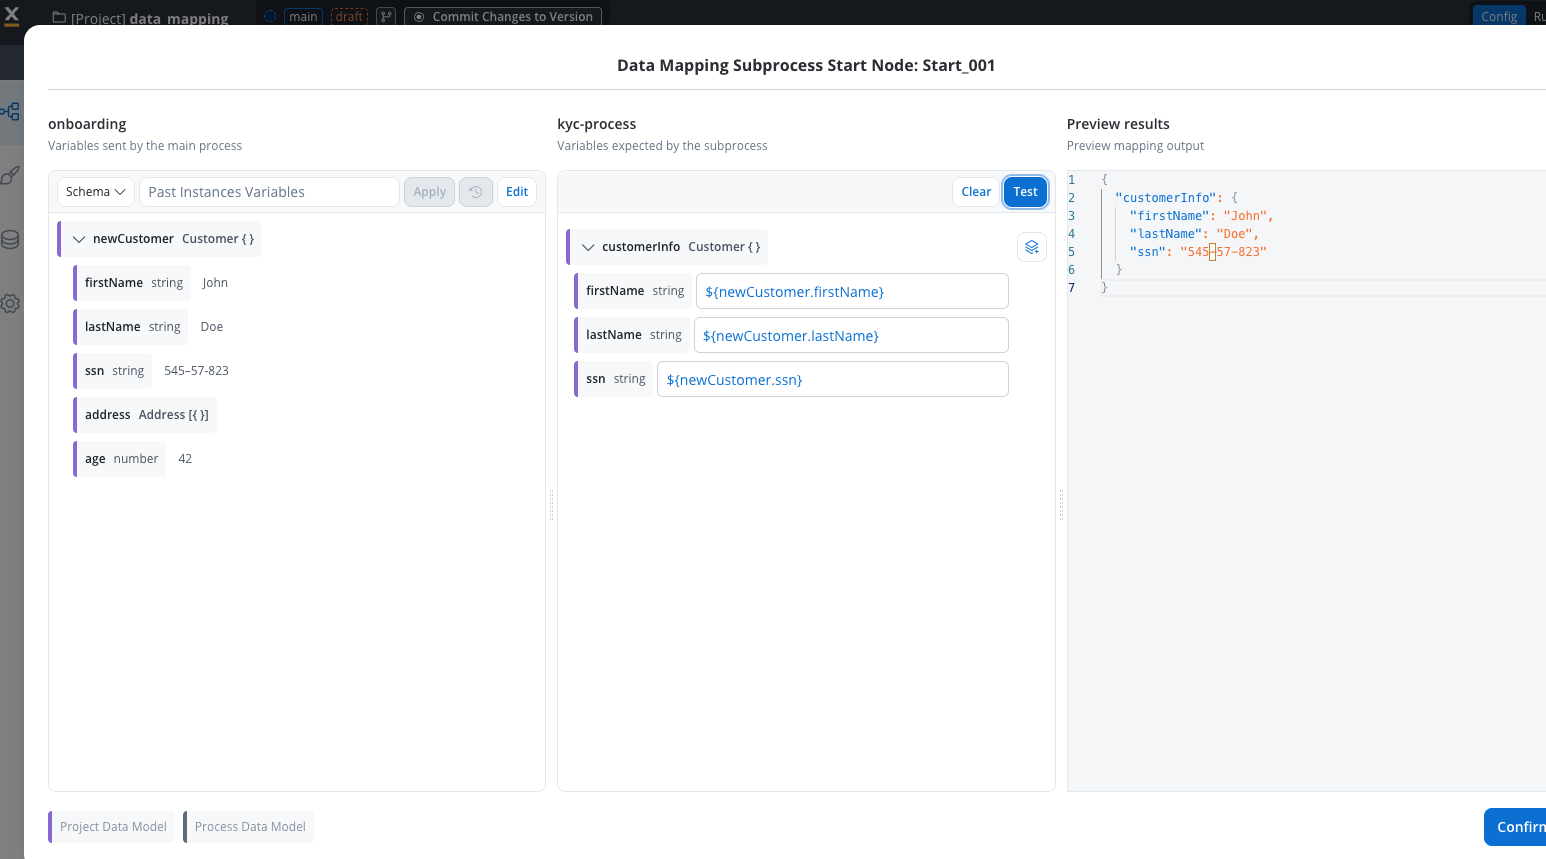
- Individual Mapping: Map each attribute individually using interpolation syntax:
${variableName} - Auto-populate Mapping: Select the data model types from dropdown for automatic mapping of all attributes
- Quick Mapping: If source and destination have the same data type, use dropdown for automatic mapping of all attributes
- Individual Mapping: Map each attribute individually using interpolation syntax:
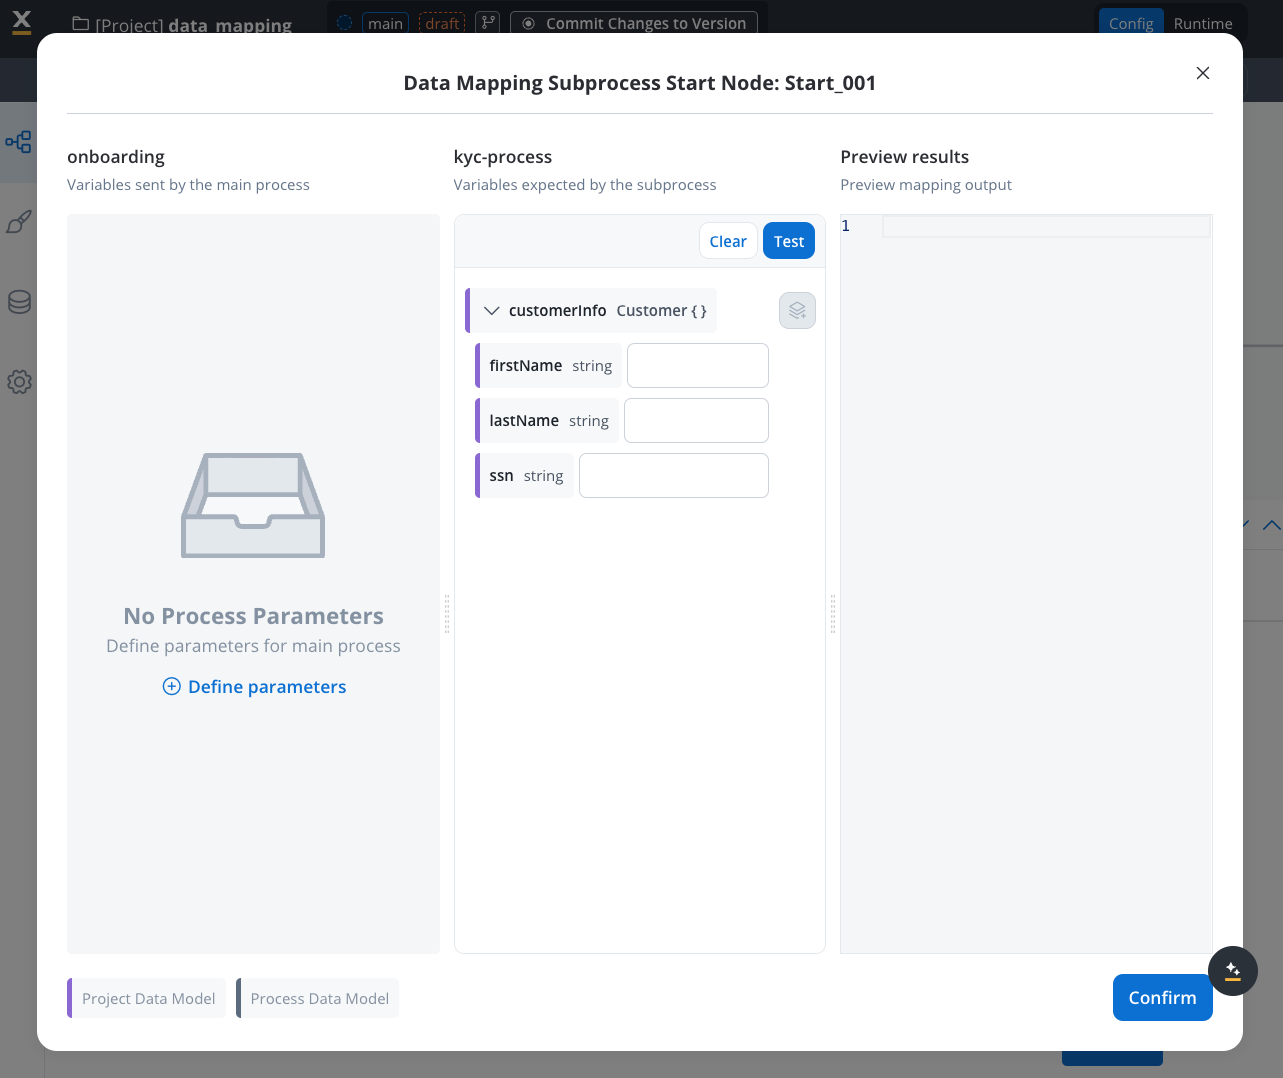
- Display Options: You can view variables as schema or JSON format for better visualization
- Variable Format: When mapping manually, use interpolation syntax
${variableName}- this format differs from process keys - Testing: Click the “test” button to visualize the JSON payload using example values from your data model
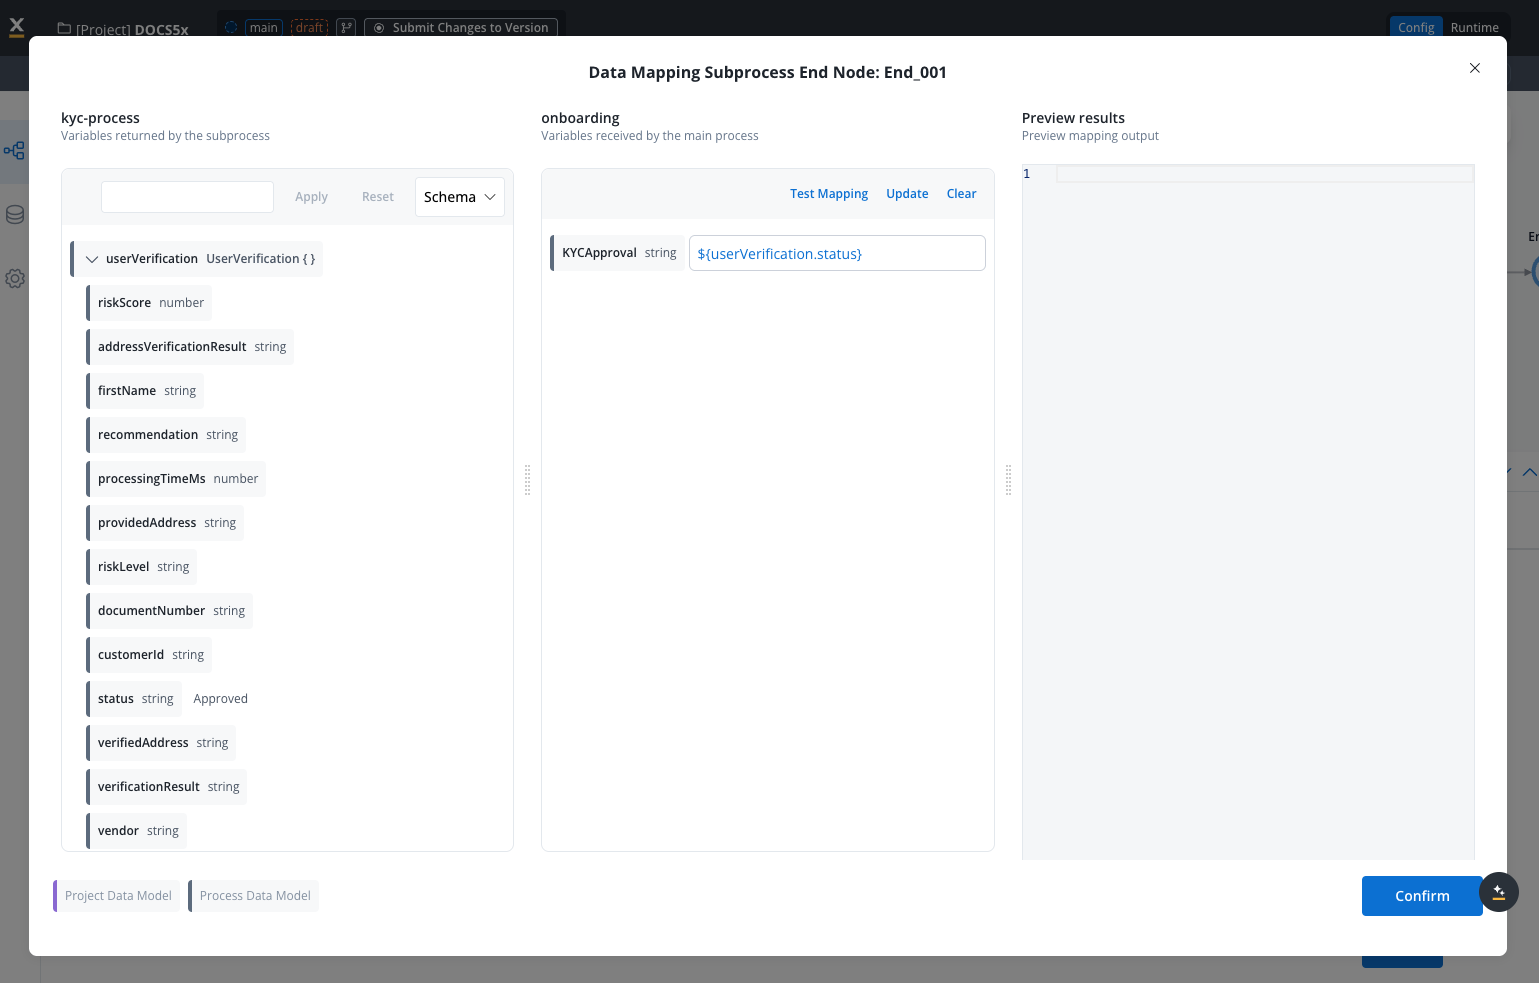
Map Output Parameters
- Select the Output tab
- View subprocess’s output parameters
- Select attributes in parent process data model for storing output
- Map subprocess output parameters (source) to parent process parameters (destination)
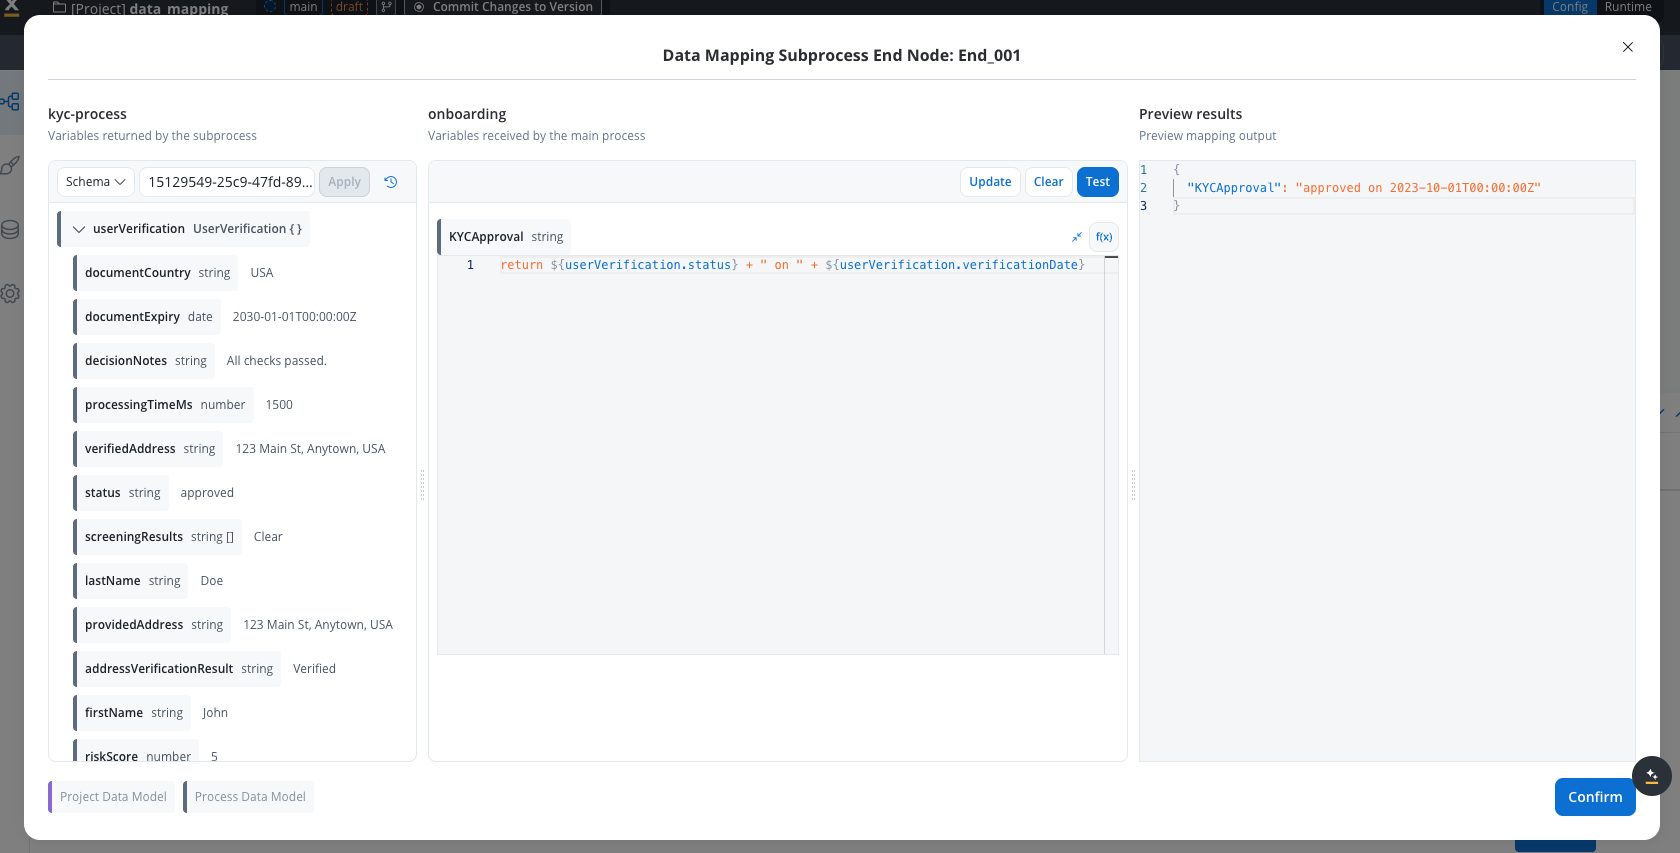
- Use JavaScript functions for data transformation and combination
- Syntax Requirements: All computed values must use
returnstatements - Example:
return ${userVerification.status} + " on " + ${userVerification.verificationDate}
- Dynamic values: Use
${variableName}syntax to reference dynamic values (same as used for variable mapping) - Example:
return ${approverName} + " approved on " + ${date}
- Testing: Use test button to see transformed output with example values
- Value Persistence: Previous values are saved until you click “confirmation” and “save”
- Error Handling: JavaScript errors trigger when functions encounter issues (e.g., reading property from undefined object)
- System sends configured data even with type mismatches (e.g., string to number)
- Always validate your transformations before saving
Save Configuration
Asynchronous call activity
Set Up Async Call Activity
- Define call-activity node or Start Subprocess action on User Task
- Select subprocess to be called
- Check the Run async toggle
Map Input Only
- Choose Data Mapper implementation
- Map input parameters from parent process (source) to subprocess (destination)
- Save input mapping configuration
Parallel multi-instance mapping
Use parallel multi-instance mapping when you need to start multiple subprocess instances simultaneously—one for each element in an array from the parent process.Configuration options
When Parallel Multi-instance is enabled on a Call Activity node or Start Subprocess action, configure these options: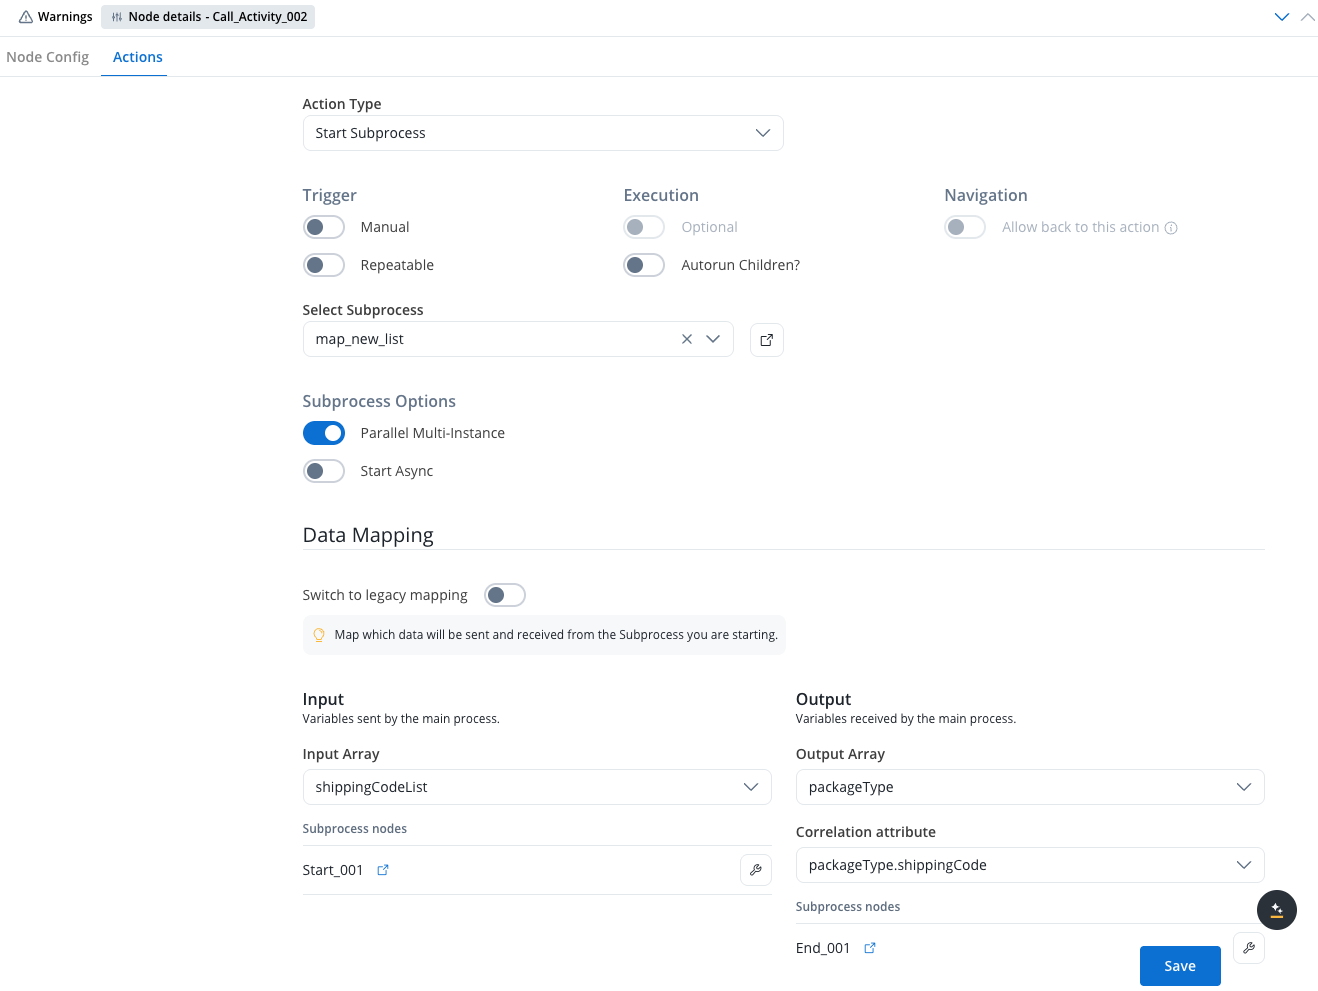
Data mapping configuration
Enable Parallel Multi-Instance
- Open the Call Activity node or Start Subprocess action
- Enable the Parallel Multi-instance toggle
Declare Arrays
- Input Array: Specify the parent process array containing the data to process (e.g.,
ordersList) - Output Array: Specify where to store the subprocess results (e.g.,
processedOrdersList)
Configure Input Mapping
- Click to open the mapping modal
- Map array element attributes to subprocess input parameters
- Example: Map
${item.orderId}from parent array toorderIdin subprocess
Configure Output Mapping
- Map subprocess output parameters back to the parent output array
- Each subprocess instance’s result is added to the output array
Set Correlation Attribute
- Define which attribute correlates subprocess results with parent data
- This determines whether results update existing or insert new array elements
Correlation attribute behavior
When subprocess results return, the correlation attribute determines how data is handled:Update Existing
Insert New
Example: Processing shipping codes
Scenario: Process multiple shipping codes in parallel, determining package type for each.Prepare Parent Process Data
Configure Call Activity
- Enable Parallel Multi-instance
- Set Input Array:
shippingCodeList - Set Output Array:
packageType - Set Correlation Attribute:
shippingCode
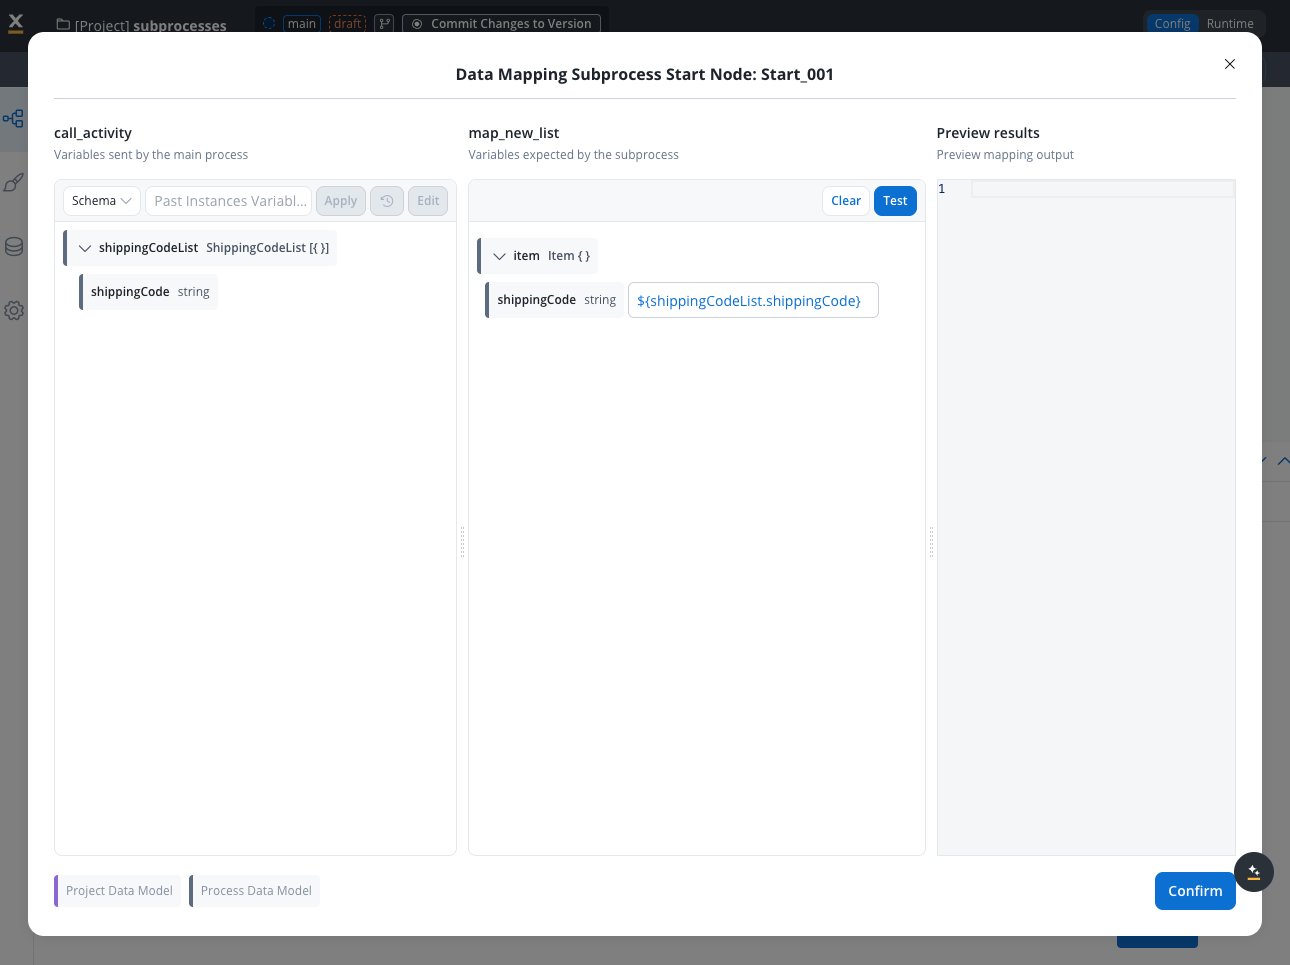
Map Input Parameters
- Map
${item.shippingCode}→ subprocessshippingCodeinput parameter
Subprocess Processing
Result
Testing and validation
Testing methodology
Use Example Values
- Use example values from your data model for testing
- No need for separate mock data
- Values automatically populate in test scenarios
- Auto-populate benefit: Example values help visualize attribute meaning and expected data
Test Payload Generation
- Click “test” button to visualize JSON payload
- See exactly what data will be sent to destination component
- Verify transformations work as expected
- Display formats: View results as schema or JSON for better understanding
Variable Mapping Validation
- Verify interpolation syntax
${variableName}is correctly formatted - Test both manual mappings and auto-populated ones
- Ensure data type compatibility between source and destination
${variableName} used in Data Mappers differs from process key formats. Pay attention to this when manually entering variable paths.Apply Previous Session Information
- Use information from previous sessions in testing
- Validate real-world scenarios
- Ensure data flows correctly end-to-end
Testing subprocess data
- When testing data coming from subprocesses, you need to check for the UUID instance of the subprocess and copy paste it in the instance field of the test data, as shown in the demo below:
JavaScript transformation testing
Syntax Requirements
Syntax Requirements
- All computed values must include
returnstatements - Use clear parameter notation (e.g.,
userVerification.status) - Functions must handle potential undefined values
Error Handling
Error Handling
- System sends data even with type mismatches
- JavaScript errors trigger for undefined object property access
- Test transformations thoroughly before deployment
Value Persistence
Value Persistence
- Previous values are saved during configuration
- Only lost upon clicking “confirmation” and “save”
- Allows iterative testing and refinement
Managing parameter changes
Different types of parameter changes require different handling - some propagate automatically while others need manual updates.Automatic propagation
These changes propagate automatically to input/output parameters and mappings:Deleted Attributes
Renamed Attributes
Manual intervention required
New Attributes
- Add them to input/output parameters
- Configure them in the data mapper
Data Model propagation timing
Propagation speed varies by data model type:- Project data model: Immediately
- Library data model: After the dependency build is updated
Best practices for parameter changes
Use cases
Configure data mappers for these scenarios:Start Subprocess Action
Start Subprocess Action
- Call Activity node: Direct subprocess invocation within process flow
- User Task node: Subprocess triggered by user interaction
Subprocess Execution Modes
Subprocess Execution Modes
- Synchronous execution: Parent process waits for completion, enabling both input and output mapping
- Asynchronous execution: Parent process continues without waiting, supporting input mapping only
- Single instance: One subprocess instance per trigger
- Parallel multi-instance: Multiple subprocess instances started simultaneously from an array. See Parallel multi-instance mapping for detailed configuration.
Reusable UI Template Integration
Reusable UI Template Integration
- Map data from parent process to template input parameters
- Configure template output to flow back to parent process
- Enable consistent UI behavior across multiple processes
Real-world examples
Example 1: Monthly income collection
Scenario: A subprocess collects monthly income information from users and passes it back to the parent process.Subprocess Design
- UI Behavior: Modal appears asking user to select currency and enter income amount
- Data Collection: User enters monthly income value
- Requirement: Pass collected data back to parent process
Data Model Configuration
- Add
monthlyIncomevariable to the data model - Navigate to Output Parameters tab
- Define
monthlyIncomeas an output parameter
- Initially no input parameters needed (not sending data to subprocess)
- Focus on receiving output data
Call Activity Mapping
- Open the call activity node in parent process
- Navigate to Input and Output Parameters section
- Output mapping: Connect subprocess output to parent process variable
${monthlyIncome} (interpolation syntax)Variable Renaming Example
- Subprocess variable:
monthlyIncome - Parent process variable:
incomePerMonth(renamed for clarity) - Mapping:
${monthlyIncome}→incomePerMonth - Result: Two distinct data models successfully connected
Example 2: Time-off approval with JavaScript transformation
Scenario: A colleague submits a time-off request, requiring approval with enhanced data transformation.Request Flow Design
- Input data: Start/end dates, requester information
- UI Behavior: Modal shows request details with approve/deny options
- Output requirement: Return approval status + approver name
Input Parameter Mapping
- Parent process sends:
- Approver name
- Request details (start date, end date)
- Subprocess receives: Input parameters for display
JavaScript Transformation for Output
- Click the function icon next to the output variable
- Script example:
- Use
${variableName}to reference dynamic values:${approverName}
Testing Transformation
- Click test button to preview transformed output
- Verify JavaScript logic with example data
- Result: Enriched data flows back to parent process
Best practices
Define Data Models Early
Use Example Values
Plan for Reusability
Test Thoroughly
Document Dependencies
Use Quick Mapping
FAQs
Do parameter changes propagate automatically?
Do parameter changes propagate automatically?
- Deleted attributes: Automatically removed from mappings
- Renamed attributes: Automatically updated in mappings
- New attributes: You must manually add and configure them
How do data mappers impact subprocess configuration?
How do data mappers impact subprocess configuration?
- No need to configure “Append Data to Parent Process” action in the subprocess anymore
- For synchronous subprocesses: Output automatically flows back to parent process
- For asynchronous subprocesses: You can configure input mapping, and the subprocess can append data back to the parent process asynchronously
How do you set up process parameters with multiple end nodes?
How do you set up process parameters with multiple end nodes?
- Navigate to Data Model → Input/Output Parameters
- Select the specific node from the dropdown
- Configure parameters independently for each end node
What happens with currency variables in input mapping?
What happens with currency variables in input mapping?
- Set the code as optional in the output parameters, OR
- Gather the code separately using a segmented button or other input method
Current limitations
Current limitations to be aware of:Start Subprocess for collection item
Start Subprocess for collection item
- Array to Object Mapping: Cannot map array → object for scenarios when you edit or add an item in a collection (estimated fix: 5.X Feature)
Currency variable input mapping
Currency variable input mapping
- Currency Code Transmission: When mapping currency variables as input, only the amount is sent - the currency code is not transmitted
- Workaround Required: Either make code optional in output parameters or collect currency code through separate input methods