User task nodes provide a flexible framework to defining and configuring UI templates and actions for specific template config nodes, such as an upload file button.

Prerequisites
- Access Permissions: Ensure that you have the necessary permissions to use the Documents Plugin. The user account used for these operations should have the required access rights.
-
Kafka Configuration: Verify that the Kafka messaging system is properly configured and accessible. The Documents Plugin relies on Kafka for communication between nodes.
- Kafka Topics: Familiarize yourself with the Kafka topics used for these operations (later in this section)
Uploading and reviewing a document - step by step
After exploring how to generate documents in the previous section, let’s create a process that enables users to generate a document, review/sign it, and subsequently upload it again. Consider a scenario where a user inputs data, a document is generated for preview, and the user must then sign and uploads it. The following types of nodes are involved:- Start and End nodes
- Milestone nodes to configure the stepper/steps structure
- A User Task for user input
- Send Message Task (Kafka) and Receive Message Task (Kafka) for document generation and retrieval
- Service Task for adding the generated document path
- User Tasks for document preview and upload
Configuring the process
- Follow the steps in Generating from HTML templates to set up the document generation part of the process.
If your goal is to only upload a new file without generating it from templates or requiring user input, you can skip the template generation step.

Request message example
This JSON structure represents a Kafka message sent through the..in topic to initiate a request in the Process Engine. It includes information for generating an “AccountCreation” document with a custom ID “119237” in English. Data specifies client details extracted dynamically from user input (first name, last name, age, country) and company information (name, registration date).
This an example of a message that follows the custom integration data model.
Response message example
This JSON structure represents the response received on the..out Kafka topic, where the Process Engine expects a reply. It contains details about the generated PDF file corresponding to the custom ID “119237” and the “AccountCreation” template. The response provides file-related information such as file ID, document type, document label, storage path, download path, number of pages, and any potential errors (null if none). The paths provided in the response facilitate access and download of the generated PDF file.
- Configure the preview and upload parts of the process.

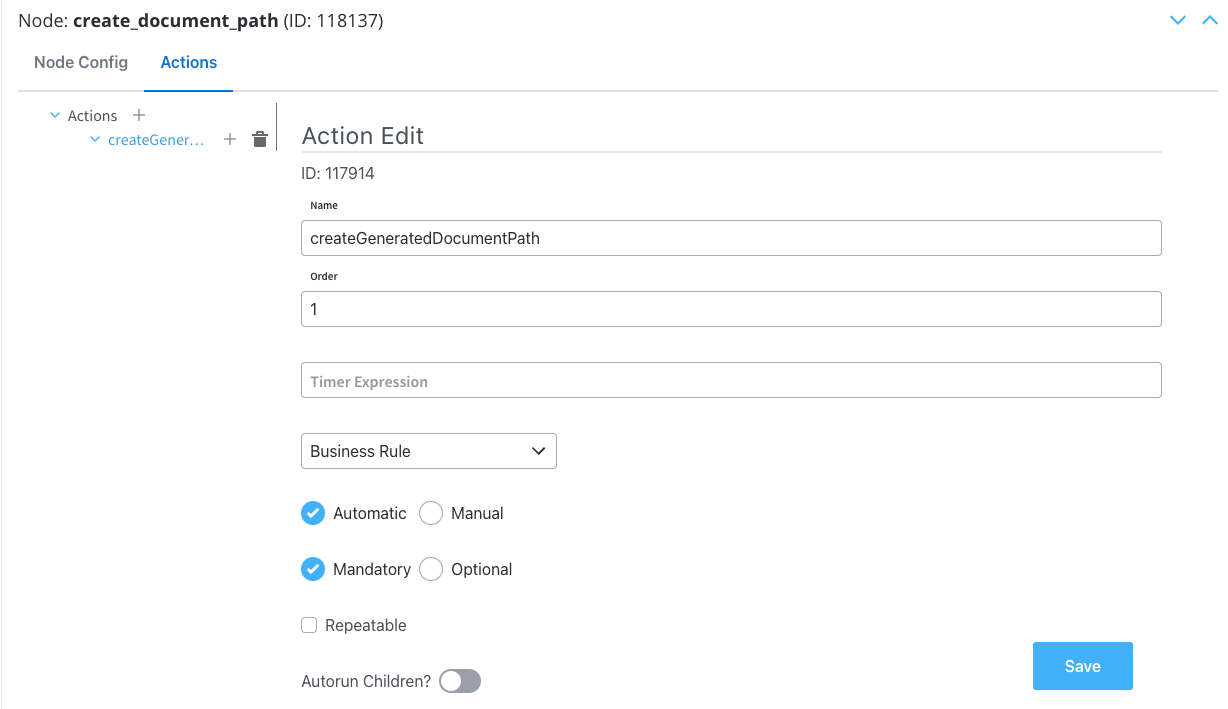
Document path - Service Task
Configure a business rule to construct a file path for the generated document. Ensure the base admin path is specified.Ensuring the base admin path is specified is crucial, as it grants the required administrative rights to access the endpoint responsible for document generation.
Actions
Actions Edit
- Action Type: Set to Business Rule
- Trigger Type: Choose Automatic because is not a user-triggered action
- Required Type: Set as Mandatory
Parameters
- Language: We will use MVEL for this example
- Body Message: Fill in the body message request
Explanation of MVEL code
Explanation of MVEL code
- adminPath: Base URL for the admin path.
- processInstanceId: Extracts the process instance ID from the input. Assumes an input structure with a generatedDocuments property containing a generatedFiles property. Retrieves the keys, converts them to an array, and selects the first element.
- downloadPath: Retrieves the downloadPath property using the obtained processInstanceId.
- if condition: Checks if downloadPath is not null and constructs a new object in the output map.
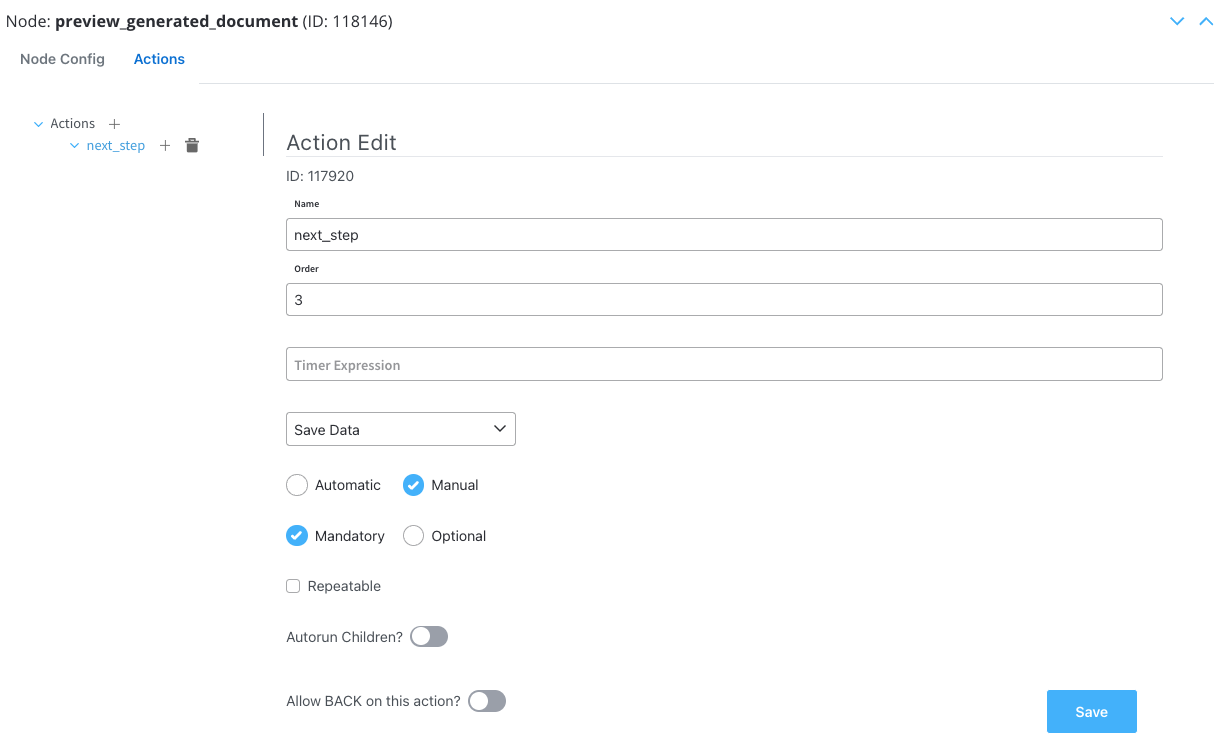
Preview document - User Task
Actions
Actions edit
- Action Type: Set to Save Data.
- Trigger Type: Choose Manual to allow user-triggered action.
- Required Type: Set as Mandatory.
- The screen where you can fill in the client details:
- The screen where you can preview and download the generated document:
Upload document - User Task
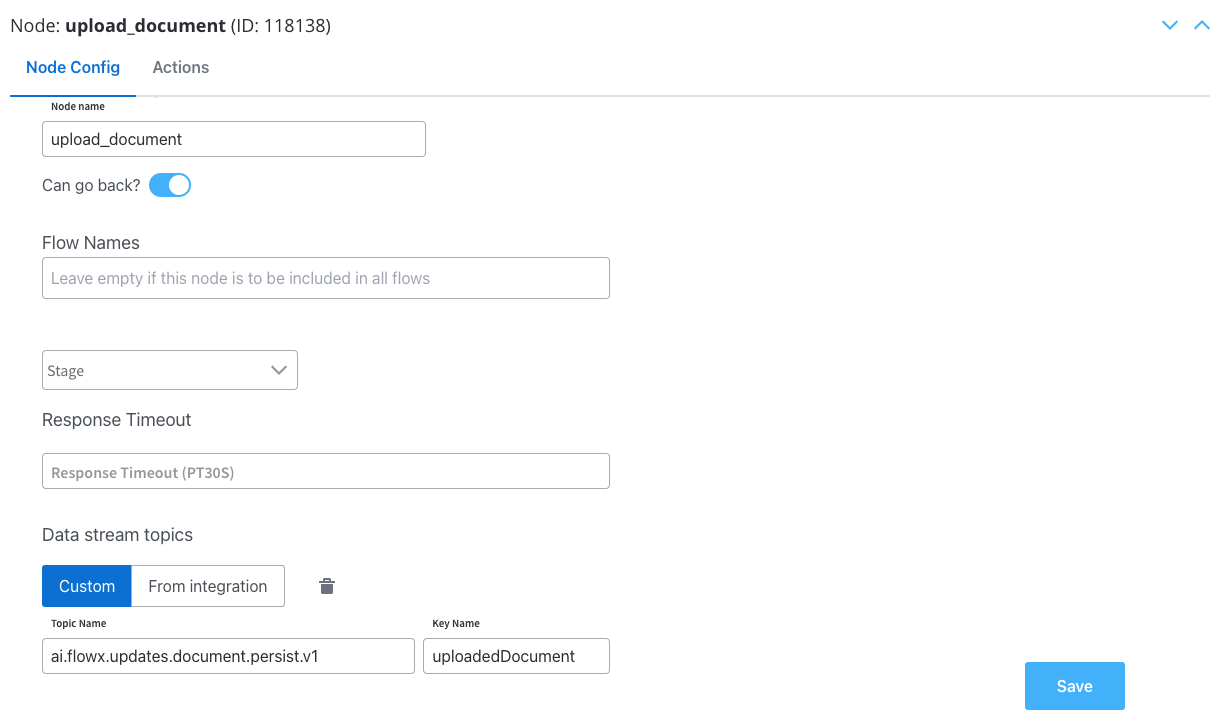
Node Config
- Swimlane: Choose a swimlane (if multiple) to restrict access to specific user roles.
- Stage: Assign a stage to the node.
- Data stream topics: Add the topic where the response will be sent; in this example
ai.flowx.updates.document.html.persist.v1and its key:uploadedDocument.
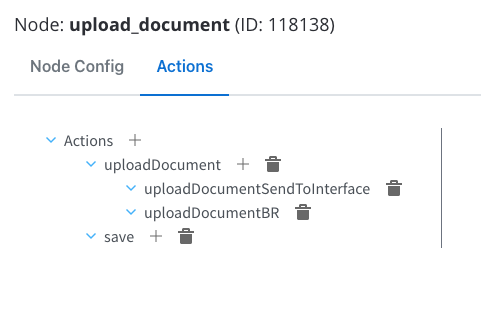
Actions
Configure the following node actions:- Upload File action with two child actions:
- Business Rule
- Send Data to User Interface
- Save Data action
Upload file action
This is a standard predefined FlowX Node Action for uploading files. This is done through Kafka and by usingpersist topics.
Configuring the File Upload action
Configuring the File Upload action
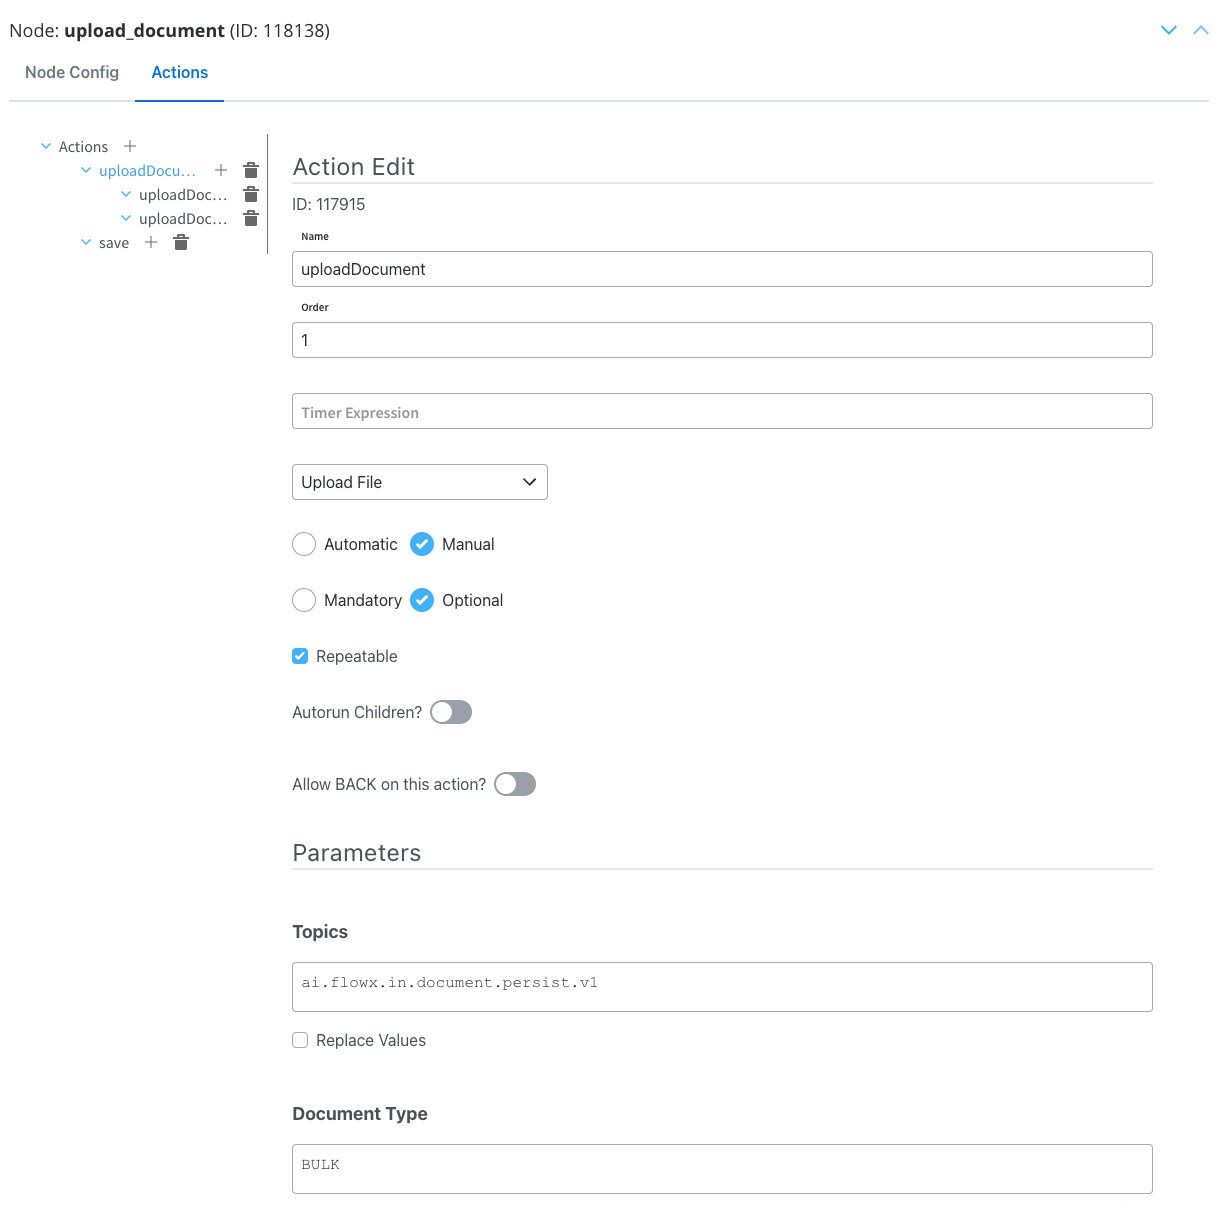
Action edit
- Action Type: Set to Upload File.
- Trigger Type: Choose Manual to allow user-triggered action.
- Required Type: Set it as Optional.
- Repeatable: Check this option if the action can be triggered multiple times.
Parameters
- Topics: Kafka topic where the file will be posted, in this example
ai.flowx.in.document.persist.v1.
To identify your defined topics in your current environment, follow the next steps: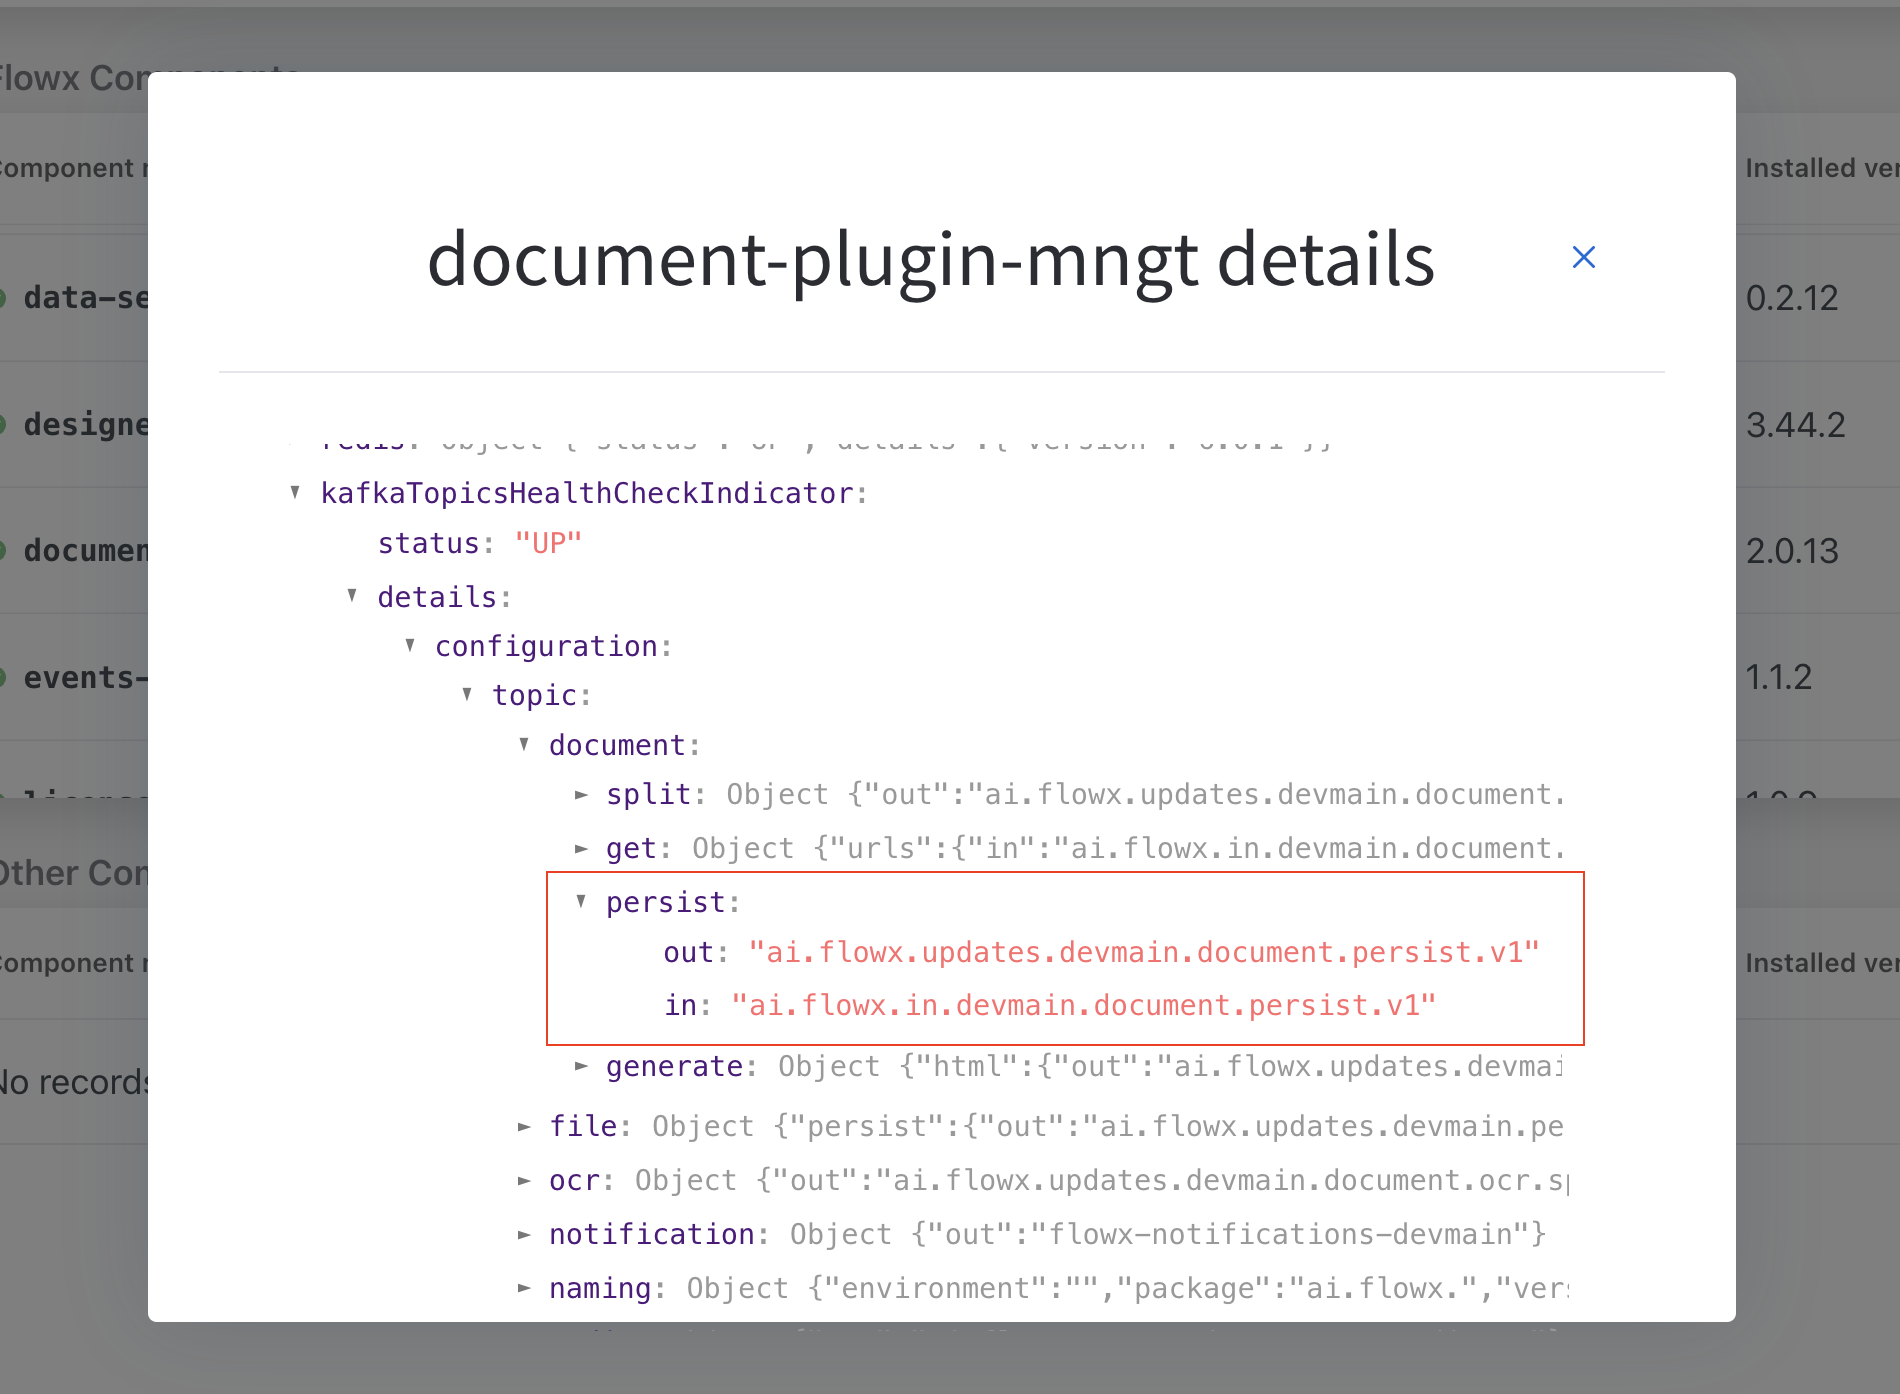
- From the FLOWX.AI main screen, navigate to the Platform Status menu at the bottom of the left sidebar.
- In the FLOWX Components list, scroll to the document-plugin-mngt line and press the eye icon on the right side.
- In the details screen, expand the
KafkaTopicsHealthCheckIndicatorline and then details → configuration → topic → document → persist. Here will find the in and out topics for persisting (uploading documents).
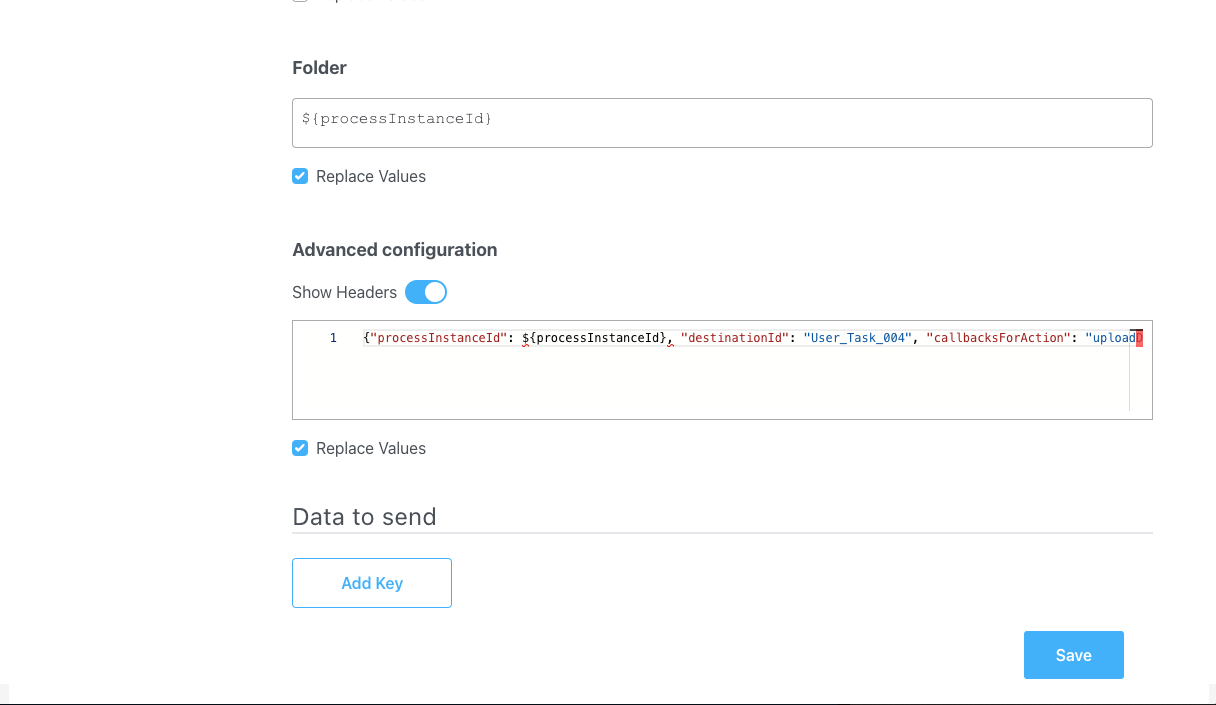
- Document Type: Metadata for the document plugin, in this example
BULK. - Folder: Configure a value by which the file will be identified, in this example it will be the
${processInstanceId}(it will be replaced at runtime with a generated process instance id). - Advanced configuration (Show headers): This represents a JSON value that will be sent on the headers of the Kafka message, in this example:
Data to send
- Keys: Used when data is sent from the frontend via an action for data validation.
1. Business Rule
This is necessary to create the path to display the uploaded document.Configuring the Business Rule action
Configuring the Business Rule action
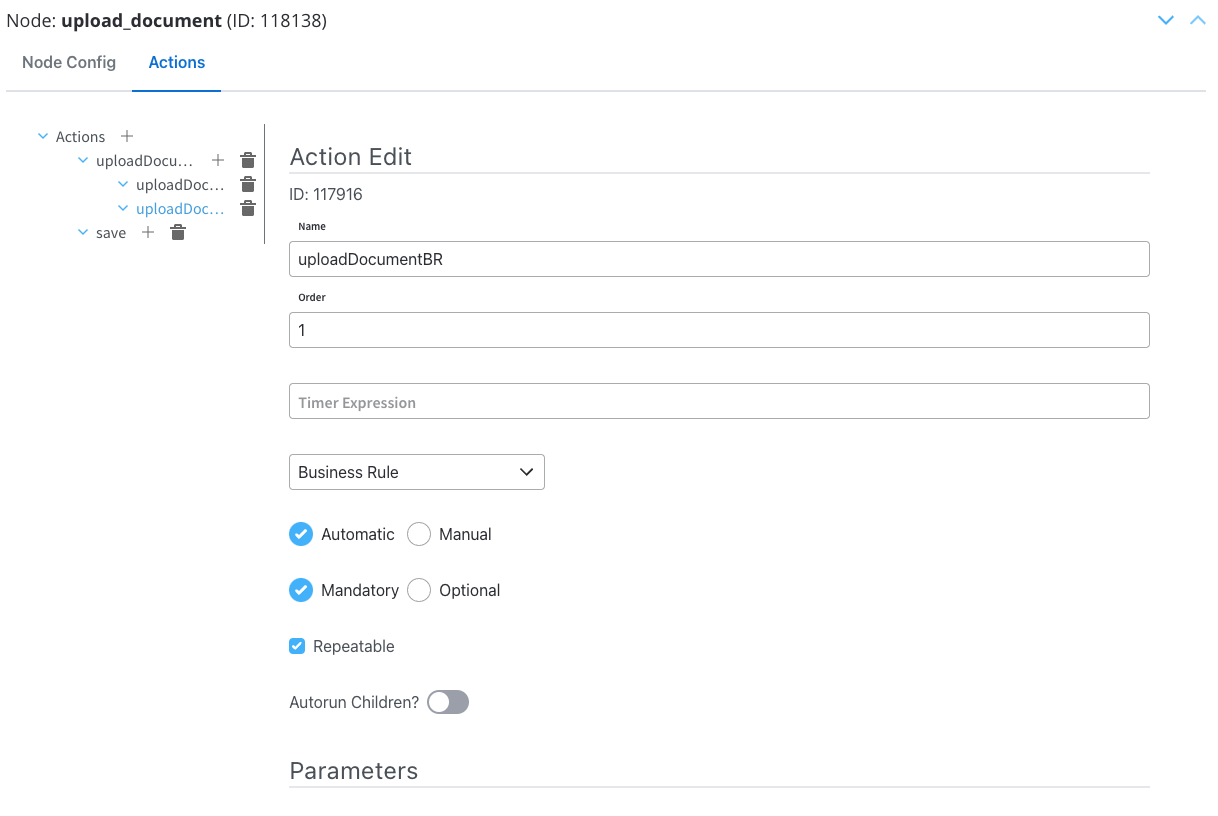
Action edit
- Order: Set to 1 so it will be processed before the second child action.
- Action Type: Set to Upload File.
- Trigger Type: Choose Automatic, it does not need user intervention.
- Required Type: Set as Mandatory.
- Repeatable: Check this option if the action can be triggered multiple times.
Parameters
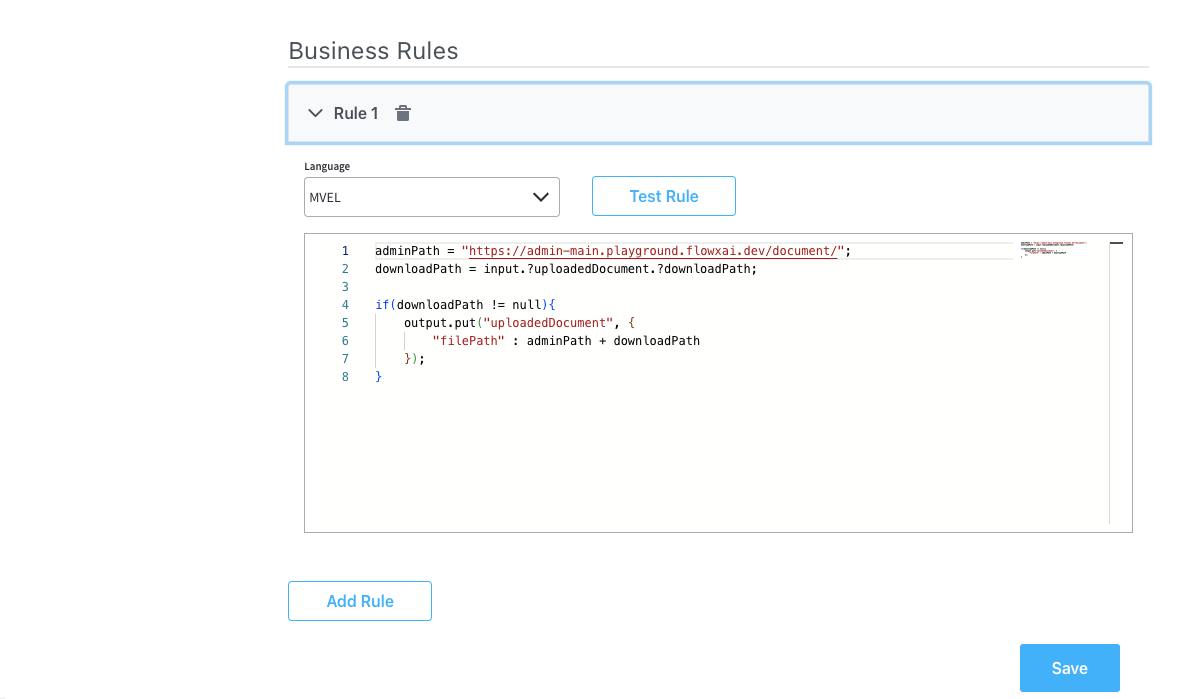
- Language: In this example we will use MVEL.
- Body Message: Fill in the body of the message request by applying a logic similar to the one utilized in configuring the “preview_document” node. Establish a path that will be later employed to showcase the uploaded document within a preview UI component.
2. Send Data to User Interface
This is necessary to send the previously created information to the frontend.Configuring the Send Data to User Interface action
Configuring the Send Data to User Interface action
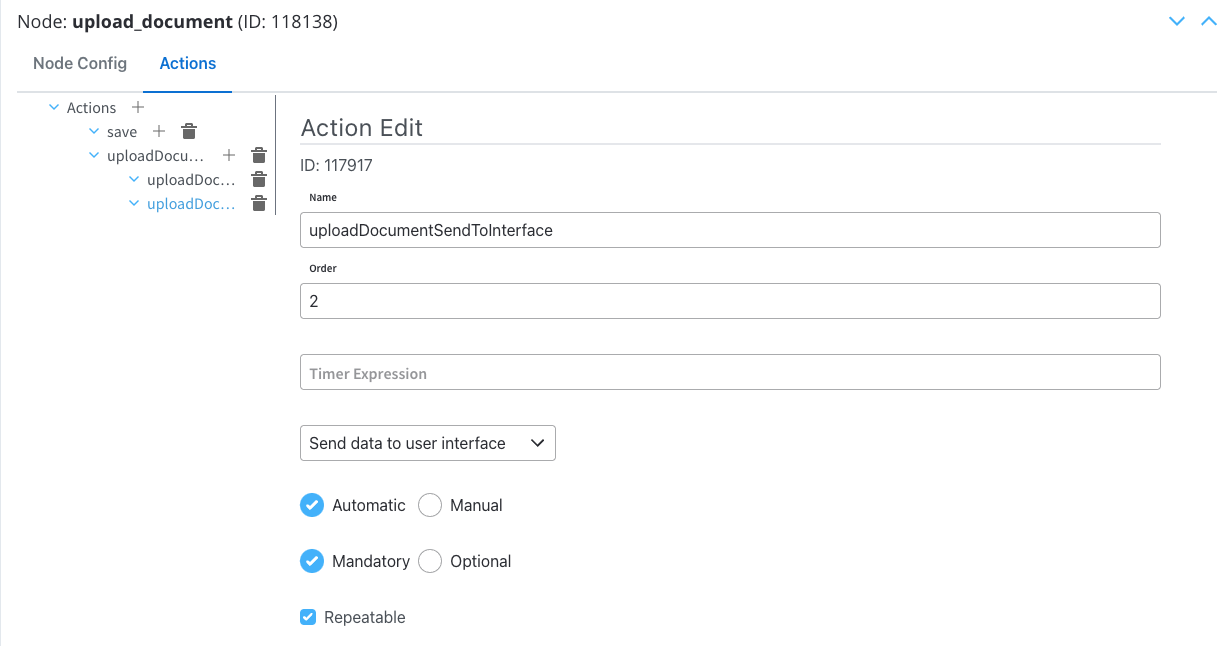
Action Edit
- Order: Set to 2 so it will be processed after the previously created Business Rule.
- Action Type: Set to Send data to user interface.
- Trigger Type: Choose Automatic, it does not need user intervention.
- Required Type: Set as Mandatory.
- Repeatable: Check this option if the action can be triggered multiple times.
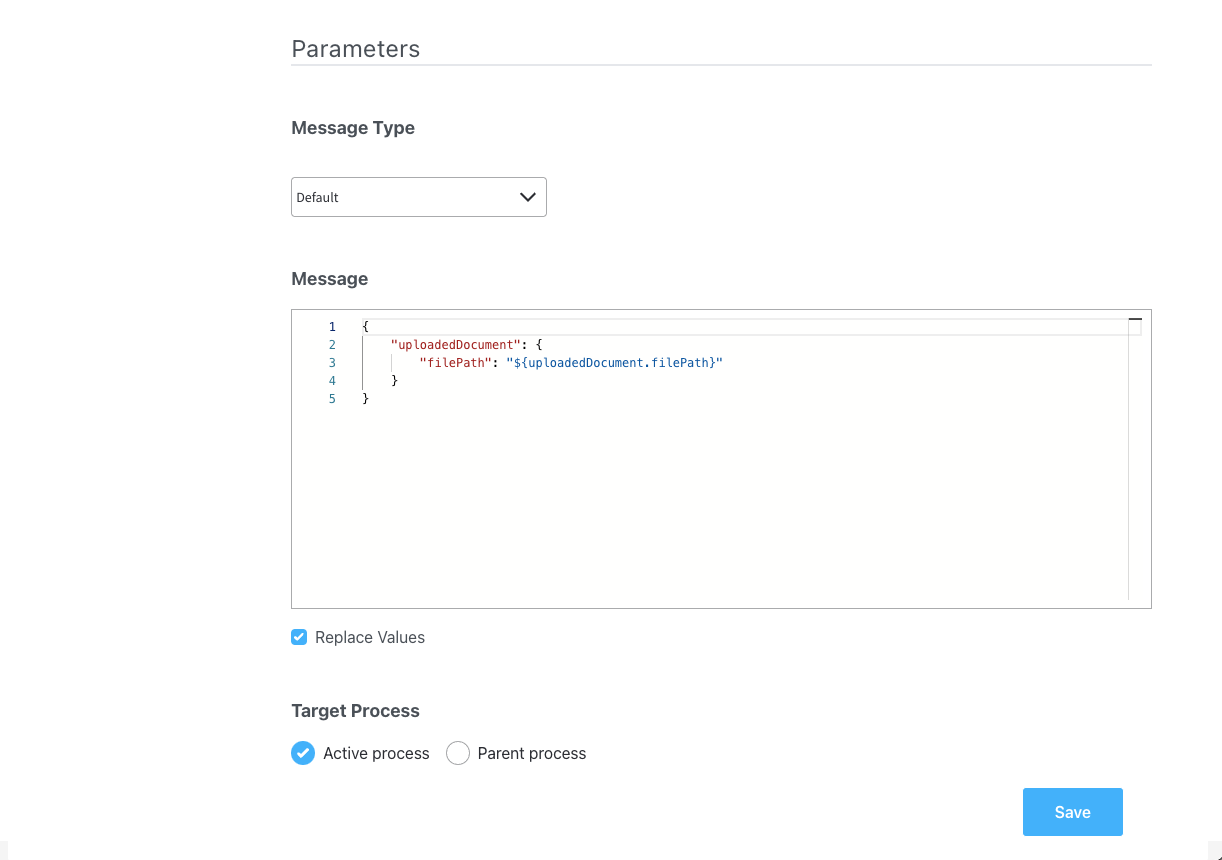
Parameters
- Message Type: Set to Default.
- Body Message: Populate the body of the message request; this object will be utilized to bind it to the document preview UI element.
- Target Process: Used to specify to what running process instance should this message be sent - set to Active Process.
Save Data
Configure the last node action to save all the data.Action edit
- Order: Set to 3.
- Action Type: Set to Save Data.
- Trigger Type: Choose Manual to allow user-triggered action.
- Required Type: Set as Mandatory.
Request message example
To initiate the document processing, a Kafka request with the following JSON payload will be sent through..in topic:
This an example of a message that follows the custom integration data model.
Response message example
Upon successful processing, you will receive a JSON response on the..out topic with details about the processed document:
Receiving the reply
The response, containing information about the generated and uploaded documents as mentioned earlier, is sent to the output Kafka topic defined in the Kafka Receive Event Node. The response includes details such as file IDs, document types, and storage paths.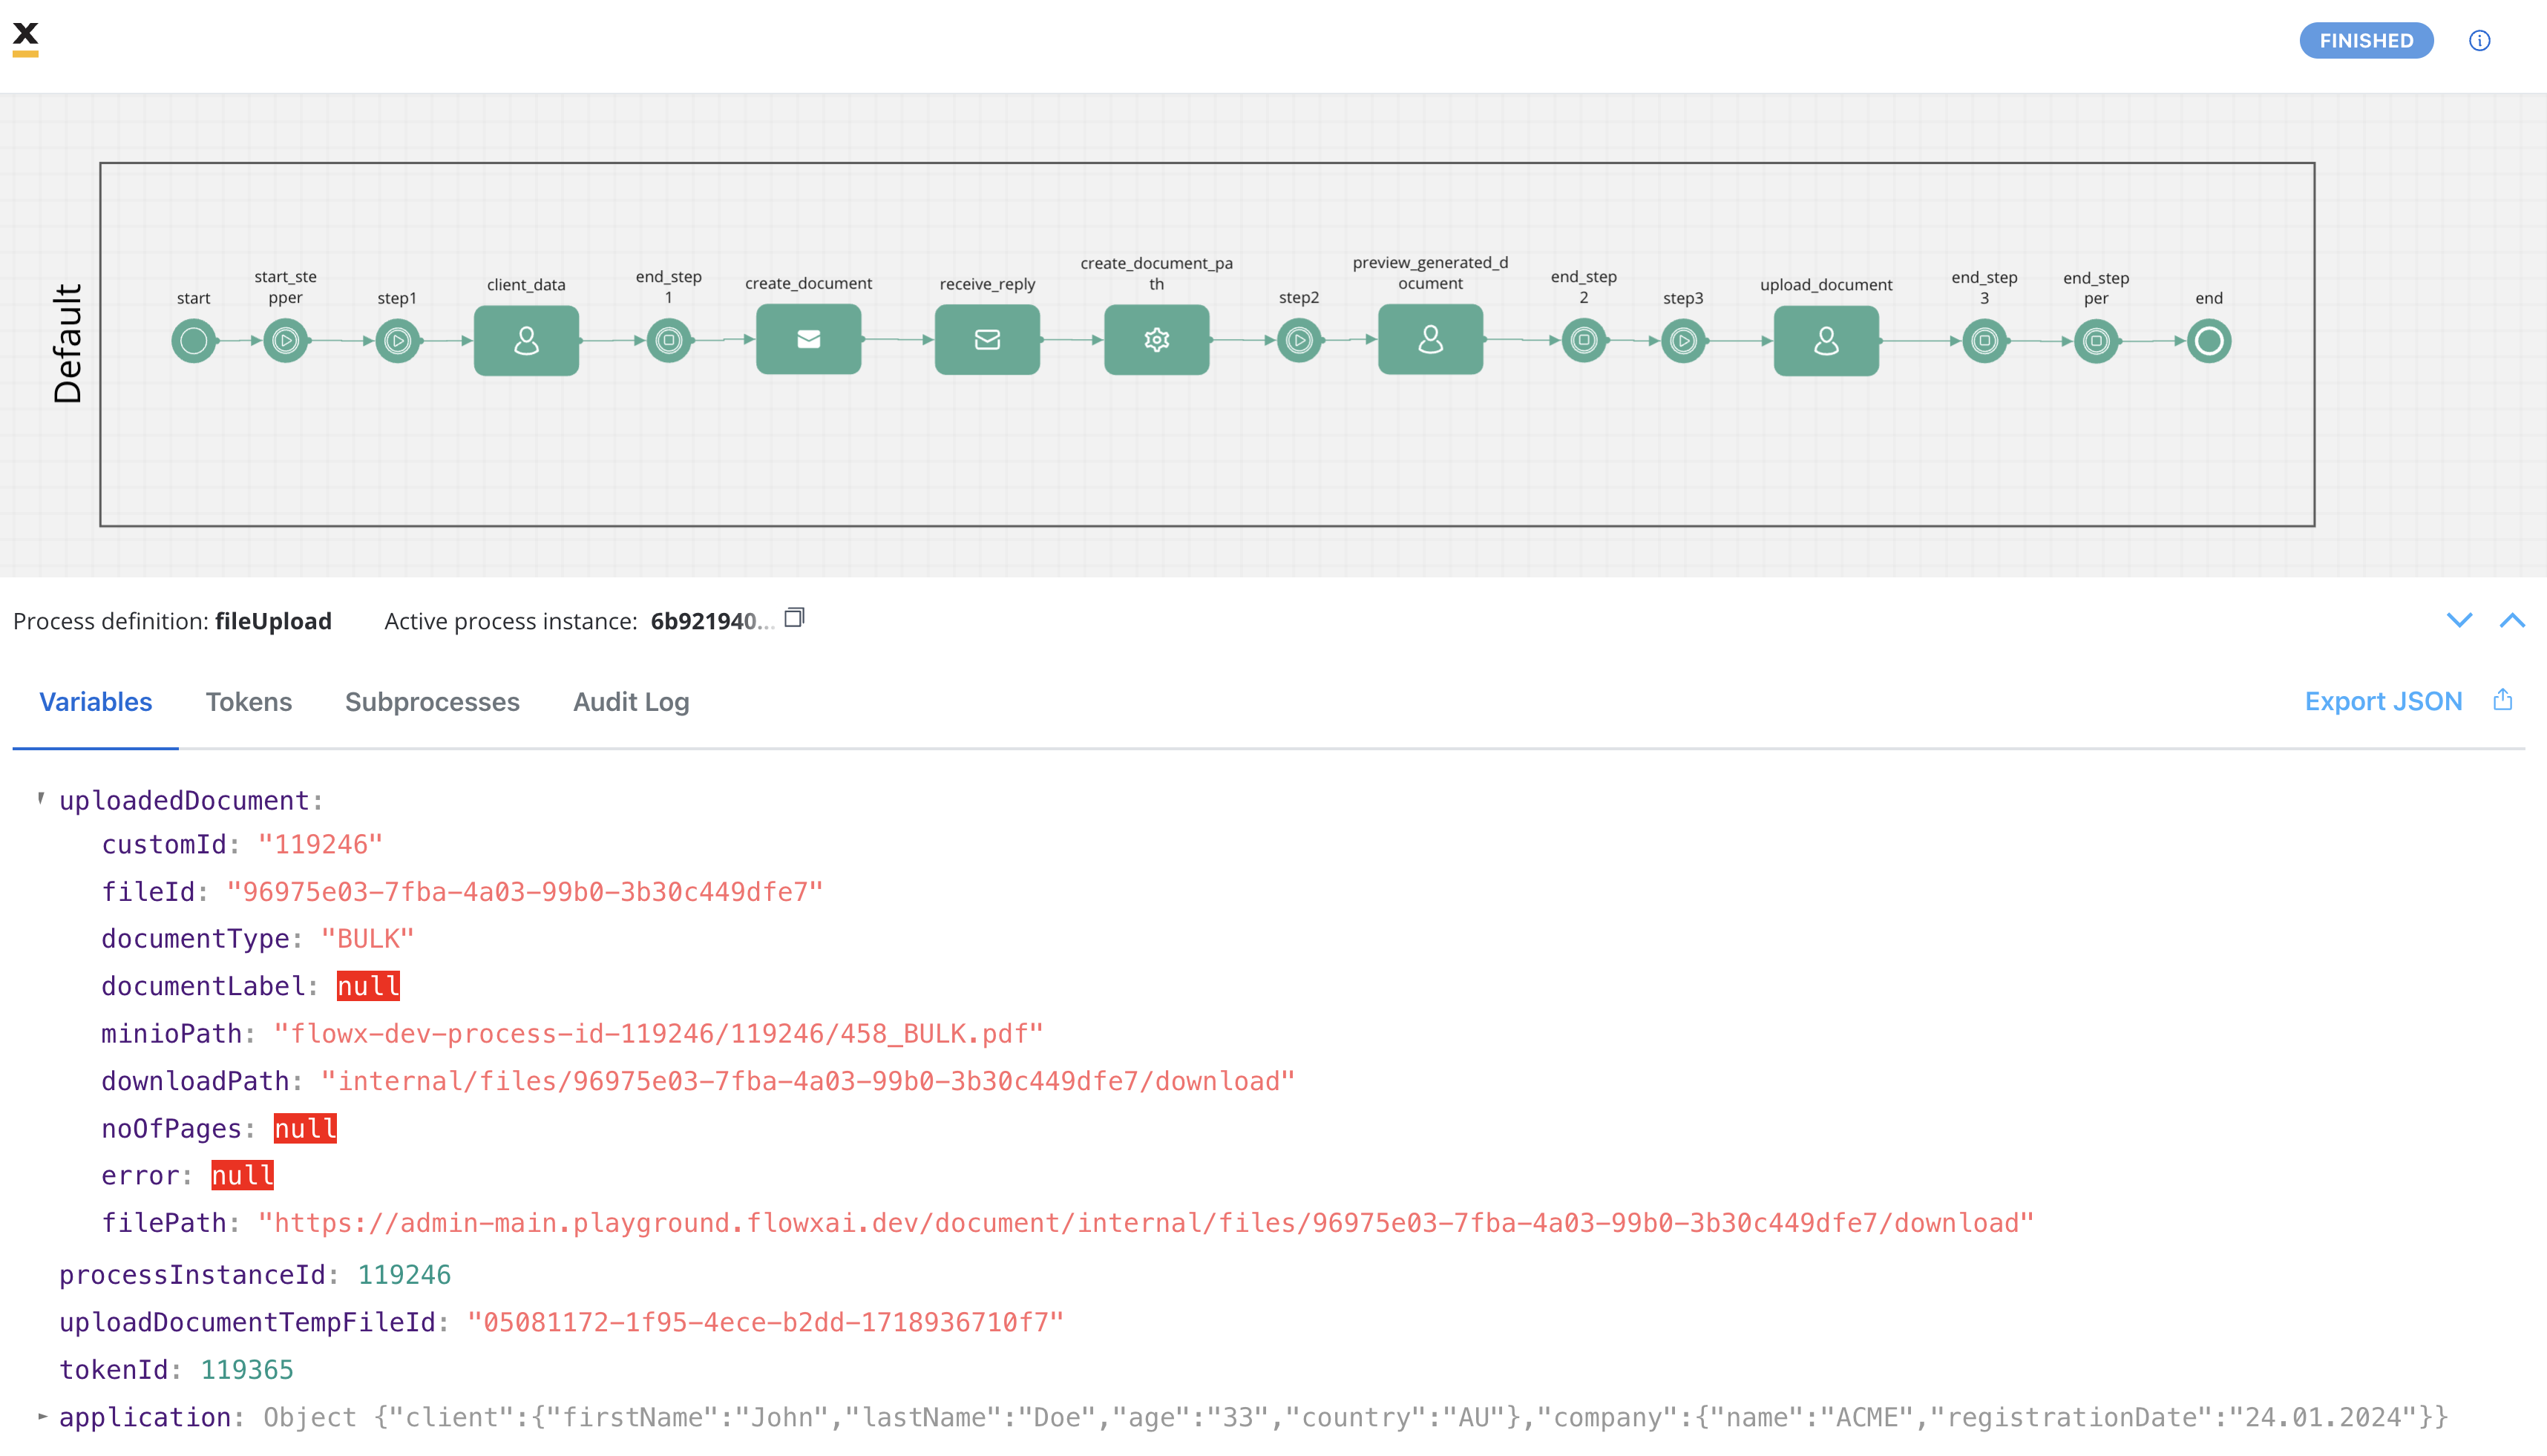 The reply body is expected to contain the following values:
- customId: A custom identifier associated with the document.
- fileId: The ID of the file.
- documentType: The document type.
- minioPath: The path where the uploaded file is saved. It represents the location of the file in the storage system, whether it’s a MinIO path or an S3 path, depending on the specific storage solution.
- downloadPath: The download path for the uploaded file. It specifies the location from where the file can be downloaded.
- noOfPages: The number of pages in the document (if applicable).
- filePath: The path to the file that we built in our example so we can display the document.