Before proceeding, make sure you understand how to send basic notifications.
Overview
This guide explains how to send emails with document attachments through the notification plugin. You’ll learn how to:- Configure email templates with dynamic content
- Reference generated documents as attachments
- Implement the complete email notification flow in your processes
Prerequisites
- A configured notification template (see Managing notification templates)
- Properly defined Kafka topics for the notification plugin
- Files to attach (such as generated documents or uploaded files)
Implementing email notifications with attachments
Let’s walk through a common scenario: sending a customer a copy of their account details document via email.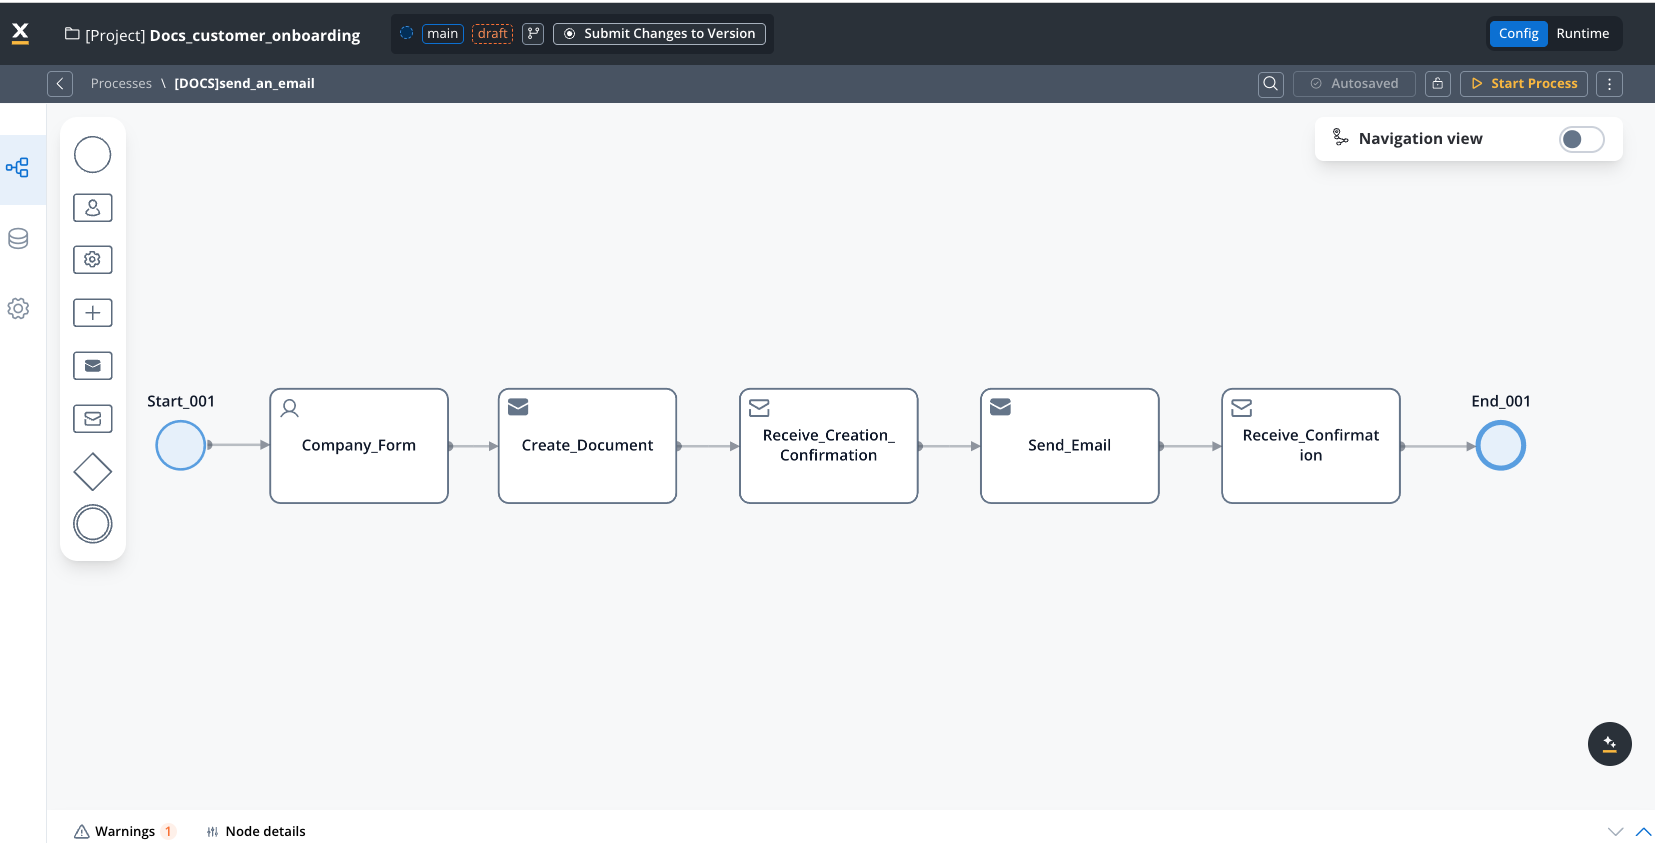
Document Generation
If you need to generate the document first, see the document generation guide.
Understanding document references
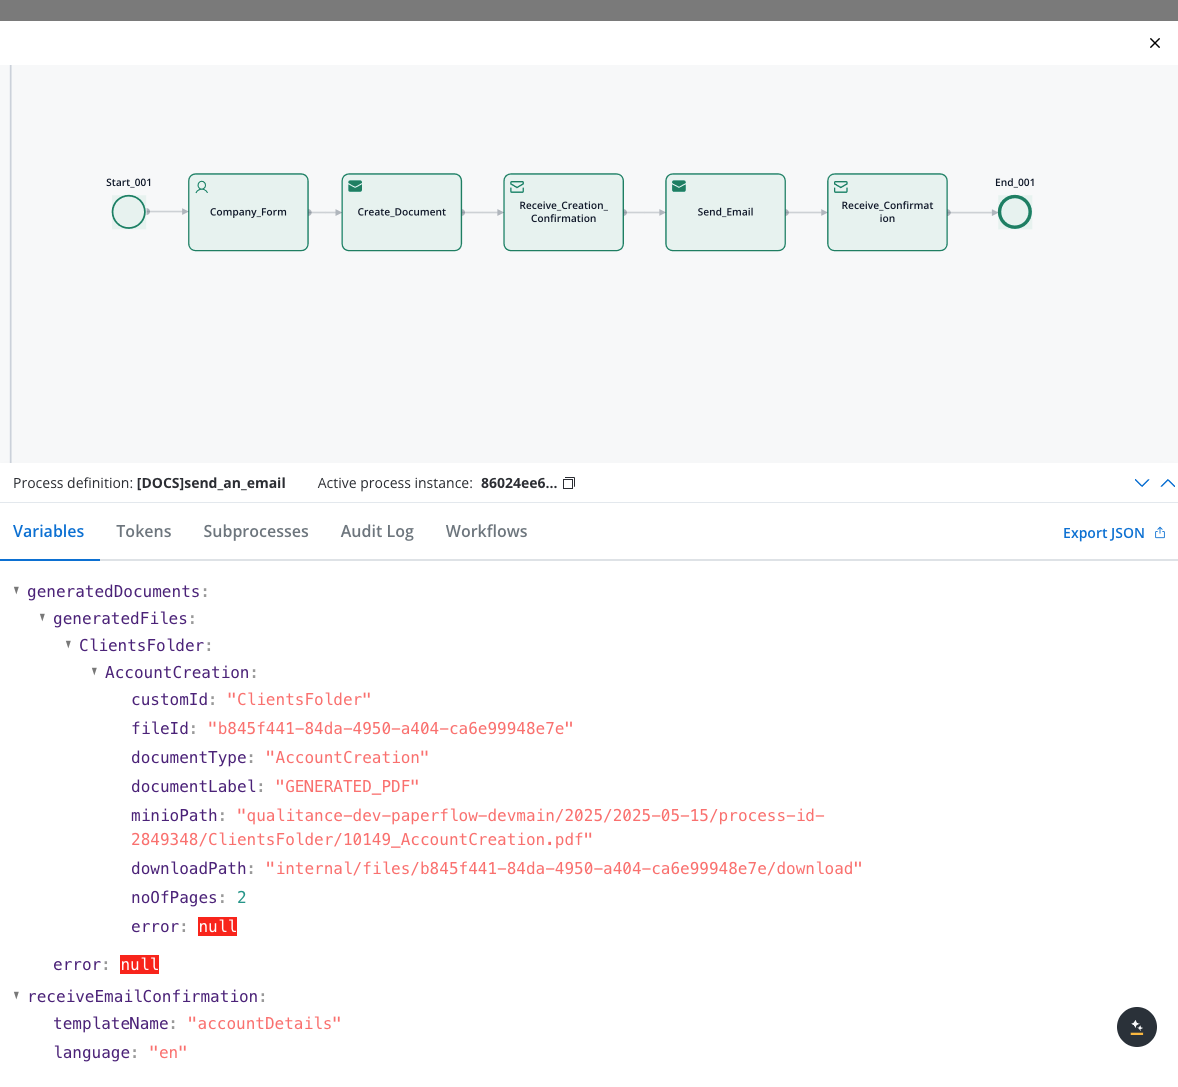
When you generate a document, as explained in the Generating documents guide, you need to reference two key pieces of information:- minioPath: The storage location of the generated document
- documentType: The type identifier used to create the attachment filename
- customId: “ClientsFolder”
- templateName: “AccountCreation”
You can verify these values in the process instance details: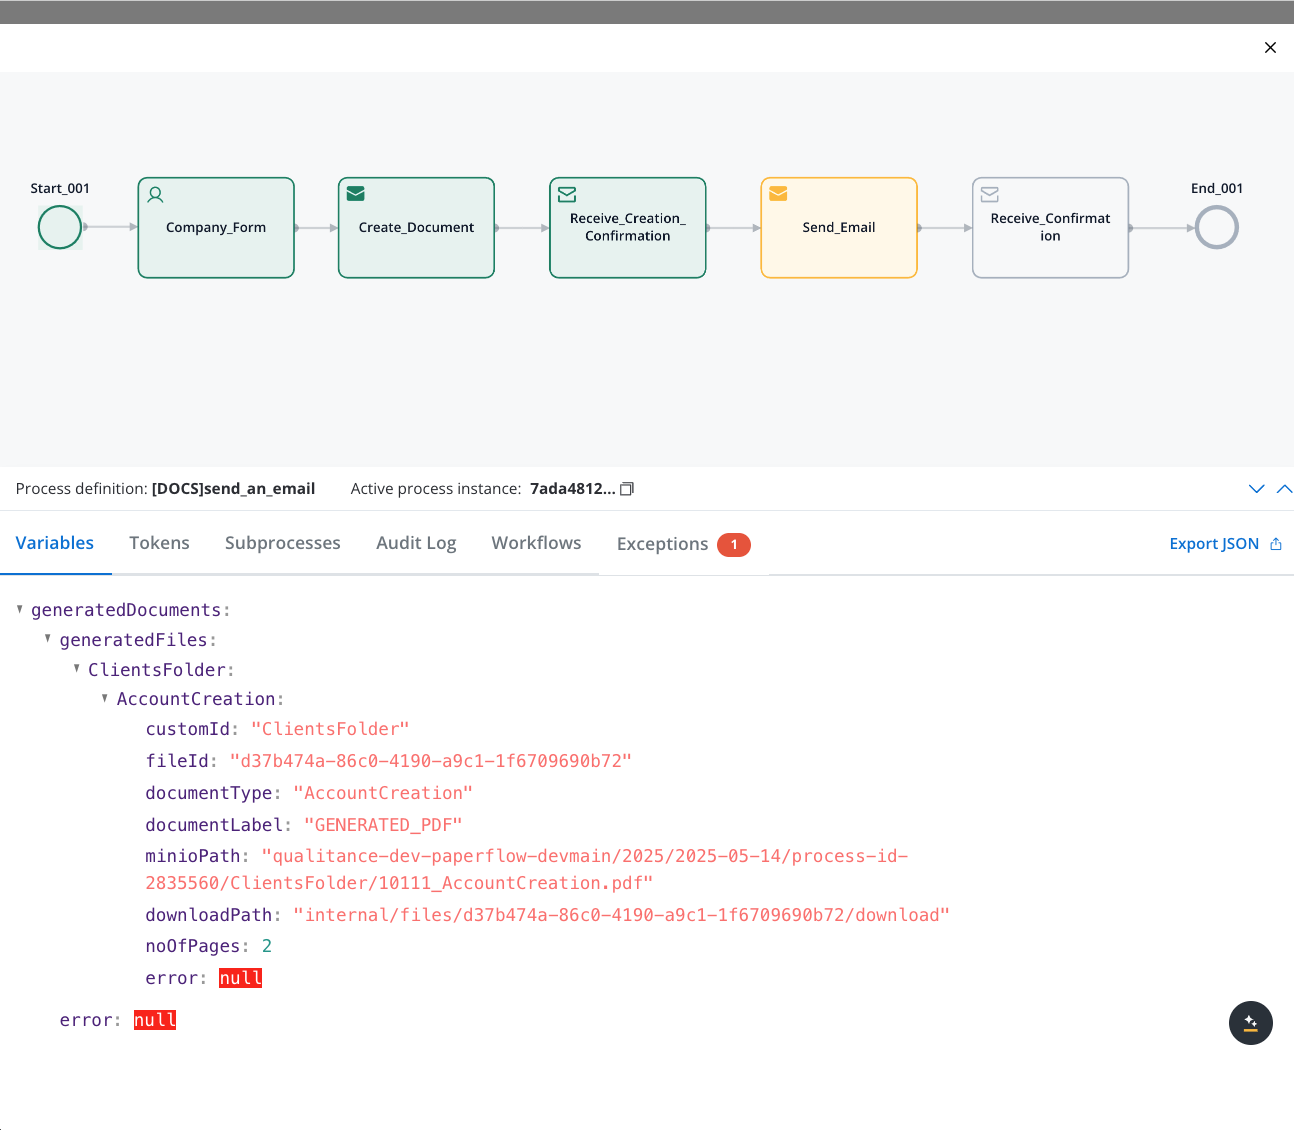
Step-by-step implementation
Prepare your email template (notification template)
Configure the template you’ll use for the email: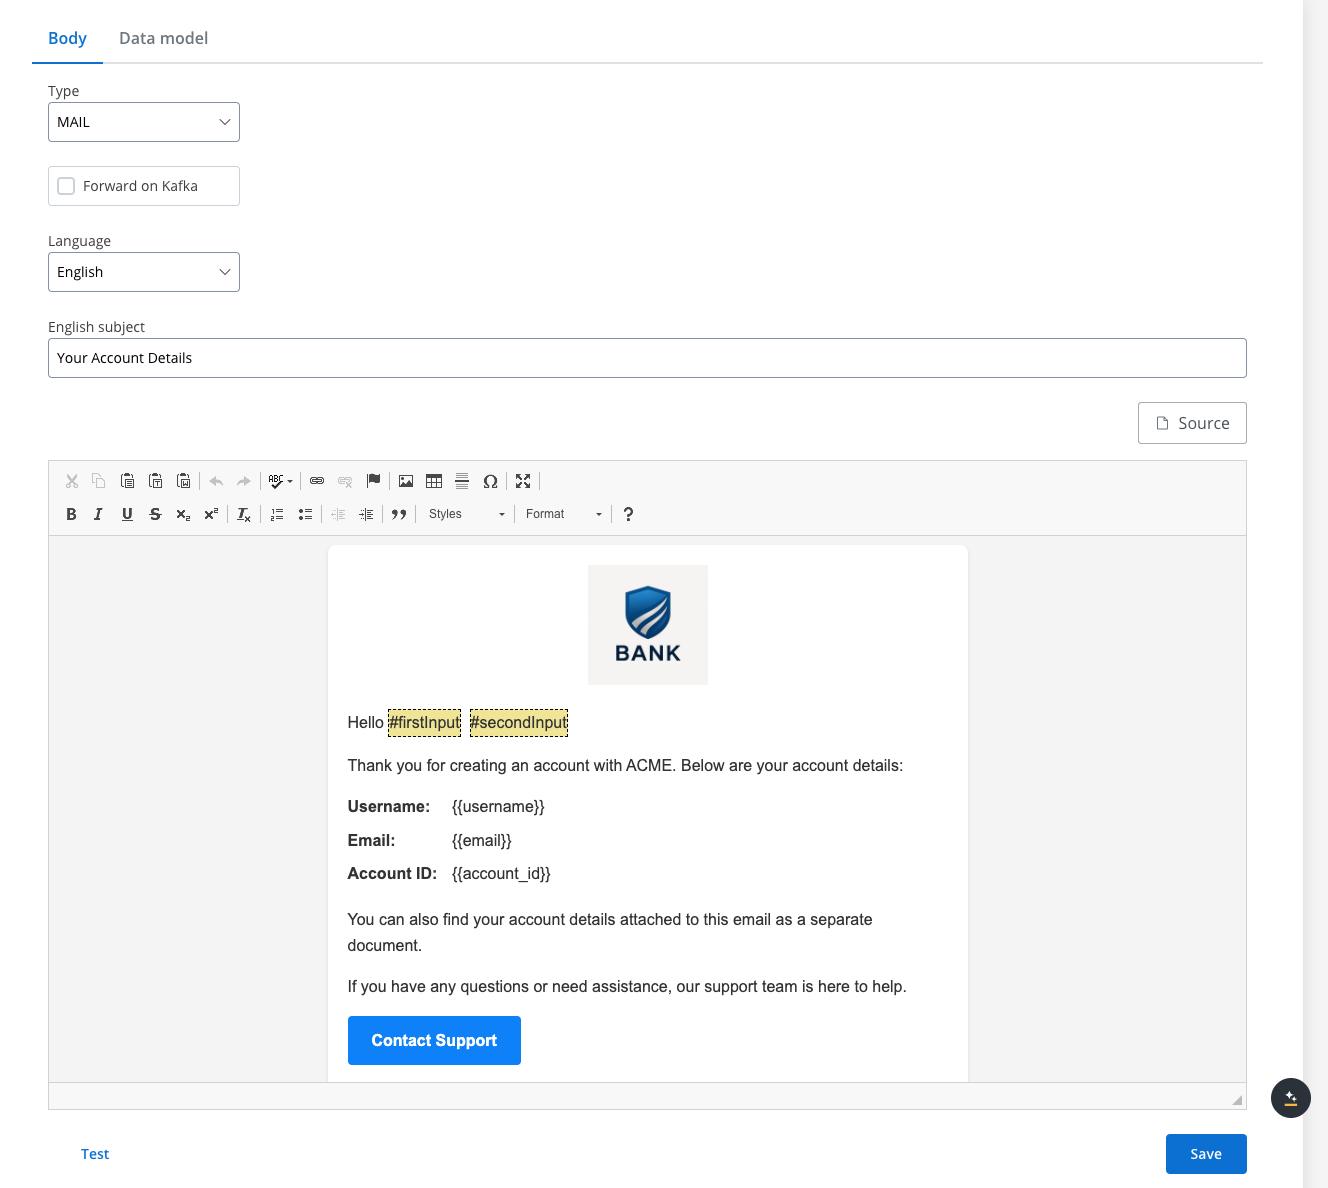 See Managing notification templates for detailed instructions.
- Define subject line, body text, and placeholders for dynamic content
- Set proper HTML formatting if needed
- Test the template to ensure it displays correctly
Verify Kafka topic configuration
Confirm that the required Kafka topics are properly defined:
- Navigate to FlowX Designer → Platform Status
- Select notification-plugin-mngt
- Expand kafkaTopicsHealthCheckIndicator → details → configuration → topic → notification → internal
- Verify that the input and output topics for email notifications are listed
Add a Send Message Task (Kafka) and Receive Message Task (Kafka)
In your process definition: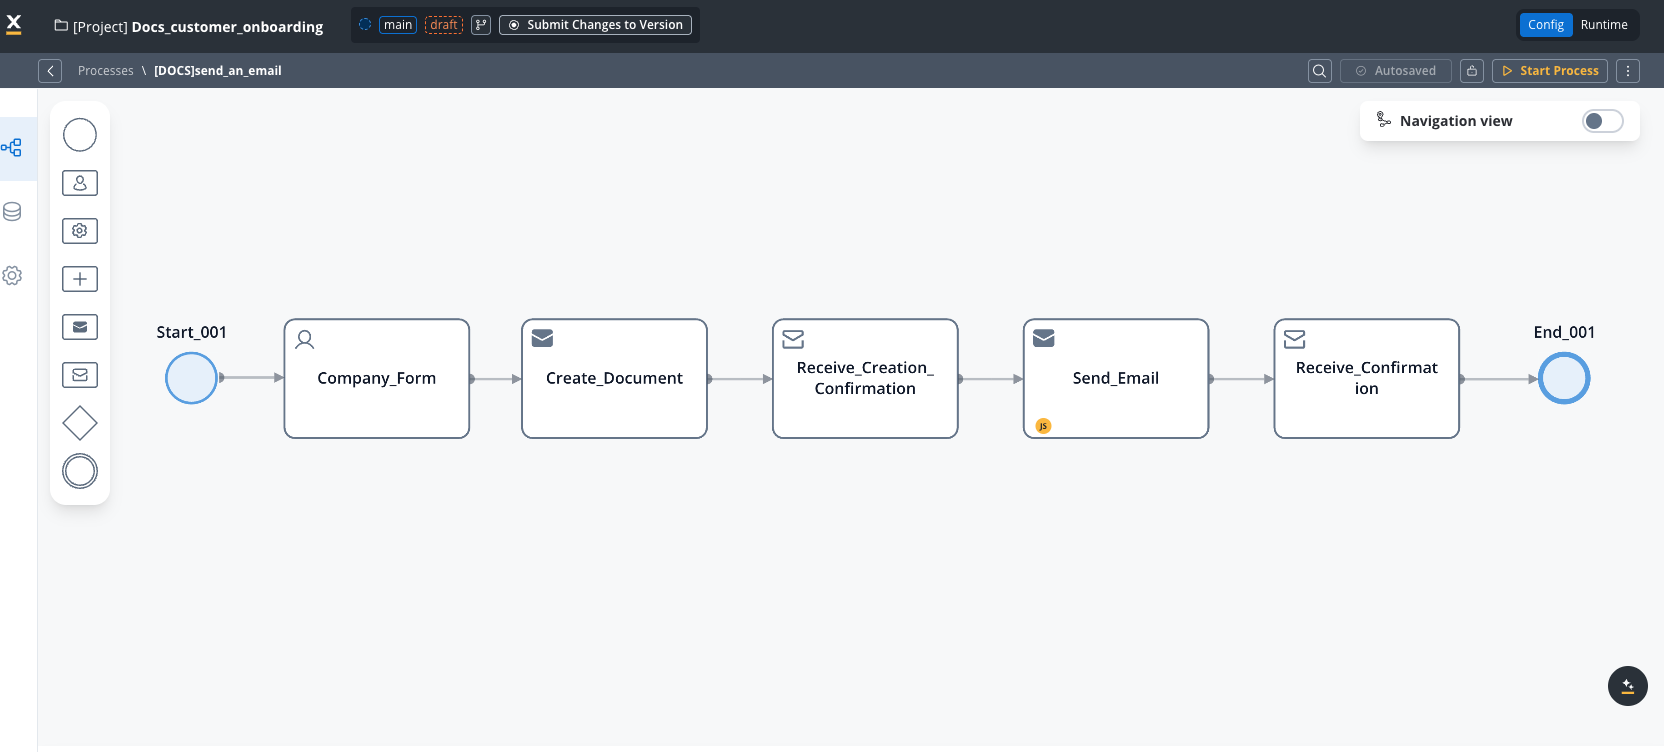
- Open the process definition in your project in FlowX Designer
- Add a Send Message Task (Kafka) after the document generation step
- Add a Receive Message Task (Kafka) after the Send Message Task
Configure the email request payload (Send Message Task)
On the Send Message Task, add a Kafka send action, add the corresponding kafka topic and create the JSON payload containing all information needed for the email: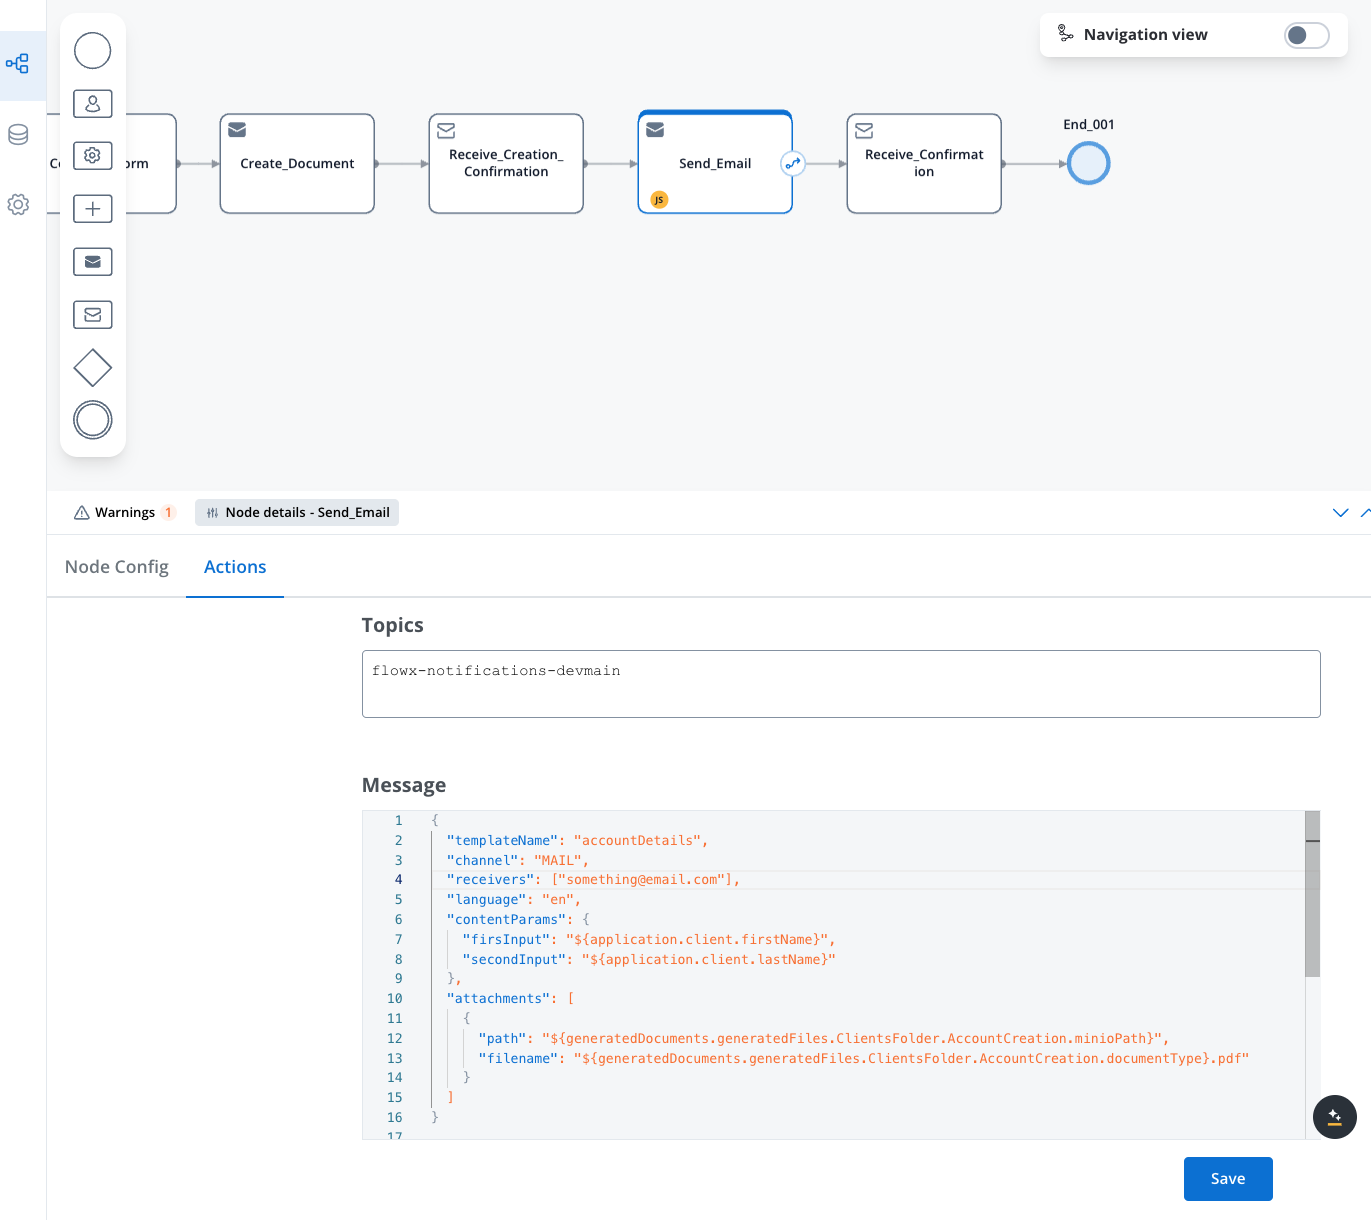 Key parameters:
- templateName: The name of your configured email template
- language: The language code matching your template’s language version
- receivers: Array of email addresses (can use process data variables)
- contentParams: Values to replace template placeholders
- attachments: Array of files to attach, with filename and minioPath/storage path
Configure the email success handler (Receive Message Task)
On the Receive Message Task, add a Kafka receive action, add the corresponding kafka topic and configure the node with the following properties: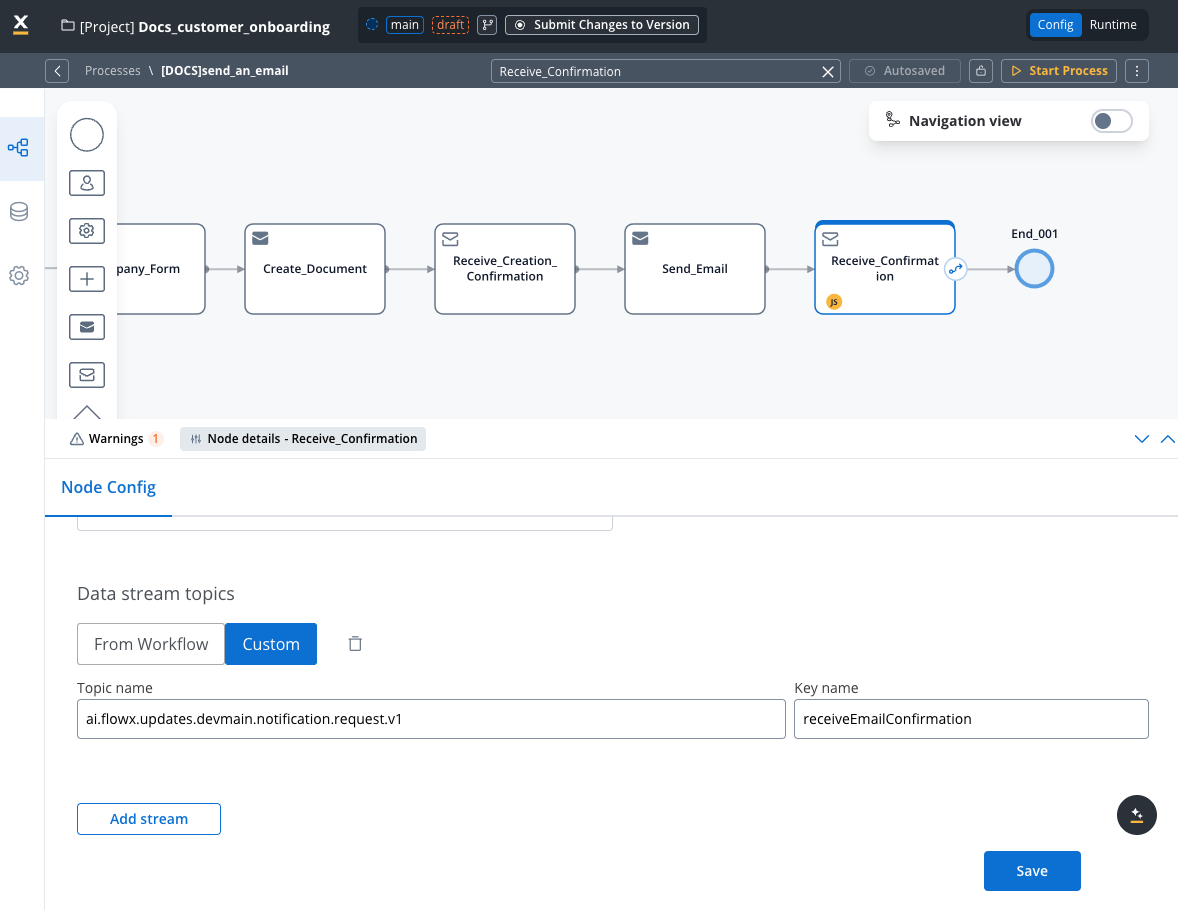
- Go to Node config tab
- Under Data stream topics select Custom
- Add the topic name
- Click Save
Request payload reference
Required fields
| Field | Description | Example |
|---|---|---|
| templateName | The unique identifier of your email template | ”accountDetails” |
| channel | The delivery channel (use “MAIL” for email) | “MAIL” |
| language | Language code (must match a template language) | “en” |
| receivers | List of email addresses to receive the message | [“customer@example.com”] |
Optional fields
| Field | Description | Example |
|---|---|---|
| contentParams | Key-value pairs for template variable replacement | {"firstName": "John"} |
| attachments | List of files to attach to the email | See below |
Attachment structure
Each attachment requires:- path: References the storage location (usually a MinIO path from document generation)
- filename: The name recipients will see for the attached file (can include process variables)
Testing and troubleshooting
After configuring your email notification:- Verify that variables resolve correctly in the template and attachment references
- Check email delivery to test recipients
- Review notification plugin logs if issues occur
Common issues
| Problem | Solution |
|---|---|
| Email not received | Verify template name, receiver address, and SMTP configuration |
| Missing attachment | Check that the MinIO path is correct and the file exists |
| Template errors | Ensure all variables in template have corresponding values in contentParams |
| Variable resolution | Confirm process variables use the correct path (check in process instance view) |