Configuring the notification process
To configure a business process that sends notifications, follow these steps:- Create or edit a notification template in FlowX Designer
- Design your BPMN process in Process Designer with:
- Configure required node actions
- Set up the request body parameters
The notification process uses Send message task/receive message task nodes to manage communication between components.

DEVELOPER NOTE: Ensure that Kafka topics are properly configured in your environment by setting these variables:
KAFKA_TOPIC_NOTIFICATION_INTERNAL_IN(default:ai.flowx.plugin.notification.trigger.send.notification.v1) - Topic for notification requestsKAFKA_TOPIC_NOTIFICATION_INTERNAL_OUT(default:ai.flowx.engine.receive.plugin.notification.confirm.send.notification.v1) - Topic for notification responses
Send notification request body parameters
Your notification request must include these parameters:| Key | Definition | |
|---|---|---|
| templateName | The name of the notification template to use | Mandatory |
| channel | Notification channel: SMS/MAIL | Mandatory |
| receivers | Notification recipients: email addresses or phone numbers | Mandatory |
| language | The language code of the template to use (e.g., “en”, “fr”) | Mandatory |
| contentParams | Parameters for filling the template with dynamic content | Optional |
| senderEmail | Email address of the notification sender | Optional |
| senderName | Name of the notification sender | Optional |
| attachments | Files to attach to the notification (only for MAIL notifications) | Optional |
Using dynamic keys
Notifications support dynamic keys (placeholders) that allow for personalized content:- Dynamic keys use the syntax
${...}to insert data from the process context - The system fetches corresponding values from the specified data path
- This approach eliminates hardcoding and supports personalized content
- Example:
${application.client.firstName}retrieves and displays the client’s first name
Implementation example
Let’s implement a welcome email notification for new customer onboarding.Create a notification template
First, create and configure your welcome email template. See Managing notification templates for detailed instructions.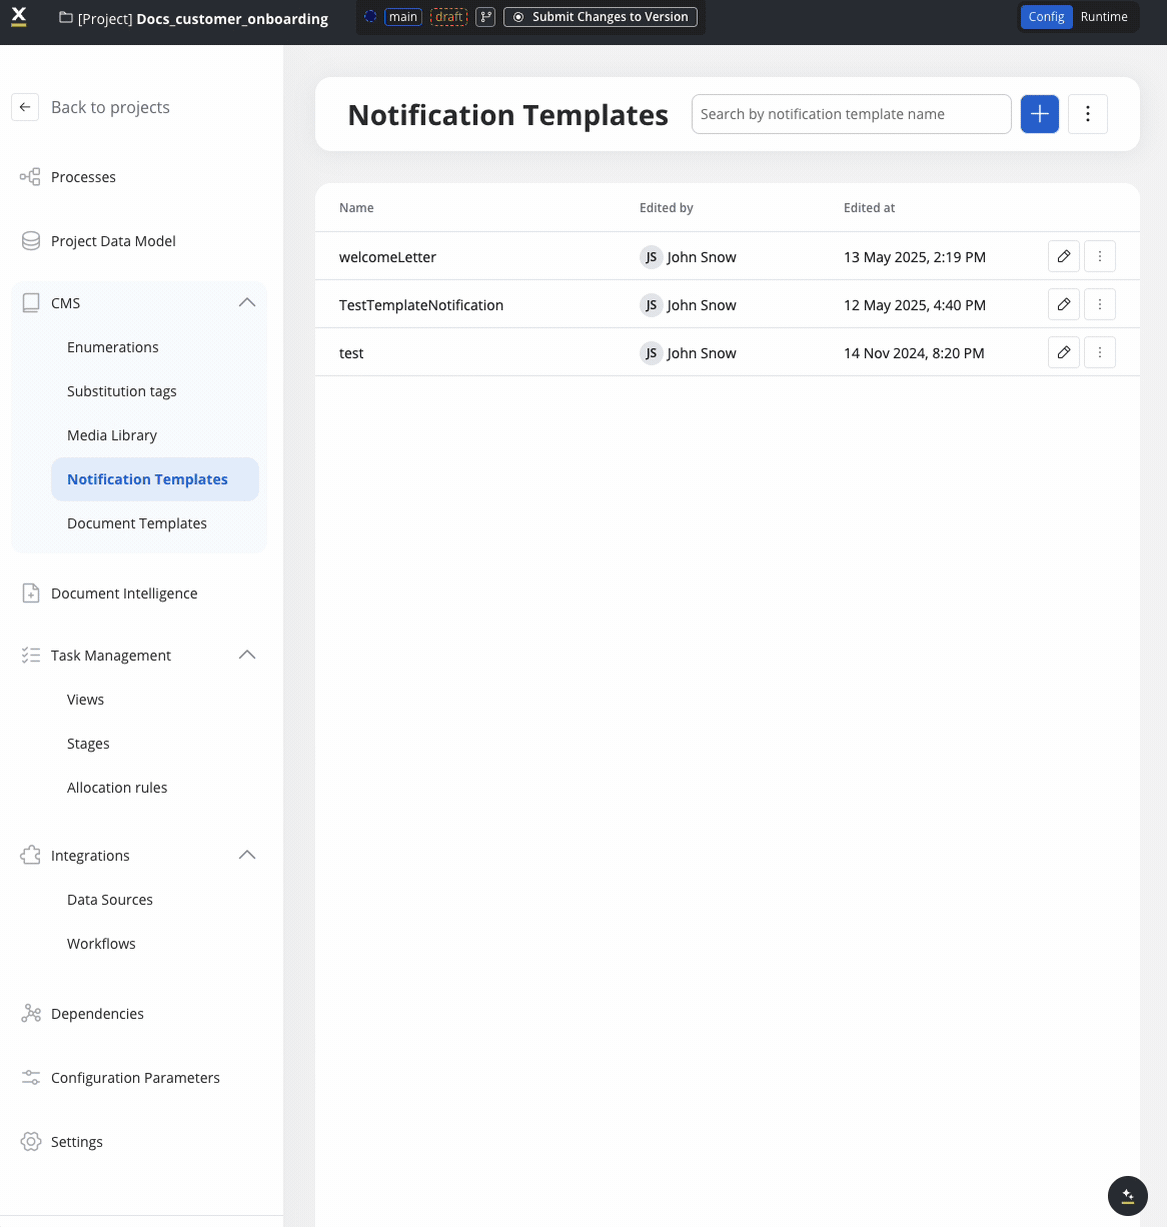 With notification templates, you can:
With notification templates, you can:- Set up subjects and body content with a WYSIWYG editor
- Add dynamic fields using the data model to include recipient-specific information
- Define multiple language versions of the same template
- Configure notification types and delivery channels
Design the BPMN process
Inside your project, create a process definition with: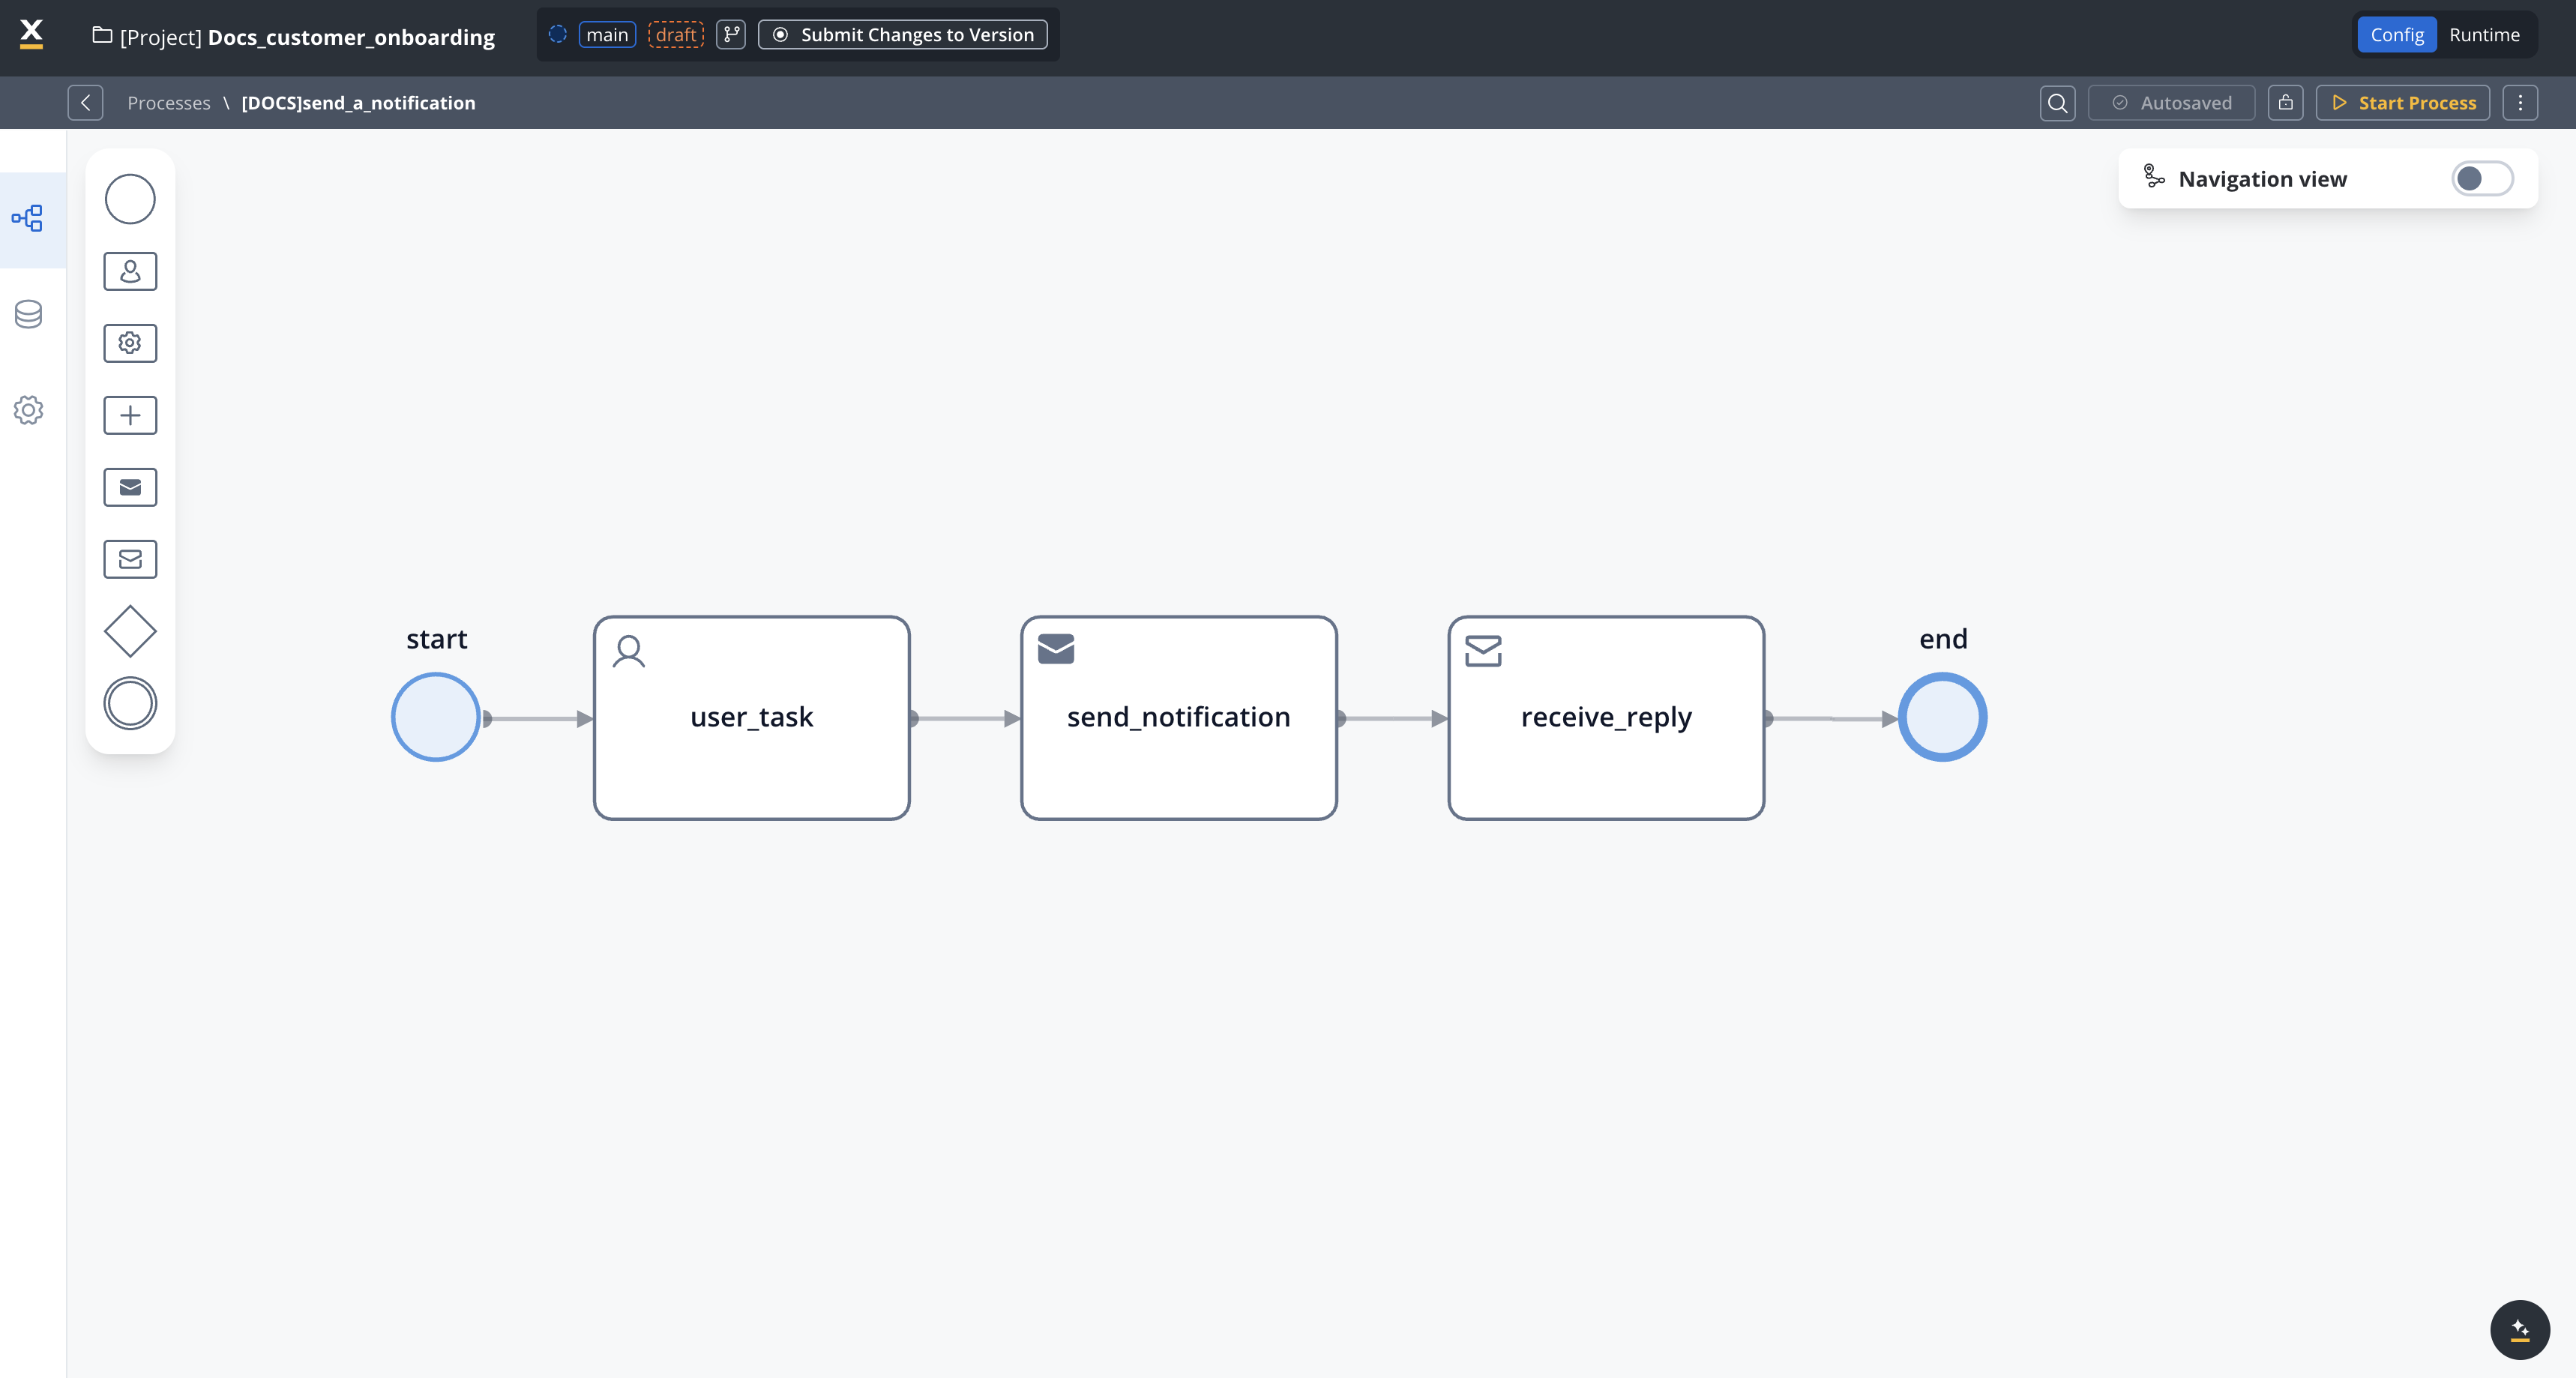
- A User Task to capture the recipient’s email address and other user inputs if needed
- A Send Message Task
- A Receive Message Task
Configure the send message task
On the send message task, add a Kafka send action with the following settings: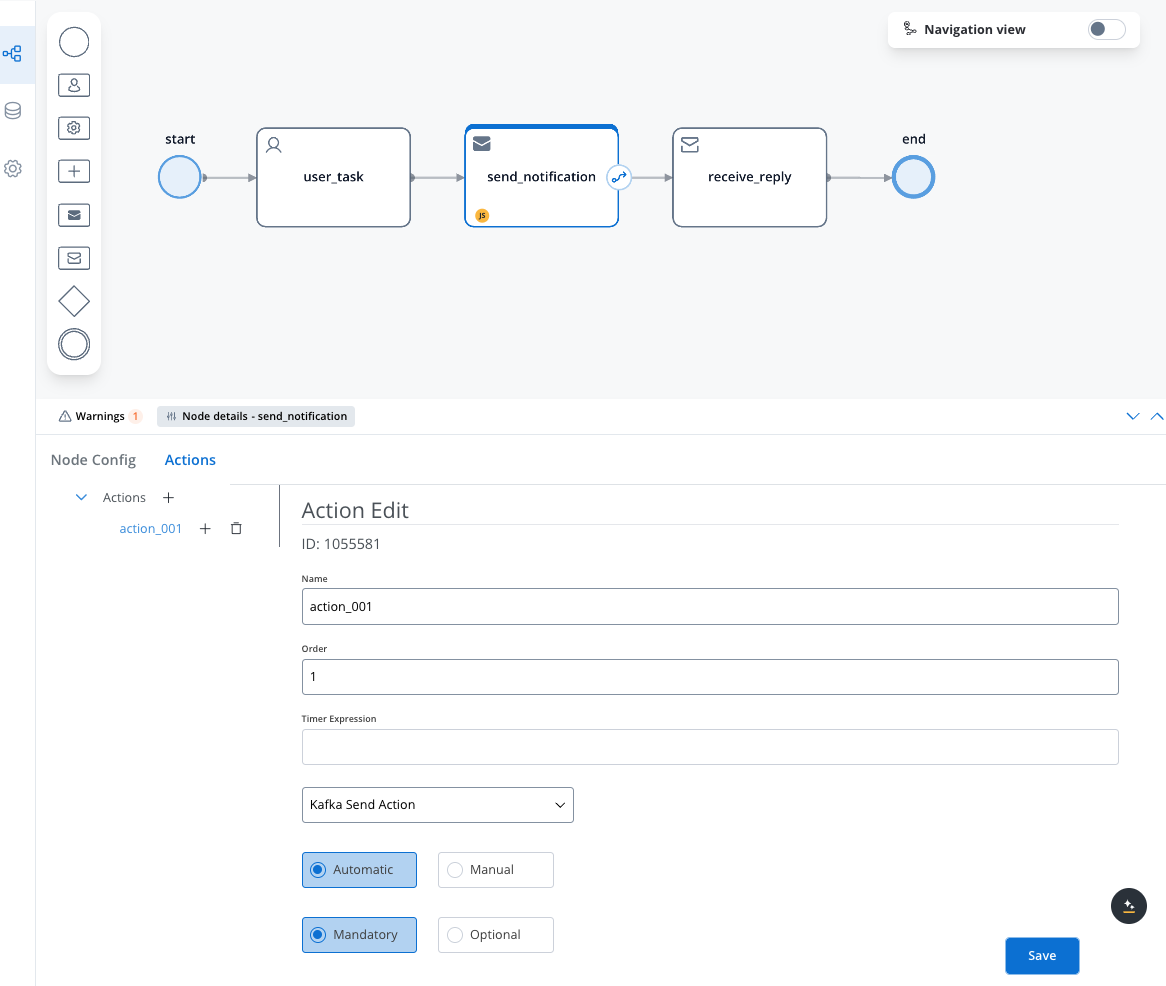
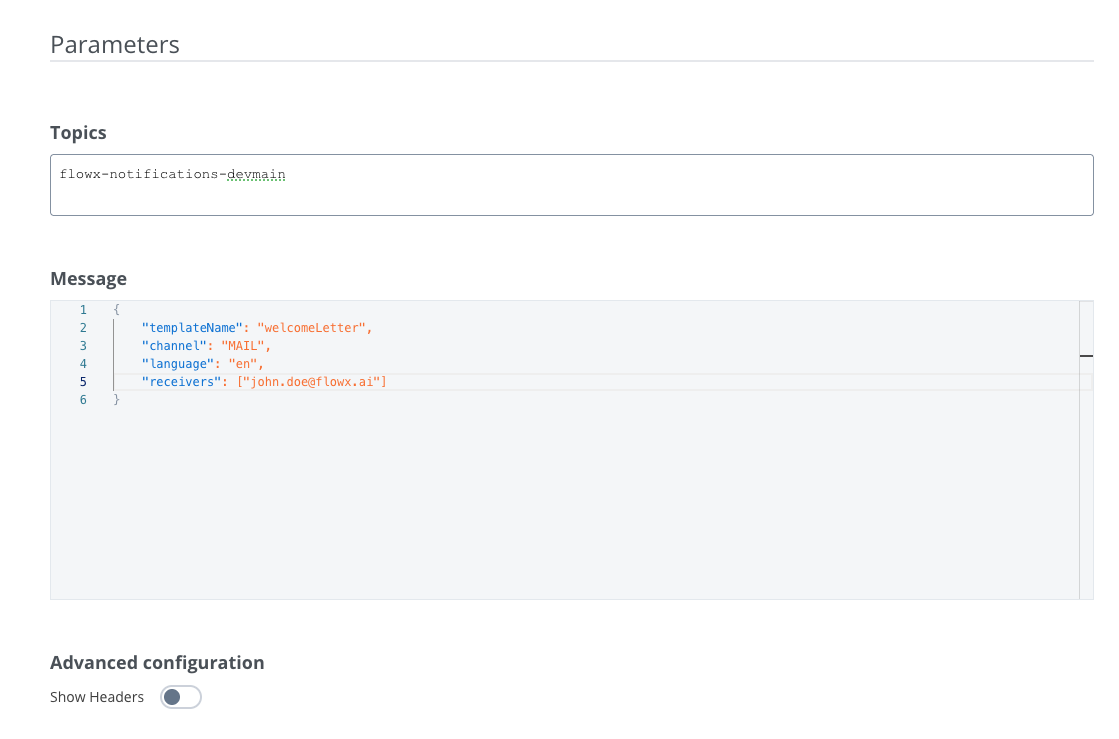
- Topics:
- Use the value from
KAFKA_TOPIC_NOTIFICATION_INTERNAL_INenvironment variable - Example (in our case):
flowx-notifications-devmain
- Use the value from
To find defined topics in your environment: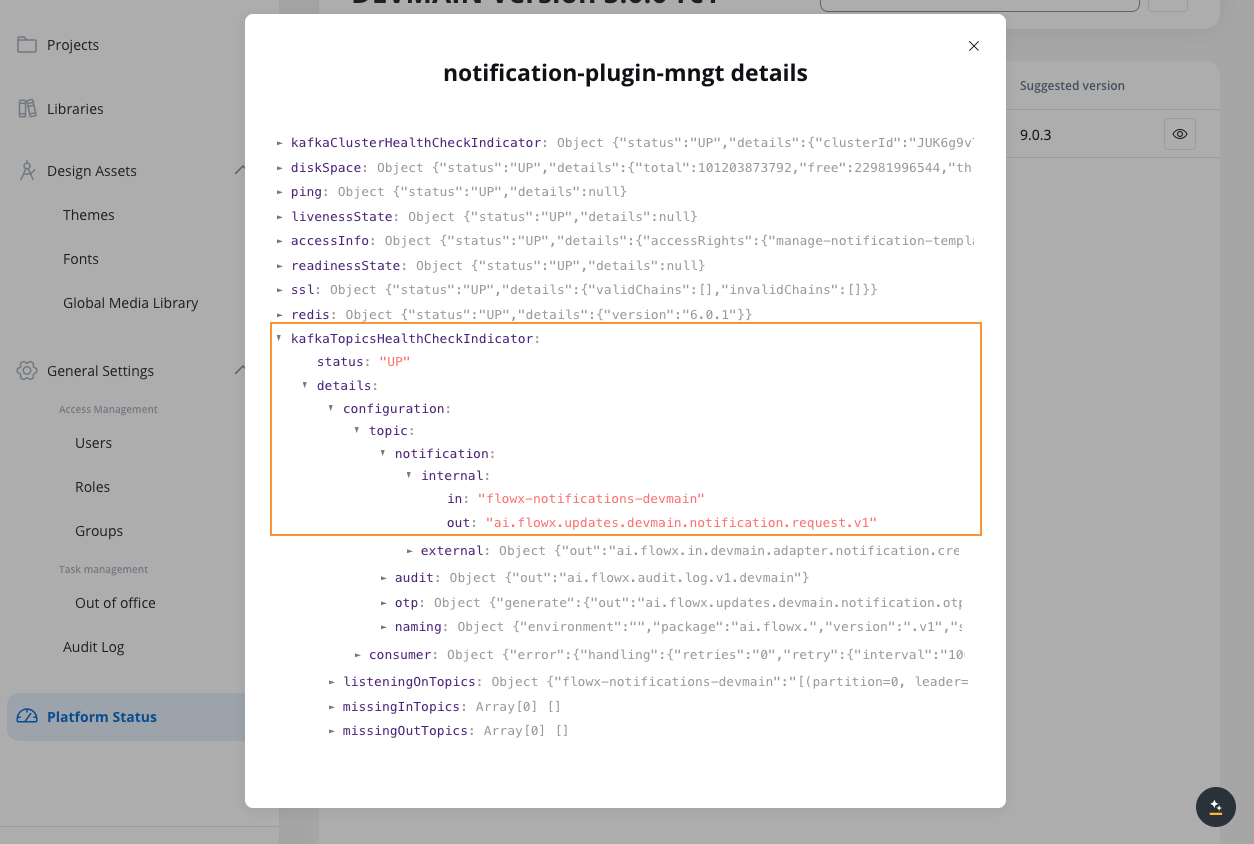
- Navigate to FlowX Designer > Platform Status
- Select notification-plugin-mngt
- Open kafkaTopicsHealthCheckIndicator > details > configuration > topic > notifications
- Message (expected parameters):
- templateName (string)
- channel (string)
- language (string)
- receivers (array) - usually extracted from process context but also can be a static value
- Can include:
contentParams(object) for dynamic content,attachments(array) for emails
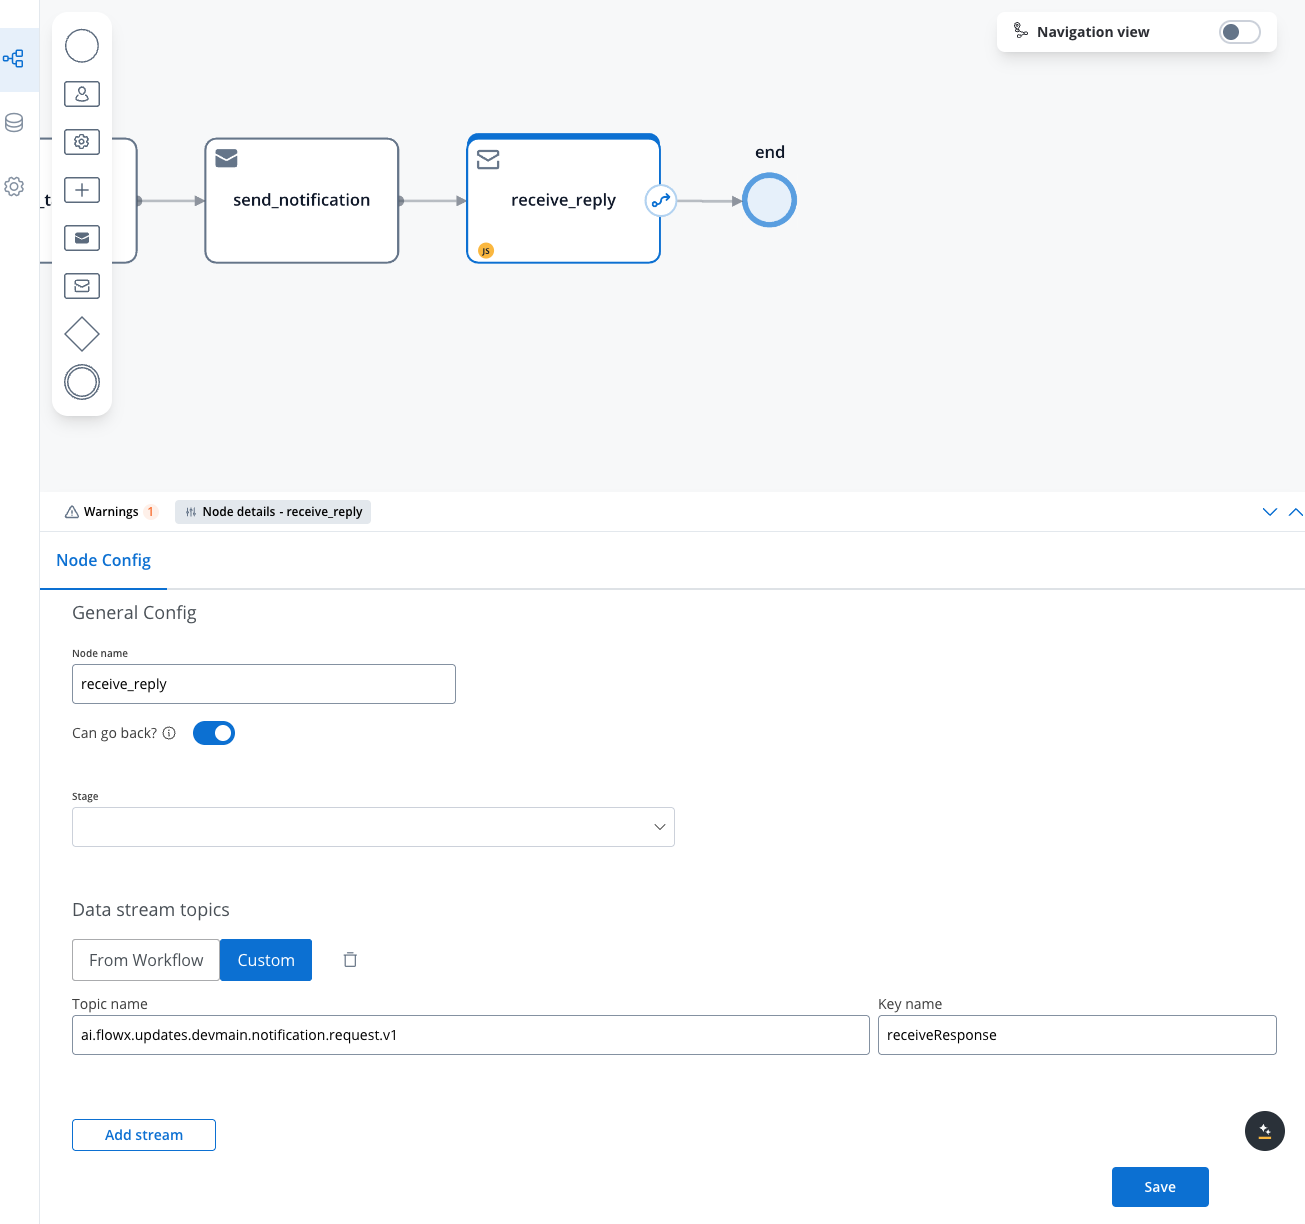
Configure the receive message task
- On the receive message task, add a data stream topic where you will receive the confirmation that the notification was sent:
- Data stream topics:
- Use the value from
KAFKA_TOPIC_NOTIFICATION_INTERNAL_OUTenvironment variable - Example (in our case):
ai.flowx.updates.devmain.notification.request.v1
- Use the value from
- Data stream topics:
- On your Receive Message Task node, click on the Node Config tab.
- Then under Data stream topics click Add stream.
- Select Custom and enter the topic name from the
KAFKA_TOPIC_NOTIFICATION_INTERNAL_OUTenvironment variable. - Add a key where you will see the response added to the process instance.
- Click Save.
To find the corresponding data stream topic in your environment follow the same steps as in the previous step
Run and verify the process
Execute the process and verify the results by: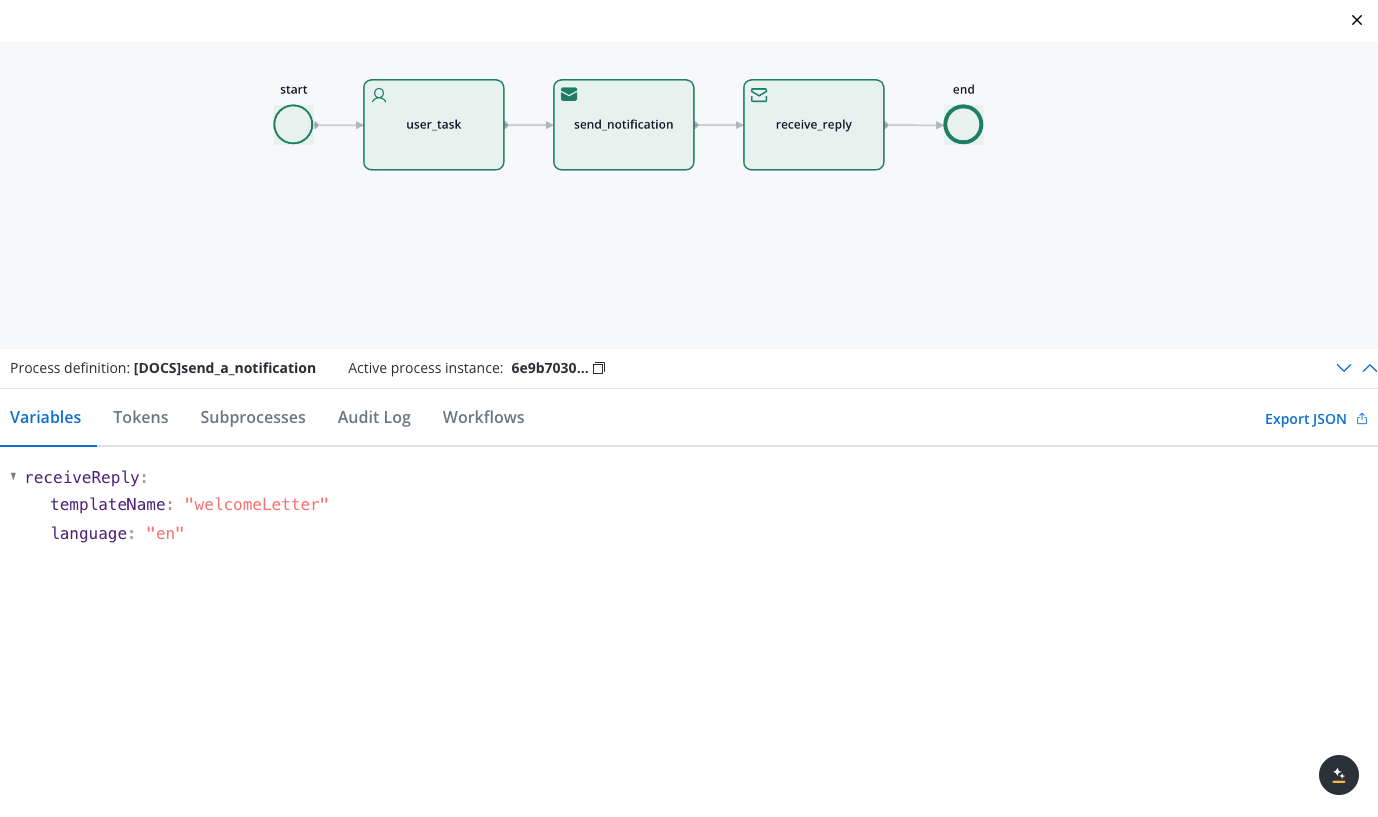 When successful, you’ll receive a response on the
- Checking the audit log
- Checking the process instance status
- Monitoring responses on the
KAFKA_TOPIC_NOTIFICATION_INTERNAL_OUTtopic
When successful, you’ll receive a response on the KAFKA_TOPIC_NOTIFICATION_INTERNAL_OUT topic similar to this:Integration with document generation
You can enhance your notifications by attaching dynamically generated documents. To accomplish this: Set up document templates using the Document Plugin Generate documents in your process before sending the notification Reference the generated documents in the notification request using dynamic keys:Troubleshooting
Missing Kafka topics
Missing Kafka topics
Ensure that all required Kafka topics are properly configured in your environment variables. Check the Platform Status screen for confirmation that topics are available and accessible.
Notification not received
Notification not received
Verify that the receiver information is correct and that your template is properly configured. Check the audit log for any error messages in the notification response.
Template rendering issues
Template rendering issues
If your notification is sent but doesn’t display properly, check that all template variables are correctly defined and that the contentParams in your request match the expected template variables.
Dynamic key not resolving
Dynamic key not resolving
If a dynamic key isn’t displaying the expected value, verify the path is correct and that the data exists in the process context. Dynamic keys are case-sensitive and must match the exact path to the data.
Attachment problems
Attachment problems
For issues with attachments, ensure the document was successfully generated and stored before attempting to attach it. Check that the path and filename are correctly specified in the attachment configuration.