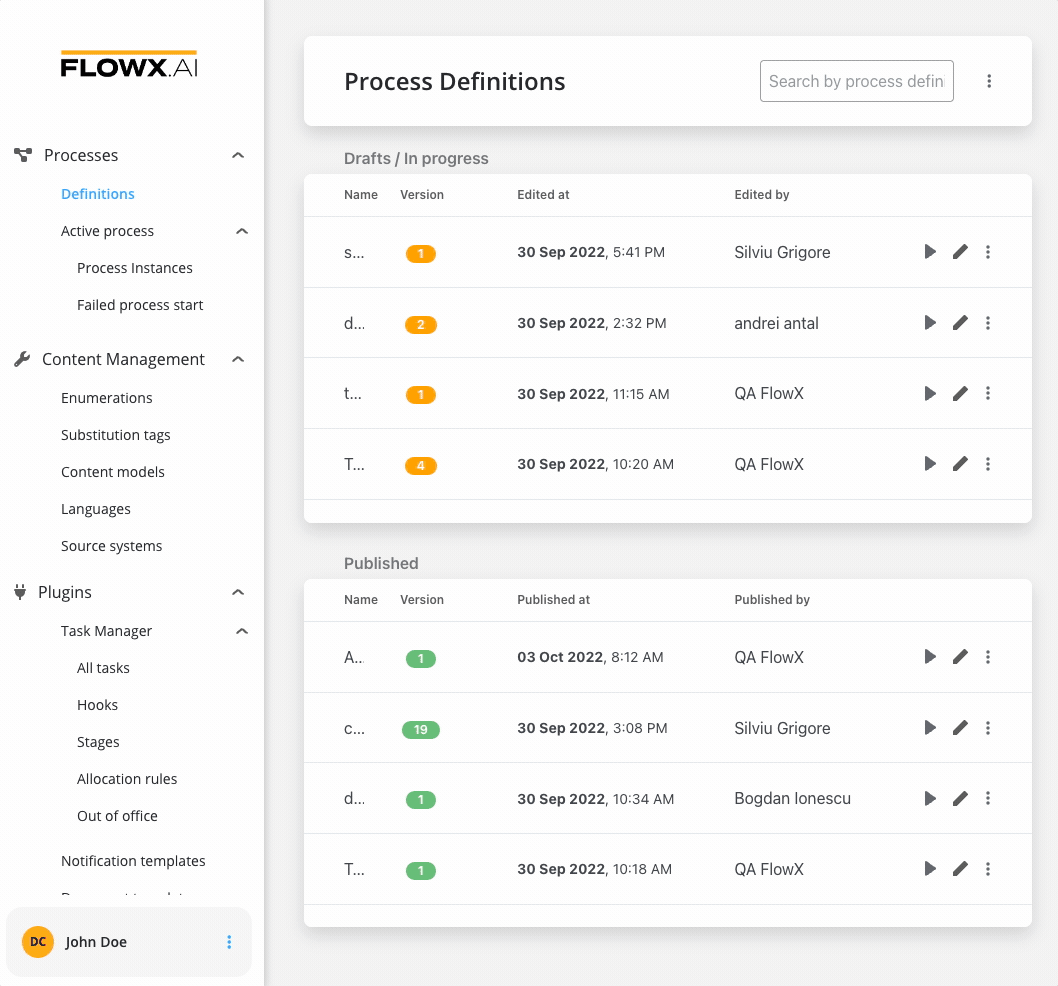
These templates can be easily configured using the What you see is what you get (WYSIWYG). You can create and manage your templates by accessing the Document Templates section in FlowX Designer.
Generating documents from HTML templates
The Documents plugin simplifies the document generation process through predefined templates. This example focuses on generating documents using HTML templates.Prerequisites
- Access permissions: Ensure that you have the necessary permissions to manage documents templates (more details, here). The user account used for these operations should have the required access rights.
-
Kafka configuration: Verify that the Kafka messaging system is properly configured and accessible. The documents plugin relies on Kafka for communication between nodes.
- Kafka topics: Familiarize yourself with the Kafka topics used for these operations (later in this section)
Creating an HTML template
To begin the document generation process, HTML templates must be created or imported. Utilize the WYSIWYG editor accessible through FLOWX Designer → Plugins → Document templates. Learn more about managing HTML templates:Managing HTML templates
Before using templates, ensure they are in a Published state. Document templates marked as Draft/In Progress will not undergo the generation process.
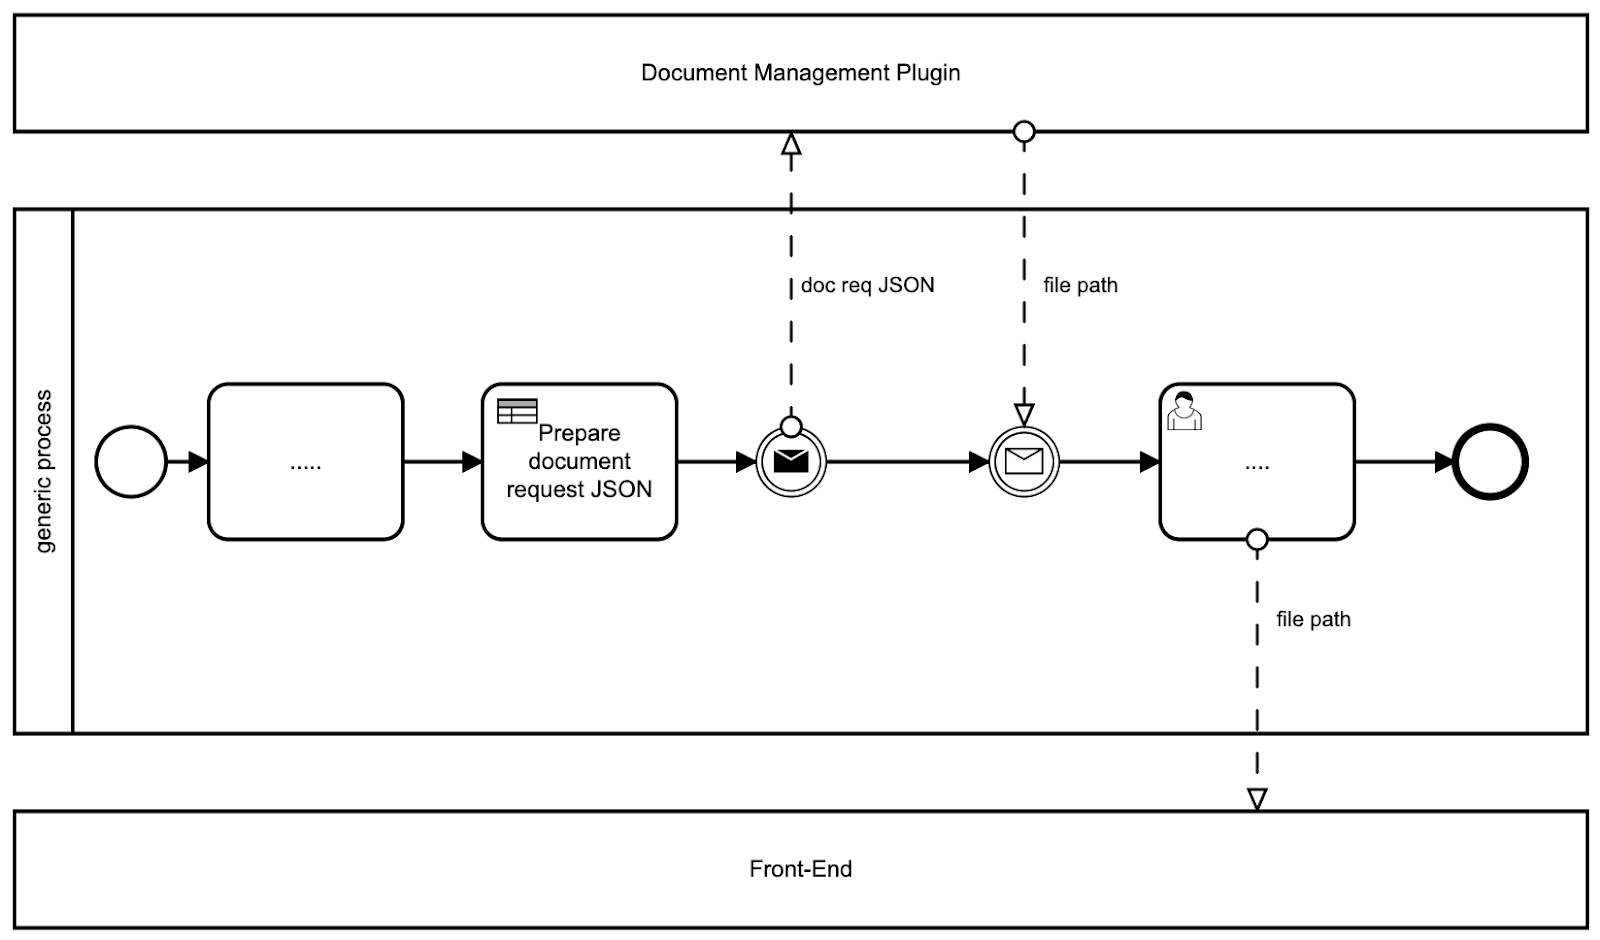
Sending a document generation request
Consider a scenario where you need to send a personalized document to a customer based on specific details they provide. Create a process involving a User task, a Send Message Task (Kafka), and a Receive Message Task (Kafka).In the initial user task node, users input information.The second node (Kafka send) creates a request with a specified template and keys corresponding to user-filled values.The third node sends the reply with the generated document under the specified key.

- Add a User task and configure it with UI elements for user input.
In this example, three UI elements, comprising two input fields and a select (dropdown), will be used. Subsequently, leverage the keys associated with these UI elements to establish a binding with the template. This binding enables dynamic adjustments to the template based on user-input values, enhancing flexibility and customization.
- Configure the second node (Send Message Task) by adding a Kafka send action.
- Specify the Kafka topic to which the request should be sent, enabling the Process Engine to process it; in our example it is
ai.flowx.in.document.html.in.
To identify your defined topics in your current environment, follow the next steps: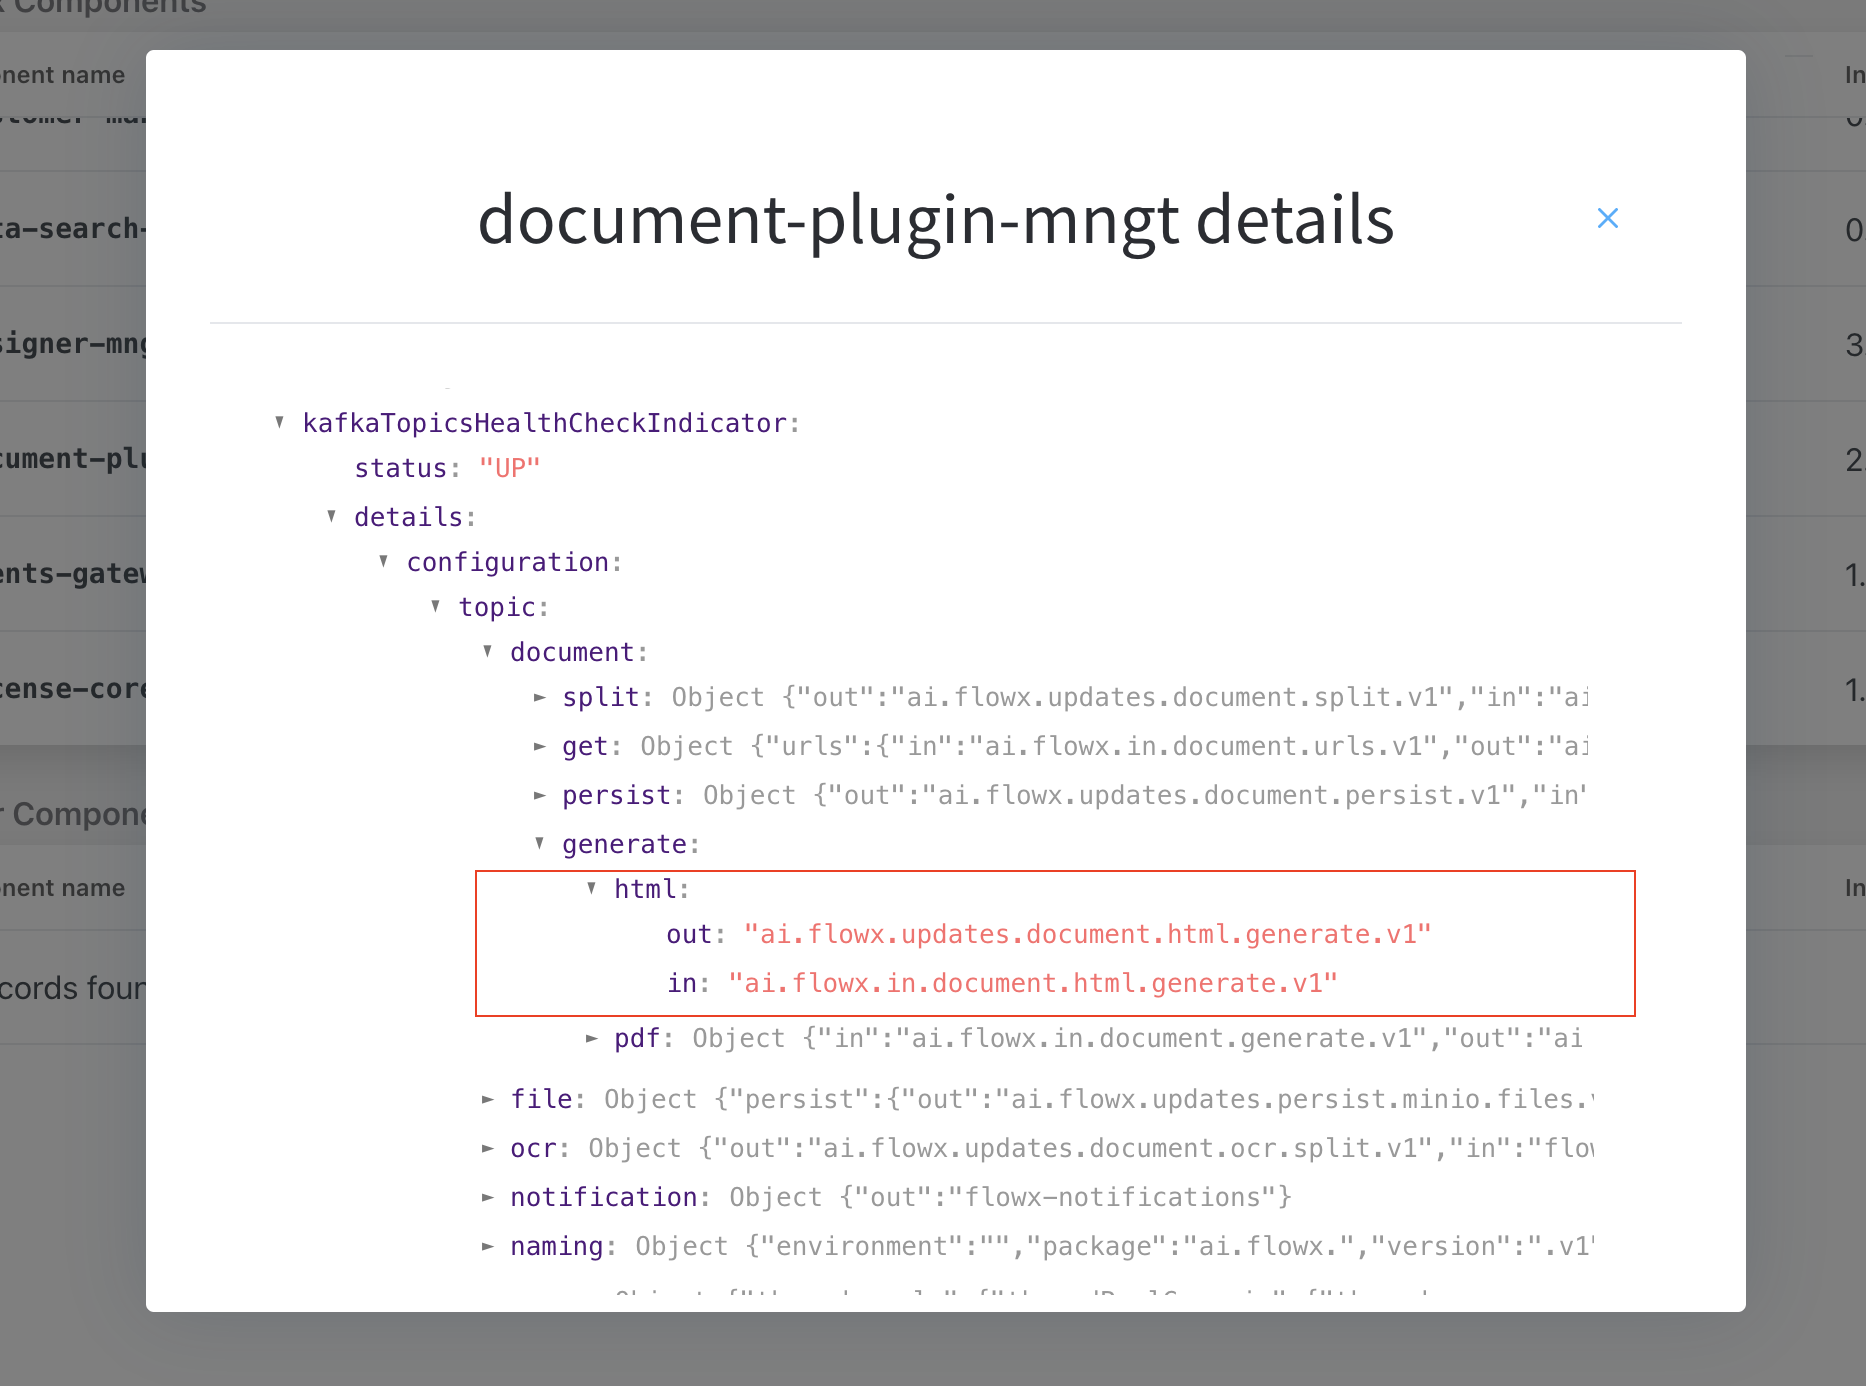
- From the FlowX Designer main screen, navigate to the Platform Status menu at the bottom of the left sidebar.
- In the FlowX Components list, scroll to the document-plugin-mngt line and press the eye icon on the right side.
- In the details screen, expand the
KafkaTopicsHealthCheckIndicatorline and then details → configuration → topic → document → generate. Under HTML and PDF you will find the in and out topics for generating HTML or PDF documents.

- Fill in the message with the expected values in the request body:
- documentList: A list of documents to be generated with properties (name and value to be replaced in the document templates)
- customId: Client ID
- templateName: The name of the template that you want to use (defined in the Document templates section)
- language: Should match the language set on the template (a template can be created for multiple languages as long as they are defined in the system, see Languages section for more information)
When incorporating templates into the execution of a process, the extracted default values will be in accordance with the specifications of the default language configured in the system. For instance, if the default language is set to English, the template’s default values will reflect those assigned to the English version. Make sure to match the language of your template with the default language of the system.
- includeBarcode: True/False
- data: A map containing the values that should be replaced in the document template (data that comes from user input). The keys used in the map should match the ones defined in the HTML template and your UI elements.

-
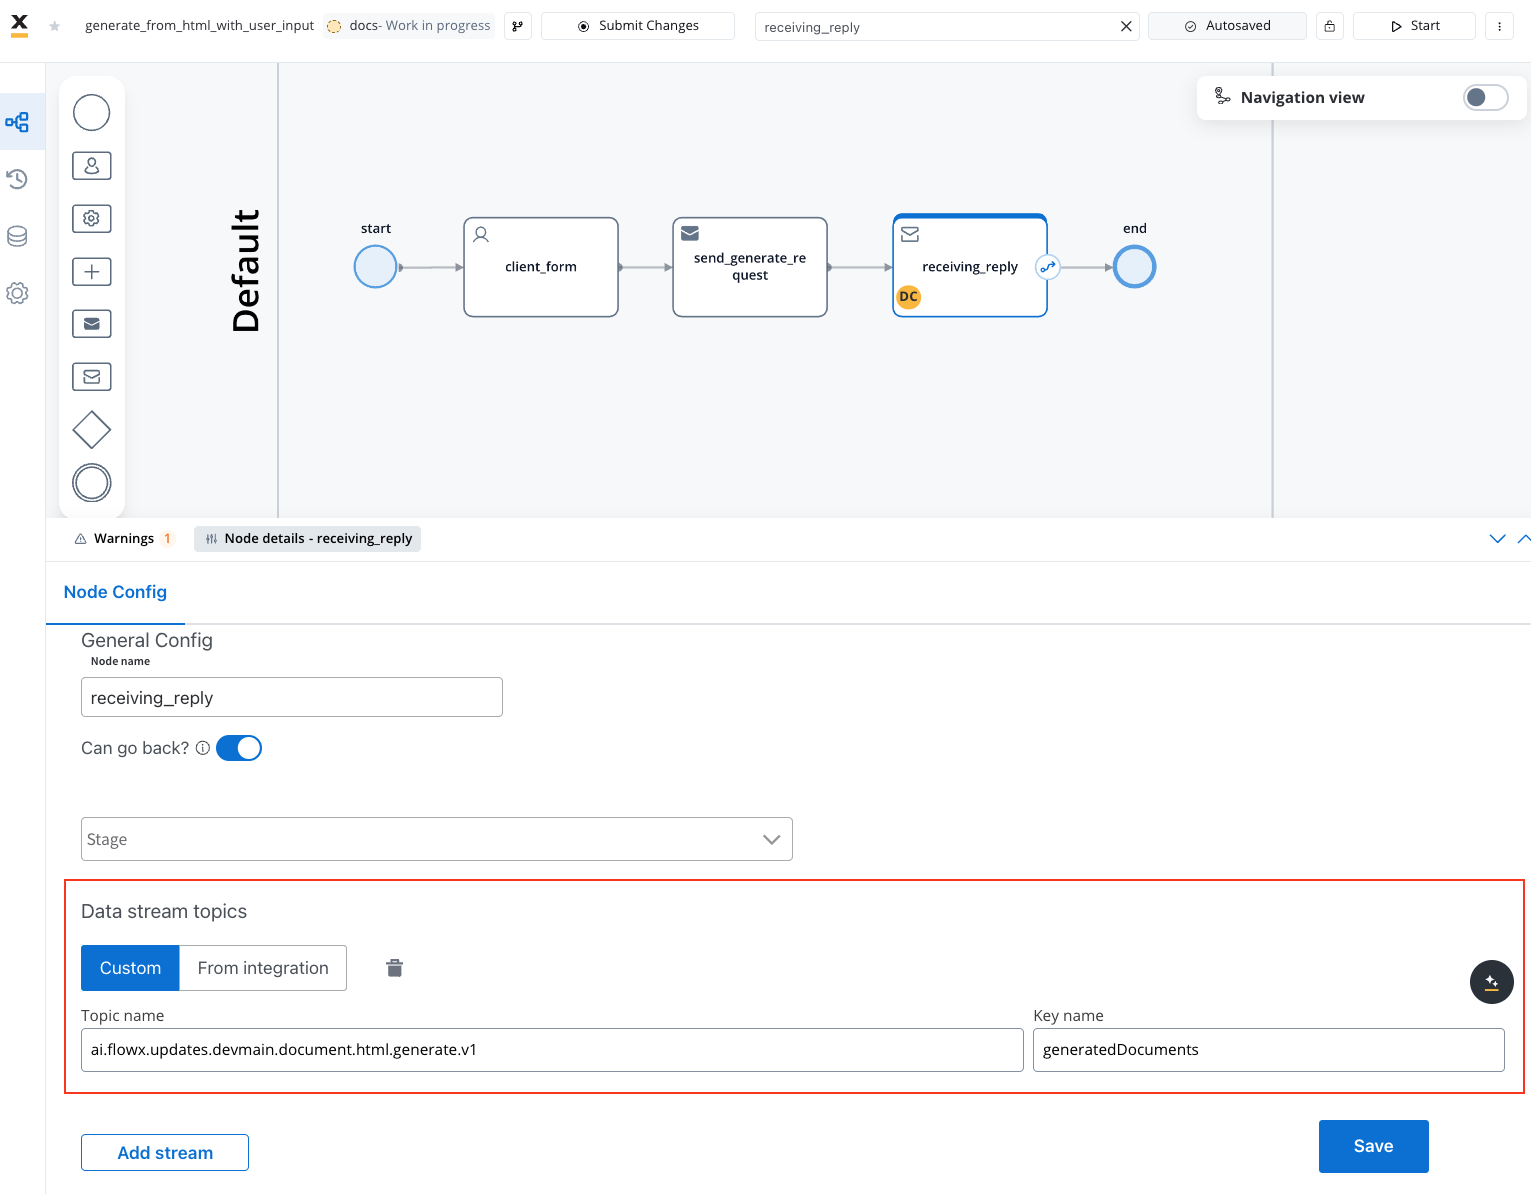
Configure the third node (Receive Message Task):
- Add the topic where the response will be sent; in our example
ai.flowx.updates.document.html.generate.v1and its key:generatedDocuments
- Add the topic where the response will be sent; in our example
Receiving the document generation reply
The response, containing information about the generated documents, is sent to the output Kafka topic defined in the Kafka Receive Event Node. The response includes details such as file IDs, document types, and storage paths.
generatedDocuments key):
- generatedFiles: List of generated files.
- customId: Client ID.
- fileId: The ID of the generated file.
- documentType: The name of the document template.
- documentLabel: A label or description for the document.
- minioPath: The path where the converted file is saved. It represents the location of the file in the storage system, whether it’s a MinIO path or an S3 path, depending on the specific storage solution.
- downloadPath: The download path for the converted file. It specifies the location from where the file can be downloaded.
- noOfPages: The number of pages in the generated file.
- error: If there were any errors encountered during the generation process, they would be specified here. In the provided example, the value is null, indicating no errors.
Displaying the generated document
Upon document generation, you now have the capability to present it using the Document Preview UI element. To facilitate this, let’s optimize the existing process by introducing two supplementary nodes:- Task node: This node is designated to generate the document path from the storage solution, specifically tailored for the Document Preview.
- User task: In this phase, we seamlessly integrate the Document Preview UI Element. Here, we incorporate a key that contains the download path generated in the preceding node.