Steps for creating a flow with exclusive branches
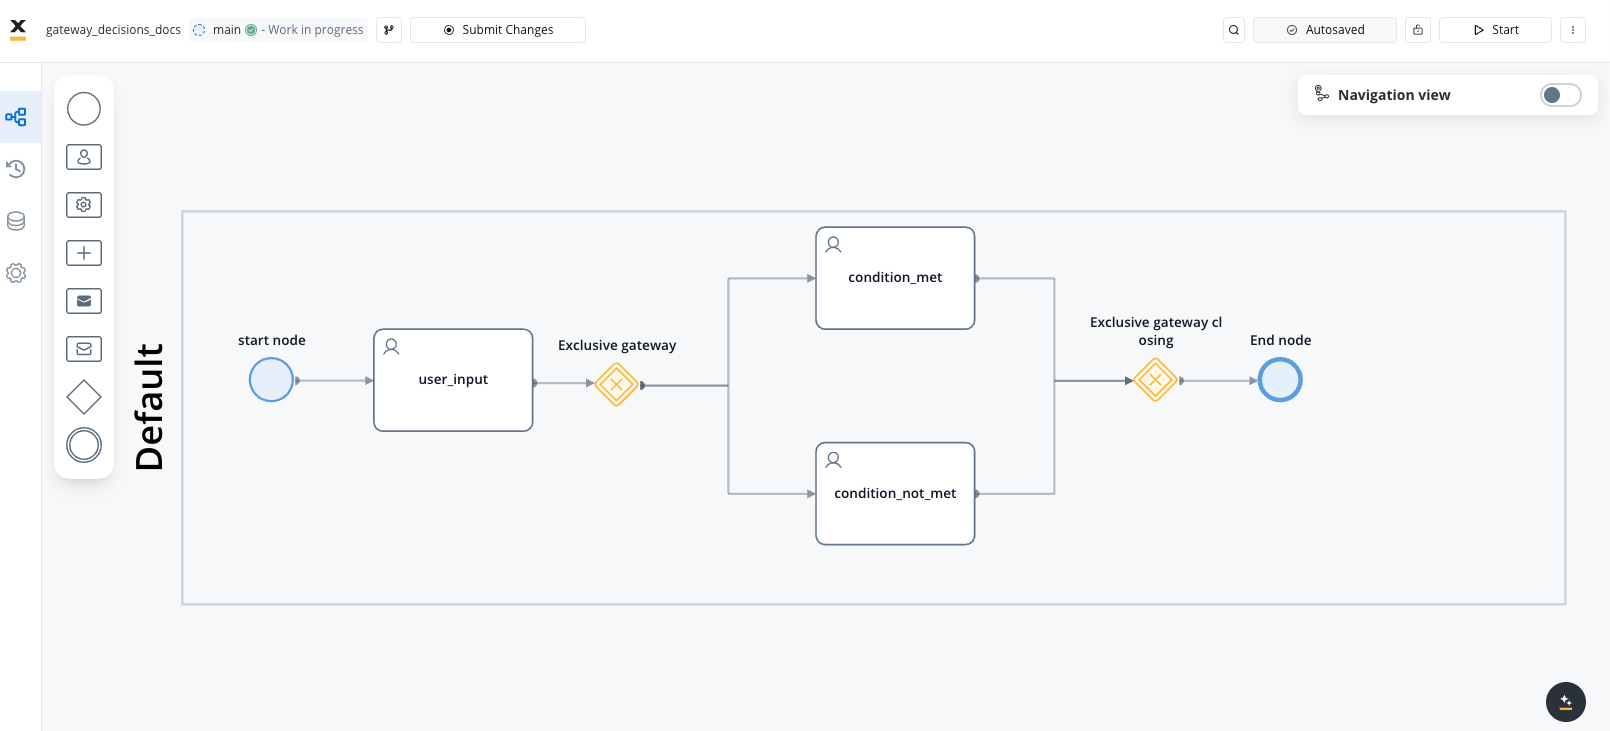
To create flow with exclusive branches:Add a new rule to a node to add a business decision:
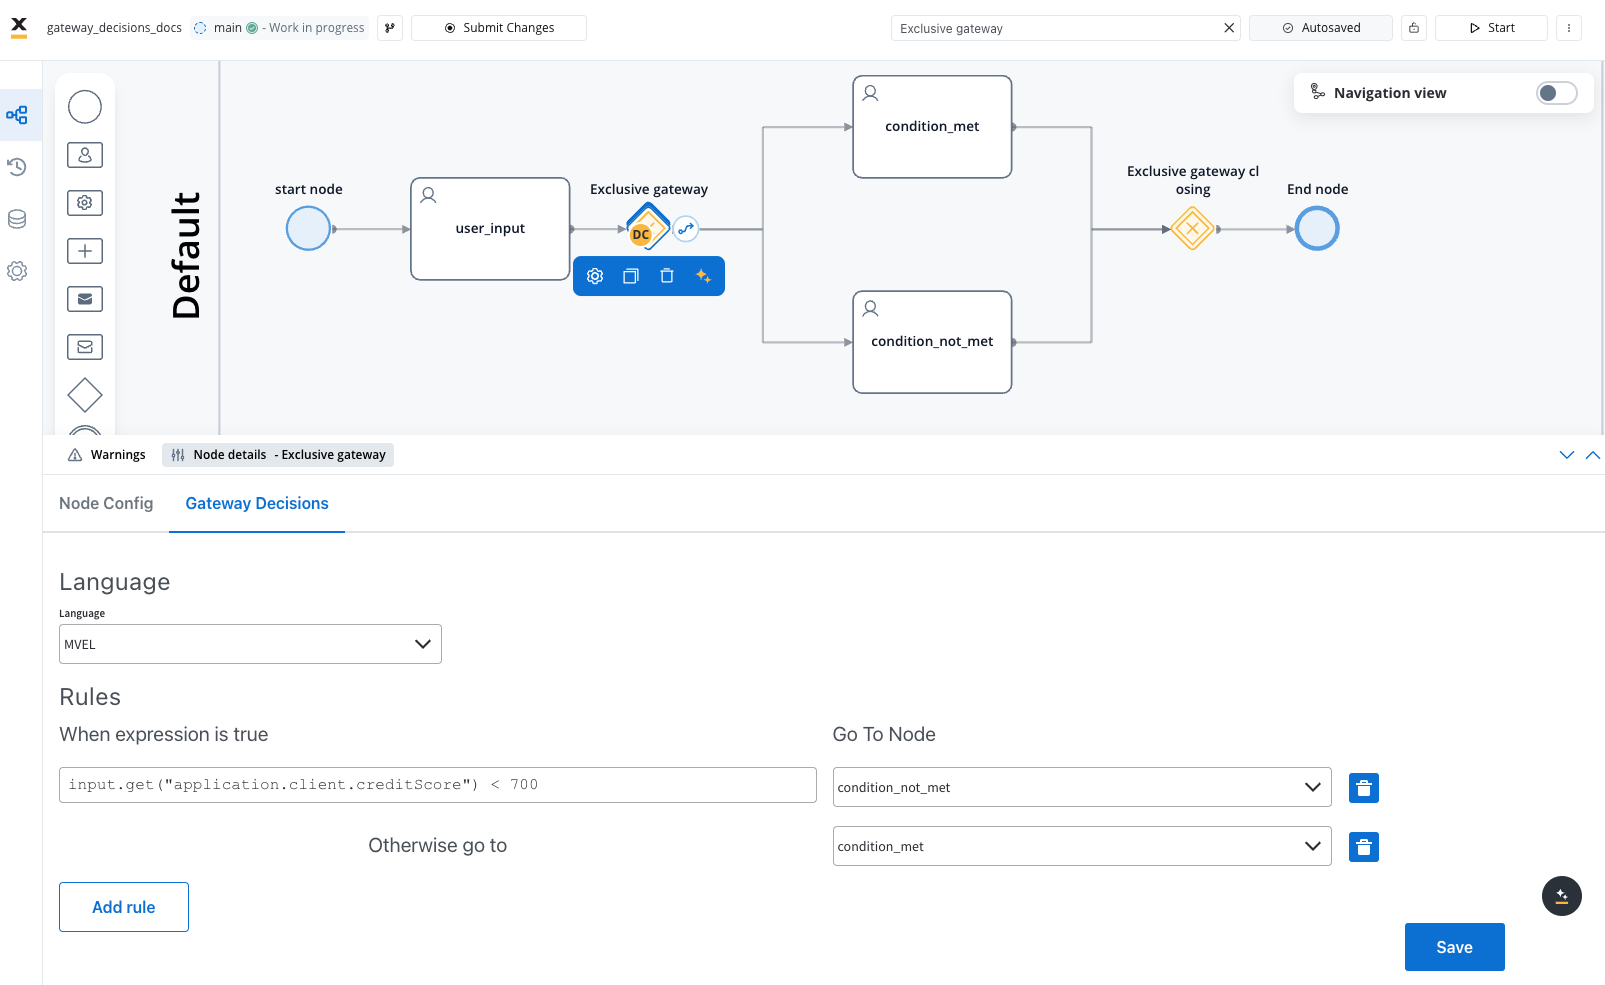
For business rules, you need to check certain values from the process and pick an outgoing node in case the condition is met. The gateway node must be connected to the next nodes before configuring the rule.
-
select a scripting language from the dropdown, for example
MVELand input your condition: -
input.get("application.client.creditScore") >= 700← proceed to node for premium credit card request -
input.get("application.client.creditScore") < 700← proceed to node for standard credit card request