 Once a process is defined and set as published on the platform, it can be executed, monitored, and optimized. When a business process is started, a new instance of the definition is created.
History
In the History tab, you will find a record of all the modifications and events that have occurred in the process.- Versions - provides information on who edited the process, when it was modified, and the version number and status
- Audit log - provides a detailed record of events and changes

Versions
In the Versions tab you will find the following details:- Last edited on - the last time when the process was modified
- Last edited by - the last person who modified a process
- Version - version number
- Status - can be either Published or Draft
- View process - clicking on the eye icon will redirect you to the process definition
Versioning
Audit log
In the Audit log tab you will find the following items:- Timestamp
- User
- Subject
- Event
- Subject Identifier
- Version
- Status
Some items in the Audit log are filterable, making it easy to track changes in the process.
Audit
Data model
In the Data Model, you can add new key-pair values, which enables you to use shortcuts when adding new keys using the UI Designer, without having to switch back and forth between menus.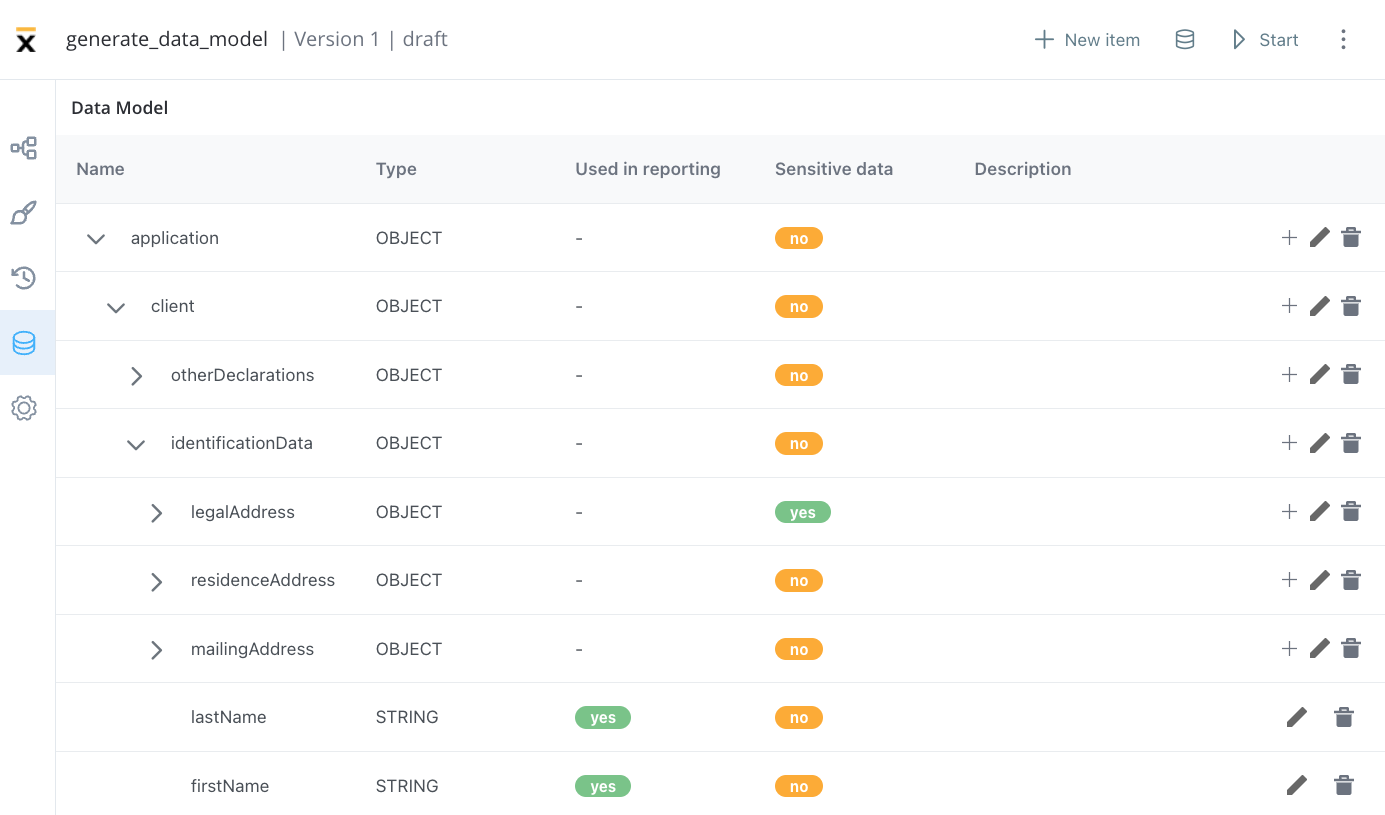
Attributes type

- STRING
- NUMBER
- BOOLEAN
- OBJECT
- ARRAY
- ARRAY OF STRINGS
- ARRAY OF NUMBERS
- ARRAY OF BOOLEANS
- ARRAY OF OBJECTS
- ARRAY OF ENUMS
- ENUM
When you export or import a process definition, the data model will be included.
Data model reference
You can use data model reference feature to view attribute usage within the data model. You can now easily see where a specific attribute is being used by accessing the “View References” feature. This feature provides a list of process keys associated with each attribute and displays possible references, such as UI Elements. For UI Elements, the references include the element label, node name, and UI Element key. Additionally, the context of the reference is provided, showing the node name and the UI element type along with its label. Users can conveniently navigate to the context by clicking the provided link to the node’s UI page.
Sensitive data
To protect your data and your customer’s data, you can hide data that could be visible in the process details or in the browser’s console. You can now also secret data for a specific key.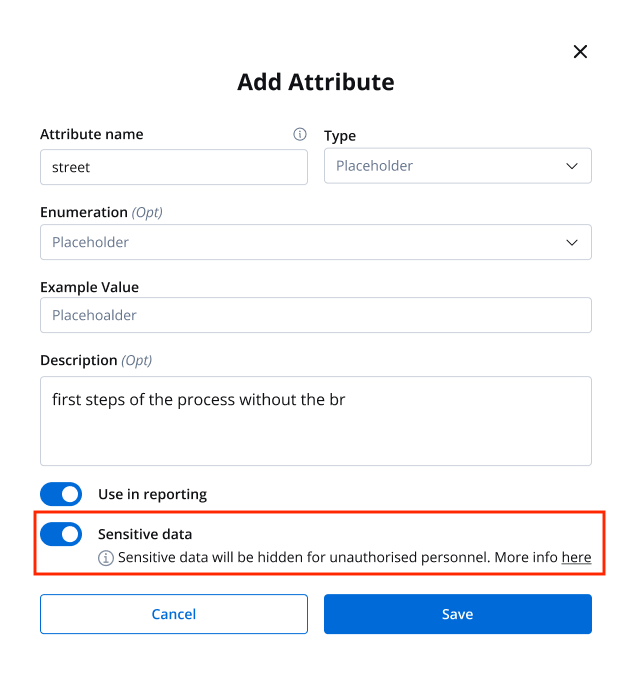
Reporting
The Use in Reporting tag is used for keys that will be used further in the reporting plugin.Reporting
Generating data model
A data model can be generated using data values from a process instance. This can be done by either merging the data model with an existing one or replacing it entirely. To generate a data model, follow these steps:- Open FLOWX.AI Designer.
- Go to the Definitions tab and select the desired process definition.
- Select the Data Model tab and then click Generate data model button.
- Add the process instance of the process from which you want to generate the data model.
- Choose whether to replace the existing data model or merge it with the new one.
- Click the Load Data button to display the data model body.
- Finally, click Save button to save the generated data model.

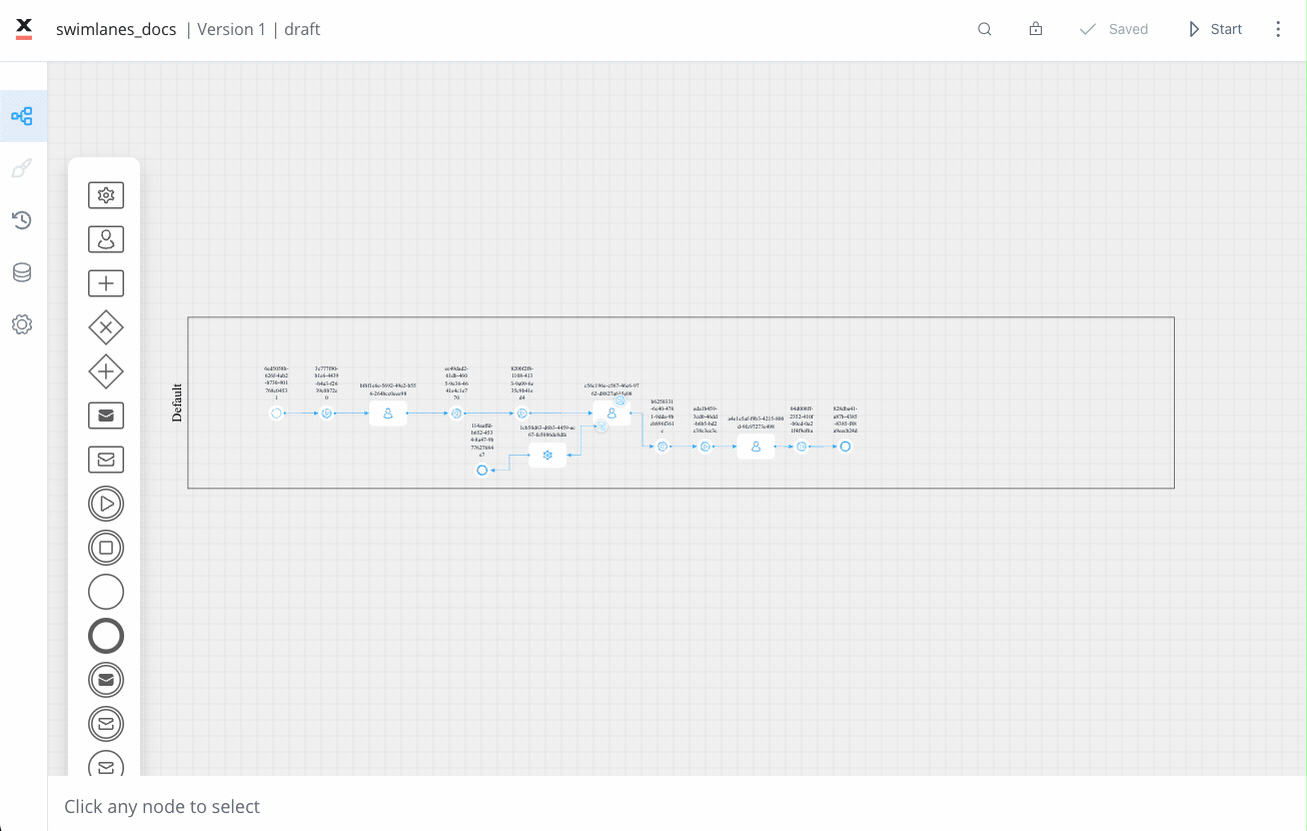
Swimlanes
Swimlanes offer a useful method of organizing process nodes based on process participants. By utilizing swimlanes, you can establish controlled access to specific process nodes for particular user roles.Adding new swimlanes
To add new swimlanes, please follow these steps:- Access the FLOWX.AI Designer.
- Open an existing process definition or create a new one.
- Identify the default swimlane and select it to display the contextual menu.
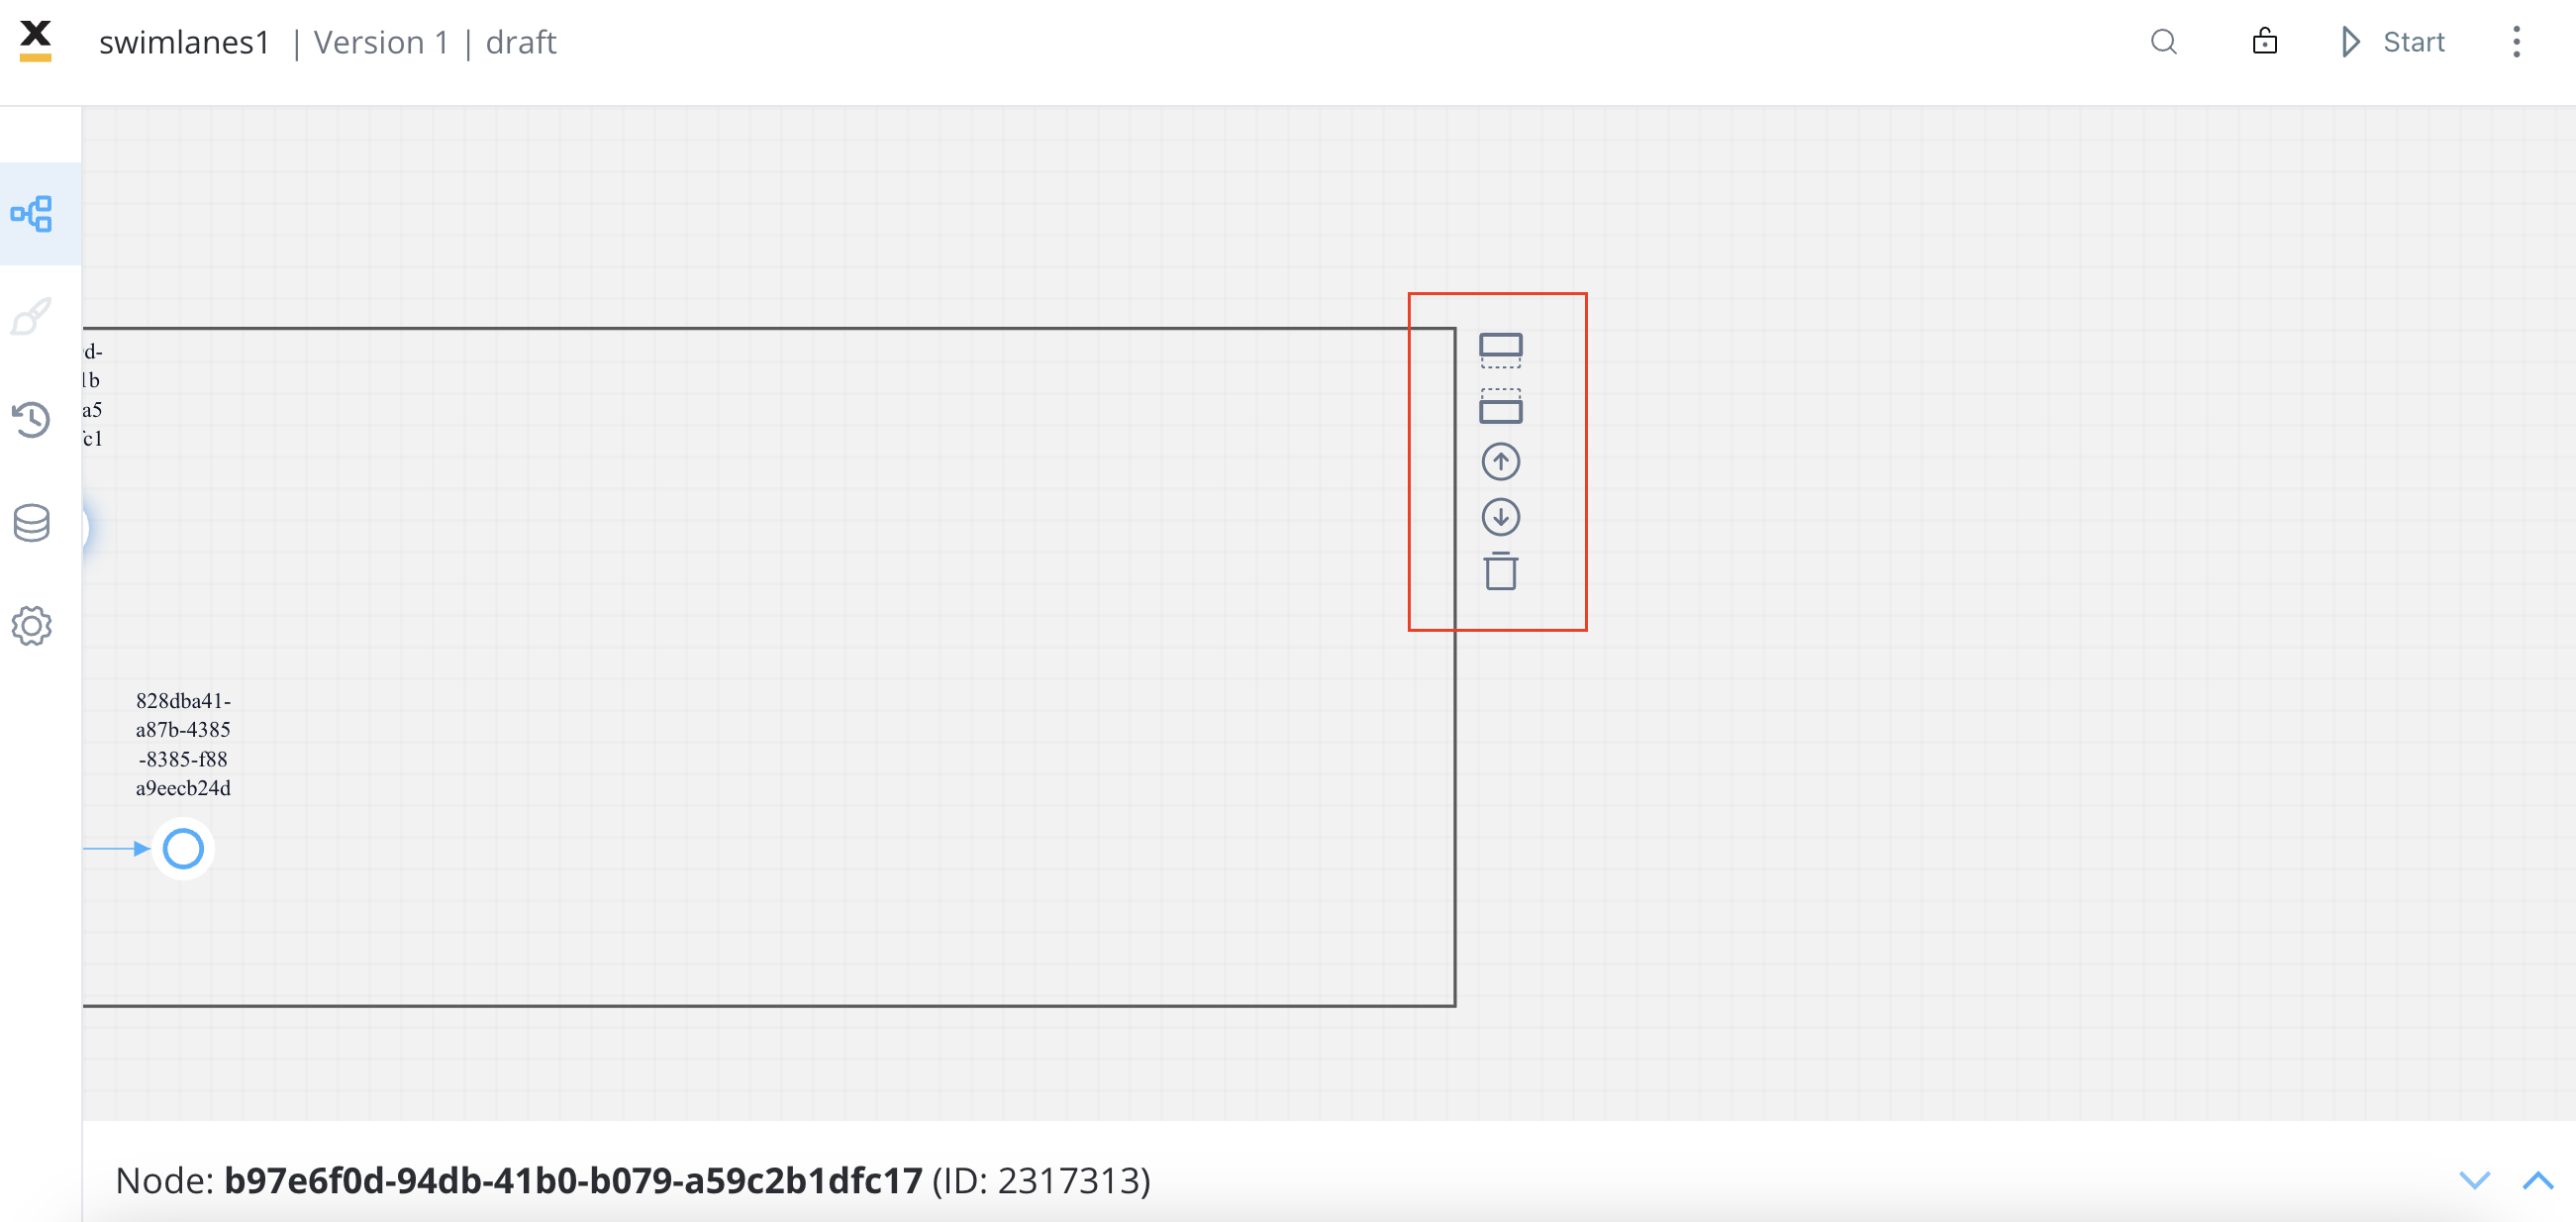
- Choose the desired location for the new swimlane, either below or above the default swimlane.
- Locate and click the add swimlane icon to create the new swimlane.
 For more details about access management, check the following sections:
Settings
General
In the General settings, you can edit the process definition name, include the process in reporting, set general data, and configure expiry time using Cron Expressions and ISO 8601 formatting.- Process definition name - edit process definition name
- Use process in reporting - if switched on, the process will be included in reporting
- Use process in task management - if switched on, tasks will be created and displayed in the Task manager plugin, more information here
- General data - data that you can set and receive on a response
- Expiry time - a user can set up a
expiryTimefunction on a process, for example, a delay of 30s will be set up like:30 16 11 4 7 1

Permissions
After defining roles in the identity provider solution, they will be available to be used in the process definition settings panel for configuring swimlane access. When you create a new swimlane, it comes with two default permissions assigned based on a specific role: execute and self-assign. Other permissions can be added manually, depending on the needs of the user.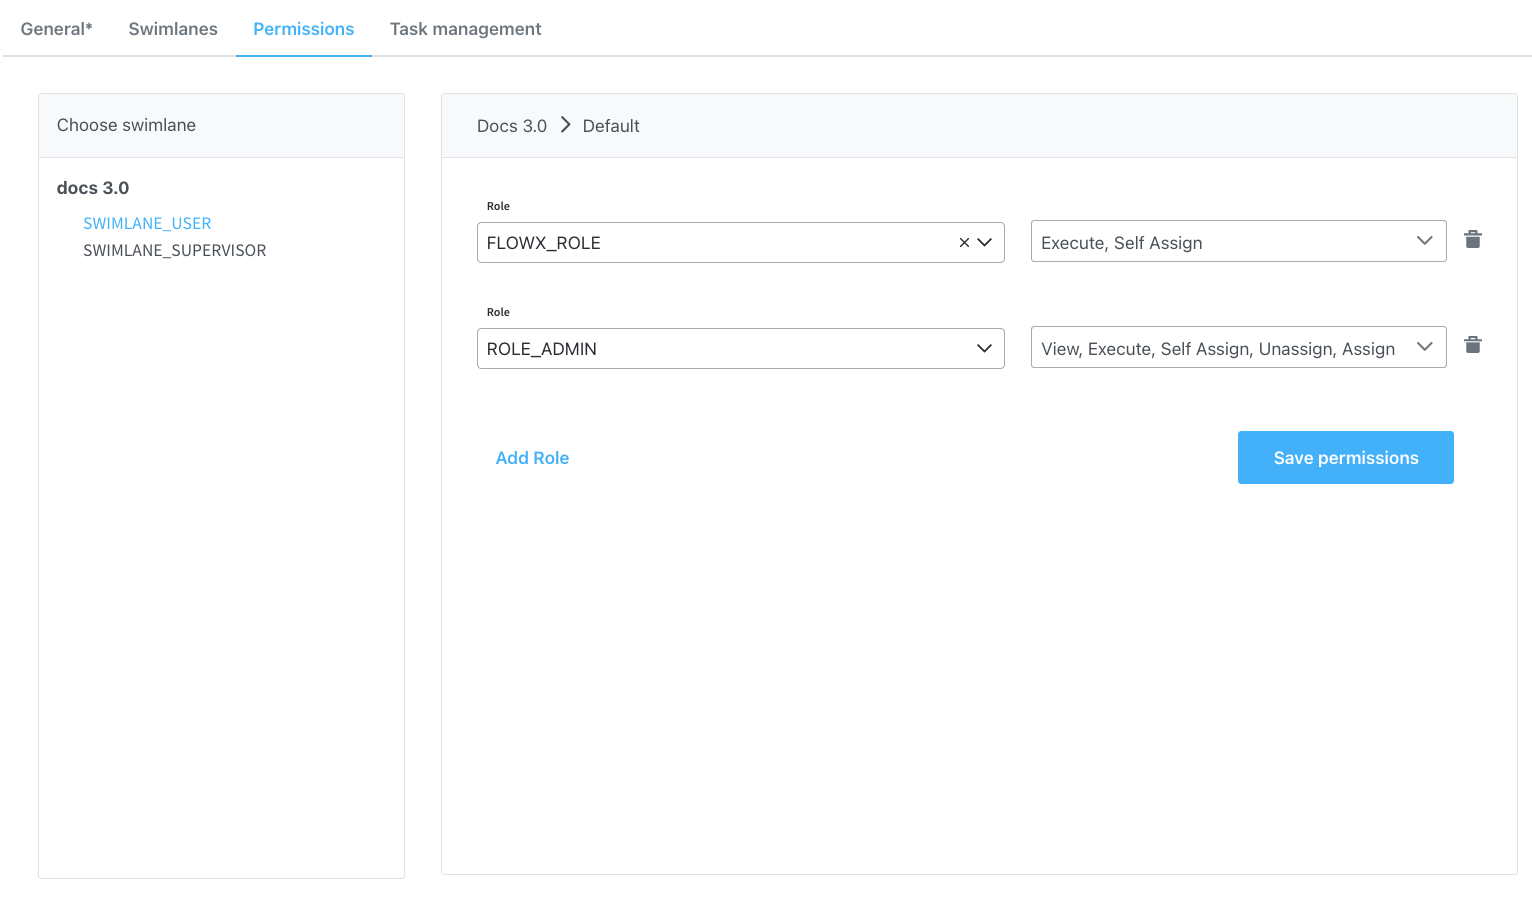
Configuring access rights for processes
Task Management
The Task Management plugin offers a business-oriented view of the process you defined in the Designer and allows for interactions at the assignment level. It also includes a generic parameter pointing to the application URL where the Flowx process is loaded and uses process keys to search data stored in the process.