

Send message task
This node is used to configure messages that should be sent to external systems.
Configuring a send message task
Node configuration is done by accessing the Node Config tab. You have the following configuration options for a send message task:General Config
Inside the General Config tab, you have the following properties:- Node Name: The name of the node
- Stage: Assign a stage to the node
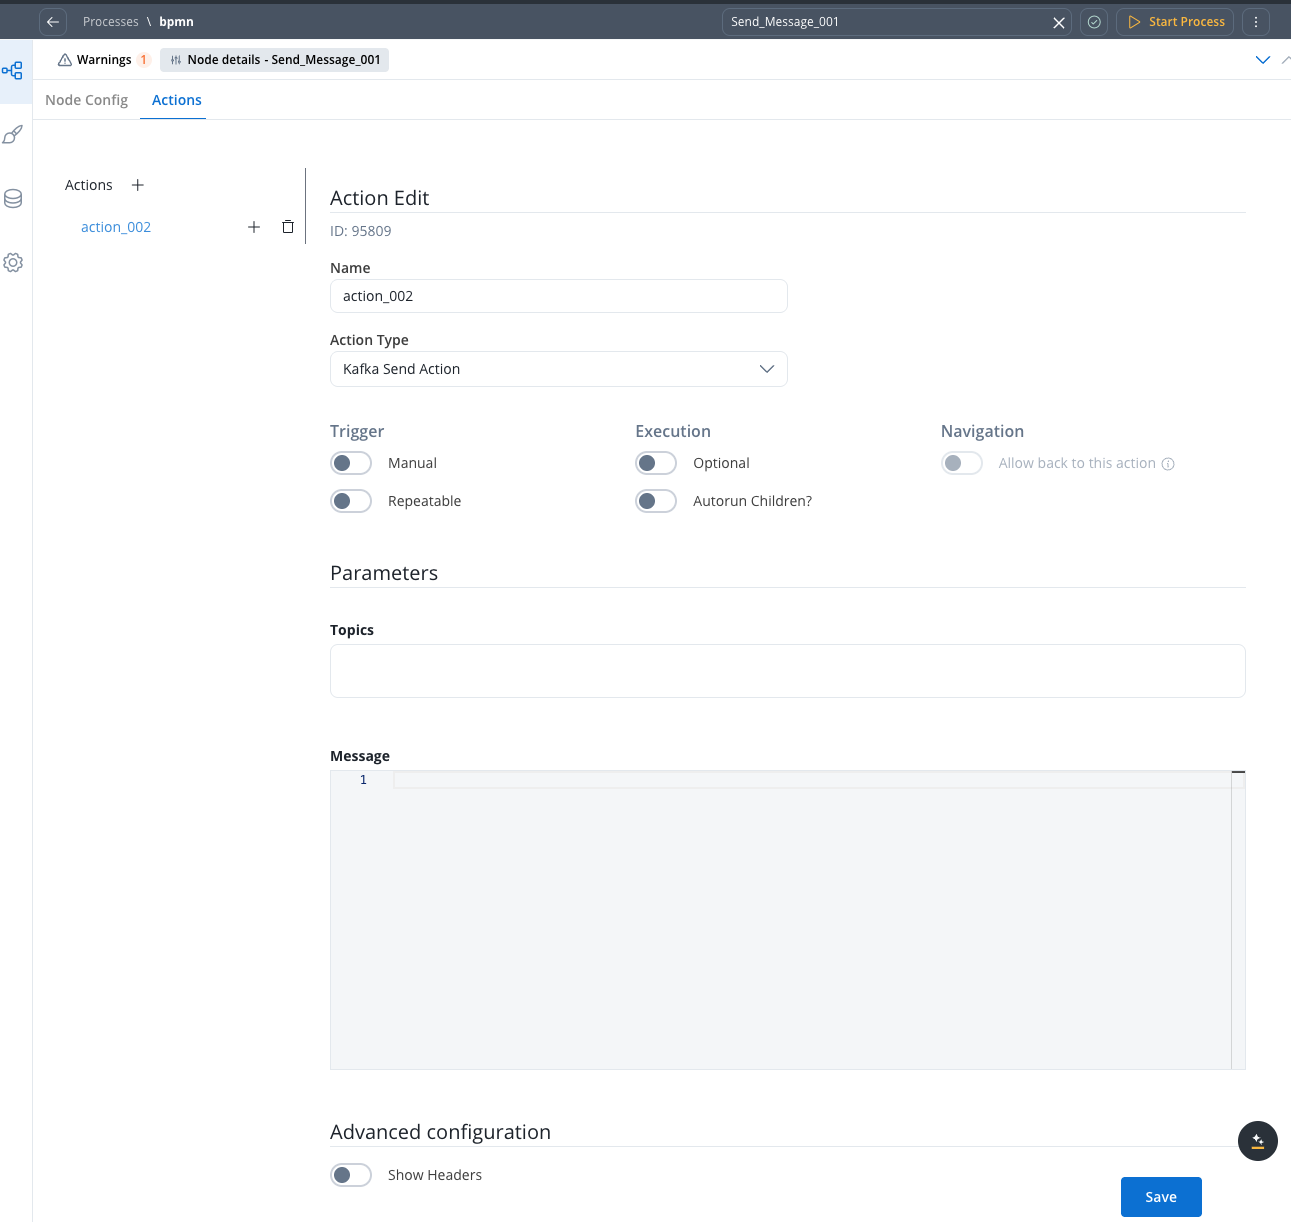
- Action Edit
- Trigger
- Execution
- Navigation
- Parameters
- Advanced configuration
Action Edit
- Name: The name of the action
- Action Type: The type of the action, should be set to Kafka Send Action for actions used to send messages to external systems, or Start Integration Workflow to trigger workflows
Additional fields like Order and Timer Expression may also be available in certain configurations to control action execution order and timing.
Trigger
- Manual: When enabled, the action must be triggered manually by the user. When off (automatic), the action triggers automatically when the process flow reaches this step
- Repeatable: When enabled, the action can be triggered multiple times
Execution
- Optional: When enabled, the action is optional and the process can continue without it being executed. When off (mandatory), the action must be completed before advancing to the next node
- Autorun Children: When enabled, child actions (defined as mandatory and automatic) run immediately after the parent action completes
Parameters
Parameters define the message details for the Kafka send action:- Topics: The Kafka topic name where the message should be sent
- Message: The message payload to send (can include process variables using
${variableName}syntax)
Parameters can be added either using the Custom option (where you configure everything on the spot) or by using From Integration to import parameters already defined in an integration.For more information, see the Integrations Management documentation.
Advanced configuration
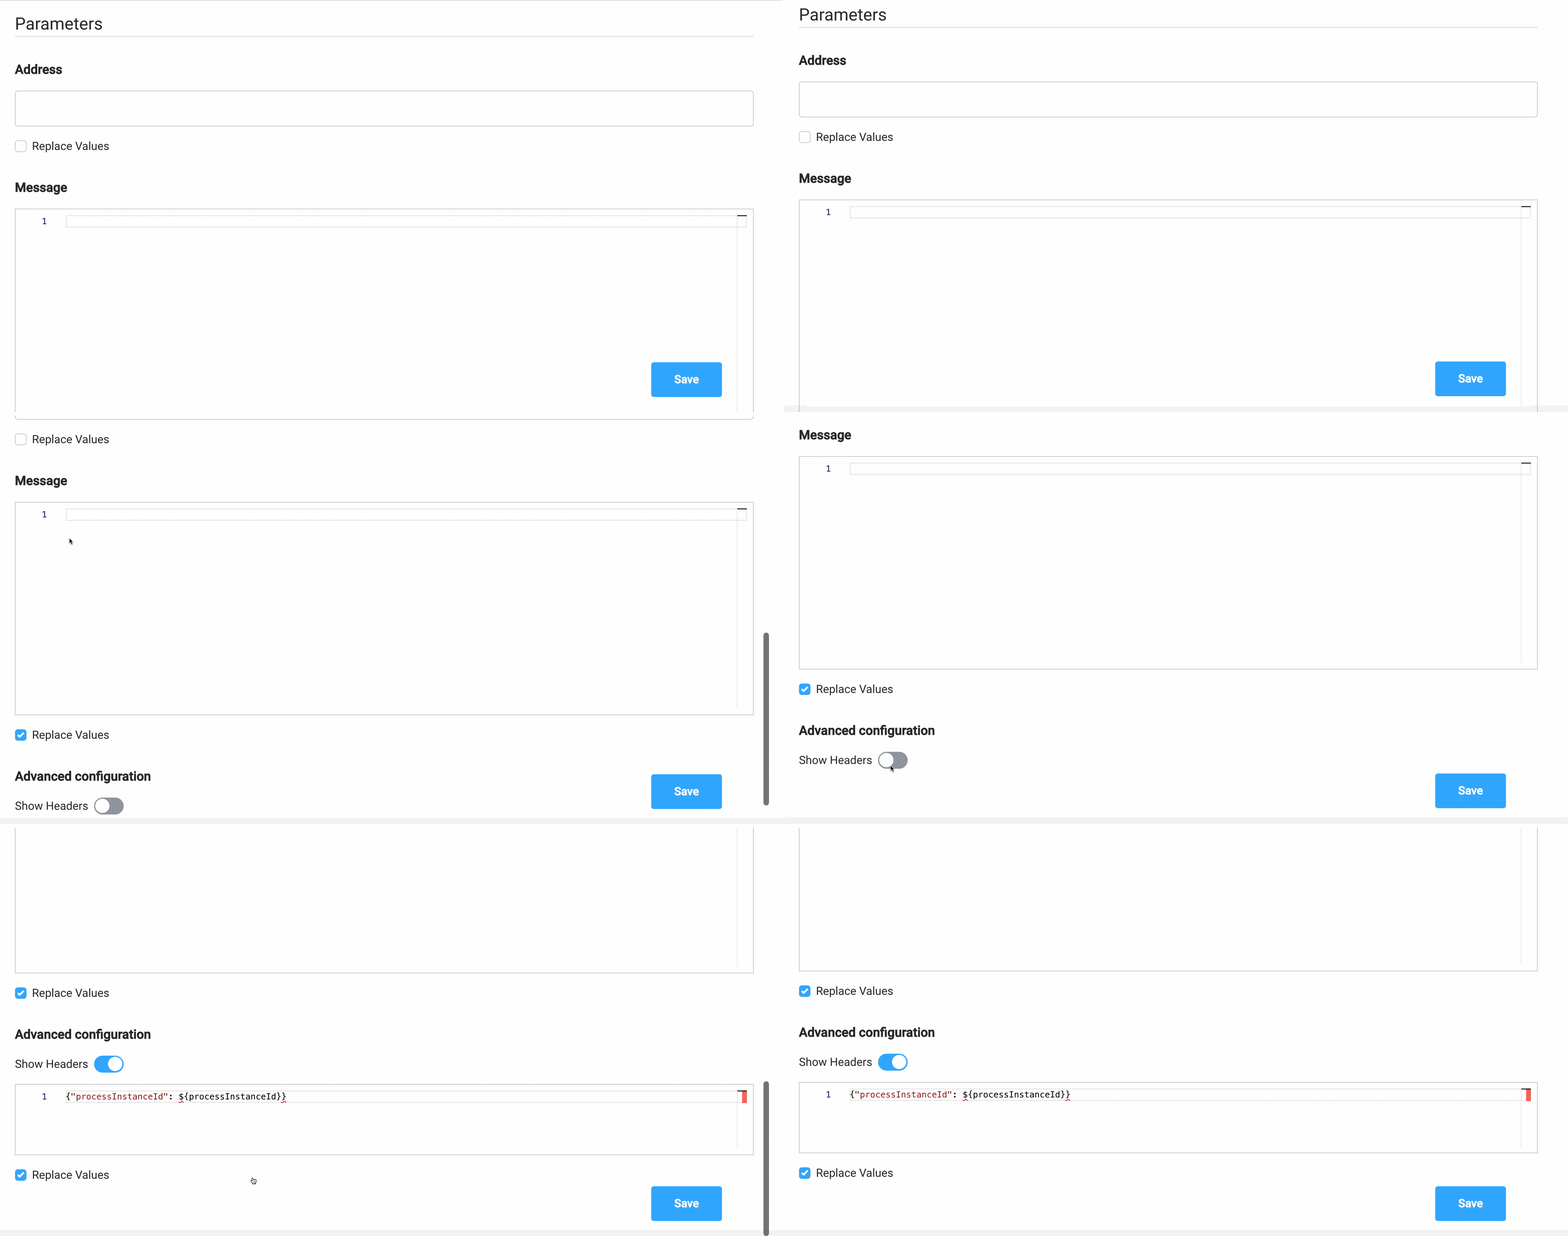
- Show Headers: When enabled, allows you to configure custom headers for the Kafka message (for example,
processInstanceId)
Intro to Kafka
Kafka documentation
Example of a send message task usage
Send a message to a CRM integration to request a search in the local database:Action Edit
- Name - pick a name that makes it easy to figure out what this action does, for example,
sendRequestToSearchClient - Action Type - Kafka Send Action
Trigger
- Manual - off (automatic trigger)
- Repeatable - off (it only needs to run once)
Execution
- Optional - off (mandatory - the action must be completed before advancing to the next node)
- Autorun Children - enabled (if there are child actions, they run automatically)
Parameters
- Topics -
ai.flowx.in.crm.search.v1- the Kafka topic on which the CRM listens for requests - Message:
Advanced configuration
- Show Headers: When enabled, allows you to configure custom headers for the Kafka message (for example,
processInstanceId, correlation IDs, or other metadata)
Receive Message Task
This type of node is used when we need to wait for a reply from an external system.
Configuring a Receive Message Task
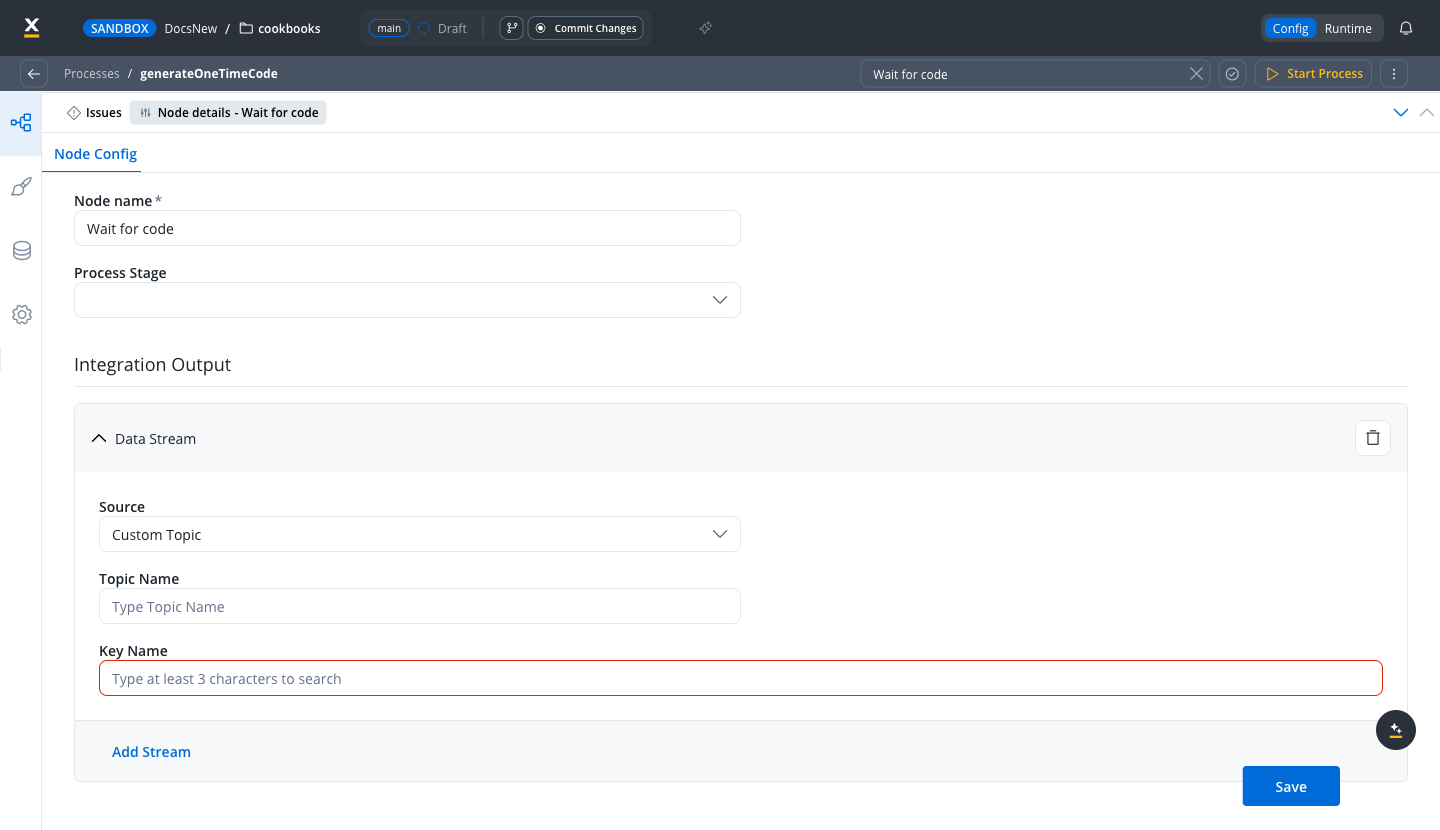
Node configuration happens in the Integration Output section of the Node Config tab.Integration Output
The reply arrives on a data stream. Click Add Stream to add one, then pick its Source:- Custom Topic: Type the Topic Name the engine listens on and the Key Name where the payload lands in the process data.
-
Workflow: Pick the integration workflow in the Select workflow dropdown. With the Legacy Mapping toggle OFF (the default - see Legacy mapping vs data mappers), the Output Mapping list shows the workflow’s End nodes - configure an output mapping for each one that tells the engine which process attribute receives the workflow’s result:
- Open the End node’s mapping (the wrench icon next to it).
- Map the process attribute to the workflow output using
${...}interpolation syntax. - Click Test to preview the mapped result, then Update to store the mapping.
- Save the node - the mapping is persisted only when the node itself is saved.
Legacy mapping vs data mappers
A Workflow data stream works in one of two modes, switched per stream with the Legacy Mapping toggle:- Data mappers (toggle OFF, the default): configure a per-End-node output mapping as described above. The mapping modal is populated from the workflow’s declared output parameters, and a broken mapping fails loudly at runtime with the errors listed in the error glossary. See Data mappers for the general mapping mechanism.
- Legacy mapping (toggle ON): type a single Key Name instead of configuring a mapping. The entire workflow output payload is stored under that key in the process data, exactly as the End node returns it. If the End node returns
{"value": 1322}and the key isresult, downstream nodes readresult.value. Nothing validates the key against the workflow - it is simply where the payload lands, so a downstream node reading a different key finds no data and no error points at the mismatch.
A Receive Message Task has no timeout of its own: the token waits on the node indefinitely until the message arrives. To bound the wait, attach an interrupting timer boundary event to the node and route the timeout path from there.