

Prerequisites
- Node.js min version 20 - Download Node.js
- Angular CLI version 19.2. Install Angular CLI globally using the following command:
Angular project requirements
Your app MUST be created using the NG app from the @angular/cli~19.2 package. It also MUST use SCSS for styling.To install the npm libraries provided by FLOWX you will need to obtain access to the private FlowX Nexus registry. Please consult with your project DevOps.
The library uses Angular version @angular~19.2, npm v10.1.0 and node v20.9.0.
If you are using an older version of Angular (for example, v16), please consult the following link for update instructions:Update Angular from v16.0 to v19.2
Installing the library
Use the following command to install the renderer library and its required dependencies:angular.json:
- To successfully link the pdf viewer, add the following declaration in the assets property:
Initial setup
Once installed,FlxProcessModule will be imported in the AppModule as FlxProcessModule.withConfig({}).
You MUST also import the dependencies of FlxProcessModule: HttpClientModule from @angular/common/http
Theming
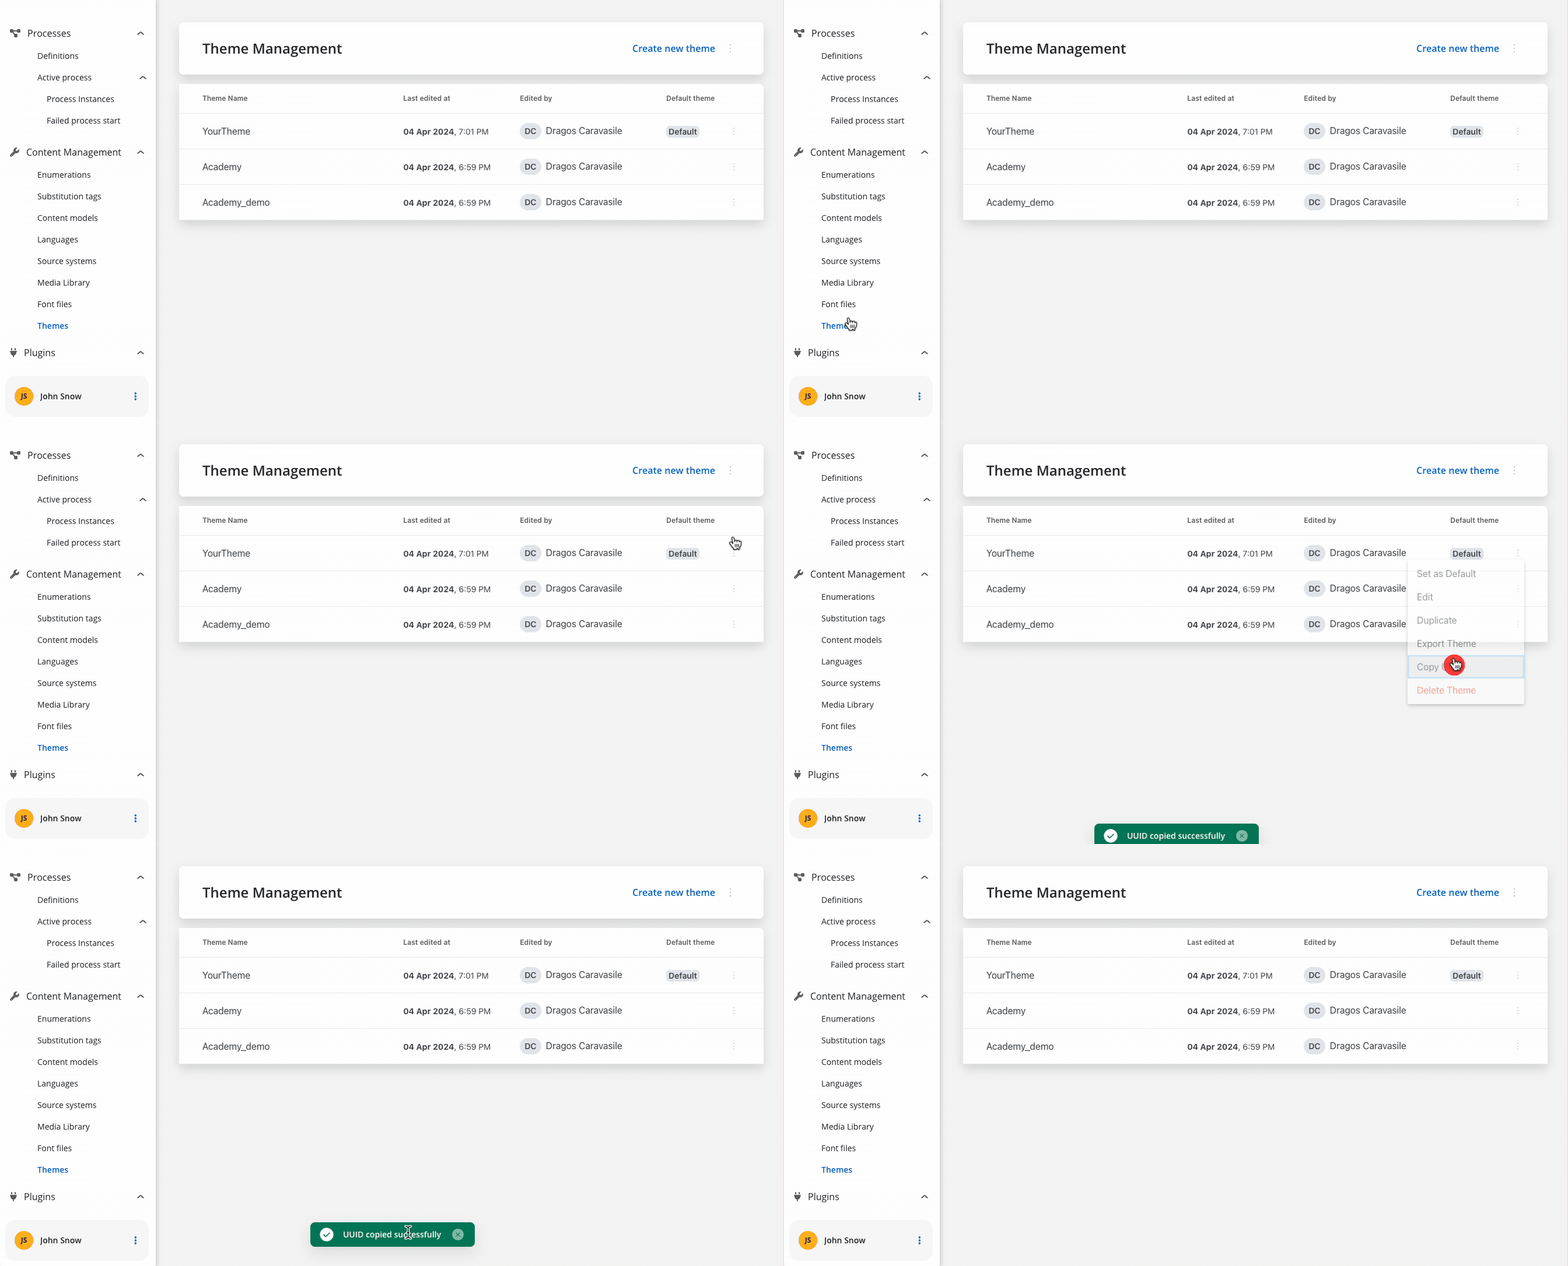
Component theming is done through the@flowx/angular-theme library. The theme id is a required input for the renderer SDK component and is used to fetch the theme configuration. The id can be obtained from the admin panel in the themes section.
Authorization
Every request from the FlowX renderer SDK will be made using the HttpClientModule of the client app, which means those requests will go through every interceptor you define here. This is most important to know when building the auth method as it will be the job of the client app to intercept and decorate the requests with the necessary auth info (eg.
Authorziation: Bearer ...).It’s the responsibility of the client app to implement the authorization flow (using the OpenID Connect standard). The renderer SDK will expect the authToken to be passed to the
flx-process-renderer as an input.withConfig() call is required in the application module where the process will be rendered. The withConfig() method accepts a config argument where you can pass extra config info, register a custom component, service, or custom validators.
Custom components will be referenced by name when creating the template config for a user task.
Custom validators will be referenced by name (currentOrLastYear) in the template config panel in the validators section of each generated form field.
<flx-process-renderer></flx-process-renderer> component. A list of accepted inputs is found below:
Parameters
When the cache is enabled, these CMS resources are stored in the browser’s cache storage, which significantly improves performance and loading times by reducing repeated network requests for the same resources.
Data and actions
Custom components will be hydrated with data through the $data input observable which must be defined in the custom component class.data -> actionsFn key.
Action names are configurable via the process editor.
Custom component validation
Custom components can validate their own status. We can inject theFLX_VALIDATOR_SERVICE service and use it to validate the component. Whe service exposes the following properties:
validate(isValid: boolean)- used to validate the componentsaveData(data: any)- used to save datavalidated$- used to monitor external submission from the process
Custom interceptors
- Starting from the FlowX SDKs version 4.6, the Angular
HttpClientModuleis no longer used internally to make HTTP requests. Thus, we have a new mechanism that allows you to create custom interceptors for handling HTTP requests.
Request Interceptors
- Here is an example that illustrates how to create an interceptor that adds a custom header to all outgoing requests:
Response Interceptors
- Here is an example that illustrates how to create an interceptor that shows a message when a response errors out:
Interceptors that use Dependency injection
- If you need to use a service in your interceptor, you can use provider factories coupled with the
depsproperty to inject the service into the interceptor:
Using custom icons
The SDK provides a mechanism for using custom icons. Providers for custom icons should be included in the main app module to be available for the whole app.Process end handling
The SDK provides a mechanism for container applications to handle process completion events through the(processEnd) output event. This allows you to implement custom logic when a main process reaches an end state, such as redirecting users or triggering cleanup operations.
The processEnd event is triggered when the main process (not subprocesses) reaches any terminal state.
Only the main process triggers this event. Subprocess completions do not trigger the event to avoid unnecessary interruptions during complex process flows.
Implementation
To handle process end events, bind to the(processEnd) output event of the <flx-process-renderer> component:
Custom loader
The SDK provides a mechanism for container applications to customize the loader UI displayed during process execution. This allows you to replace the default FlowX loader with your own custom implementation based on different loading scenarios.Configuration
To configure custom loaders, add them to theFlxProcessModule.withConfig() method in your application module:
API Specification
The custom loader configuration accepts an object of typeCustomLoader:
Loader Types
startProcess- Displayed when starting or resuming a processreloadProcess- Displayed when reloading a processdefaultAction- Default loader for actions whenloaderTypeis'action'. Used when no specific action loader is found in theactionsrecorddefaultUpload- Default loader for file uploads whenloaderTypeis'upload'actions- Record mapping specific action identifiers to custom loaders. When an action is executed, the SDK will first check for a matching entry in this record before falling back todefaultAction
Fallback Behavior
If no custom loader is provided for a specific type, the SDK will automatically fall back to the built-in FlowX loader. This ensures your application continues to function even with partial custom loader configuration.
Enumerations and translations
The SDK library provides a mechanism for handling enumerations and translations. The API for the method that handles enumerations is provided by thegetEnumeration method which is Promise based.
Custom enumerations
Translations
The SDK provides aFlxLocalizePipe that allows you to manage translations within your application. The pipe is standalone and can be used both in templates and in custom components.
- Here is an example of how to use the pipe in a template:
- Here is an example of how to use the pipe in a custom component:
Analytics
The SDK provides a mechanism for collecting analytics events through a unified
CustomEvent system. These events can be used to track screens and action events.Emitting Analytics Events
Analytics events are dispatched using thepushAnalyticsData(payload: AnalyticsData) method. The SDK defines two event types:
The value property represents the identifier set in the process definition.For ACTION type events there are some additional properties provided:
- component - The type of component triggering the action
- label - The label of the component
- screen - The identifier of the screen containing the component, if set
Listening for Analytics Events
You can subscribe to analytics events using the standard CustomEvent API: Ensure that you remove the event listener on component destruction to avoid memory leaks.
Custom Payload
This functionality, allowing you to capture and send custom data alongside standard analytics events. When analytics custom payload is configured in FlowX Designer, the renderer automatically processes variable substitution and includes the resulting data in analytics events.1
Receive custom payload configuration
The renderer receives the analytics configuration as a JSON string with variable placeholders:
2
Process variable substitution
The SDK replaces variables with actual values from the process data store:
3
Add to analytics event
The processed payload is included in the analytics event under the
customPayload property:Caching
The SDK provides a caching mechanism for static resources. The cache is enabled by default and can be disabled by setting the cache input of theflx-process-renderer component to false. When turned on, the cache will store the static resources in the browser’s cache storage.
Common Scenario: When making updates to CMS resources (like substitution tags or media library images) during development, you may find that after a browser refresh, the changes don’t appear.
Common Scenario: When making updates to CMS resources (like substitution tags or media library images) during development, you may find that after a browser refresh, the changes don’t appear.
Application (Chrome) or Storage (Firefox) tab in the browser Dev tools and either clear the cache or disable the cache for the current site.
| Browser | Dev Tools Tab | Screenshot |
|---|---|---|
| Chrome | Application tab | 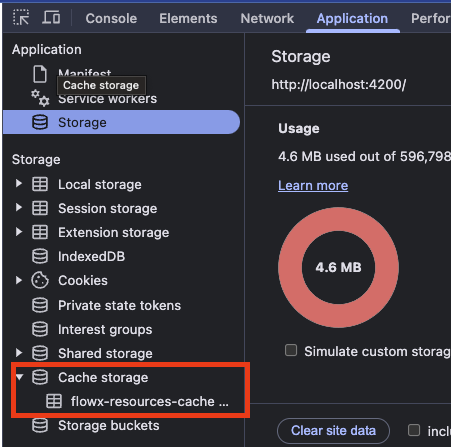 Chrome - Application tab |
| Firefox | Storage tab | 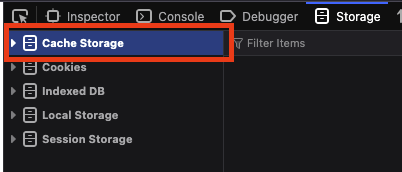 Firefox - Storage tab |
- Chrome: Navigate to Application → Storage → Cache storage → Right-click on “flowx-resources-cache” → Clear
- Firefox: Navigate to Storage → Cache Storage → Right-click → Clear
Interacting with the process
Data from the process is communicated via the Server Send Event protocol under the following keys:Chat component
To use theFlxChatRendererComponent component, import the module in your project:
Usage
Include the component in your template:chatConfig parameters
ThechatConfig object accepts the following properties:
Task management component
Theflx-task-manager component is available in the FlxTaskManagementComponent. To use it, import the required module in your Angular project:
Usage
Include the component in your template:Task management public API
The Angular SDK provides a comprehensive public API for building custom task management interfaces. This API allows you to fetch tasks, manage comments, handle task actions, and interact with task data programmatically.Importing the Service
To use the task management public API, inject thePublicTasksService from @flowx/angular-sdk:
Available Types
The Angular SDK exports the following types for task management:Initialization
Before using the task management API, you need to initialize the task manager resources. This fetches the view configuration, enumerations, and filter operators.
Returns: Observable that emits an object containing:
view: The view configuration object (TMView)enumerations: Available enumeration options for filters (TMEnumerations)filterOperators: Available filter operators for each column (TMFilterOperators)
Fetching Tasks
getViewTasks
Fetches tasks for a specific view with support for sorting, filtering, pagination, and search.
Returns: Observable that emits a
TMPaginatedResponse<TMViewTask> containing:
content: Array ofTMViewTaskobjectstotalElements: Total number of taskstotalPages: Total number of pages- Other pagination metadata
getViewTask
Fetches a specific task by ID and token UUID.
Returns: Observable that emits a
TMViewTask object.
Task Details
getTaskComments
Fetches all comments for a specific task.
Returns: Observable that emits an array of
TMTaskComment objects.
getTaskHistory
Fetches the history/audit trail for a specific task.
Returns: Observable that emits an array of
TMTaskHistory objects.
getAssignees
Fetches available assignees for a task, with optional search filtering.
Note: The keyword must be at least 4 characters long. If shorter, the Observable will emit an error.
Returns: Observable that emits an array of
TMUser objects.
getBulkAssignees
Fetches available assignees for multiple tasks in bulk.
Returns: Observable that emits an array of
TMUser objects.
Task Actions
executeTaskAction
Executes an action on a specific task (e.g., assign, complete, cancel).
Available Actions:
TaskActions.ASSIGN- Assign task to a userTaskActions.COMPLETE- Mark task as completeTaskActions.CANCEL- Cancel the taskTaskActions.CHANGE_PRIORITY- Change task priorityTaskActions.VIEW- View task details
bulkUpdate
Applies an action to multiple tasks at once.
Returns: Observable that completes when the bulk action is done.
updatePriority
Updates the priority of a specific task.
Returns: Observable that completes when the priority is updated.
Comments Management
addComment
Adds a new comment to a task.
Returns: Observable that emits the created
TMTaskComment object.
deleteComment
Removes a comment from a task.
Returns: Observable that completes when the comment is deleted.
Service State Management
getView
Gets the current view configuration.
TMView object or null if not initialized.
getEnumerations
Gets the current enumerations.
TMEnumerations object.
setView
Sets the view configuration manually.
Real-time Updates (SSE)
initSse
Initializes a Server-Sent Events (SSE) connection for real-time task updates.
getTaskManagerResources().
getSseEvents
Gets an Observable stream of SSE events.
MessageEvent<string> objects.