Send message task
This node is used to configure messages that should be sent to external systems.
Configuring a send message task
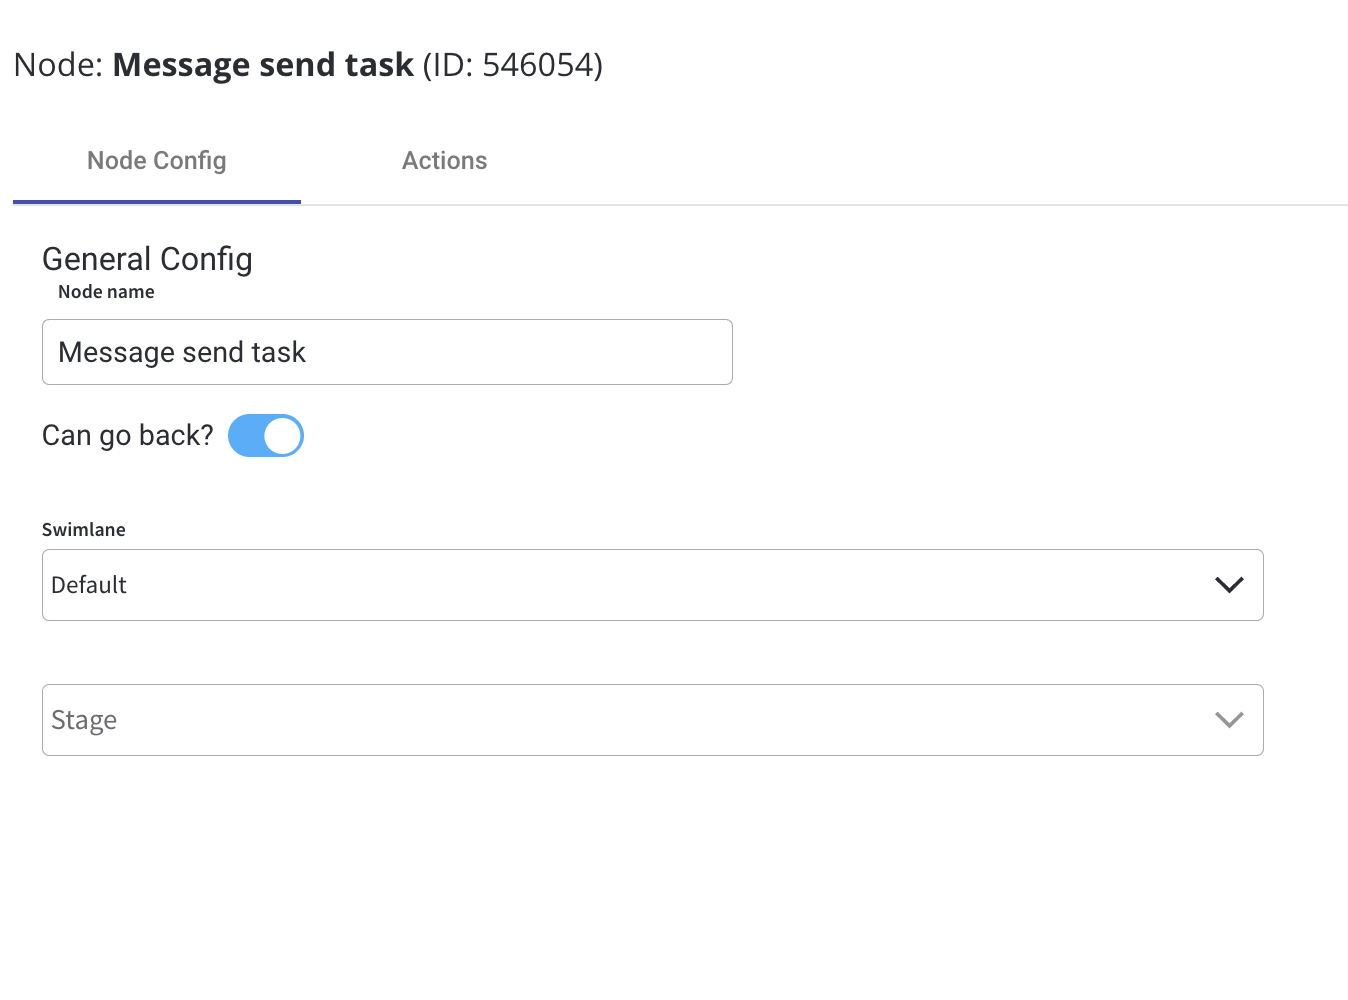
Node configuration is done by accessing the Node Config tab. You have the following configuration options for a send message task:General configuration
Inside the General Config tab, you have the following properties:- Node Name - the name of the node
- Can Go Back - switching this option to true will allow users to return to this step after completing it
When encountering a step with
canGoBack switched to false, all steps found before it will become unavailable.- Swimlane - choose a swimlane (if there are multiple swimlanes on the process) to ensure only certain user roles have access to certain process nodes; if there are no multiple swimlanes, the value is Default
- Stage - assign a stage to the node
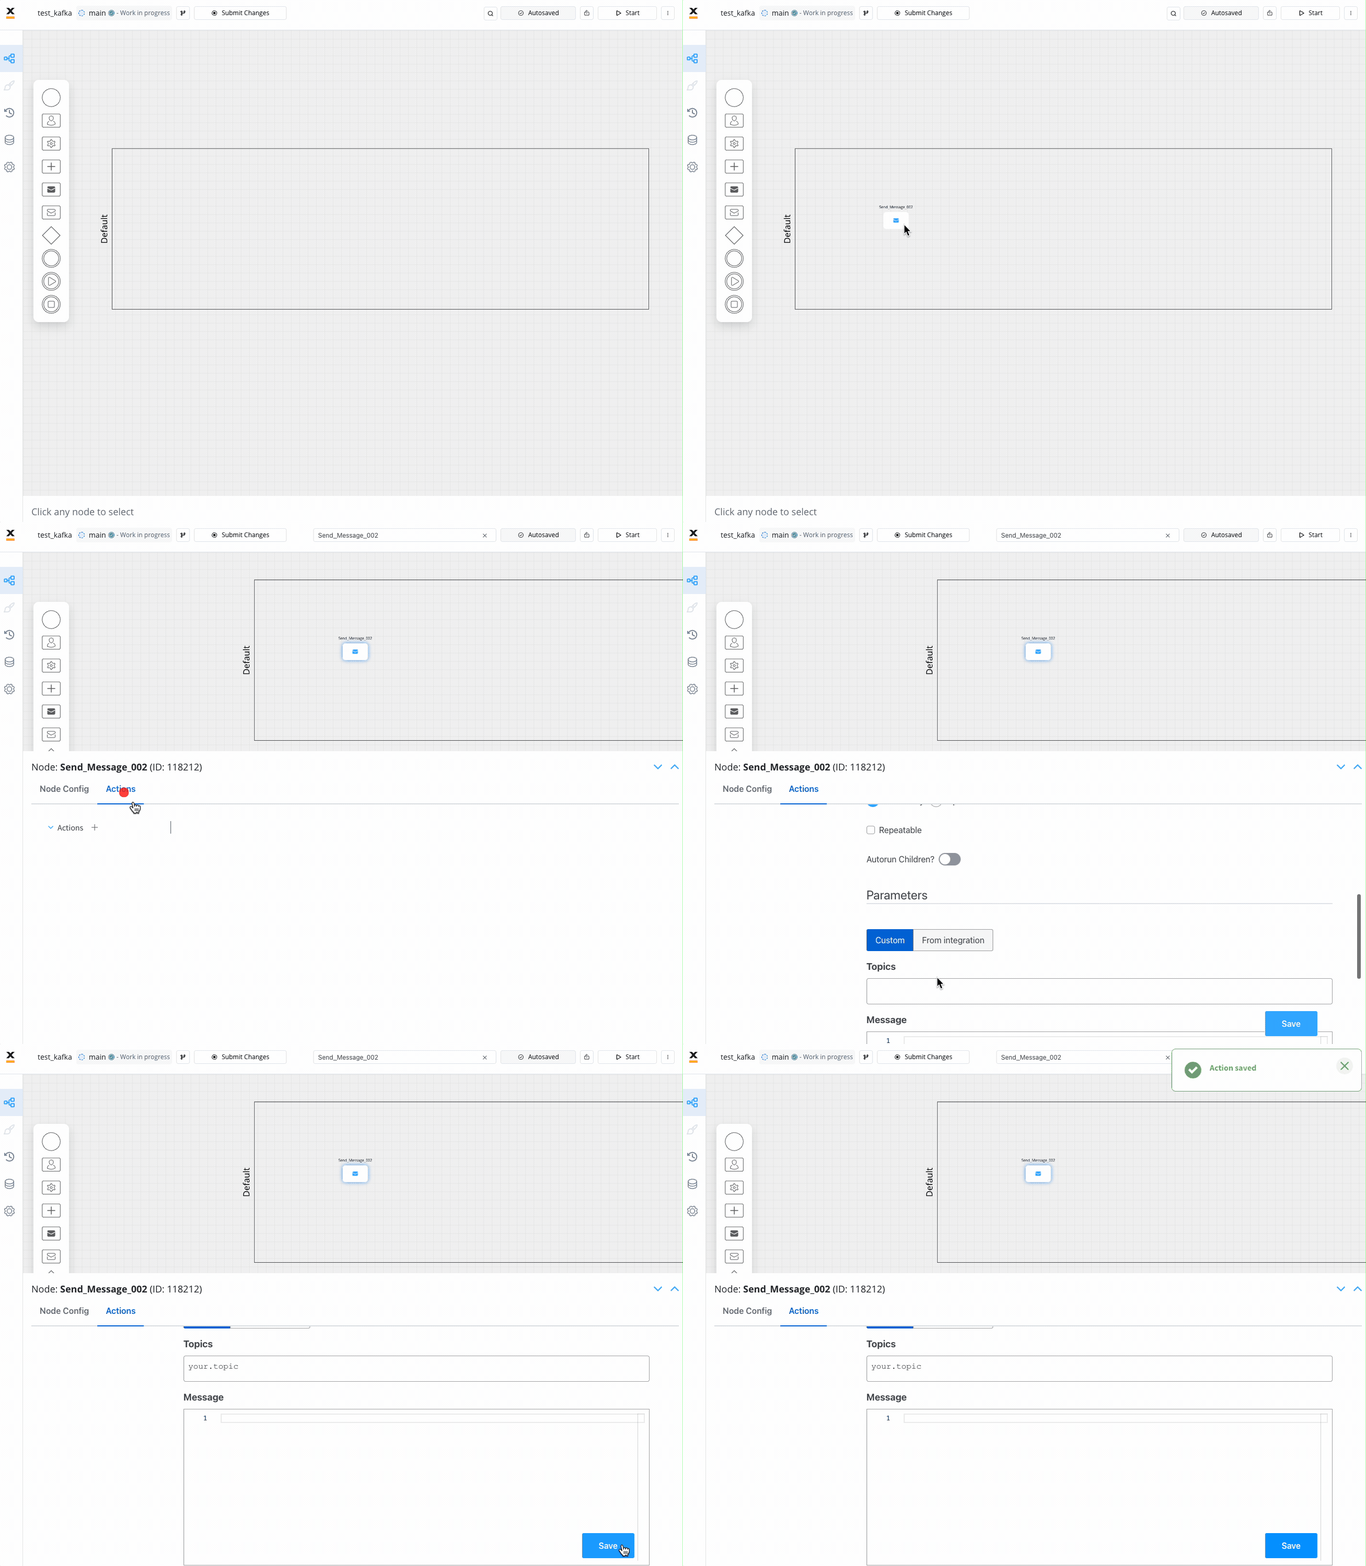
- Open and start configuring a process.
- Add a send message task node.
- Select the send message task node and open the Node Configuration.
- Add an , the type of the action set to Kafka Send Action.
- A few action parameters will need to be filled in depending on the selected action type.
 Multiple options are available for this type of action and can be configured via the FLOWX.AI Designer. To configure and add an action to a node, use the Actions tab at the node level, which has the following configuration options:
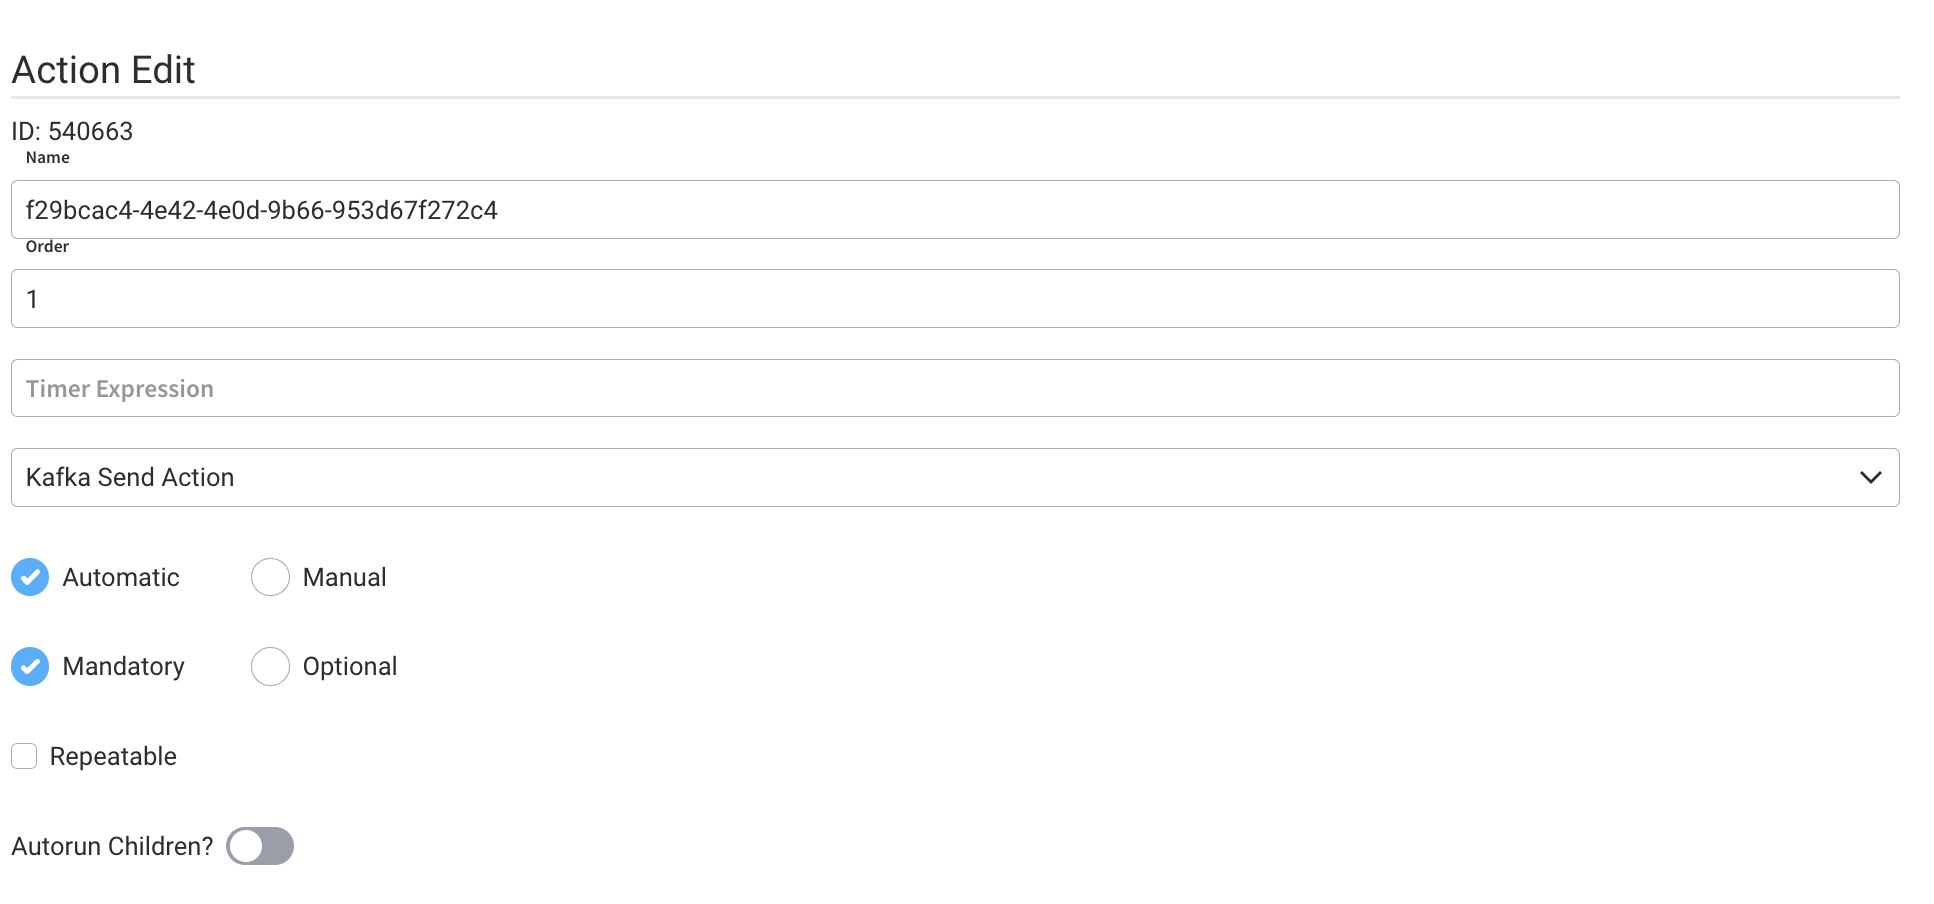
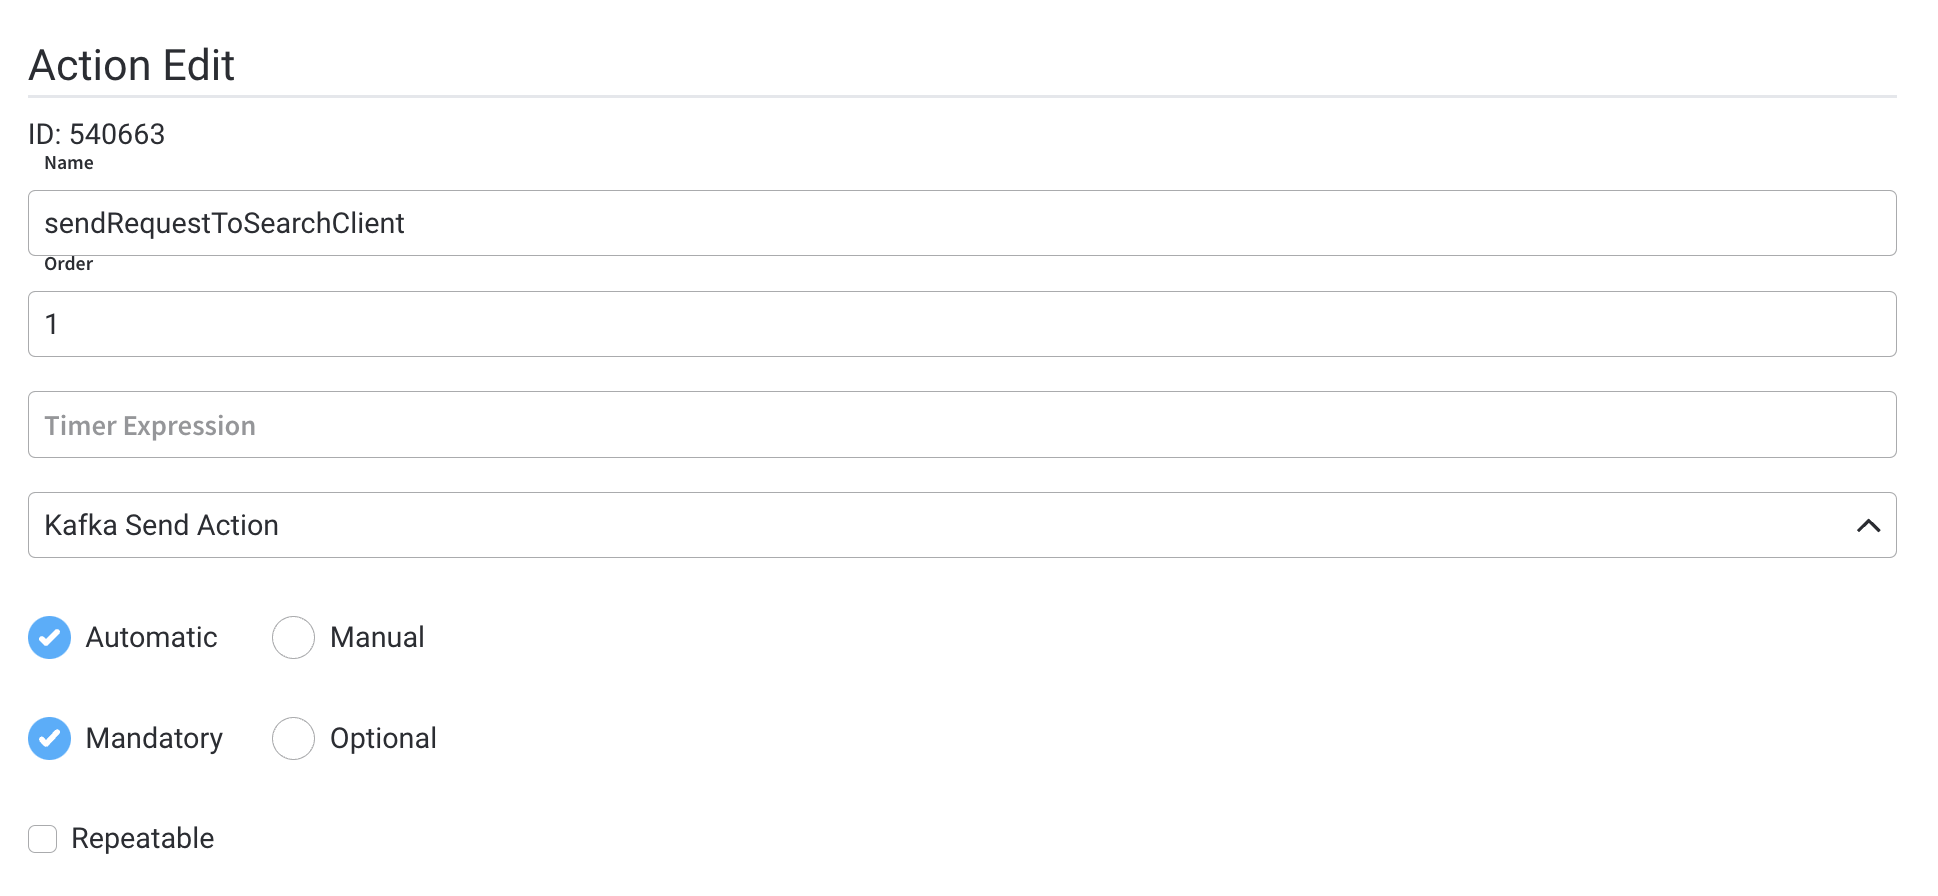
Action Edit
- Name - used internally to make a distinction between different actions on nodes in the process. We recommend defining an action naming standard to easily find the process actions
- Order - if multiple actions are defined on the same node, set the running order using this option
- Timer Expression - it can be used if a delay is required on that action. The format used for this is ISO 8601 duration format (for example, a delay of 30 seconds will be set up as
PT30S) - Action Type - should be set to Kafka Send Action for actions used to send messages to external systems
- Trigger Type (options are Automatic/Manual) - choose if this action should be triggered automatically (when the process flow reaches this step) or manually (triggered by the user); in most use cases, this will be set to automatic
- Required Type (options are Mandatory/Optional) - automatic actions can only be defined as mandatory. Manual actions can be defined as mandatory or optional.
- Repeatable - should be checked if the action can be triggered multiple times
- Autorun Children - when this is switched on, the child actions (the ones defined as mandatory and automatic) will run immediately after the execution of the parent action is finalized
Back in steps
- Allow BACK on this action - back in the process is a functionality that allows you to go back in a business process and redo a series of previous actions in the process, or for more details, check Moving a Token Backwards in a Process section
Data to Send
- Keys - are used when data is sent from the frontend via an action to validate the data (you can find more information in the User Task Configuration section)
Intro to Kafka
Kafka documentation
Example of a send message task usage
Send a message to a CRM integration to request a search in the local database:Action Edit
- Name - pick a name that makes it easy to figure out what this action does, for example,
sendRequestToSearchClient - Order - 1
- Timer Expression - this remains empty if we want the action to be triggered as soon as the token reaches this node
- Action Type - Kafka Send Action
- Trigger Type - Automatic - to trigger this action automatically
- Required Type - Mandatory - to make sure this action will be run before advancing to the next node
- Repeatable - false, it only needs to run once
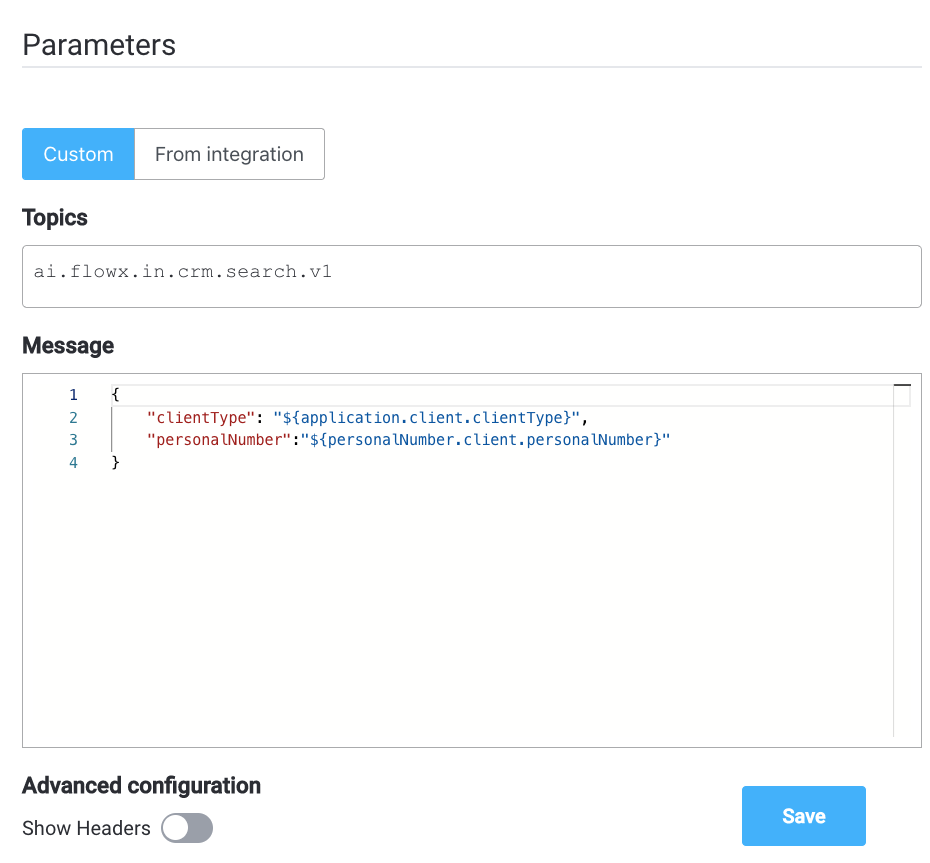
Parameters
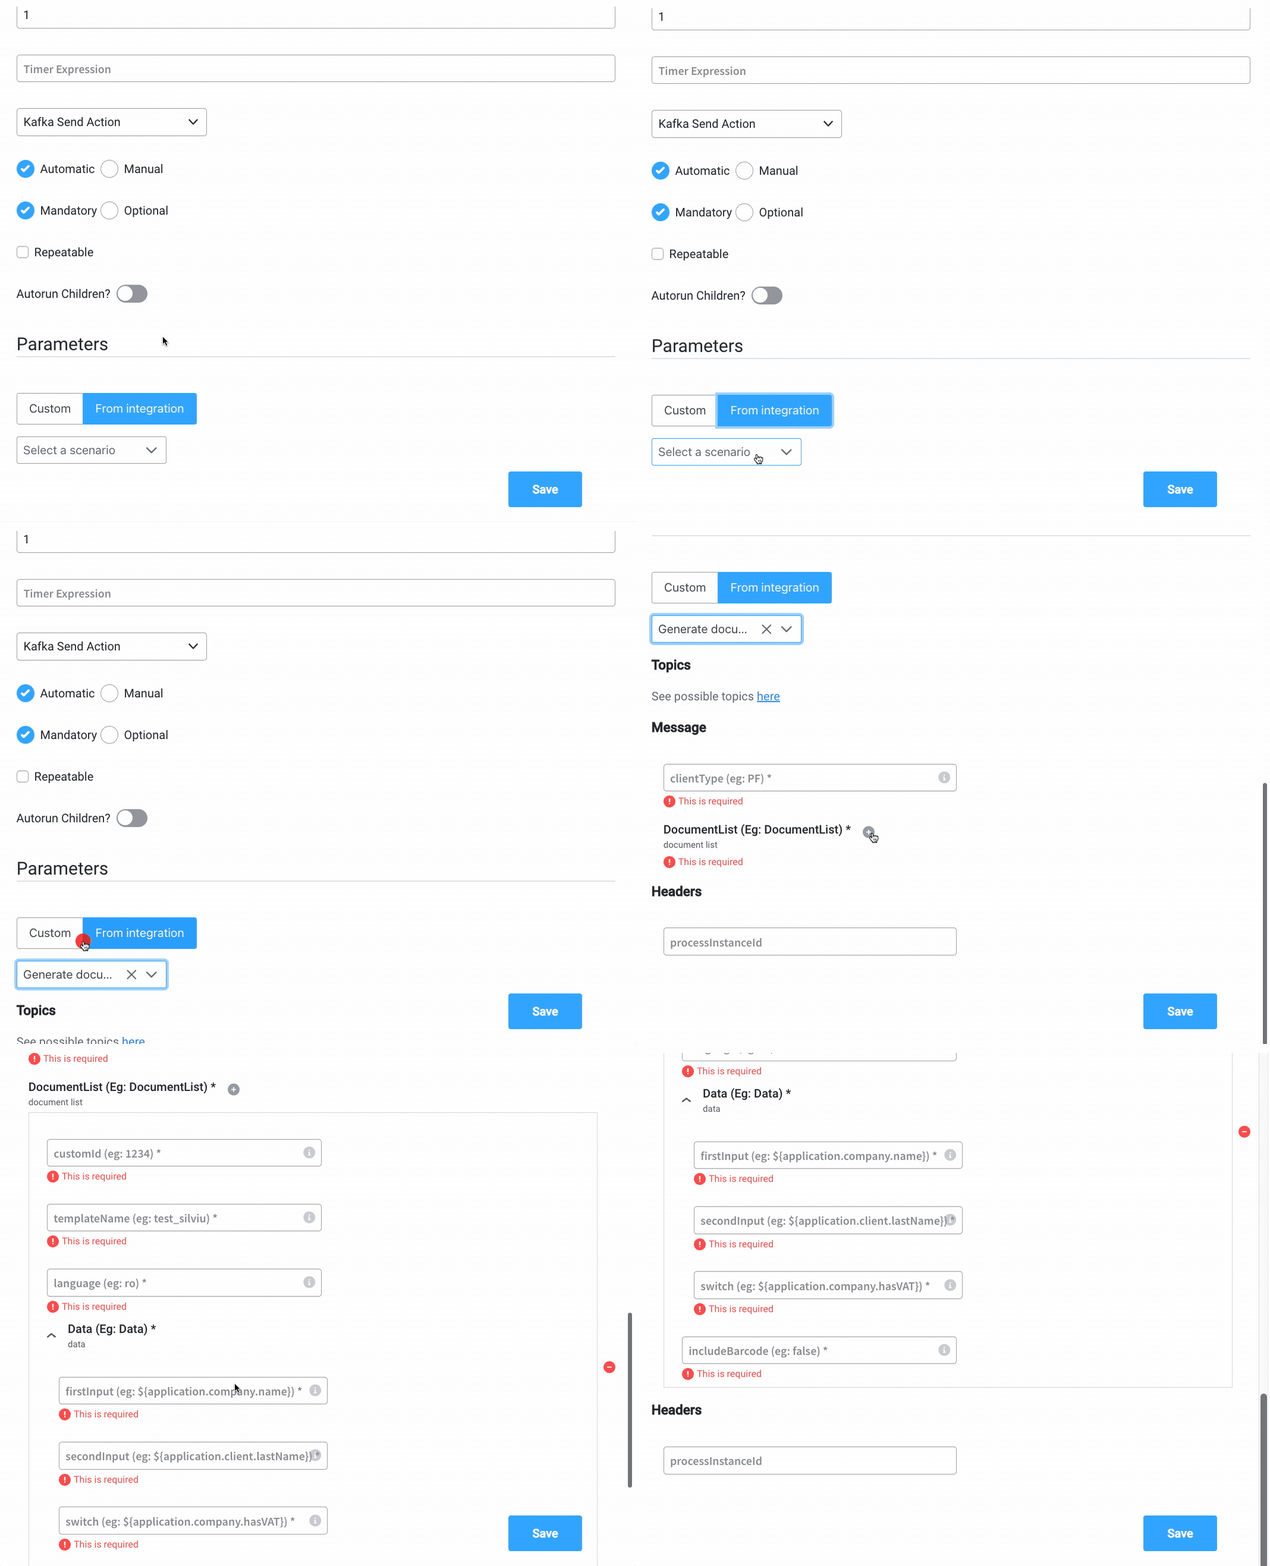
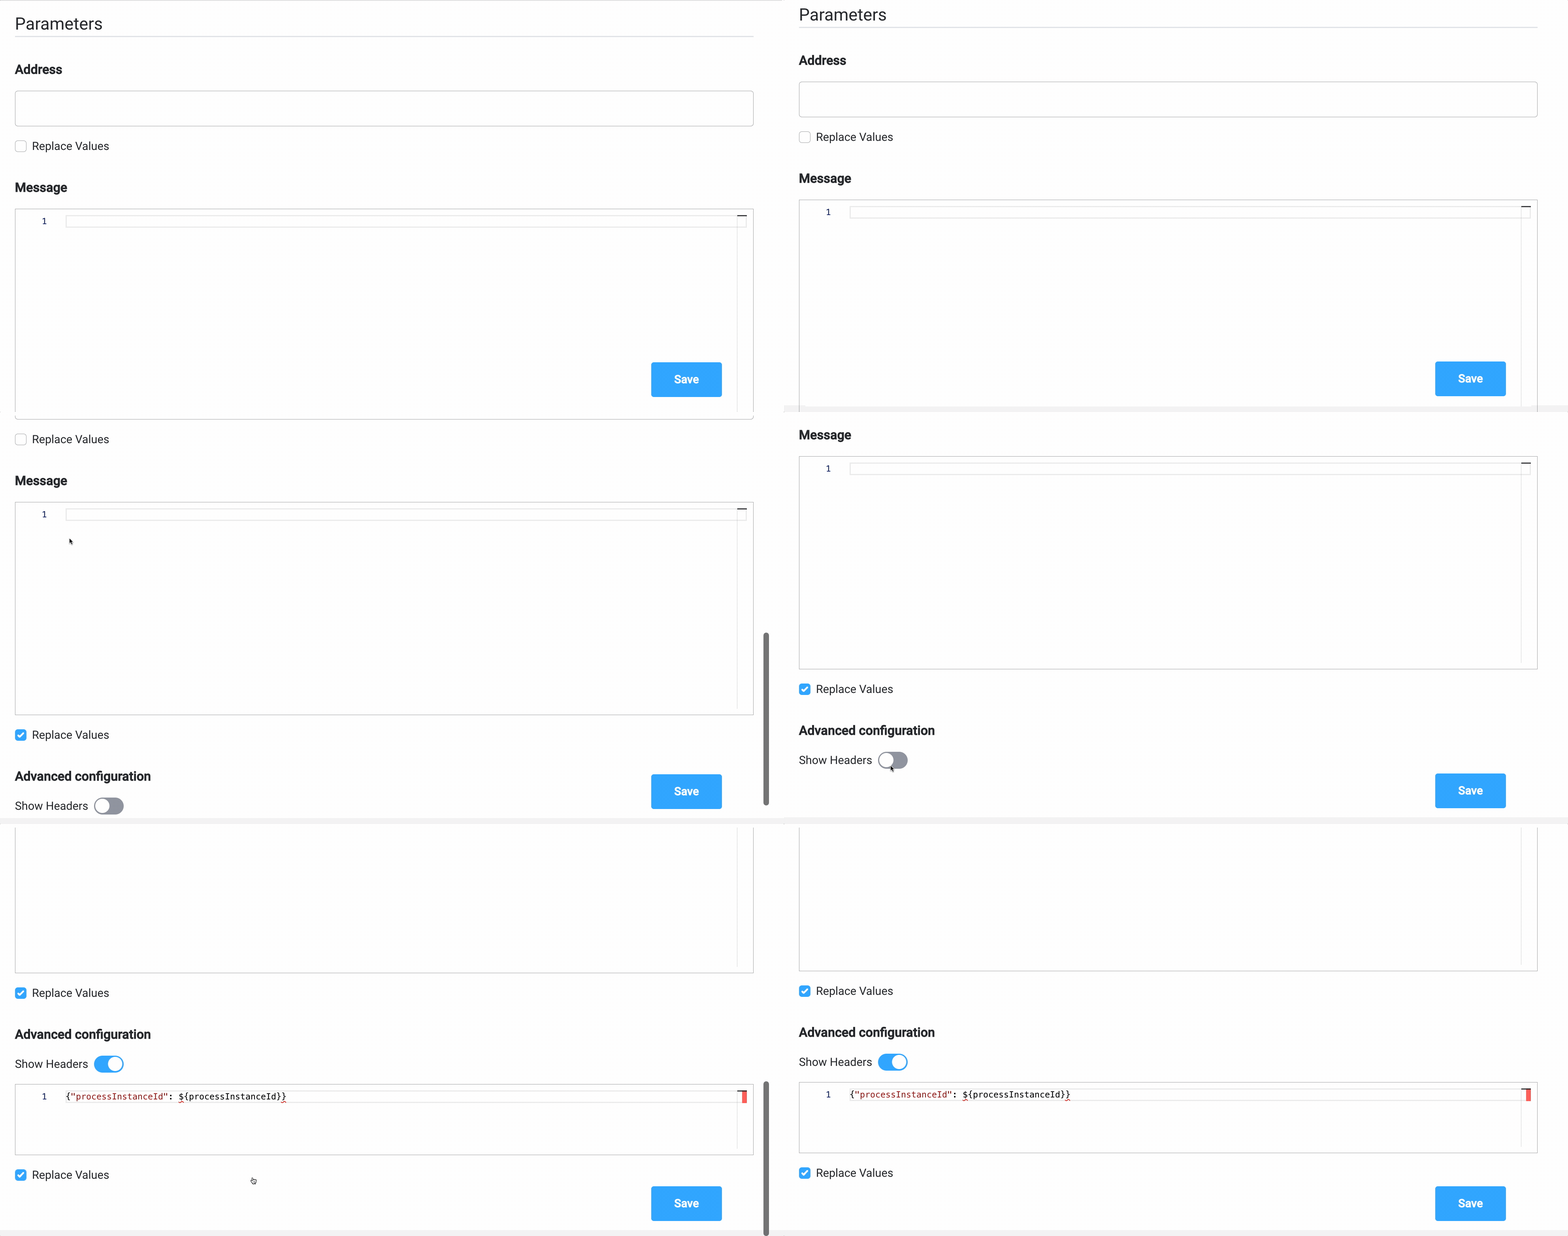
Parameters can be added either using the Custom option (where you configure everything on the spot) or by using From Integration and import parameters already defined in an integration.More details about Integrations Management you can find here.
Custom
- Topics -
ai.flowx.in.crm.search.v1the Kafka topic on which the CRM listens for requests - Message -
{ "clientType": "${application.client.clientType}", "personalNumber": "${personalNumber.client.personalNumber}" }- the message payload will have two keys,clientTypeandpersonalNumber, both with values from the process instance - Headers -
{"processInstanceId": ${processInstanceId}}

Receive Message Task
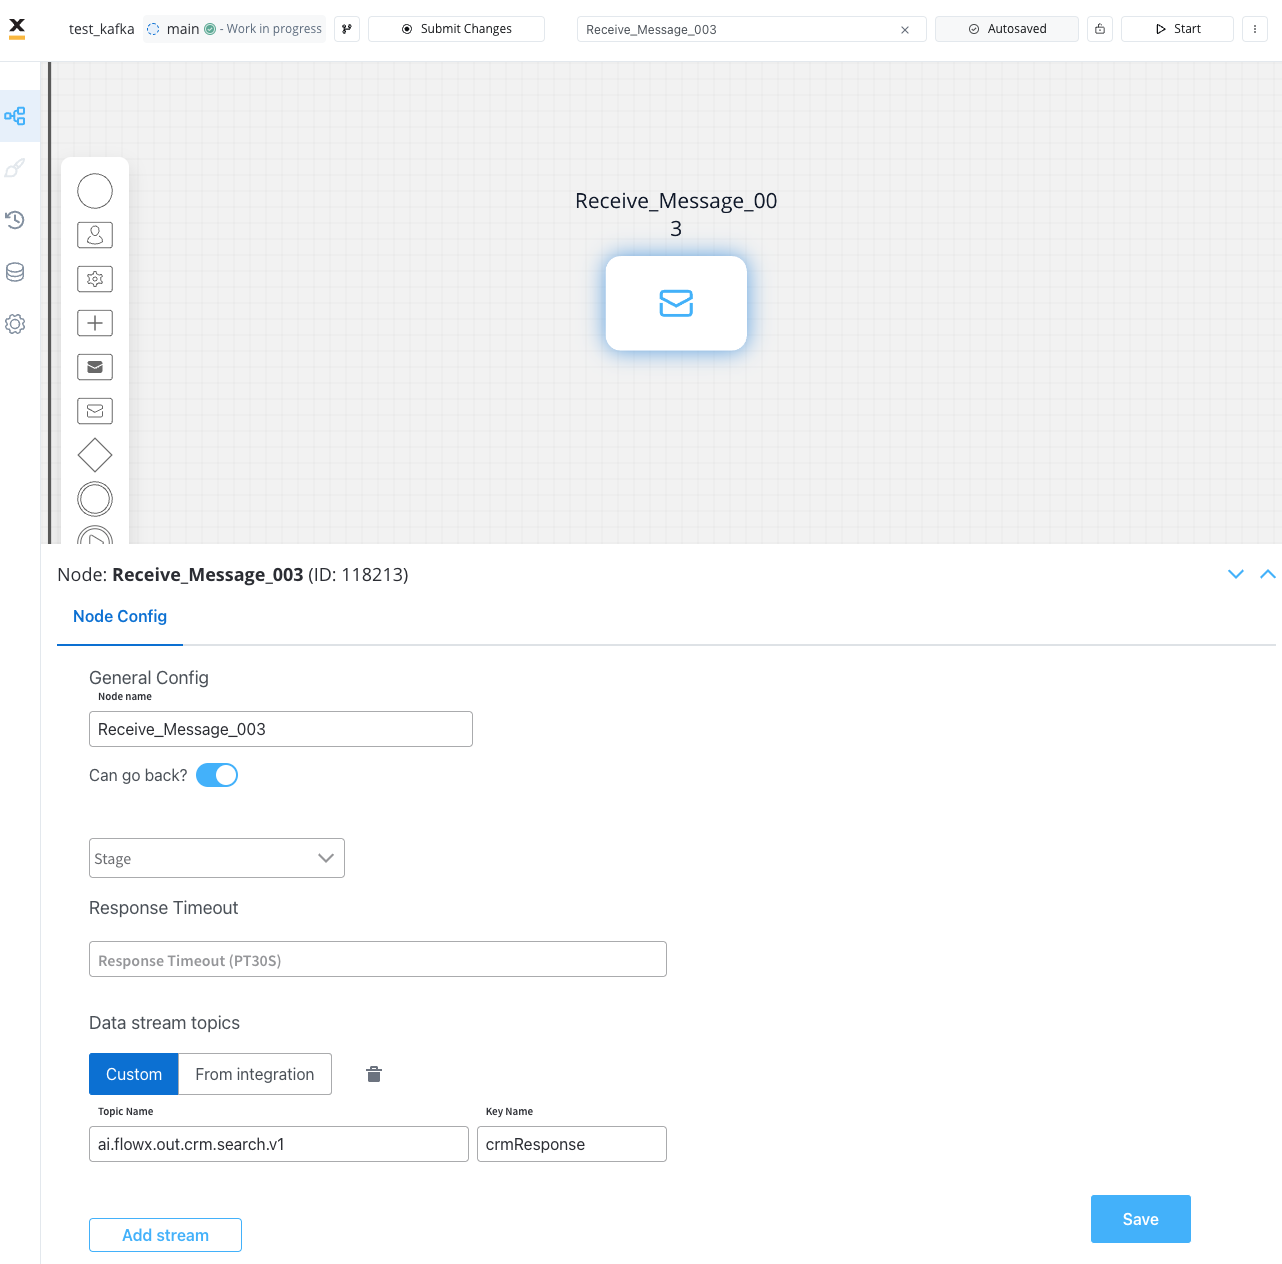
This type of node is used when we need to wait for a reply from an external system.
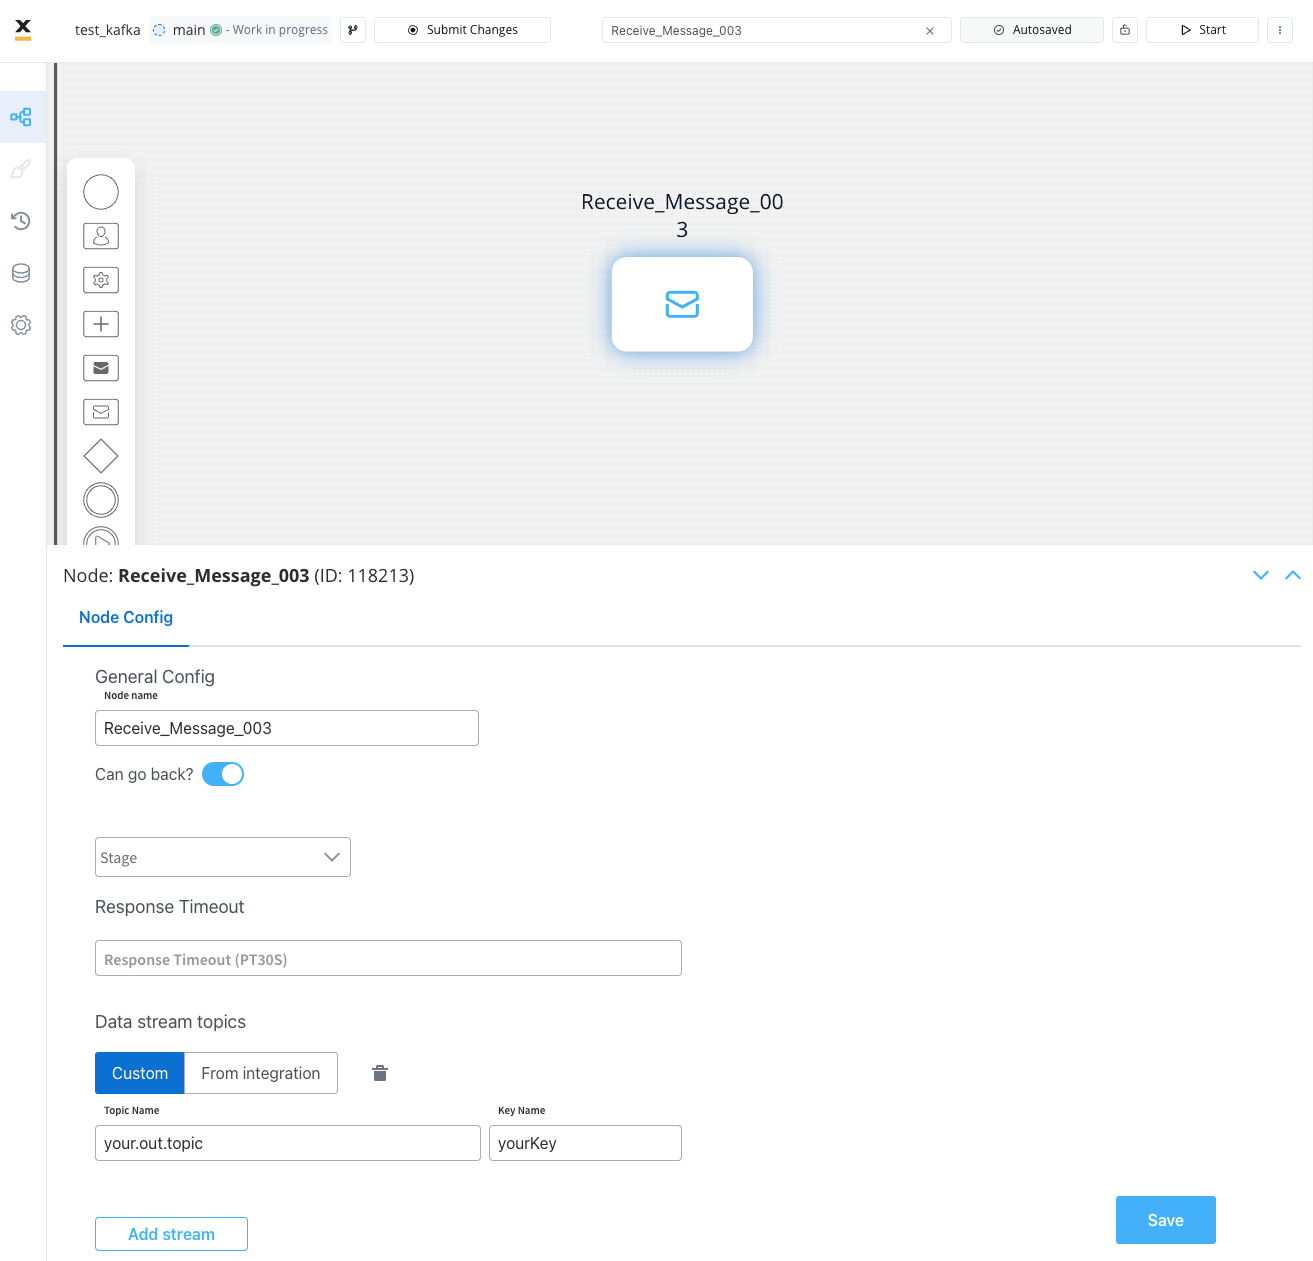
Configuring a Receive Message Task
The values you need to configure for this node are the following:- Topic Name - the topic name where the process engine listens for the response (this should be added to the platform and match the topic naming rule for the engine to listen to it) -
ai.flowx.out.crm.search.v1
- Key Name - will hold the result received from the external system; if the key already exists in the process values, it will be overwritten -
crmResponse
From integration
After defining one integration (inside Integration Management), you can open a compatible node and start using already defined integrations.- Topics - topics defined in your integration
- Message - the Message Data Model from your integration
- Headers - all integrations have
processInstanceIdas a default header parameter; add any other relevant parameters
