Docs home page
v3.x
Search...or use ASK AI
⌘K
Ask AI
Academy
Academy
Search...
Navigation
Managing a process flow
Adding more flow branches
Documentation
Release notes
SDKs
Setup guides
Getting Started
Introduction
Building with FlowX.AI
Learn more
Platform overview
Frameworks and standards
FlowX.AI architecture
Building blocks
Process
Nodes
Actions
UI Designer
Token
Supported scripts
FlowX.AI Designer
FlowX.AI Designer
Managing a process flow
Creating a new process definition
Adding a new node
Adding an action to a node
Handling decisions in the flow
Adding more flow branches
Creating a user interface
Moving a token backwards in a process
Exporting / importing a process definition
Initiating processes
Platform deep dive
Core components
Core extensions
Plugins
Integrations
Third-party components
User roles management
API reference
GET
Process status
POST
Start process
POST
Start process and inherit values
POST
Execute action
GET
List buckets
GET
List objects in a bucket
GET
Download a file
GET
Add new Kafka exchange mock
GET
View Kafka exchanges
On this page
Steps for creating a flow with two branches
FlowX.AI Designer
Managing a process flow
Adding more flow branches
Copy page
Copy page
To split the
Process flow
into more steps, you just need to use a parallel gateway node type.
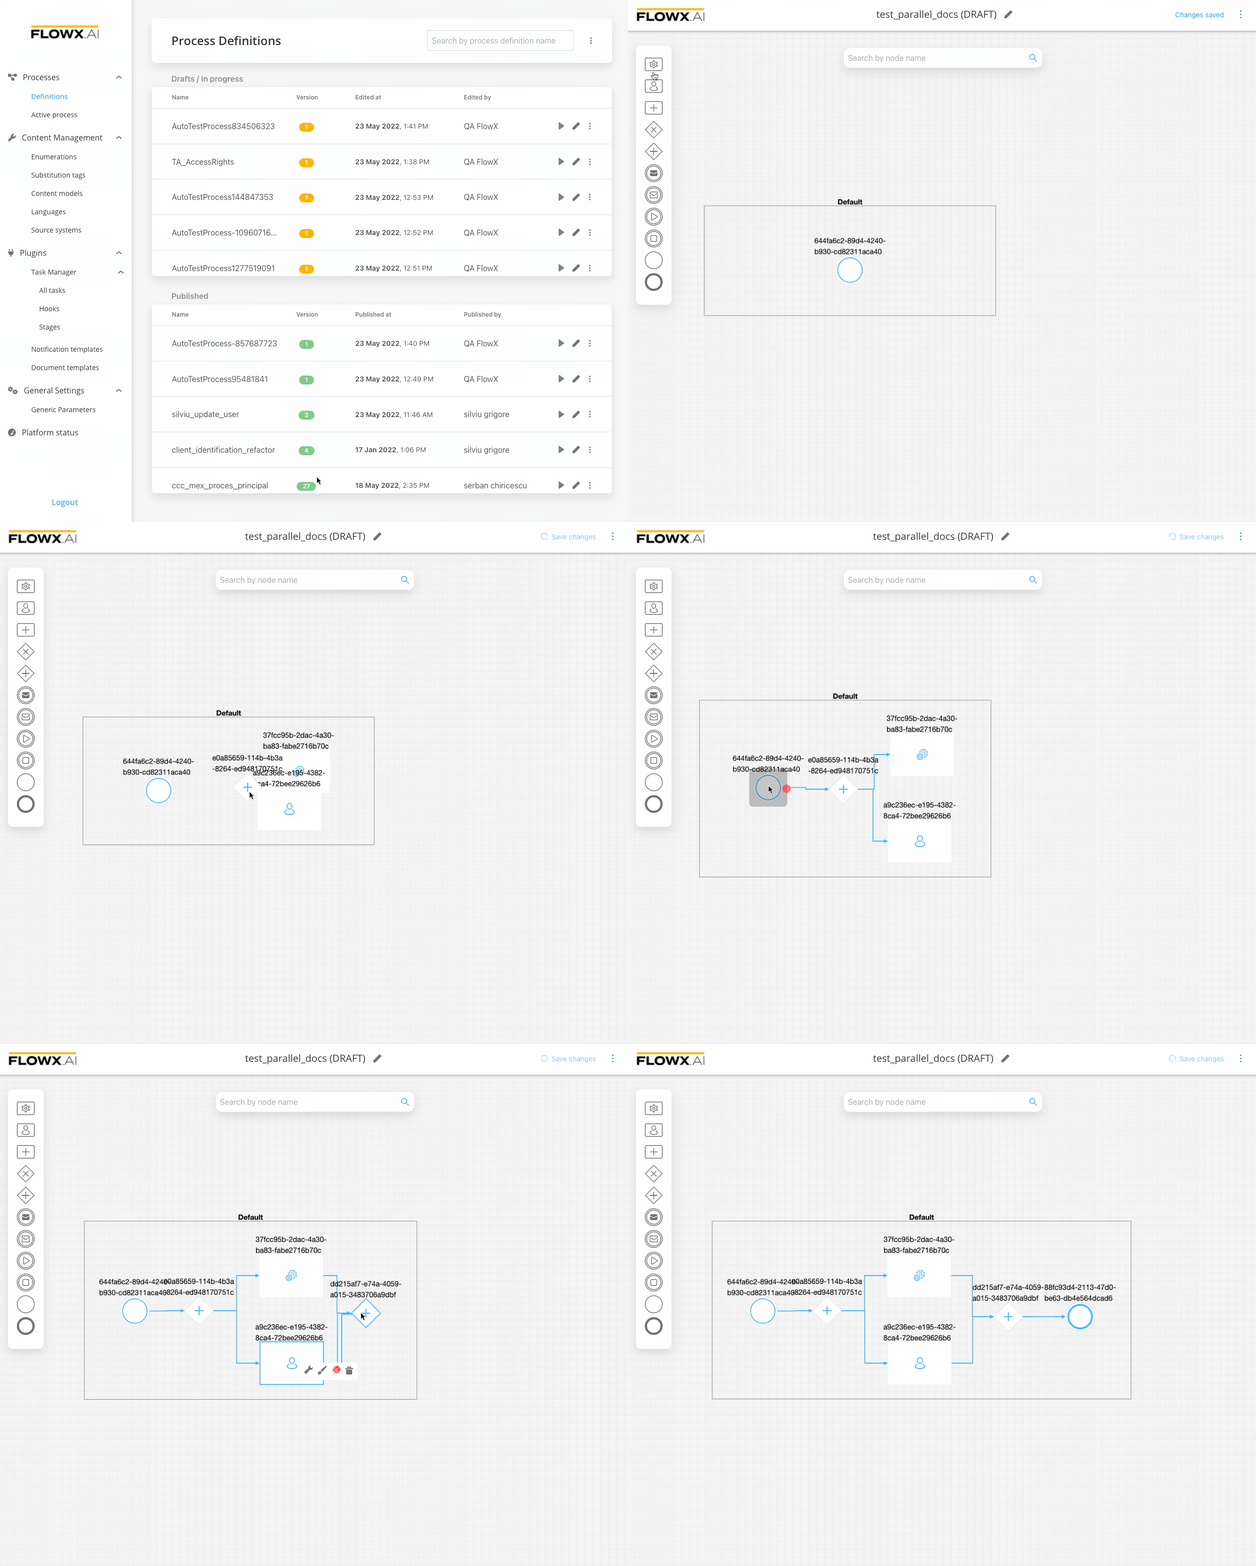
Steps for creating a flow with two branches
To create a flow with two branches:
1
Open
FlowX Designer
and go to the
Definitions
tab.
2
Click on the
New process
button, using the
breadcrumbs
from the top-right corner.
3
Add a
start node
and a
parallel gateway node
.
4
Add two different
task nodes
and link them after the
parallel gateway node
.
5
Add a
parallel gateway
to merge the two flow branches back into one branch.
6
Add an
end node
.
Parallel Gateway
Was this page helpful?
Yes
No
Handling decisions in the flow
Creating a user interface
Assistant
Responses are generated using AI and may contain mistakes.