Overview
FlowX.AI provides two main mechanisms for controlling process access:- Swimlanes: Group process nodes by participants and control access at the node level
- Business filters: Restrict access based on dynamic business rules and user attributes
Prerequisites
Before configuring process access roles, ensure you have:- Identity Provider Setup: A configured identity provider (Keycloak, Entra ID, etc.) with user roles defined
- Service Account: A service account with appropriate permissions in your identity provider
- Platform Configuration: Proper platform configuration to connect to your identity provider
Identity Provider Setup Guide
Complete guide for setting up identity provider integration
Access control with swimlanes
What are swimlanes?
Swimlanes provide a way of grouping process nodes by process participants. They allow you to ensure that only users with specific roles can access certain process nodes. Key characteristics:- By default, all process nodes belong to the same swimlane
- When a token moves between swimlanes, user access is evaluated
- Users without access to a swimlane will see the process in read-only mode
- Users receive notifications when access changes
Configuring swimlanes
Step 1: Set up roles in identity provider
First, configure the desired user roles in your identity provider solution and assign users to the appropriate roles.Use the Access Management tab under General Settings in FlowX Designer to administrate all roles and view their current assignments.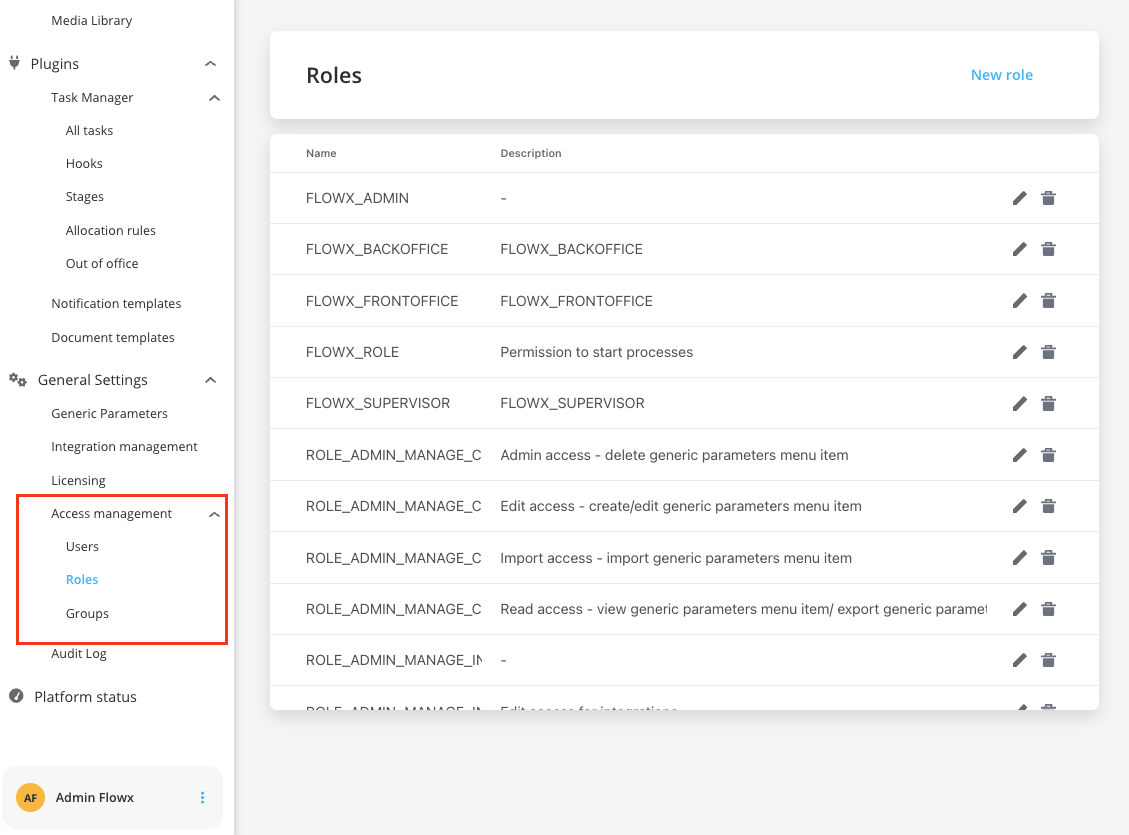
Step 2: Configure service account
A service account with appropriate permissions must be configured in your identity provider to allow FlowX.AI to access role information.
Step 3: Configure swimlane permissions
Navigate to your process definition and access the Permissions tab in the process settings panel. Here you can configure access for each swimlane. After defining roles in your identity provider solution, they will be available in the process definition settings panel for configuring swimlane access. When you create a new swimlane, it automatically comes with two default permissions assigned.Default swimlane permissions
Every process comes with a Default swimlane that includes two standard permissions: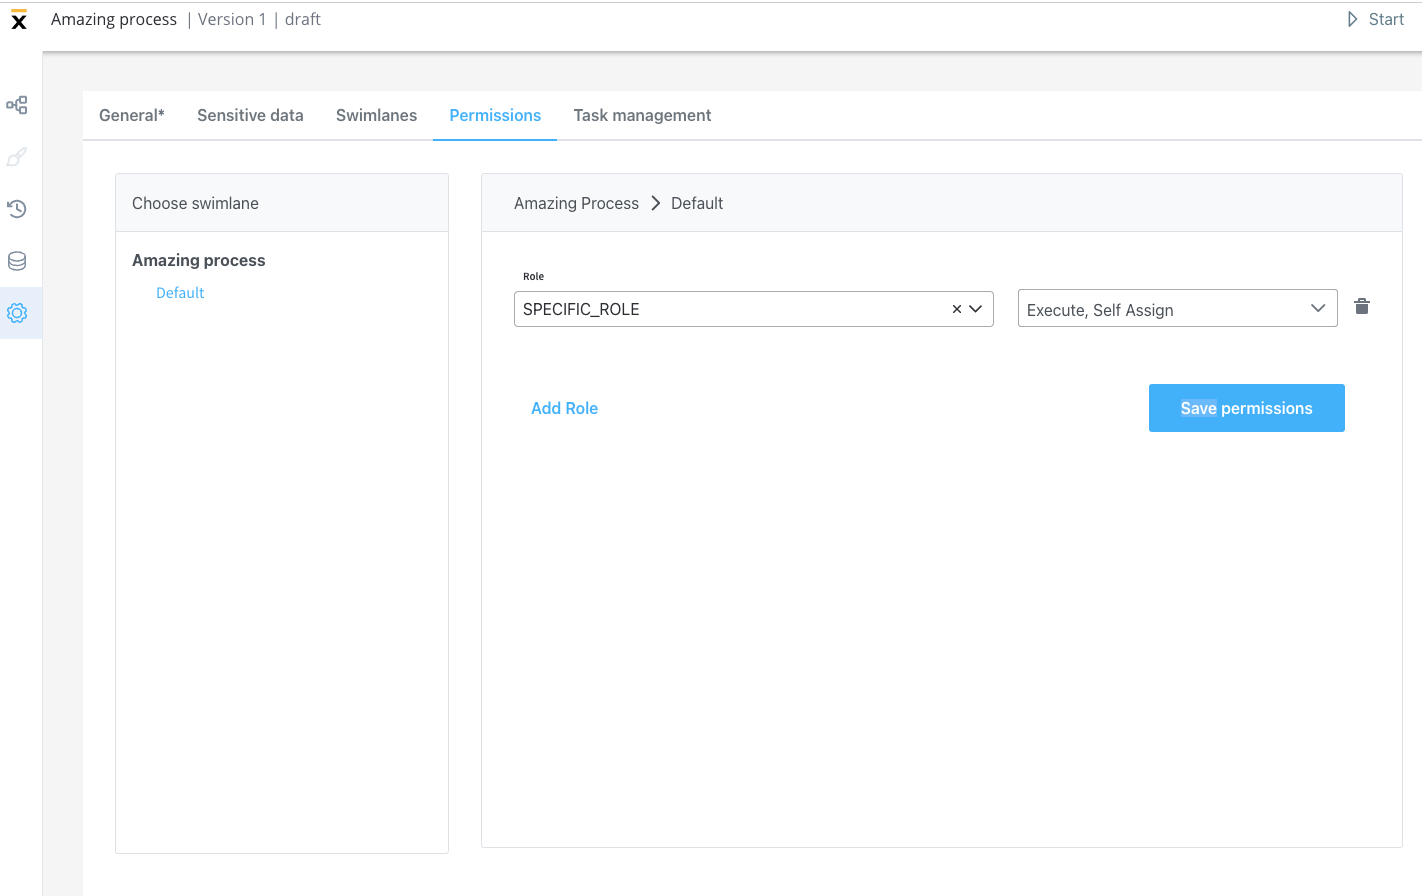
- Execute: Users can start process instances and run actions on them
- Self-assign: Users can assign process instances to themselves and begin working on them
These default permissions are available in FlowX.AI platform version 2.11.0 and later.
Swimlane execution control
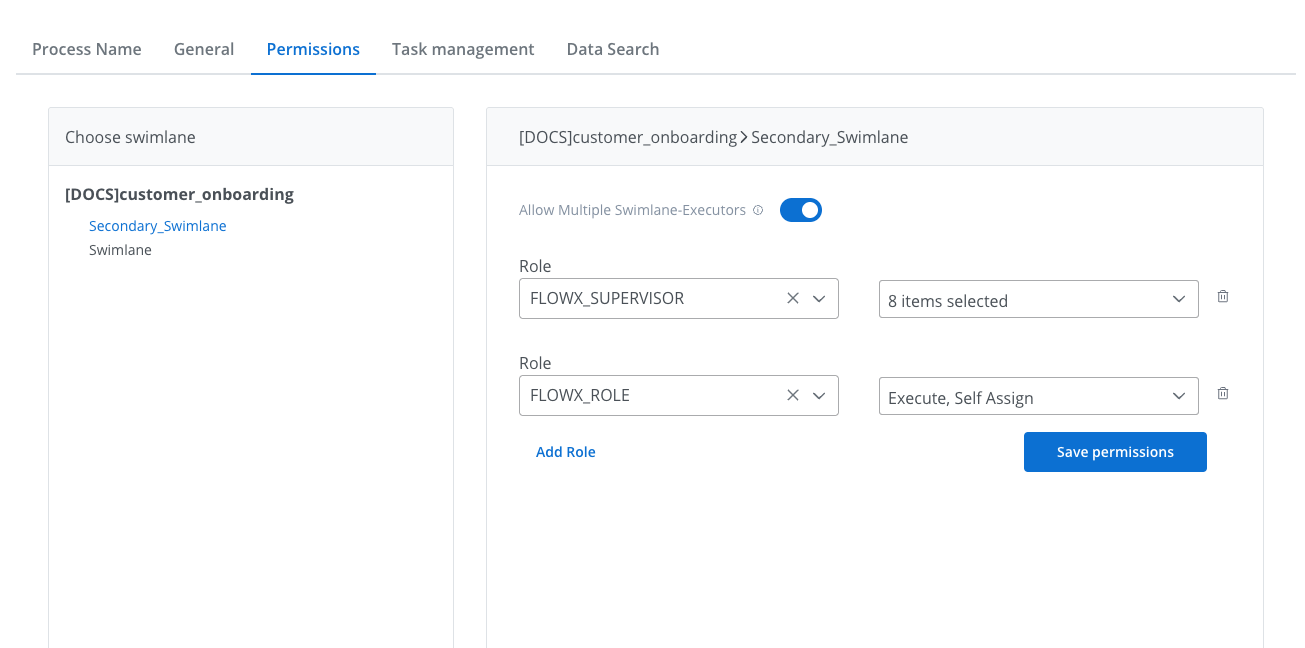
Allow multiple swimlane executors
For each swimlane, you can control execution permissions by switching between:- Swimlane owner + multiple executors (default)
- Only Swimlane Owner
This setting can be configured individually for each swimlane in your process definition.
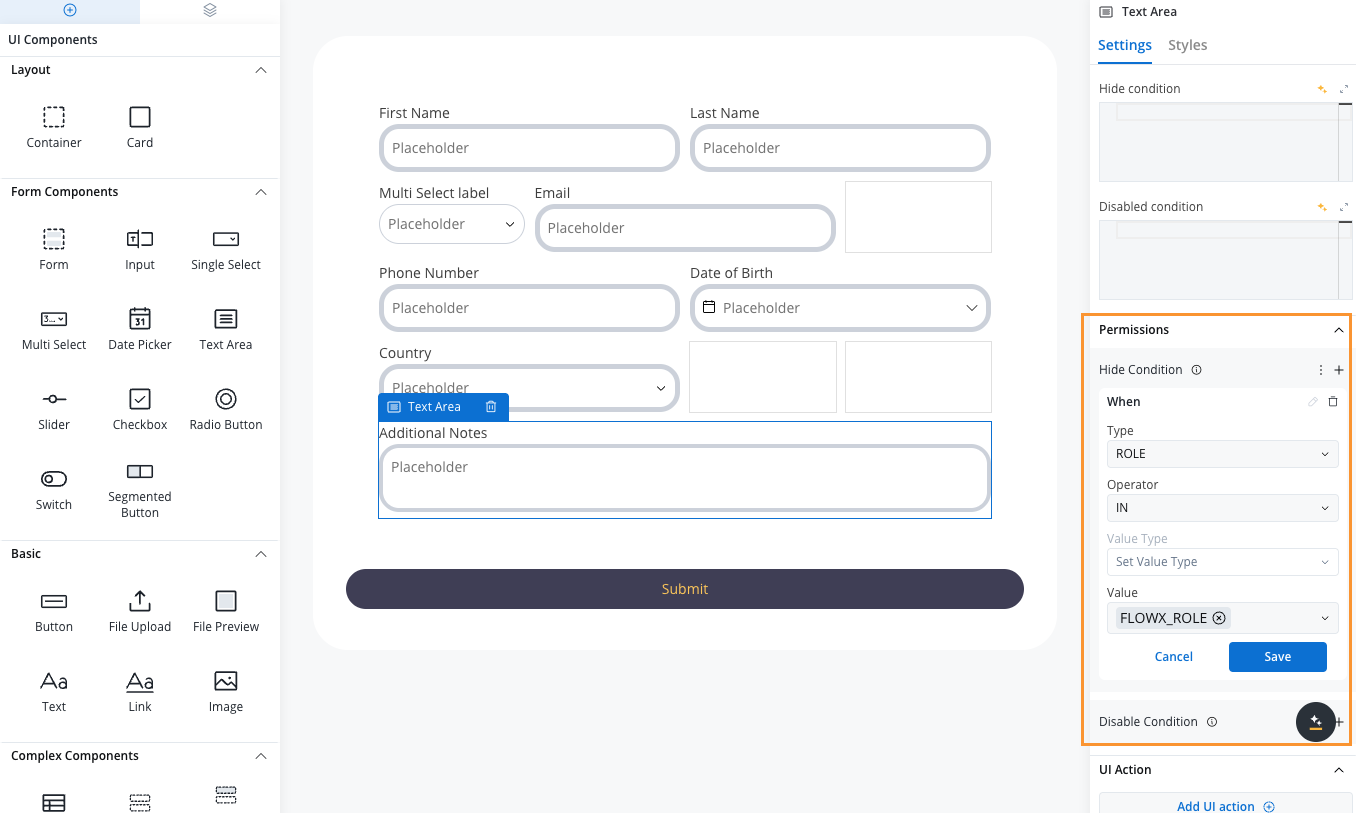
- Assign different UI elements to different roles within the same swimlane
- Create more complex permission structures for sophisticated workflows
- Maintain security while enabling collaborative work on process instances
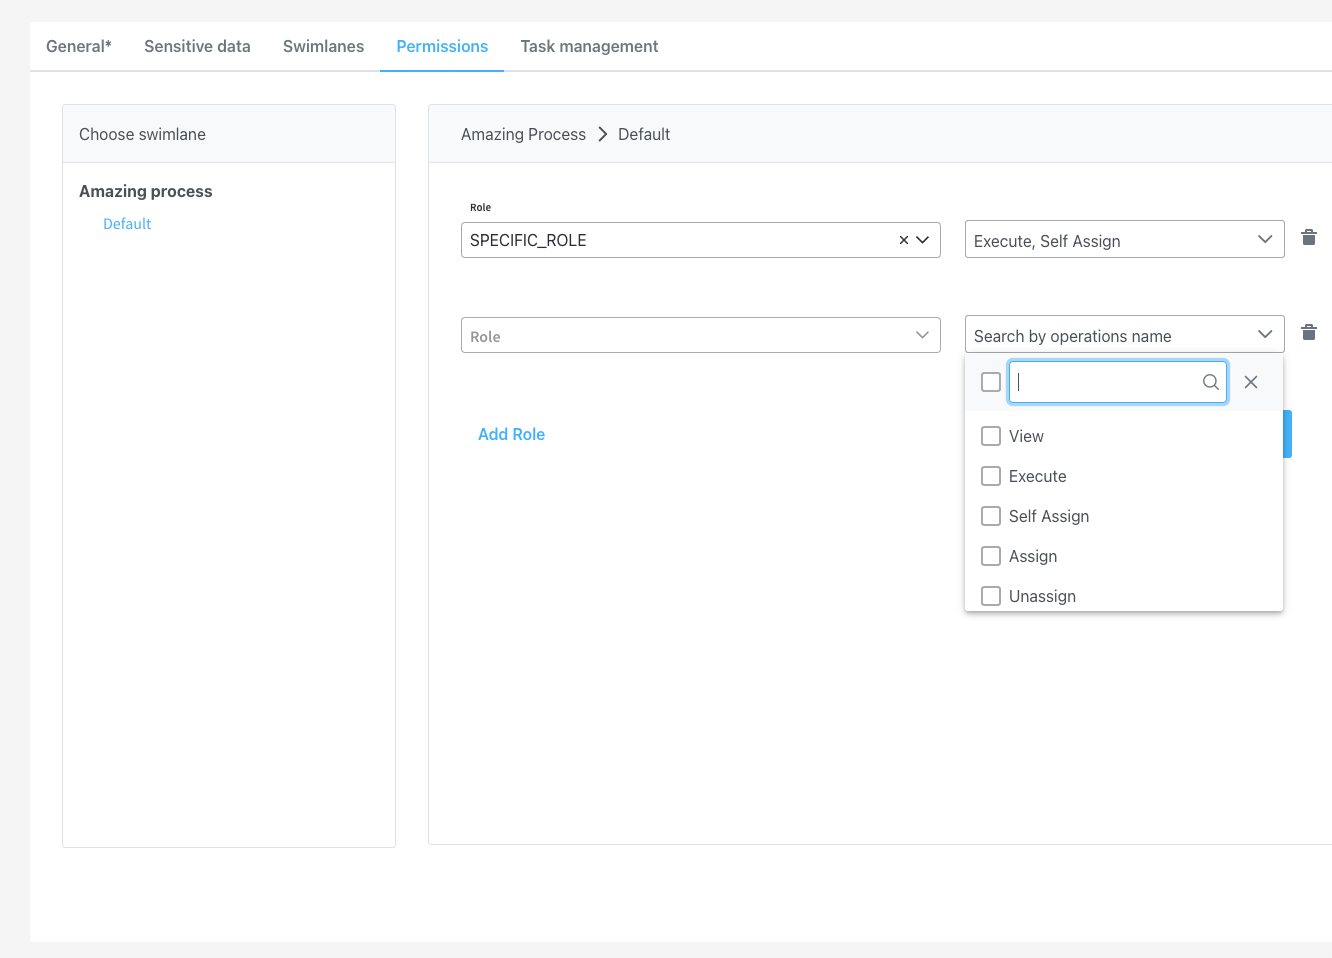
Additional permissions
You can manually add additional permissions based on your specific requirements:Core permissions
- View: Users can view process instance data
- Execute: Users can start process instances and run actions
- Self-assign: Users can assign process instances to themselves
Task management permissions
These permissions are specifically for use with the Task Management plugin:- Assign: Assign tasks to other users
- Unassign: Remove task assignments from other users
- Hold: Mark process instances as on hold
- Unhold: Remove hold status from process instances
- Change Priority: Modify task priority levels
Access control with business filters
What are business filters?
Business filters allow you to restrict process access based on dynamic business rules. For example, you might want only users from a specific bank branch to view process instances started from that branch.How business filters work
Business filters use attributes that are:- Configured in your identity management platform
- Made available on the authorization token
- Assigned to application users
- Stored in process instance parameters
Configuring business filters
Step 1: Identity provider configuration
Configure business filter attributes in your identity provider as:- A list of filters on the authorization token
- Attributes assigned to specific users
Step 2: Process definition setup
In your process definition, include nodes with actions that store the current business filter value to:Step 3: Runtime behavior
Once configured, only users with the correct business filter attribute can interact with process instances that have the filter applied.Business Filters Guide
Detailed guide on implementing business filters
Configuration examples
Standard user configuration
For regular users who need basic process interaction: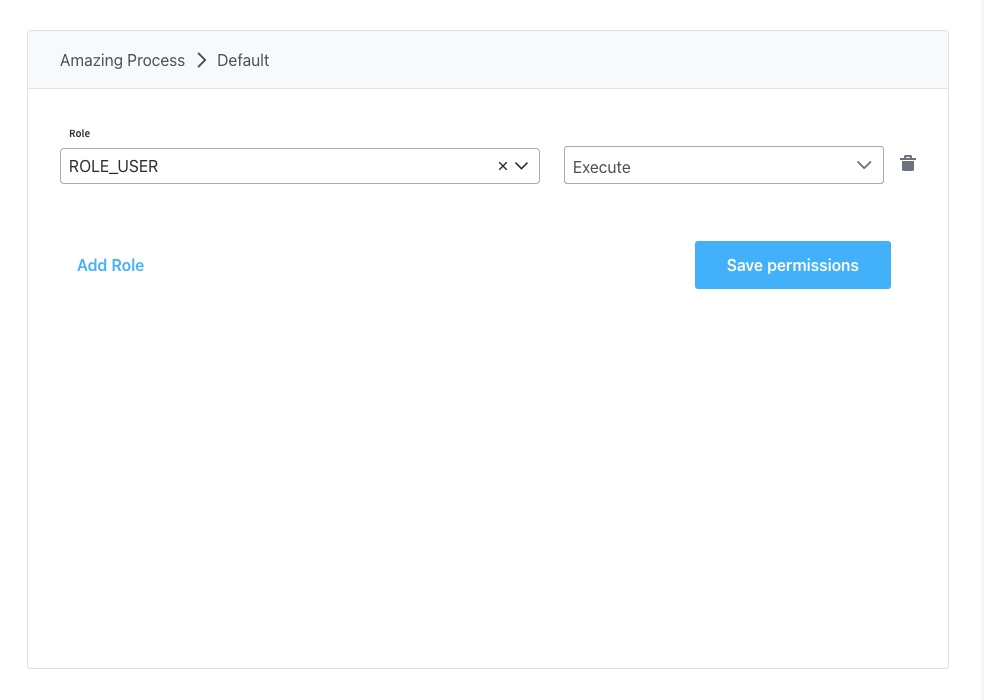
Administrator configuration
For administrators who need full process management capabilities: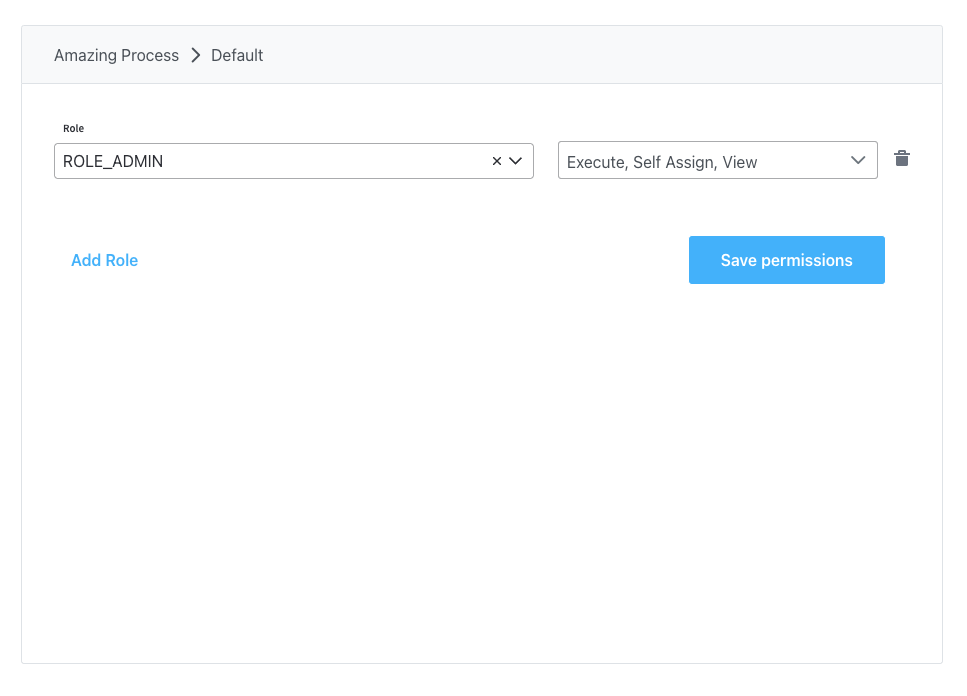
Team lead configuration
For team leads who can manage their team’s tasks:Platform configuration
Engine configuration
Configure the FlowX Engine with the necessary environment variables for your identity provider:Required variables
Optional variables
REST API access control
To restrict API calls by user role, configure path authorizations:Process instance management
Viewing process instances
Users can view active process instances and their data from FlowX Designer if they have the appropriate role (default:FLOWX_ROLE).
Data Privacy: Use the FLOWX_DATA_ANONYMIZATION environment variable to configure whether sensitive user data should be hidden in process views.
Starting processes
TheFLOWX_ROLE (or your configured default role) is required for users to start new process instances.
Troubleshooting
Common issues
Users can’t see processes: Verify that users have the correct roles assigned in your identity provider and that the service account is properly configured. Permission denied errors: Check that the required permissions are configured for the specific operations and that users have the appropriate roles. Business filters not working: Ensure that business filter attributes are properly configured in the identity provider and available on the authorization token.Version-specific considerations
Best practices
- Principle of Least Privilege: Only grant the minimum permissions necessary for users to perform their tasks
- Role Hierarchy: Design roles hierarchically (e.g., Admin > Team Lead > User) to simplify management
- Regular Audits: Periodically review role assignments and permissions to ensure they remain appropriate
- Documentation: Maintain clear documentation of what each role can do and who should have each role
- Testing: Always test permission changes in a non-production environment first
- Business Filters: Use business filters for dynamic, data-driven access control rather than static role-based restrictions