Prerequisites
Before you begin, ensure you have the following:- Keycloak installed
- Administrative access to the Keycloak server
- Basic understanding of IAM concepts
Recommended keycloak version: 22.x
Recommended Keycloak setup
To configure a minimal required Keycloak setup, in this guide we will covere the following steps:Add clients
Configure the client authentication, valid redirect URIs, and enable the necessary flows.
Keycloak documentation
Creating a new realm
A realm is a space where you manage objects, including users, applications, roles, and groups. Creating a new realm is the first step in setting up Keycloak. Follow the steps below to create a new realm in Keycloak:Log in to the Keycloak Admin Console
Log in to the Keycloak Admin Console using the appropriate URL for your environment (e.g., QA, development, production).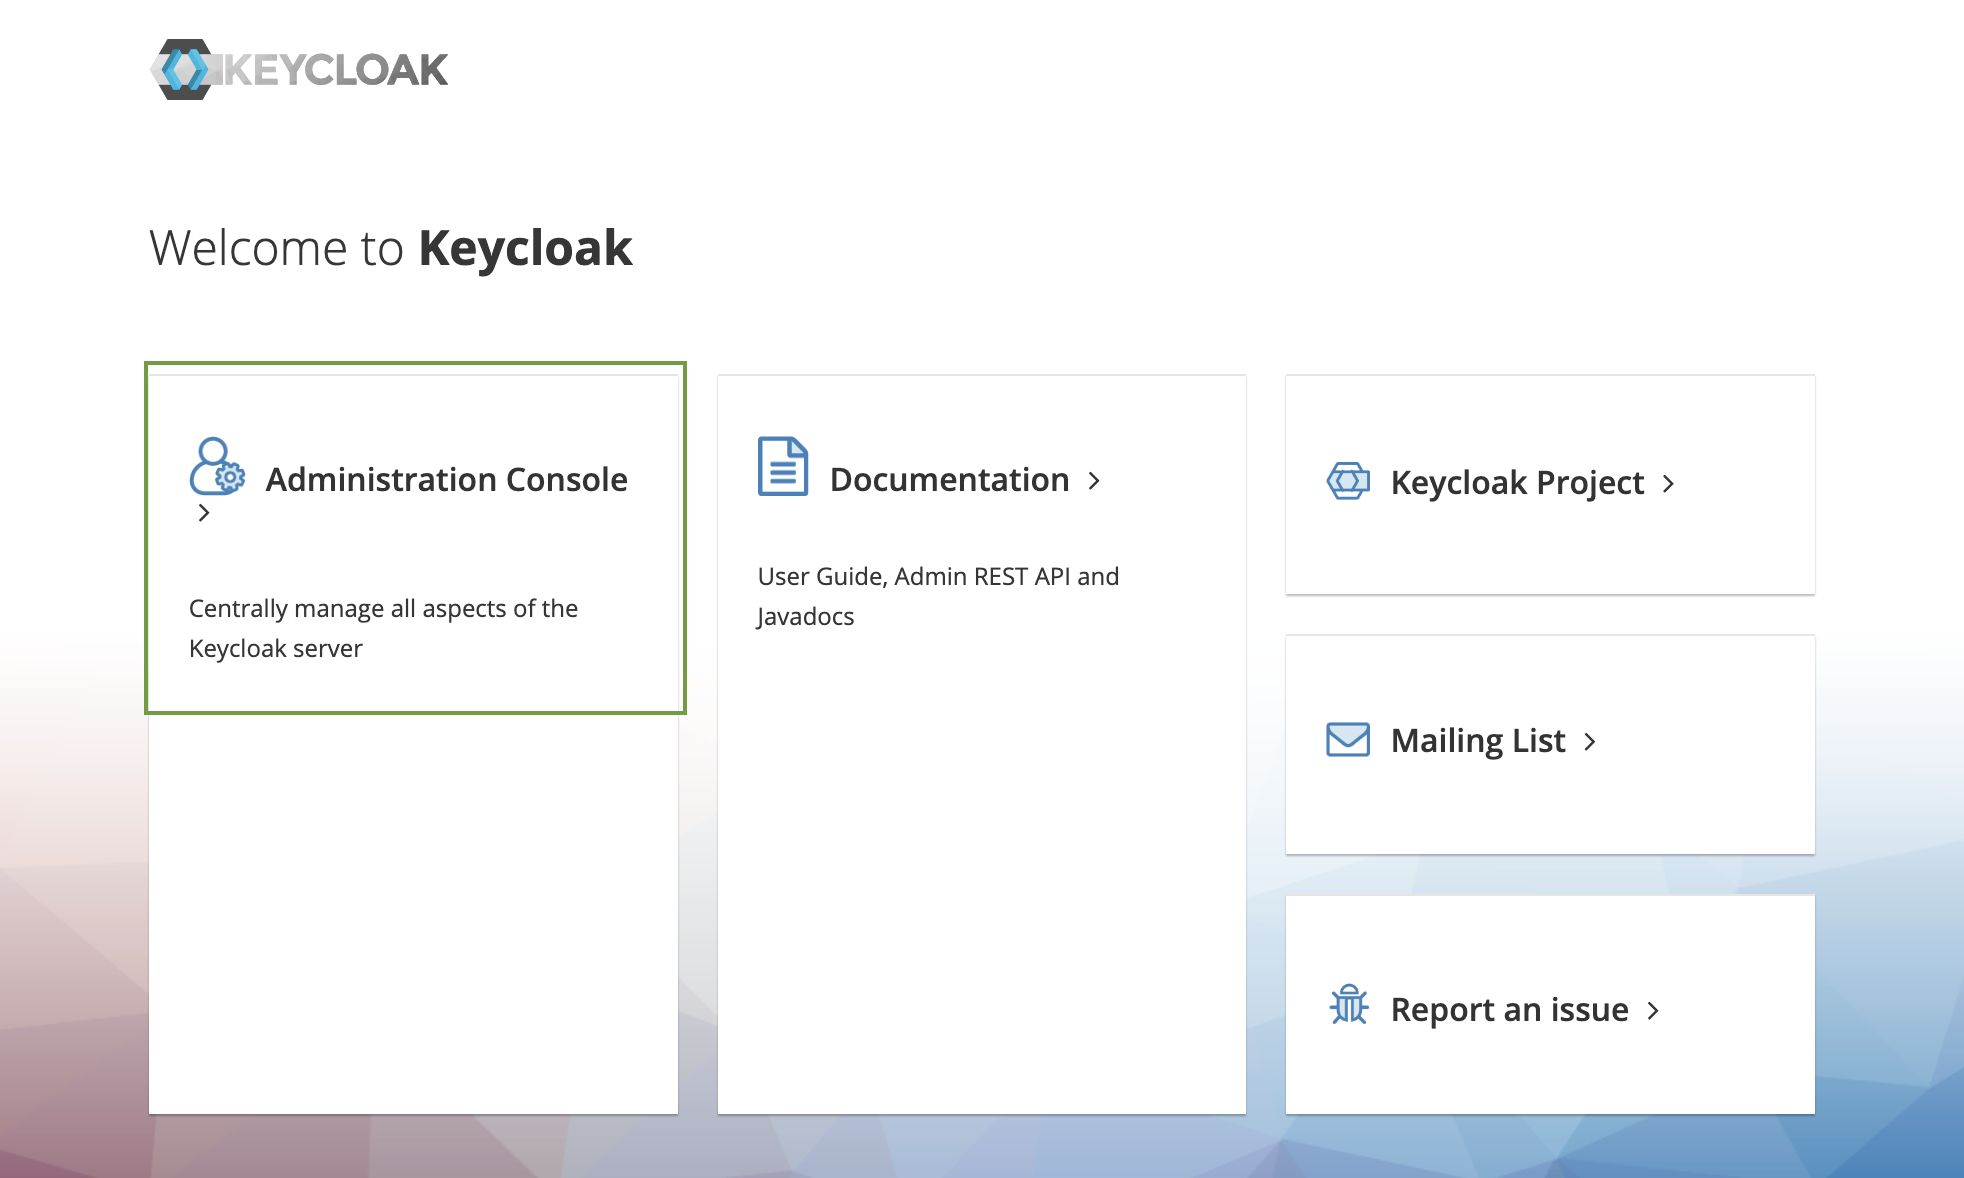
Create Realm
In the top left corner dropdown menu, click Create Realm. If you are logged in to the master realm, this dropdown menu lists all the realms created.
If you are logged in to the master realm, this dropdown menu lists all the realms created.
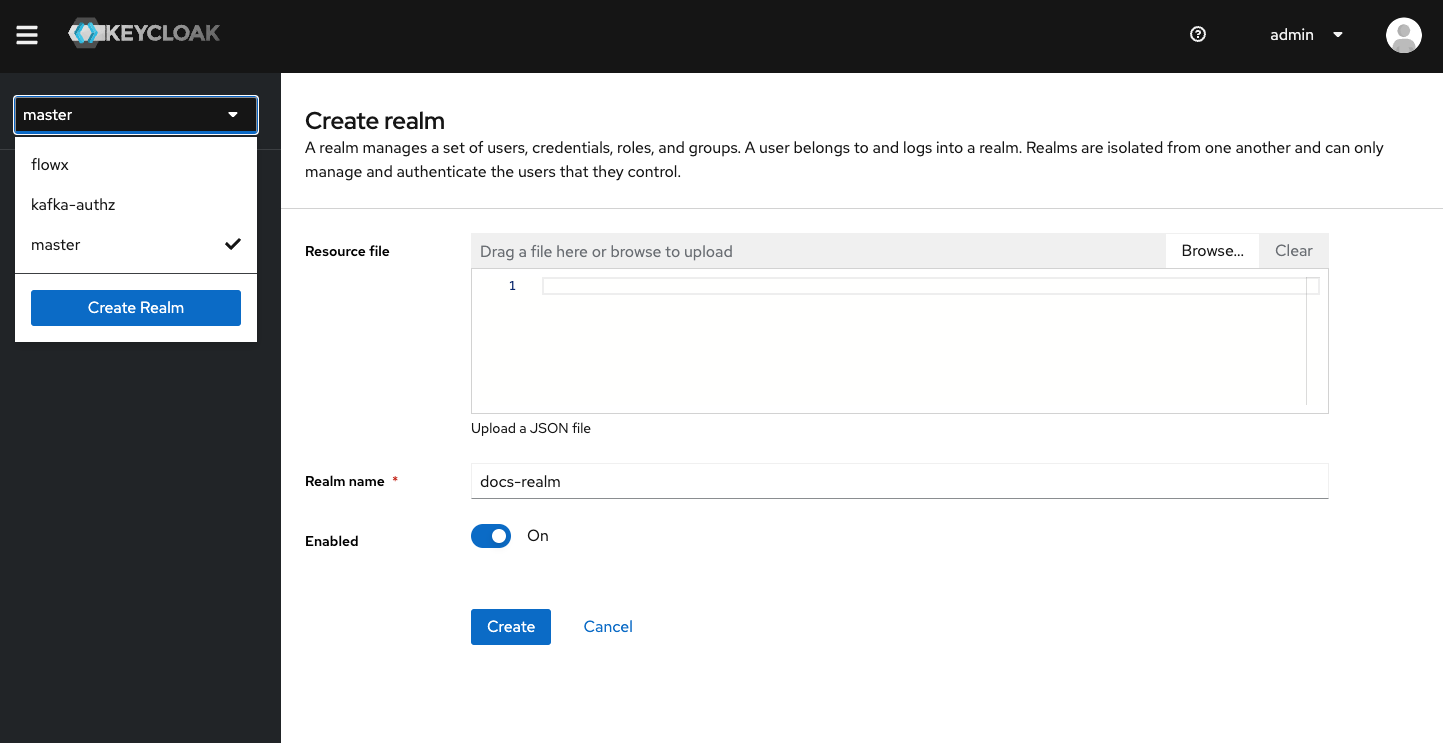
- Ensure that the realm name is unique within your Keycloak instance.
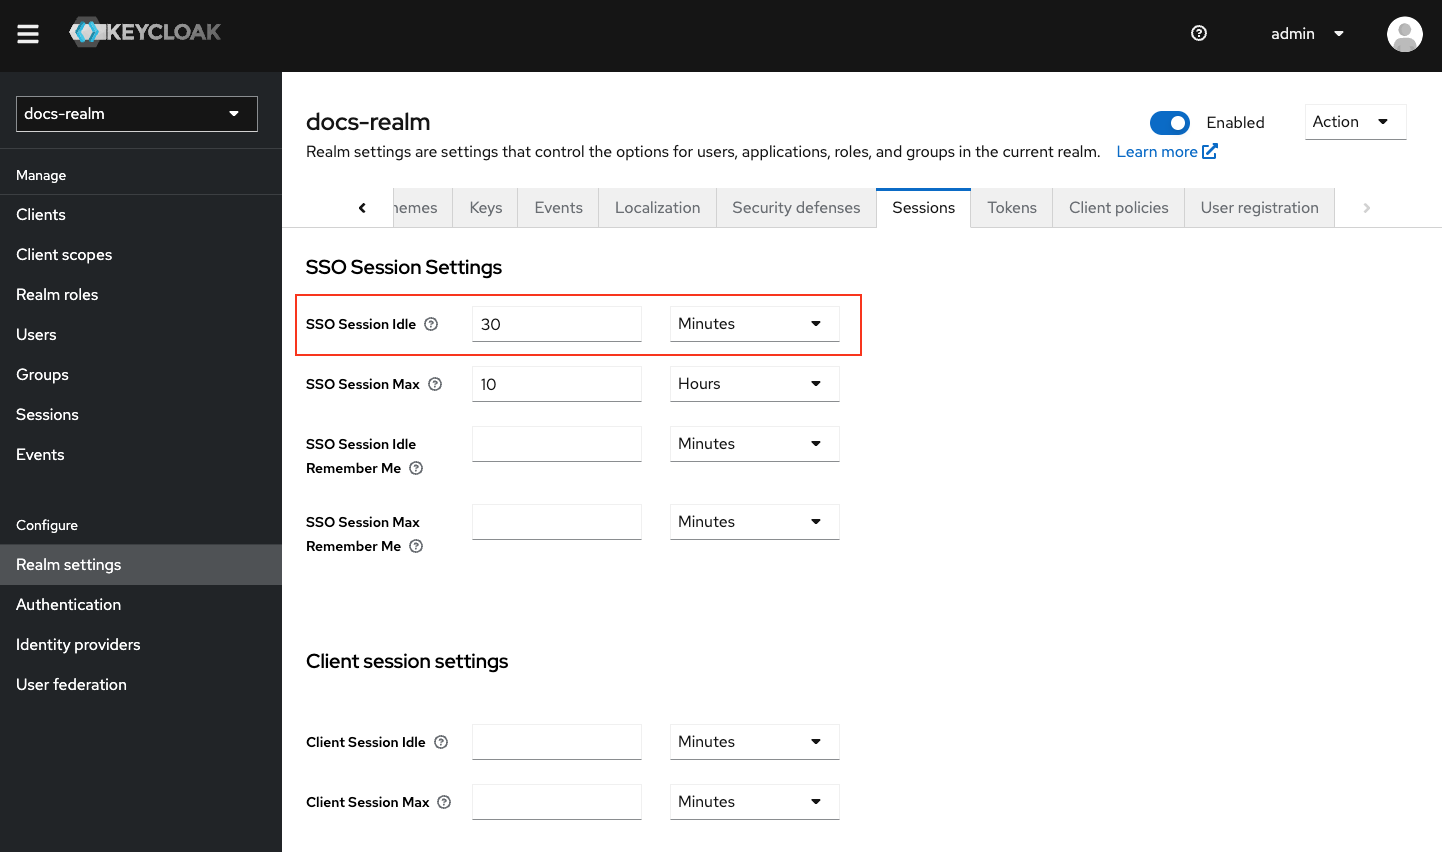
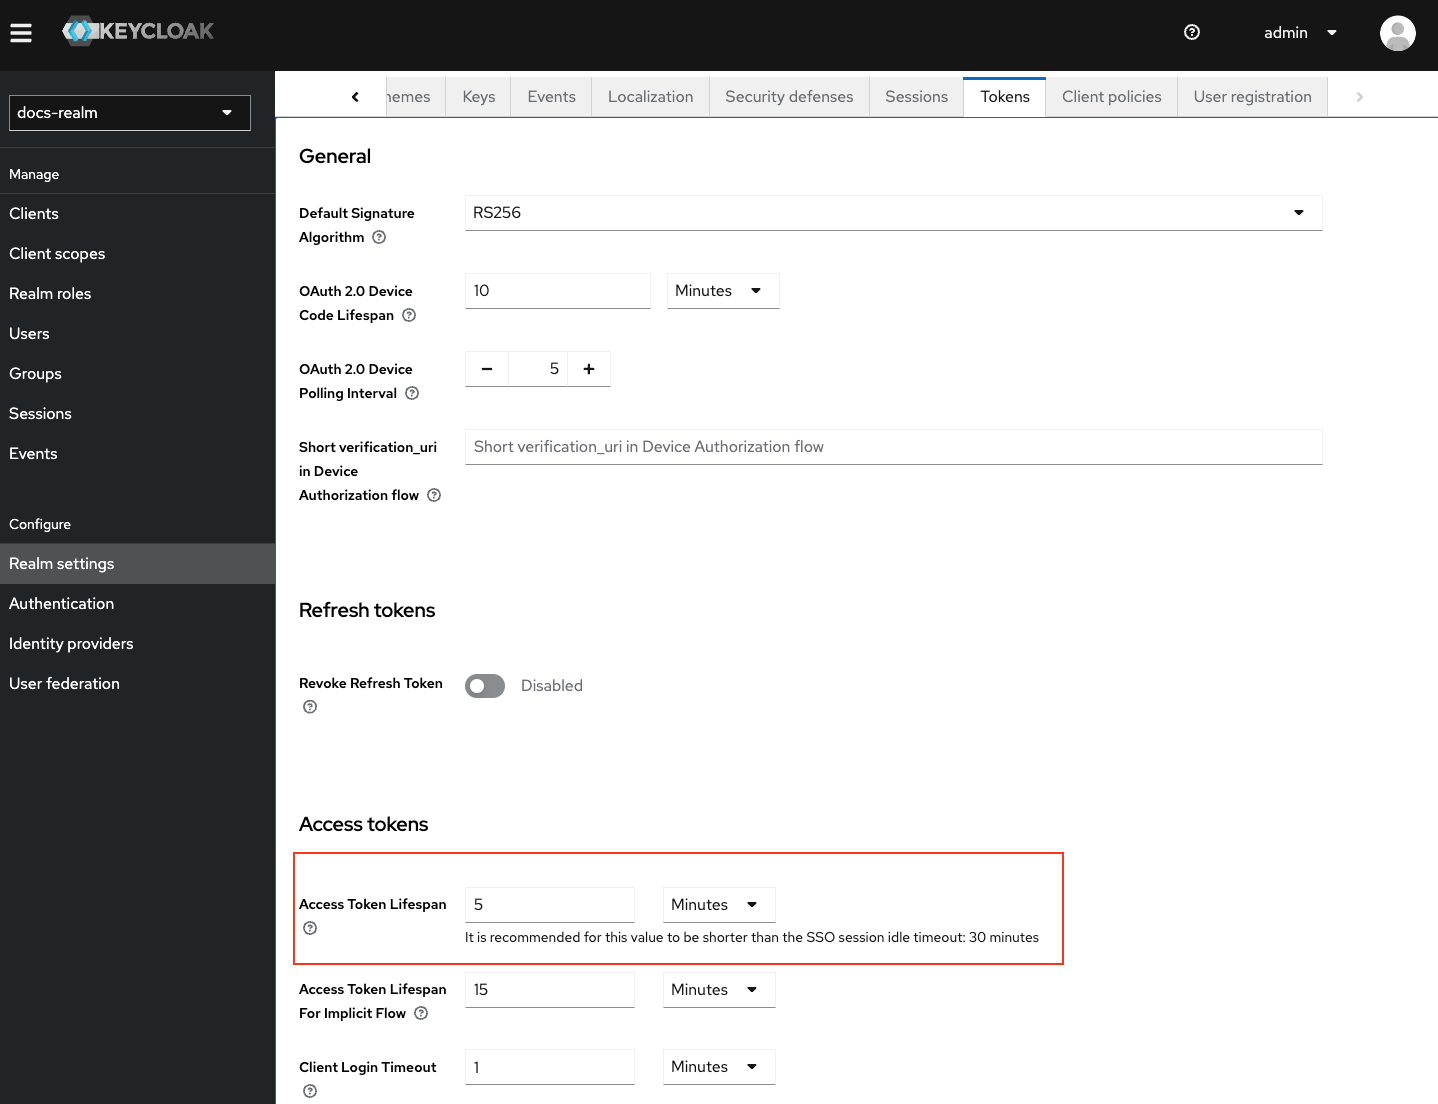
- Double-check session idle and token lifespan settings to align with your security requirements.
Creating/importing user groups and roles
User groups and roles are essential for managing user permissions and access levels within a realm. You can either create or import user groups into a realm.Download and Run the Import Script
To import a super admin group with the necessary default user roles, download and run the provided script.Instructions:
Download script
- Unzip the downloaded file.
- Open a terminal and navigate to the unzipped folder.
- Run the script using the appropriate command for your operating system.
Add Admin User to Group
After importing, add an admin user to the group and assign the necessary roles.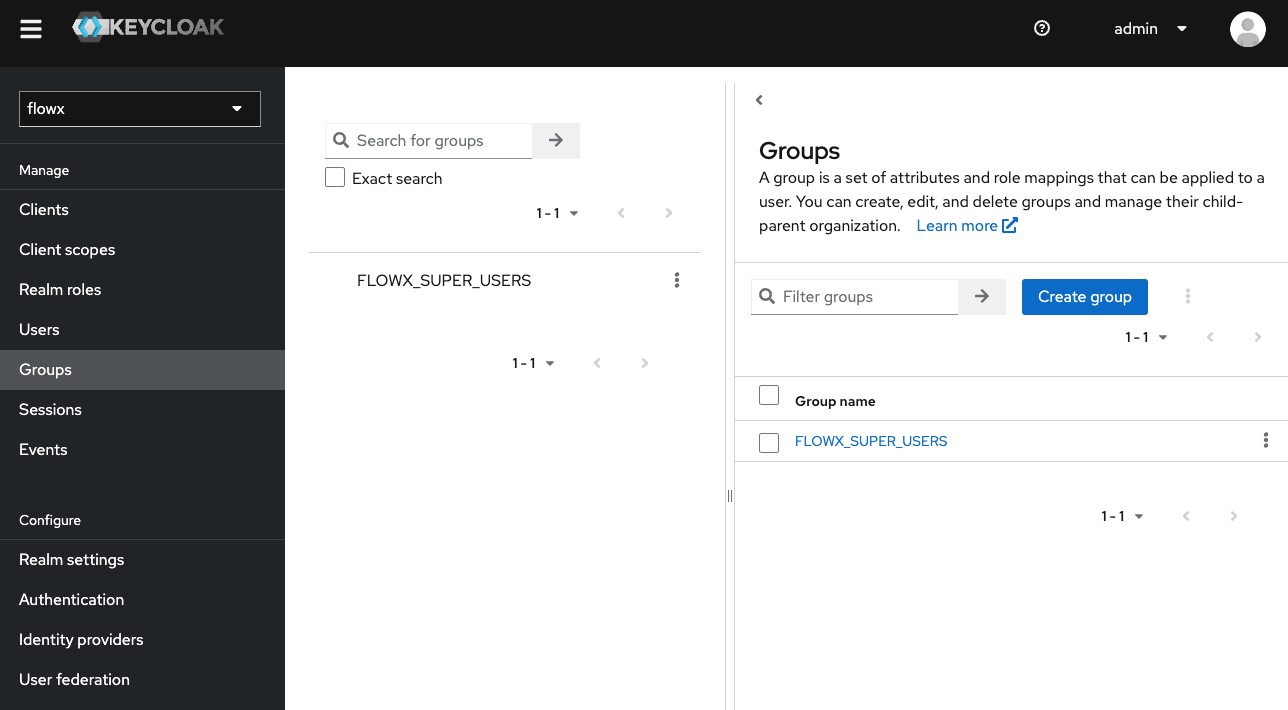
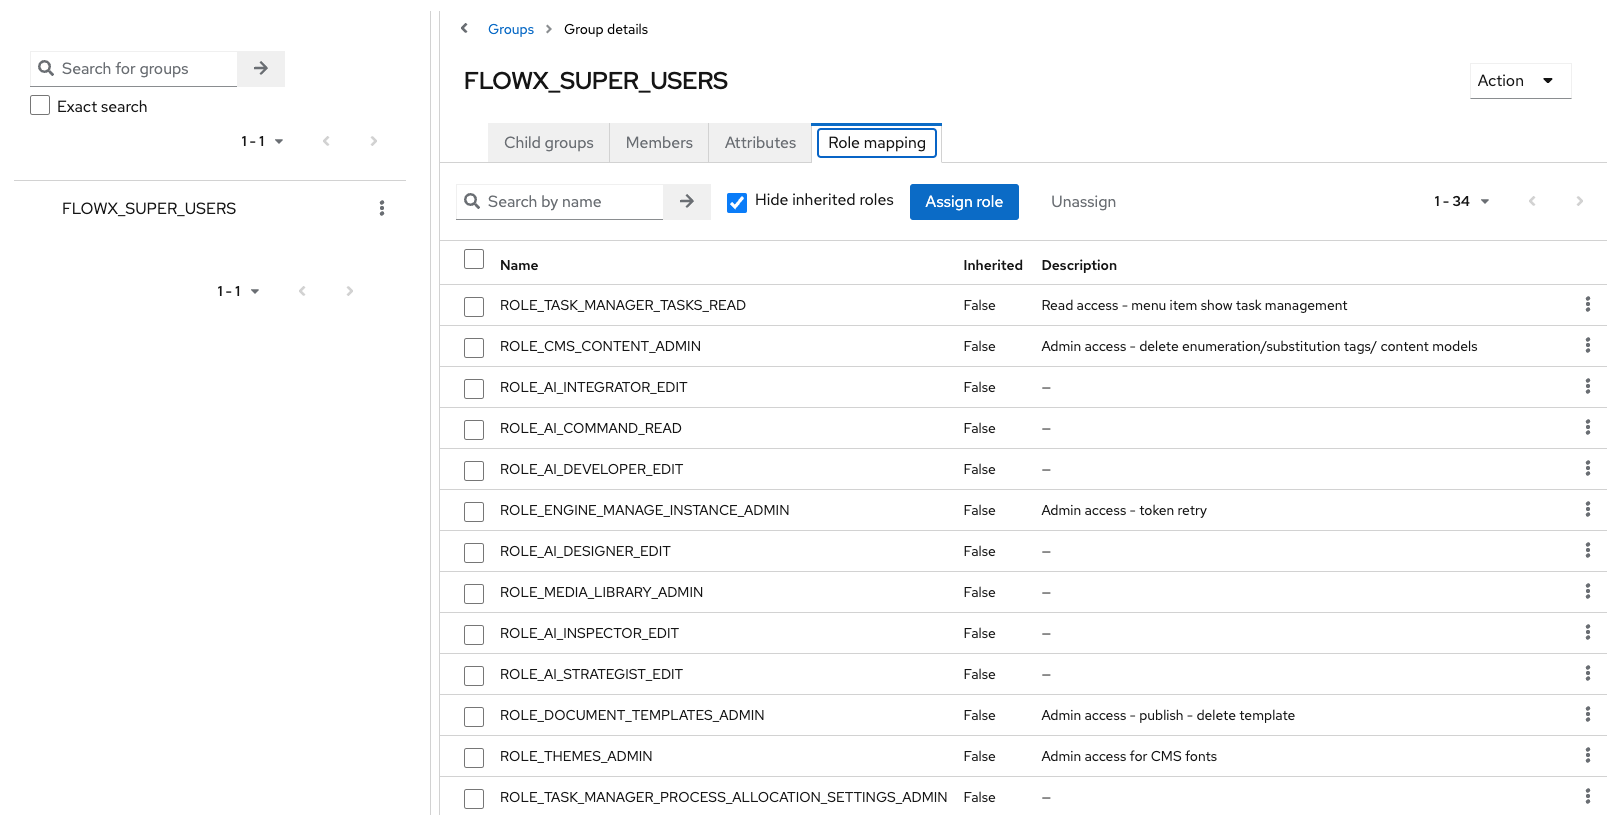
Validate imported roles
- Ensure the script has the necessary permissions to run on your system.
- Verify that the roles and groups align with your organizational structure.
Creating new users
Creating new users is a fundamental part of managing access within Keycloak. Follow these steps to create a new user in a realm and generate a temporary password:Add a New User
On the right side of the empty user list, click Add User.Fill in the user details and set Email Verified to Yes.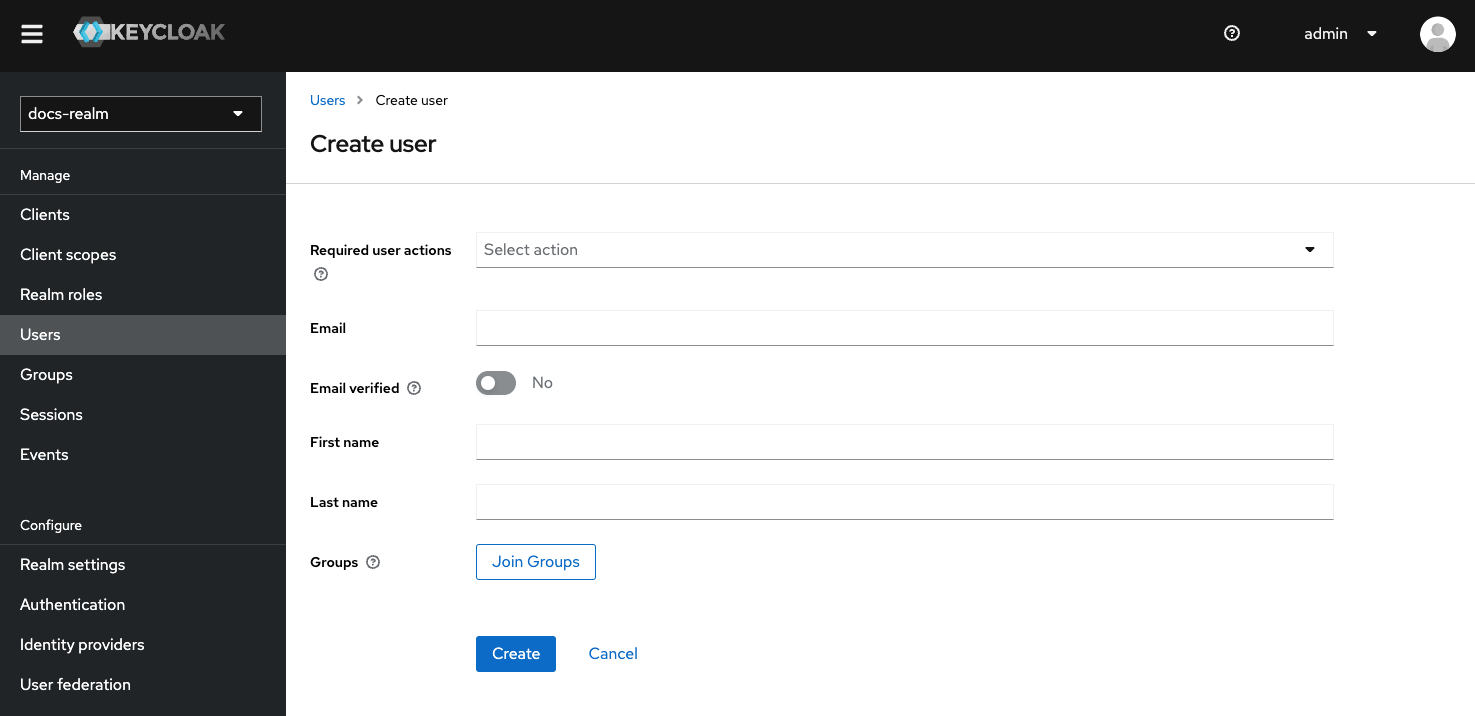
Assign User to Group
In the Groups section, search for a group, in our case: 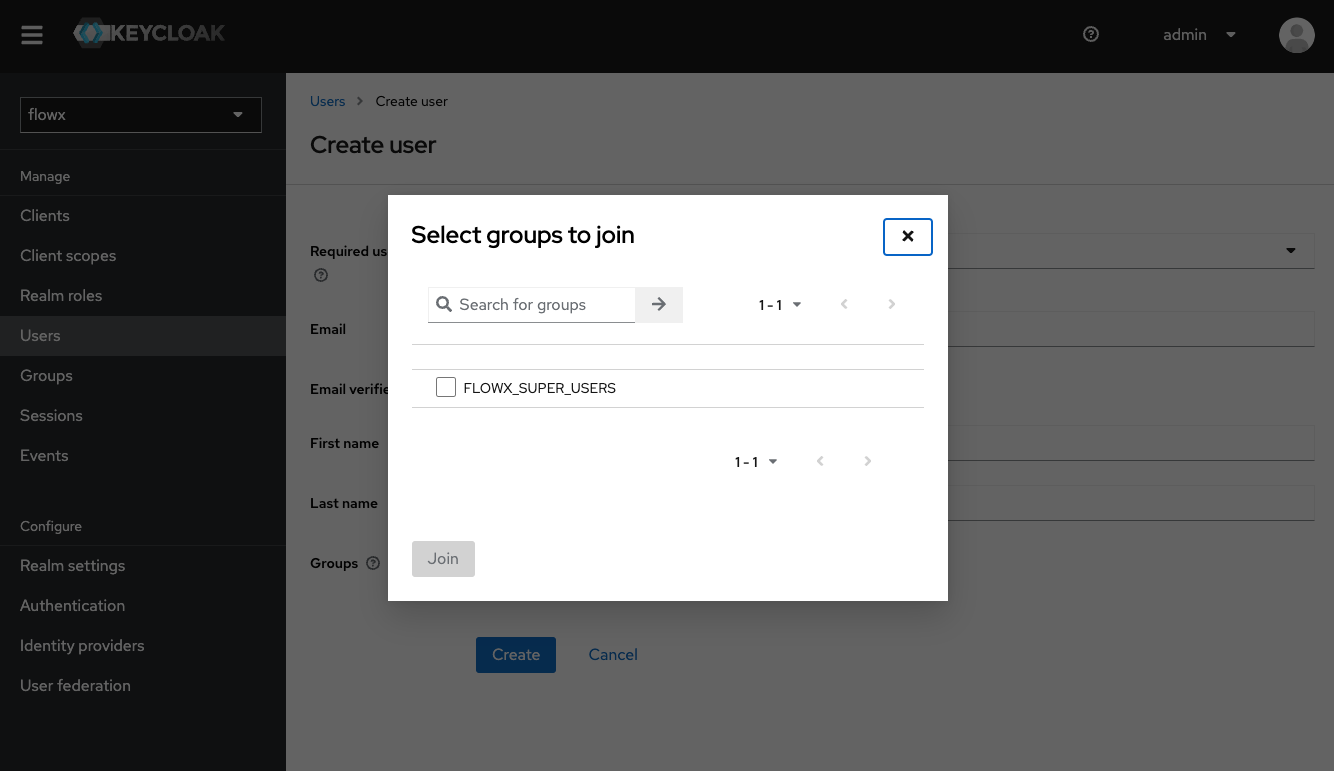
FLOWX_SUPER_USERS and click Join.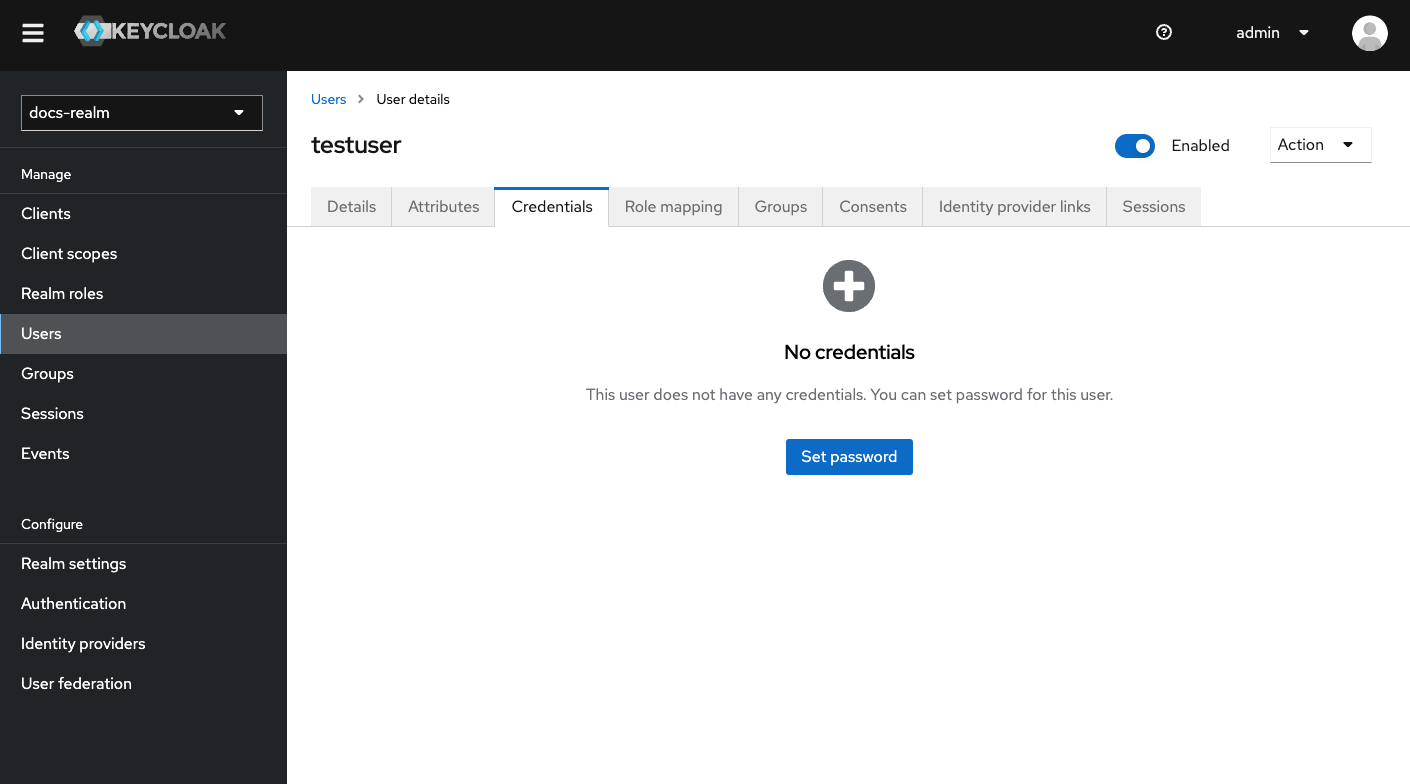
- Ensure that the email address is valid and correctly formatted.
- Set the temporary password policy according to your organization’s security requirements.
Adding clients
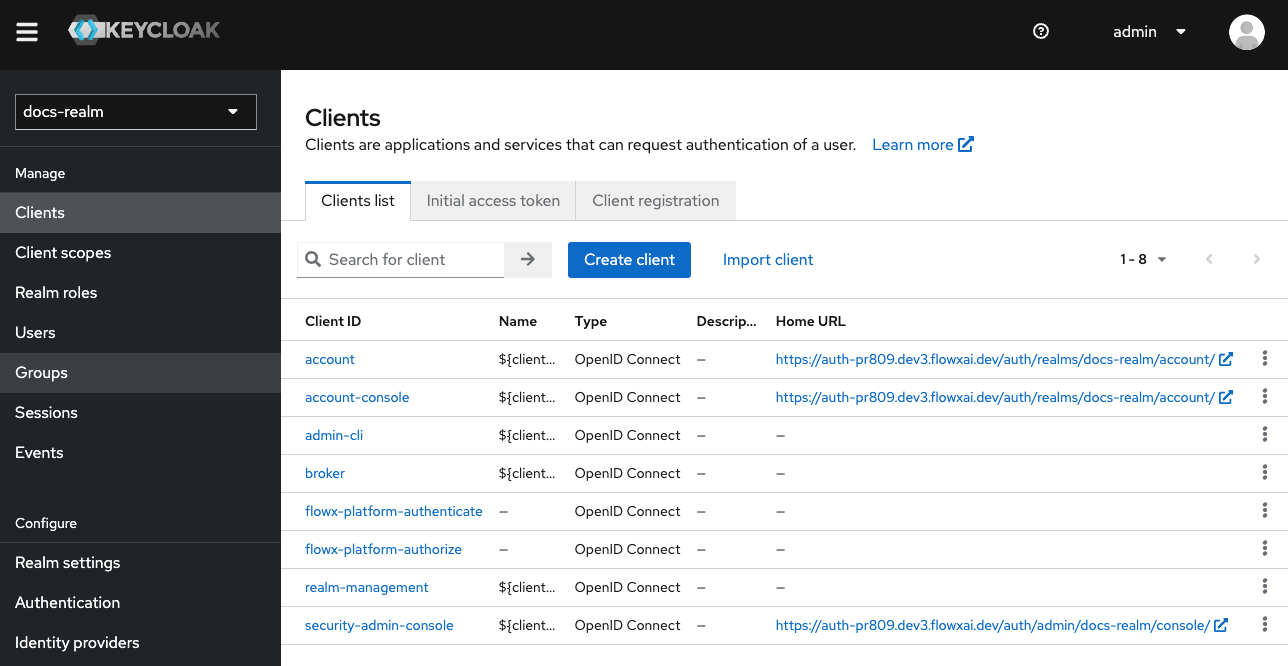
A client represents an instance of an application and is associated with a specific realm.Adding an OAuth 2.0 client
We’ll add a client namedflowx-platform-authenticate, which will be used for login, logout, and refresh token operations by web and mobile apps.
Configure General Settings
In the General Settings tab configure the following properties:
- Set a client ID to
{your-client-name}-authenticate. - Set the Client type to
OpenID Connect.
Configure Capability Config
Now click Next and configure the Capability config details: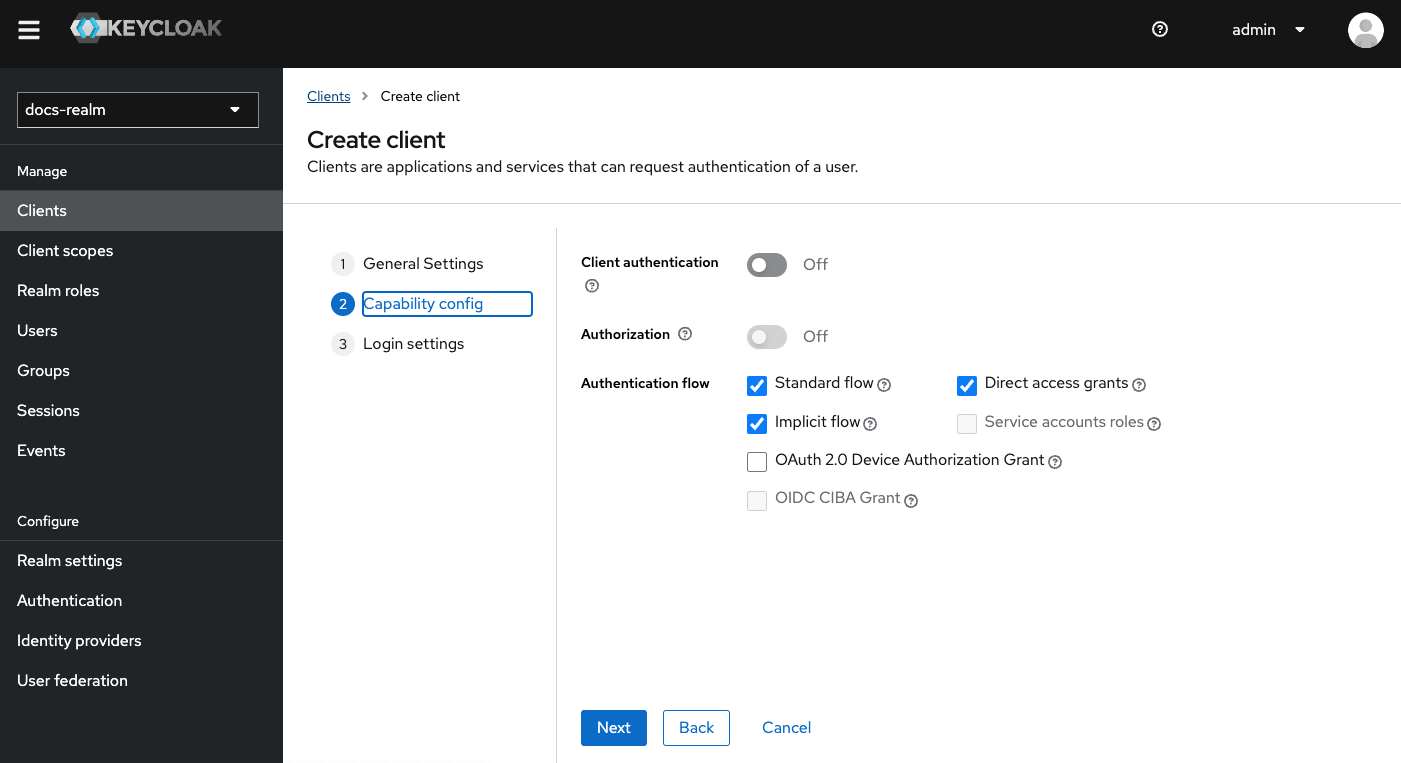
- Enable Direct Access Grants.
- Enable Implicit Flow Enabled.
Set Valid Redirect URIs
Click Next and configure Login settings: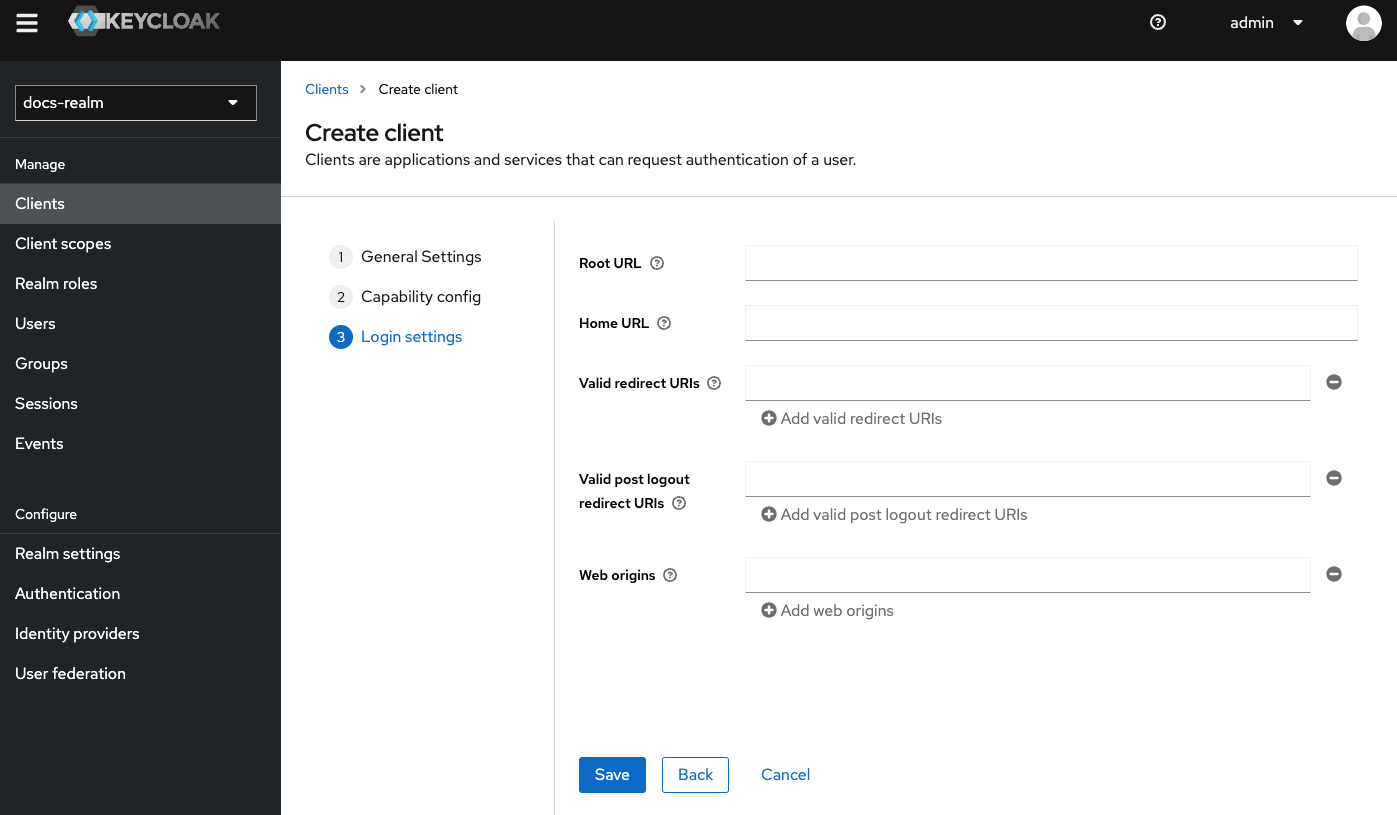
- Set Valid redirect URIs, specifying a valid URI pattern that a browser can redirect to after a successful login or logout, simple wildcards are allowed.
Configure Additional Settings
After creating the client, scroll down in the Settings tab and configure additional settings - Logout Settings:
- Backchannel Logout Session Required: Toggle OFF.
- Front Channel Logout: Toggle OFF.
Add Mappers
Add mappers to
{your-client-name}-authenticate client.For instructions on adding mappers and understanding which mappers to add to your clients, refer to the section on Adding Protocol Mappers.
Adding an Authorizing client
To authorize REST requests to microservices and Kafka, create and configure the{your-client-name}-platform-authorize client.
Create the Client
Enter the client ID (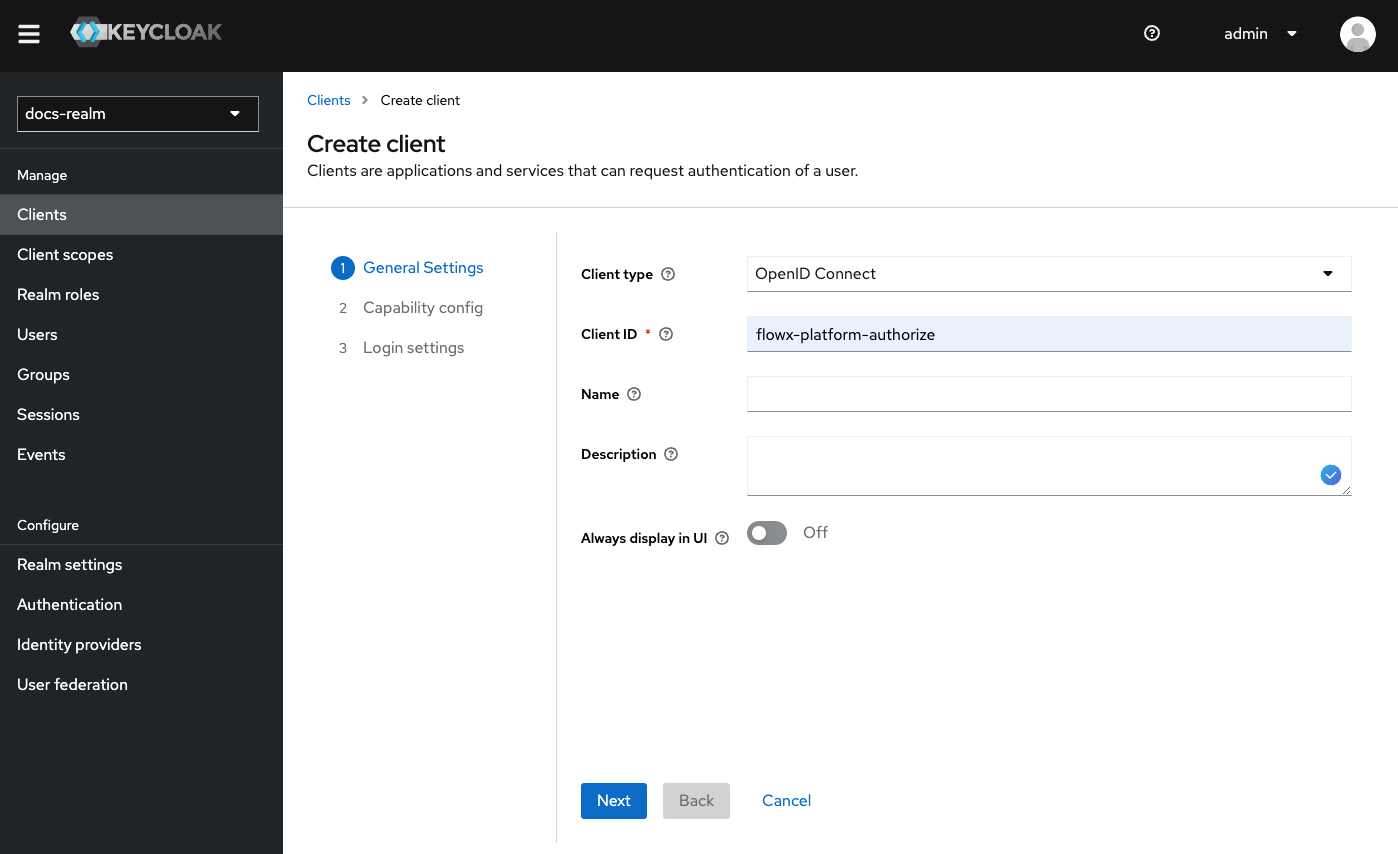
{your-client-name}-platform-authorize).Set Client type to OpenID Connect.Configure Capability Config
Client Authentication: Toggle ONDisable Direct Access Grants.
This setting defines the type of the OIDC client. When enabled, the client type is set to “confidential access.” When disabled, it is set to “public access”.
Set Valid Redirect URIs
Valid Redirect URIs: Populate this field with the appropriate URIs.
Save the configuration.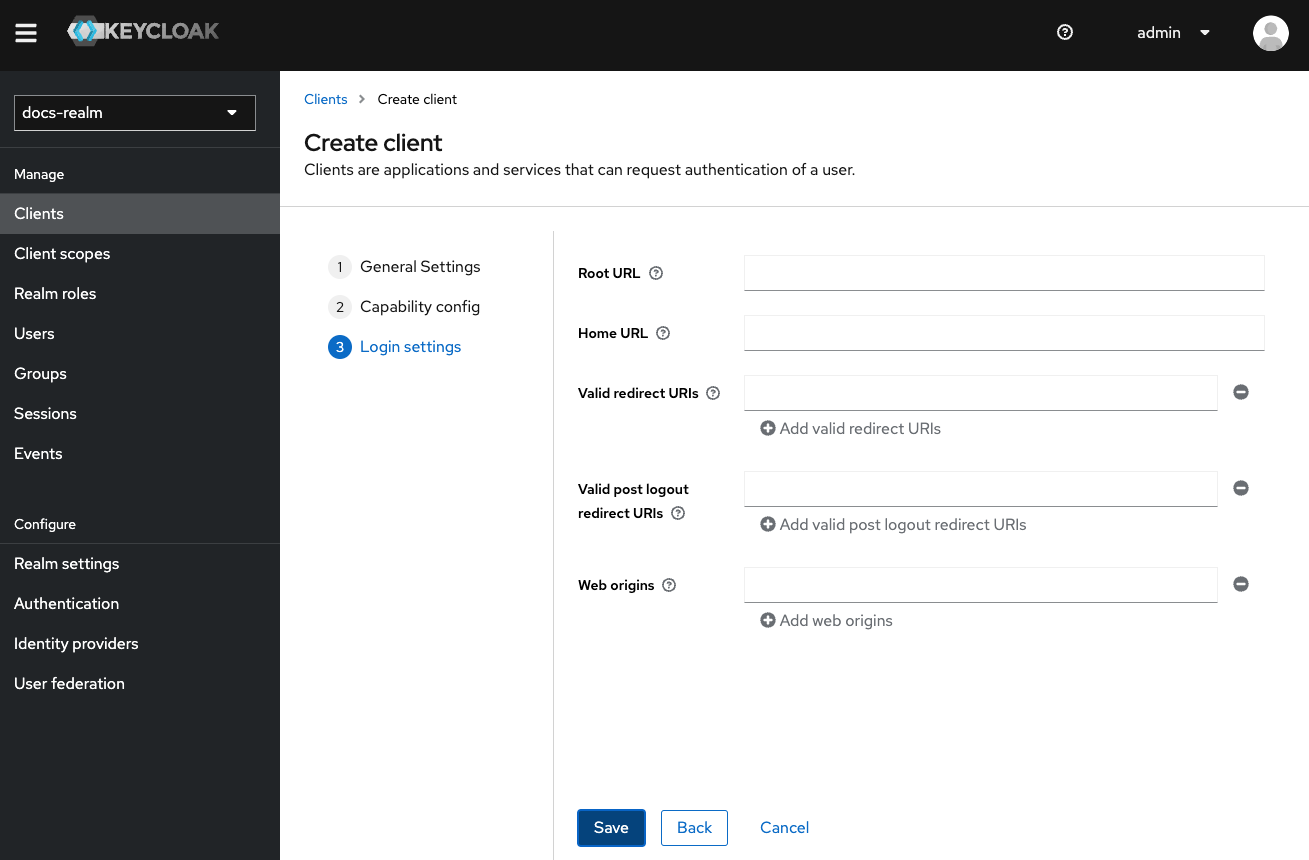
{your-client-name}-platform-authorize client will be created and can be used to authorize REST requests to microservices and Kafka within your application.
Example configuration for microservices
Below is an example of a minimal configuration for microservices using OAuth2 with the{your-client-name}-platform-authorize client:
| Configuration Key | Value/Example | Description |
|---|---|---|
security.type | oauth2 | Specifies the security type as OAuth2. |
security.basic.enabled | false | Disables basic authentication. |
security.oauth2.base-server-url | http://localhost:8080 | Sets the base server URL for the Keycloak server. |
security.oauth2.realm | flowx | Specifies the Keycloak realm. |
security.oauth2.client.access-token-uri | ${security.oauth2.base-server-url}/realms/${security.oauth2.realm}/protocol/openid-connect/token | Defines the URL for obtaining access tokens. |
security.oauth2.client.client-id | your-client-name-platform-authorize | Sets the client ID for authorization. |
security.oauth2.client.client-secret | CLIENT_SECRET | Provides the client secret for authentication. |
security.oauth2.resource.user-info-uri | ${security.oauth2.base-server-url}/realms/${security.oauth2.realm}/protocol/openid-connect/userinfo | Specifies the URL for retrieving user information. |
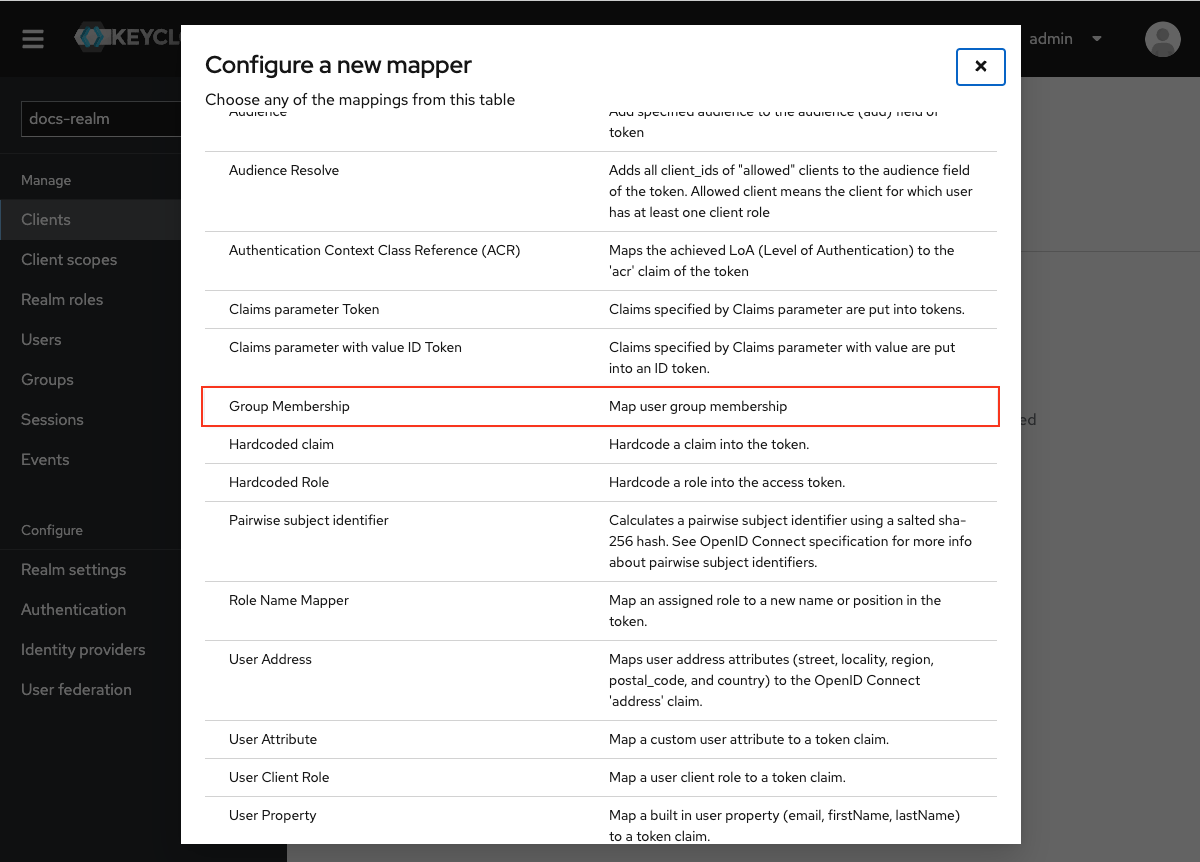
Adding protocol mappers
Protocol mappers in Keycloak allow you to transform tokens and documents, enabling actions such as mapping user data into protocol claims and modifying requests between clients and the authentication server. This provides greater customization and control over the information contained in tokens and exchanged during authentication processes.
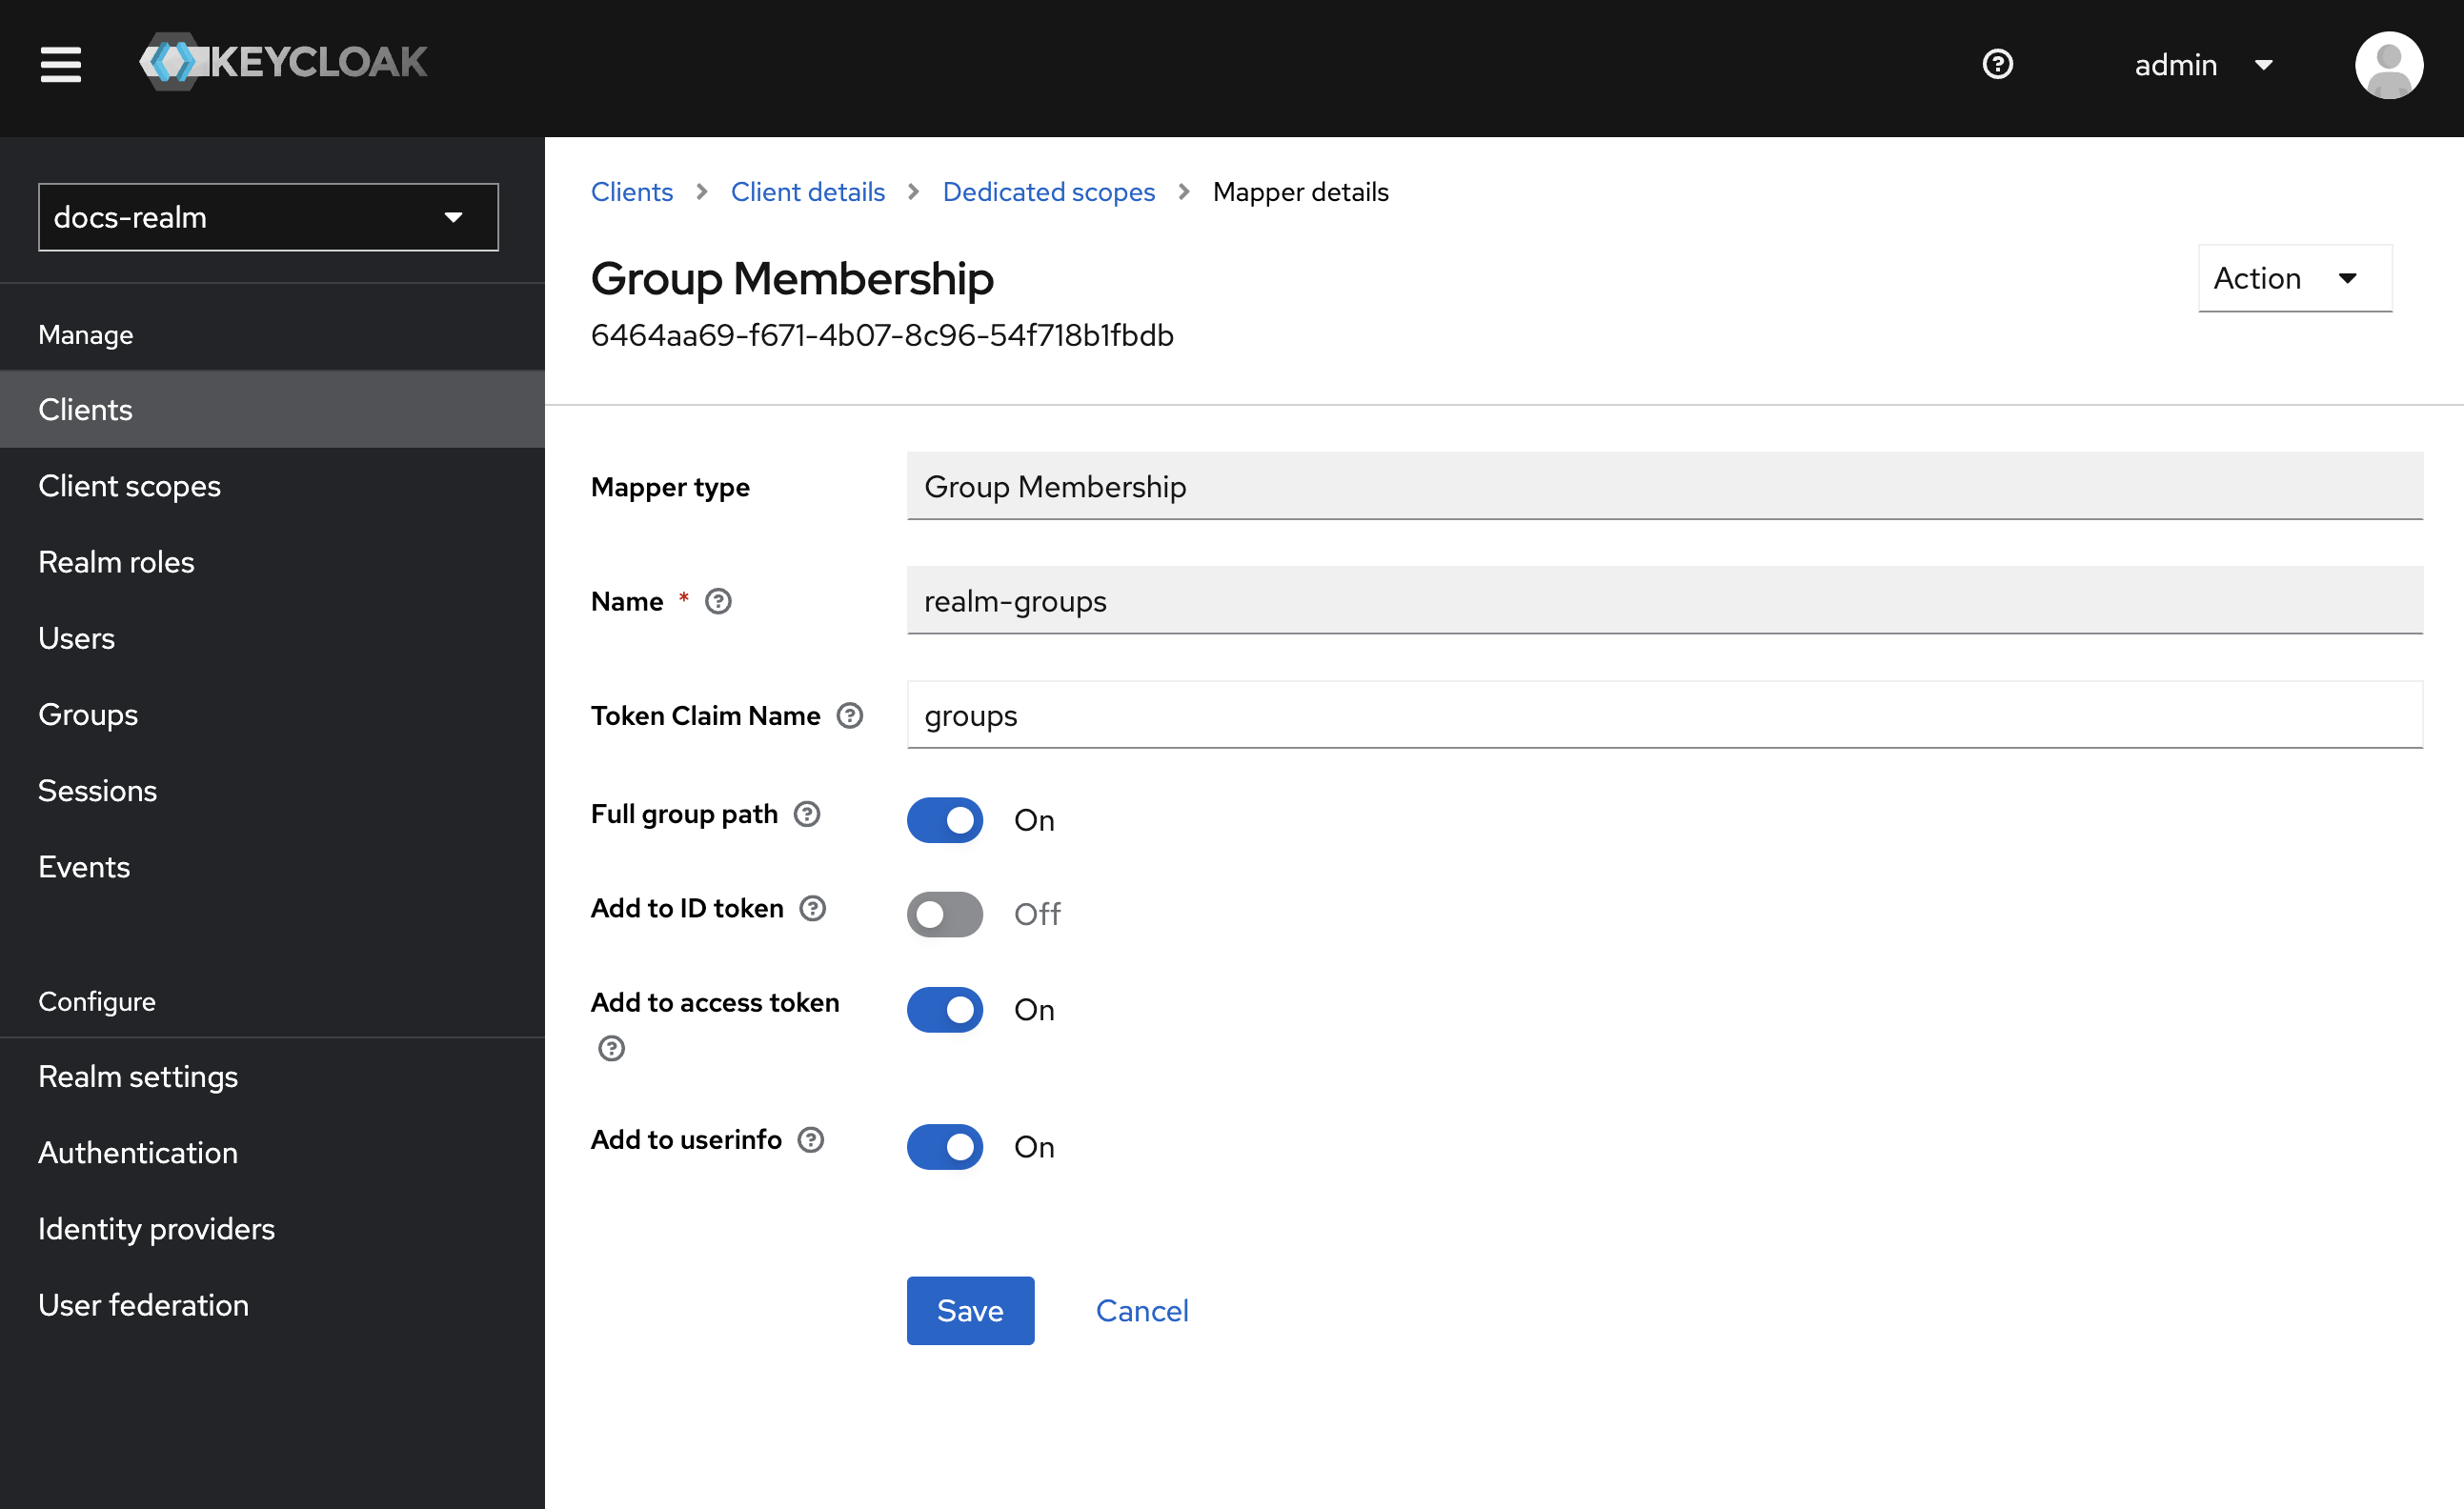
- Group Membership mapper (
realm-groups)- Maps user groups to the authorization token.
- User Attribute mapper (
business filter mapper)- Maps custom attributes, for example, mapping the businessFilters list, to the token claim.
- User Realm role (
realm-roles)- Maps a user’s realm role to a token claim.
The mappers we use can also be configured to control the data returned by the
/userinfo endpoint, in addition to being included in tokens. This capability is a feature that not all Identity Providers (IDPs) support.Group Membership mapper
Steps to add a Group Membership mapper:
Select Client Scopes
In the client settings, click on Client Scopes.Select the dedicated client scope: 
{your-client-name}-authenticate-dedicated to open its settings.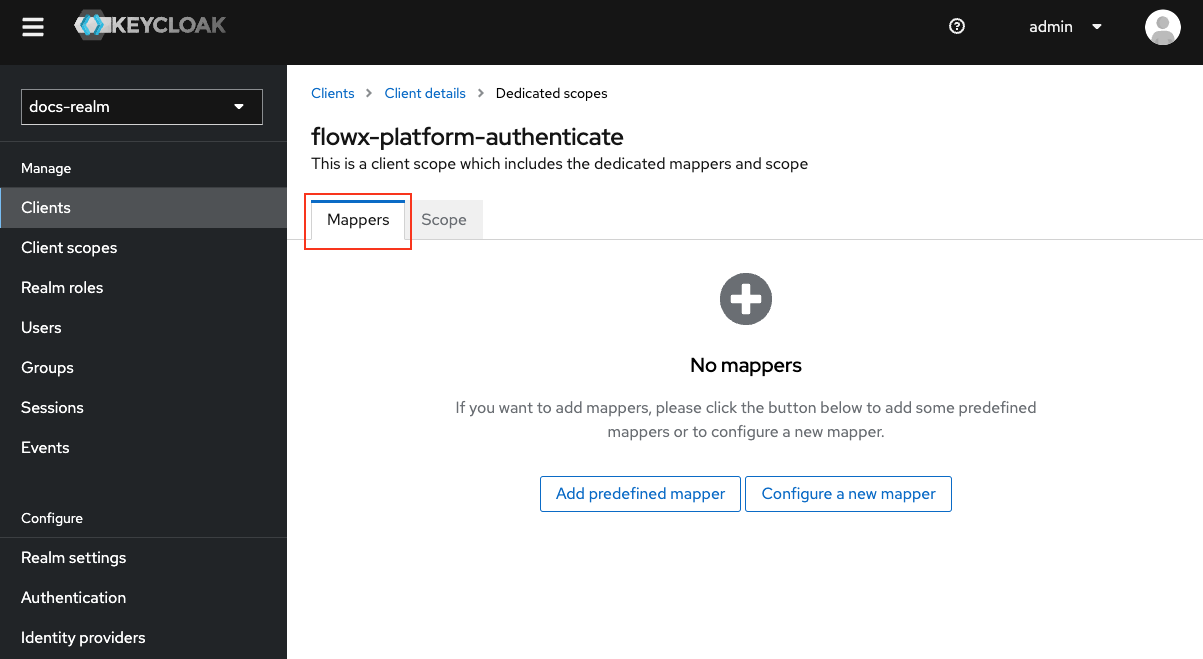
User Attribute mapper
To include custom attributes such as business filters in the token claim, follow these steps to add a user attribute mapper:Navigate to Client Scopes
From the Keycloak admin console, go to Clients and select your desired client.Click on Client Scopes and choose
{your-client-name}-authenticate-dedicated to open its settings.Ensure the Mappers tab is selected.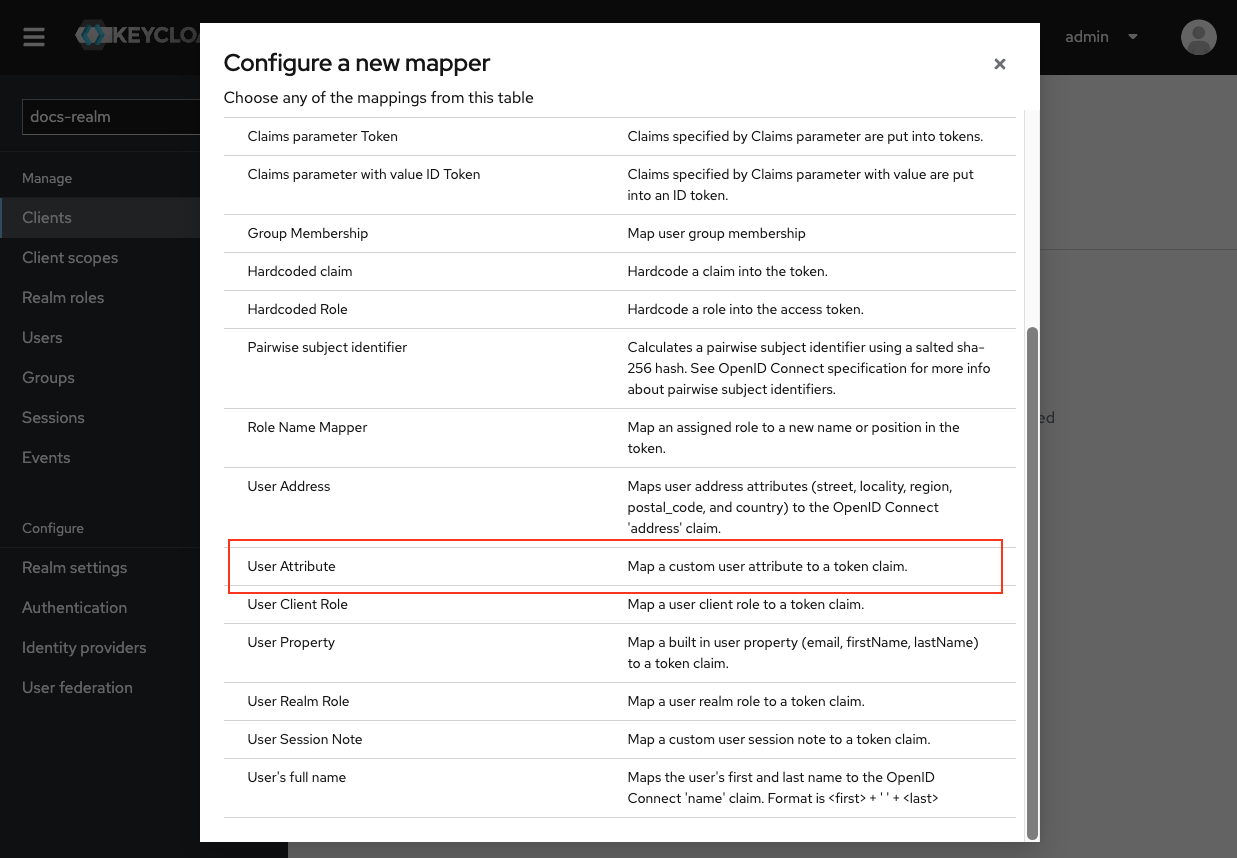
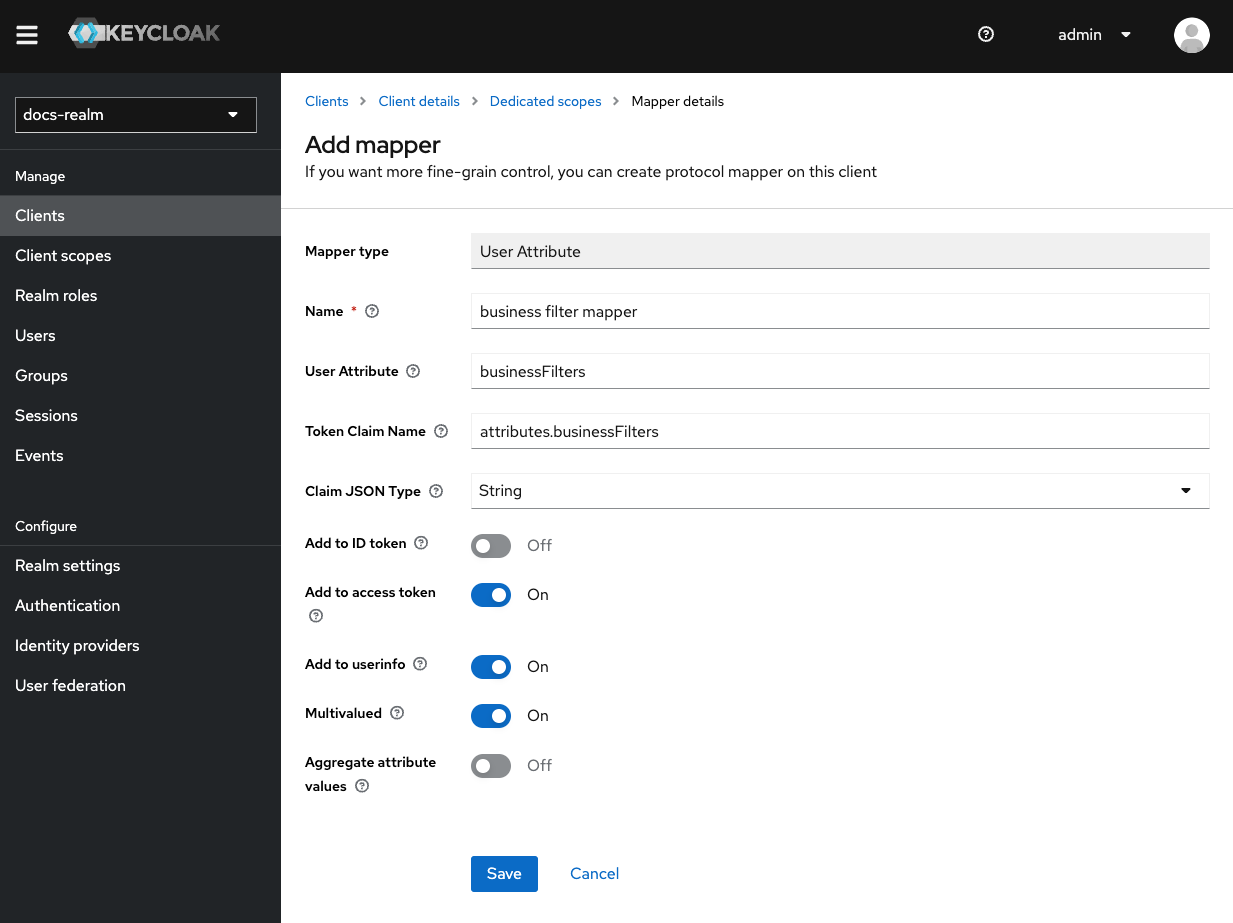
Business filters
User realm role mapper
To add a roles mapper to the{your-client-name}-authenticate client, so roles will be available in the OAuth user info response, follow these steps:
Navigate to Client Scopes
From the Keycloak admin console, go to Clients and select your desired client.Click on Client Scopes and choose
{your-client-name}-authenticate-dedicated to open its settings.Ensure the Mappers tab is selected.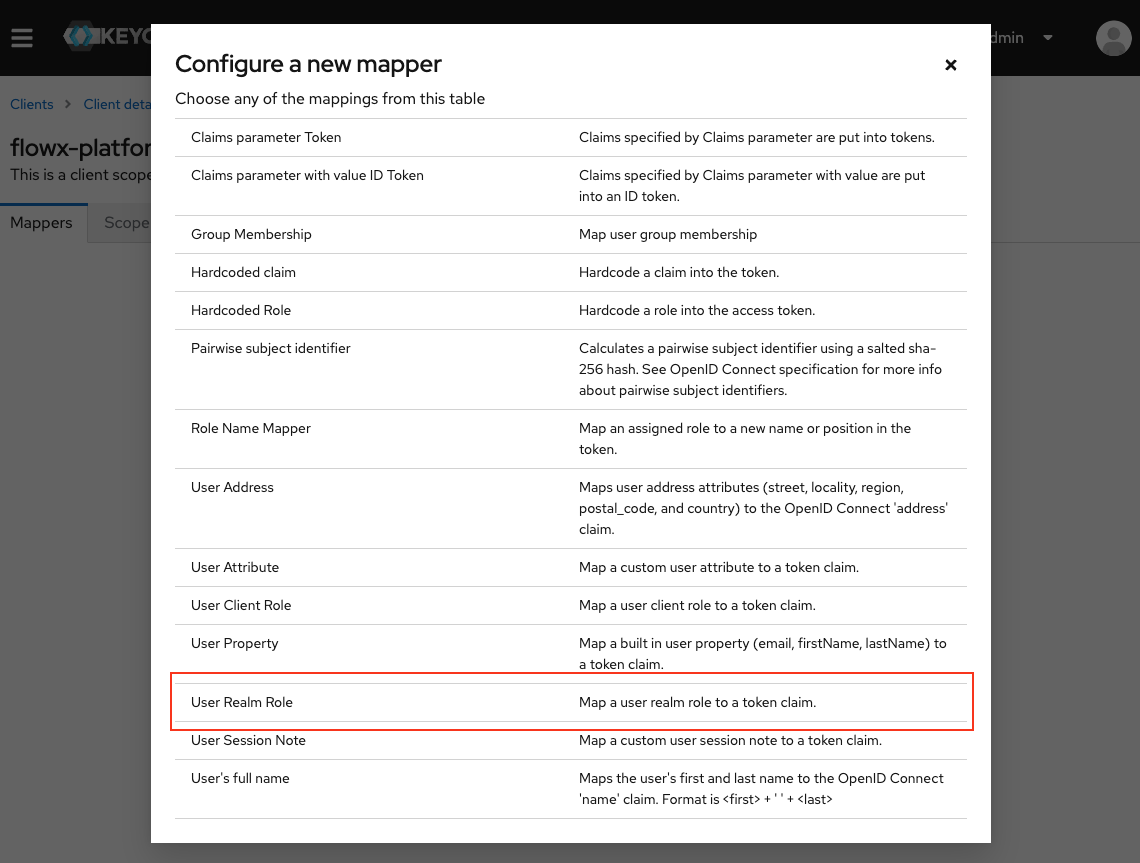
Please note that you can repeat these steps to add multiple roles mappers if you need to include multiple realm roles in the token claim.
Examples
Login
To request a login token:Refresh token
To refresh an existing token:User info
To retrieve user information:Adding service accounts
What is a service account?A service account grants direct access to the Keycloak API for a specific component. Each client can have a built-in service account that allows it to obtain an access token.
To use this feature you must enable the Client authentncation (access type) for your client. When you do this, the Service Accounts Enabled switch will appear.
Admin service account
The admin service account is used by the admin microservice to connect with Keycloak, enabling user and group management features within the FlowX.AI Designer. Steps to add an Admin service account:Create the Client
Navigate to Clients and select Create client.Enter a Client ID for your new client.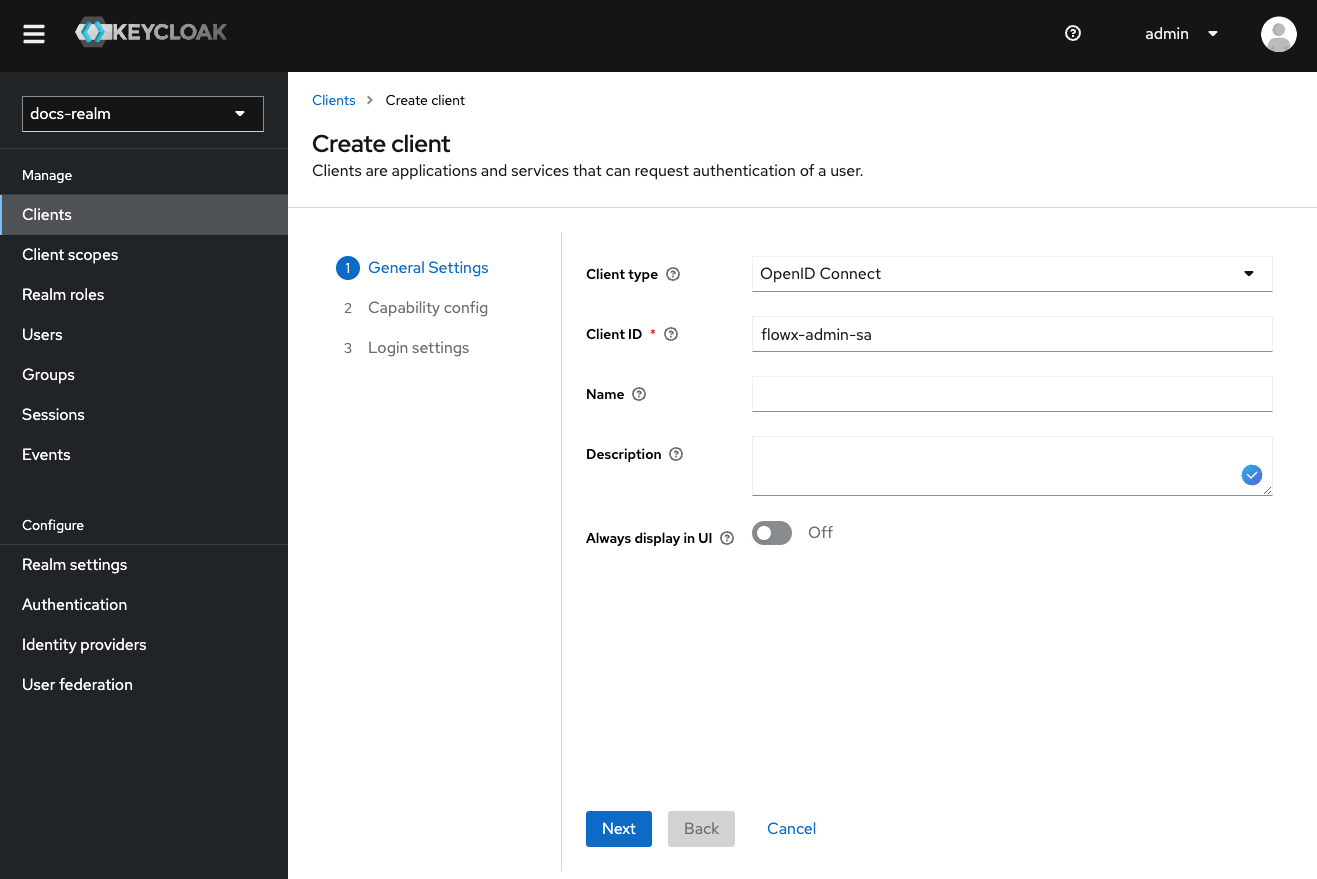
Configure Capability Config
- Enable Client authentication (access type).
- Disable Standard flow.
- Disable Direct access grants.
- Enable Service accounts roles.

Configure Additional Settings
After creating the client, scroll down in the Settings tab and configure additional settings - Logout Settings: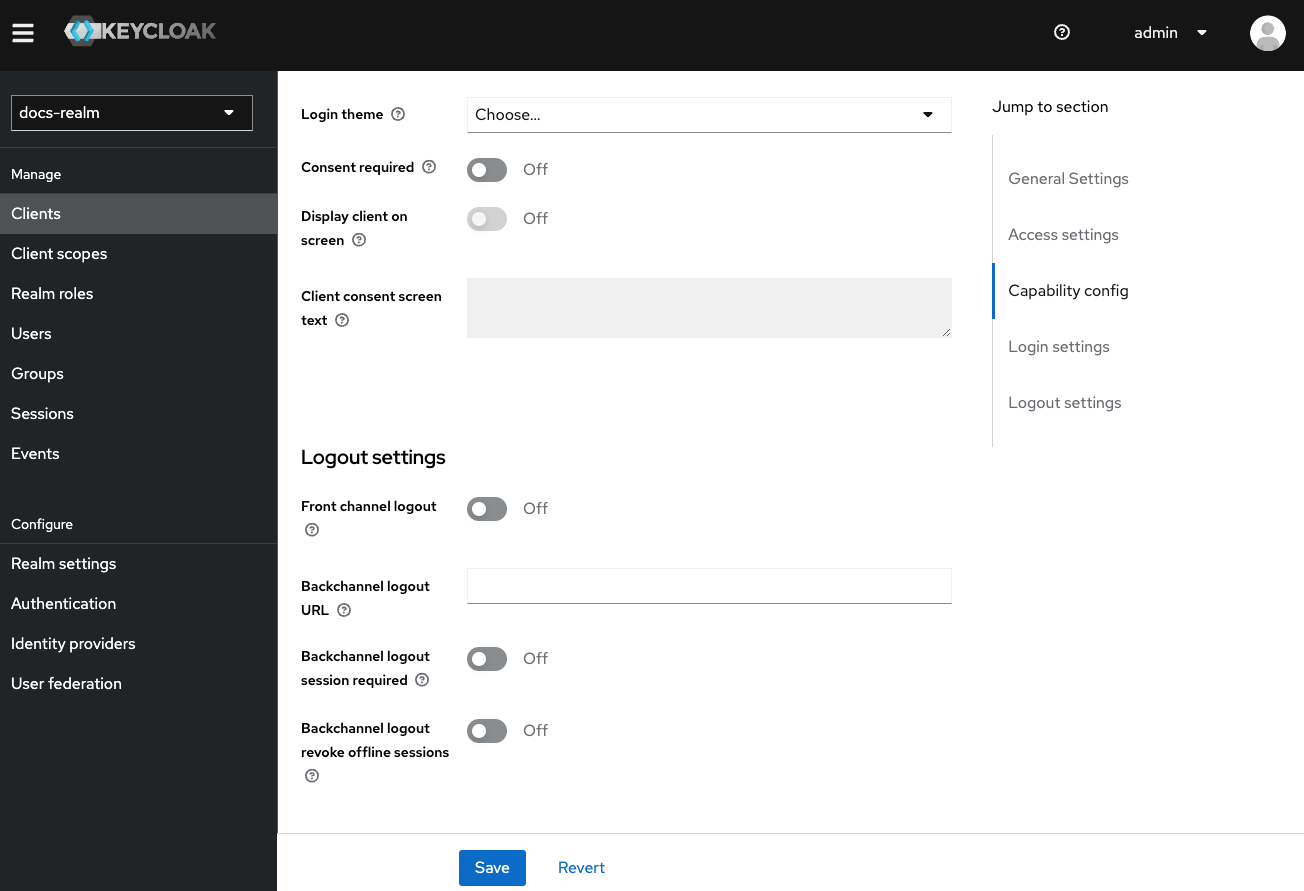
- Backchannel Logout Session Required: Toggle OFF.
- Front Channel Logout: Toggle OFF.
Assign Roles to Service Account
In the newly created client, navigate to the Service accounts roles tab.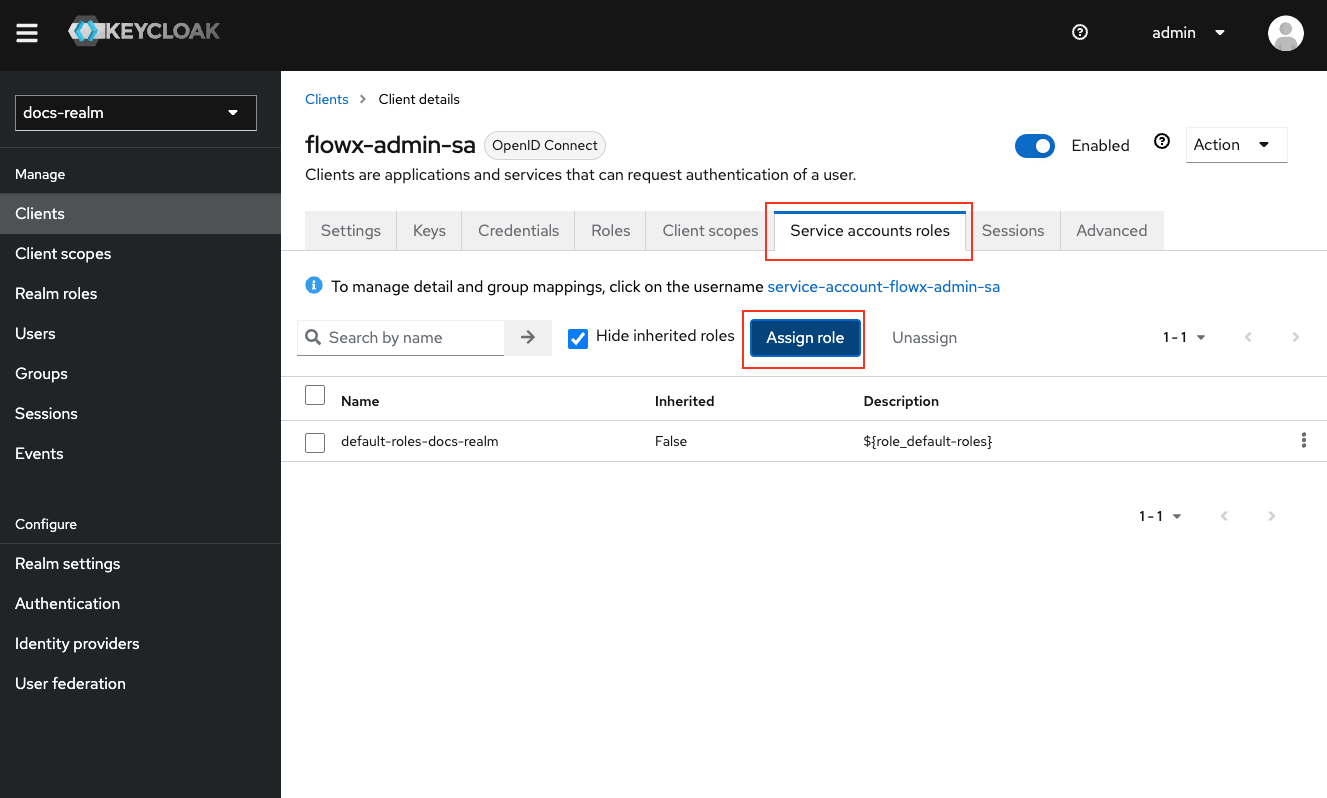 Click Assign role and in the Filter field, select Filter by clients.
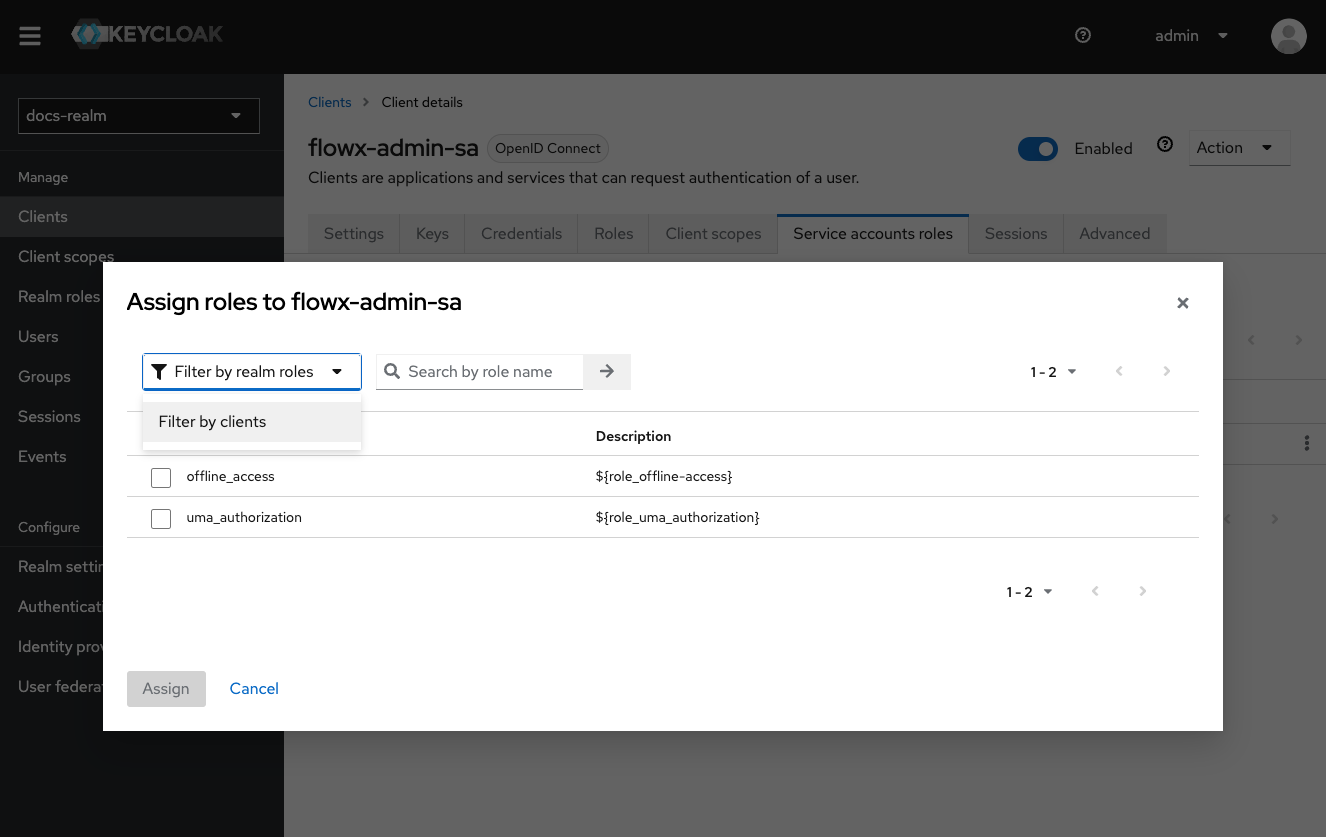 Assign the necessary roles to the admin service account based on the required access scopes, such as:
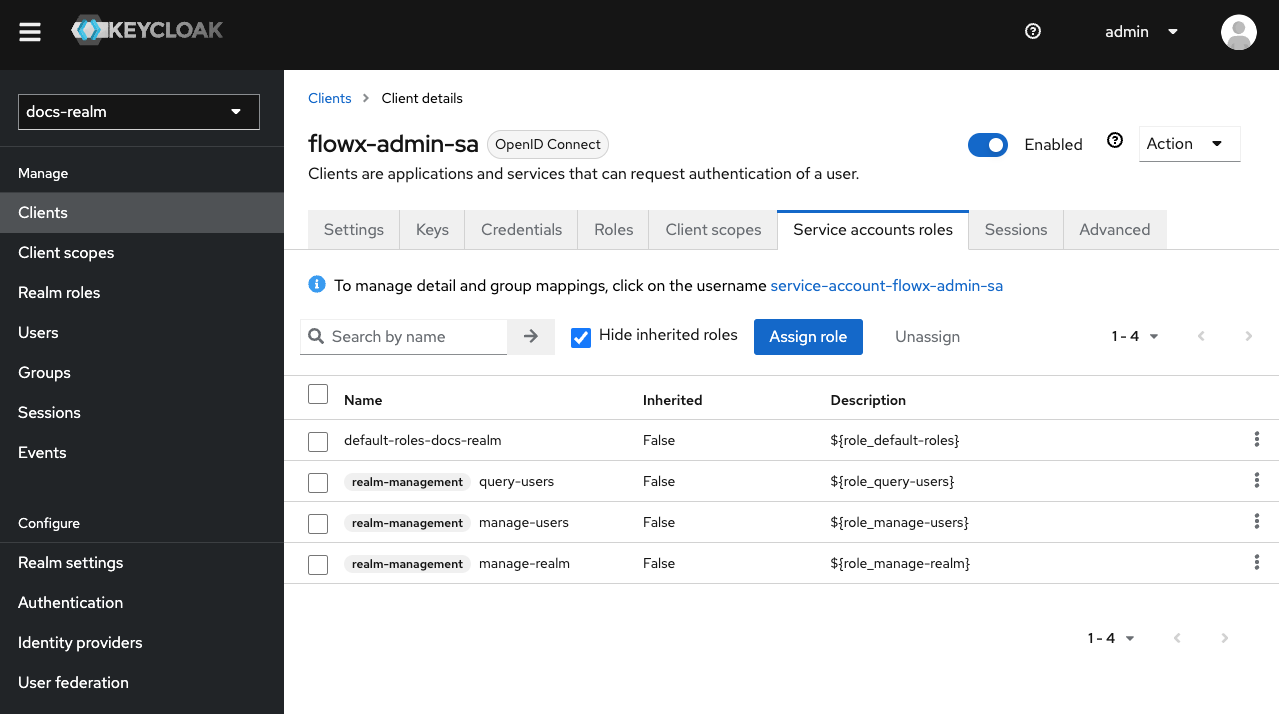
- manage-realm
- manage-users
- query-users
Ensure you have created a realm-management client to include the necessary client roles.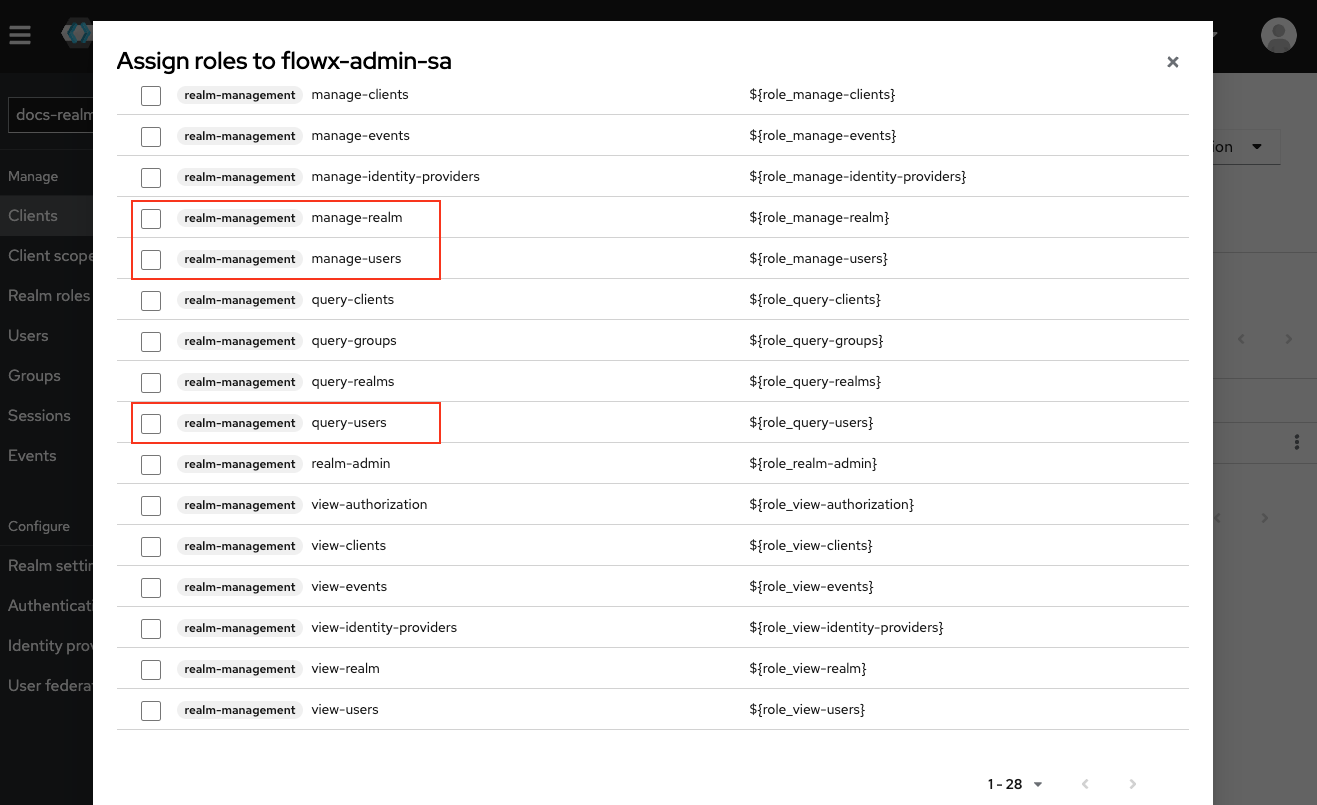
The admin service account does not require mappers as it doesn’t utilize roles. Service account roles include client roles from
realm-management.Configuring access rights for admin
Task Management service account
The task management service account facilitates process initiation and enables the use of the task management plugin (requiring theFLOWX_ROLE and role mapper), and access data from Keycloak.
Steps to Add a Task Management service account:
Create the Service Account
Follow steps 1-3 as in the Admin Service account configuration: Admin service account.
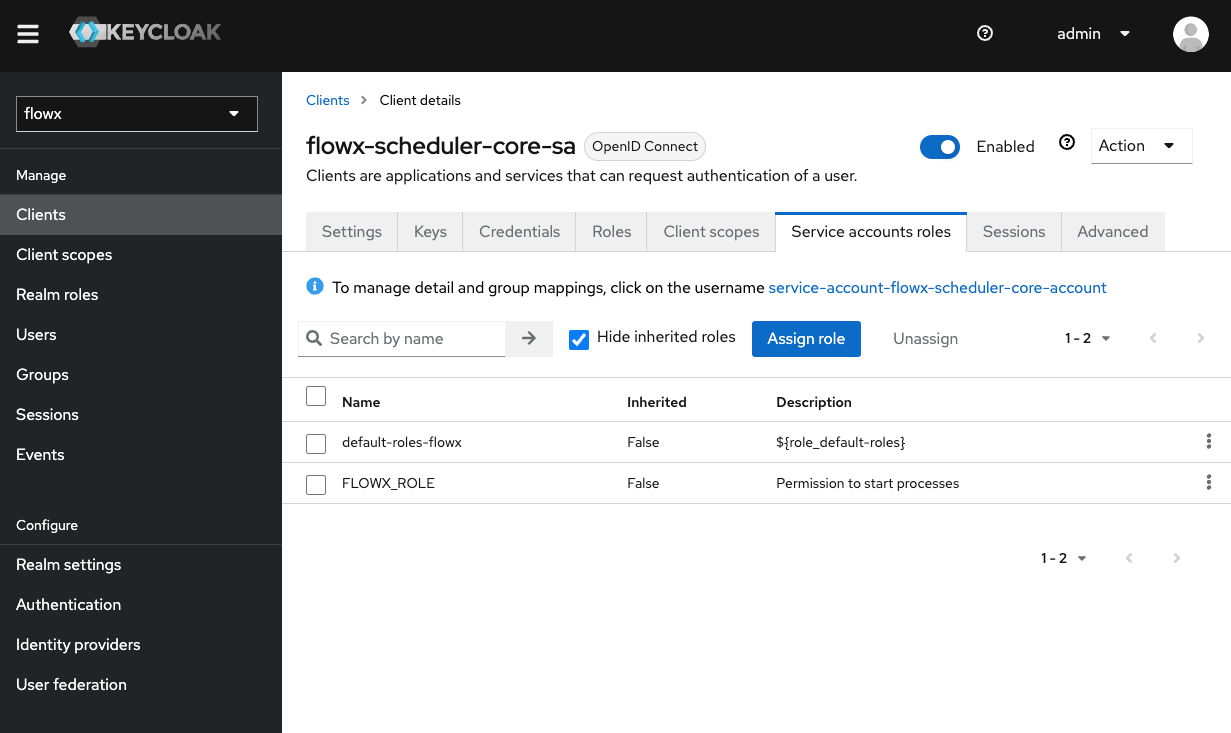
Assign Necessary Roles
Assign the necessary service accounts client roles to the Task Management plugin service account based on the required access scopes, such as: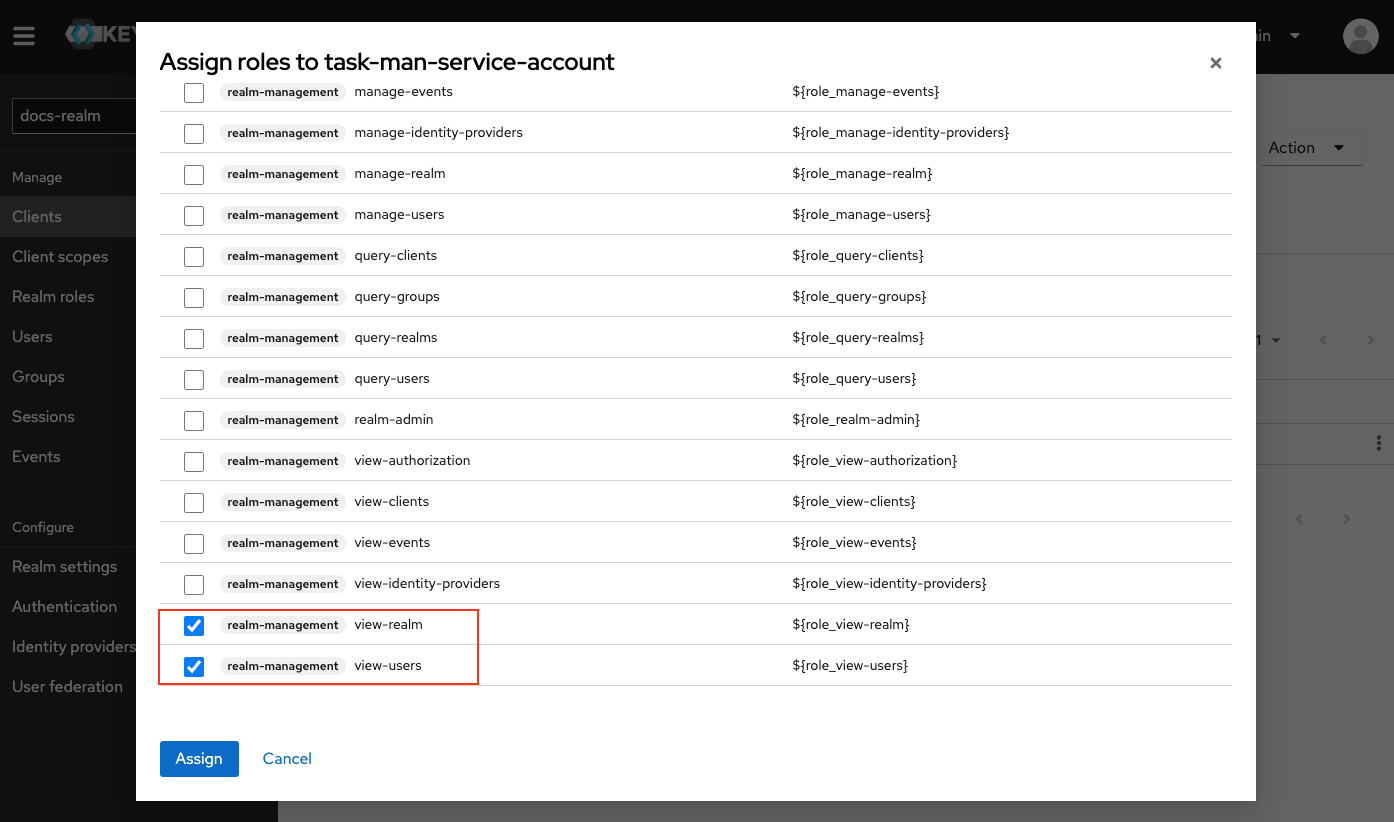 In the end, you should have something similiar to this:
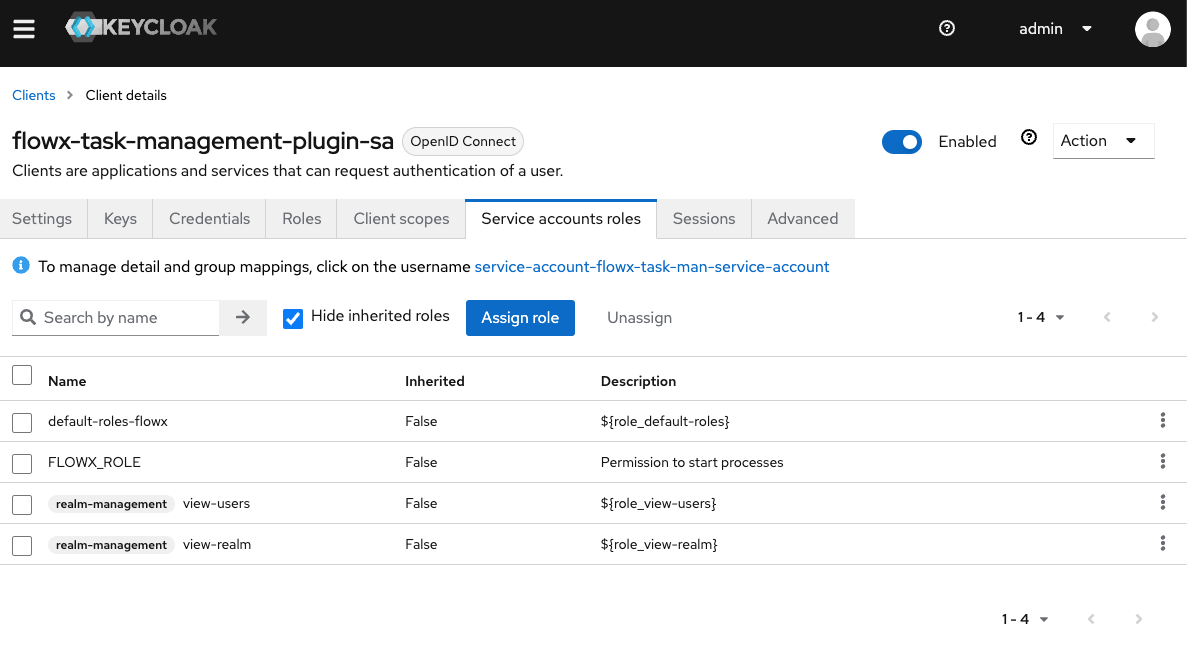
- view-realm
- view-users
The task management plugin service account requires a realm roles mapper to function correctly. Make sure to configure this to ensure proper operation.
Add a Realm Roles Mapper
In the newly created task management plugin service account, select Client Scopes:Click on Click Add mapper. From the list of available mappers, select User Realm Role.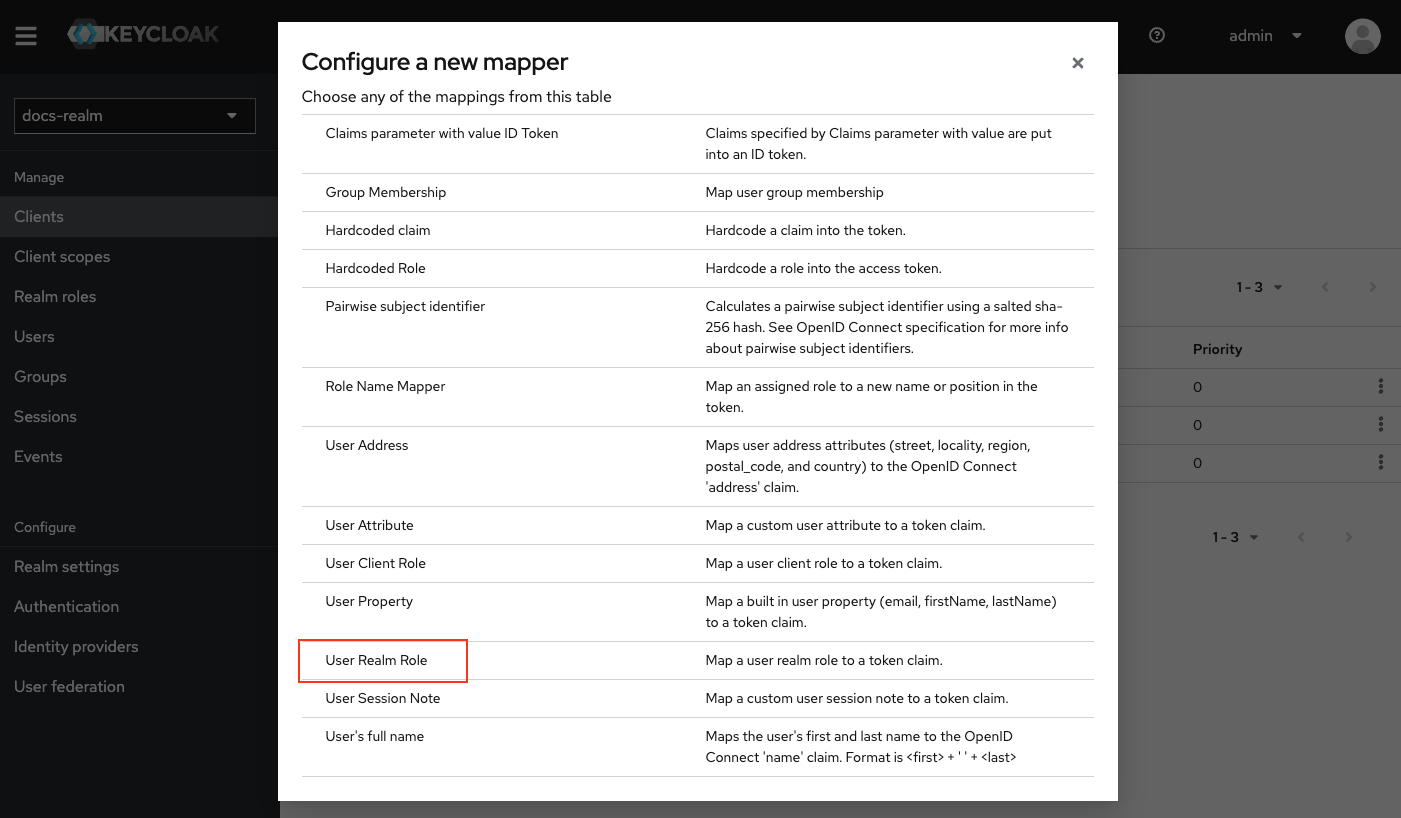
{your-client-name}-service-account to open its settings.Ensure the Mappers tab is selected within the dedicated client scope.
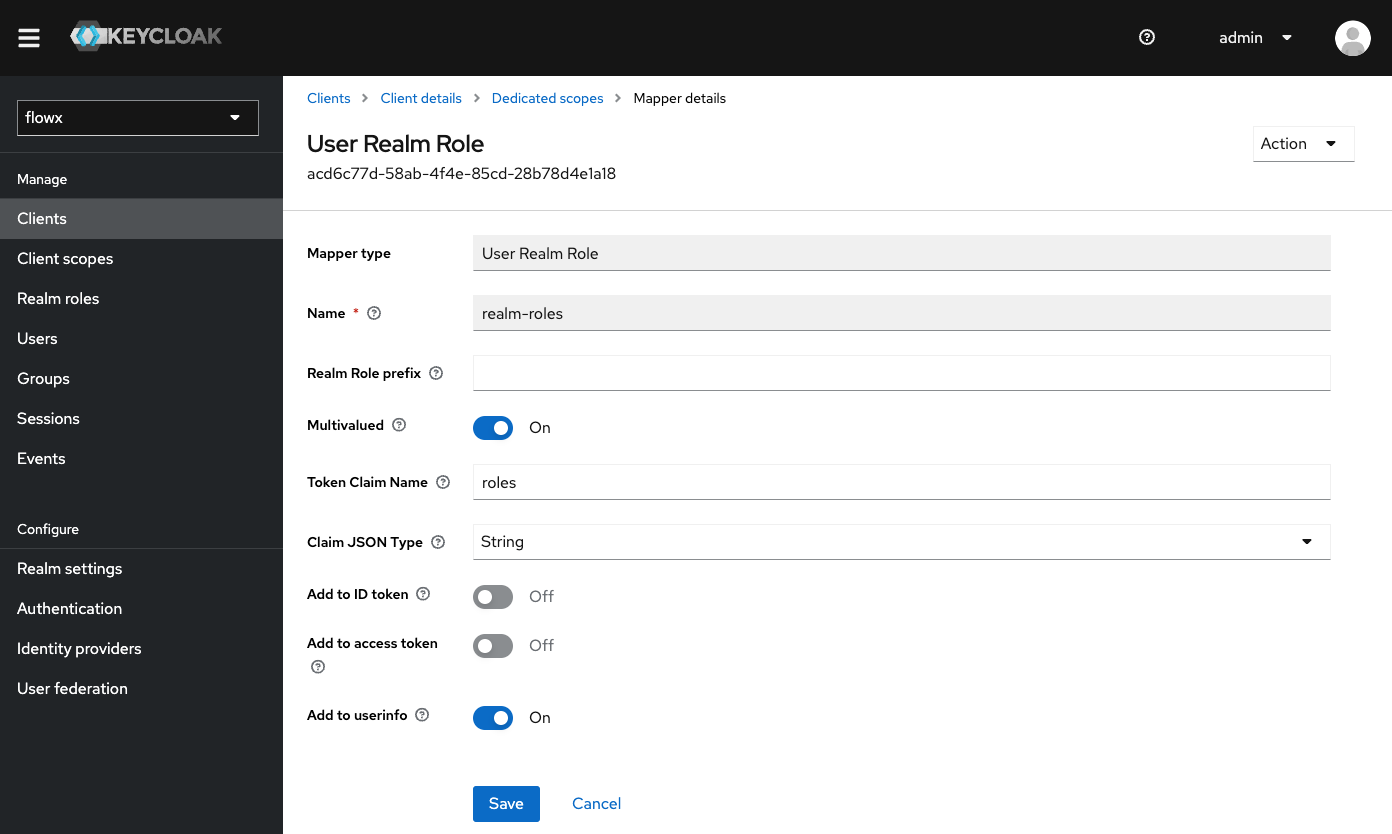
Configure the Mapper
Name: Enter a descriptive name for the mapper to easily identify its purpose, for example 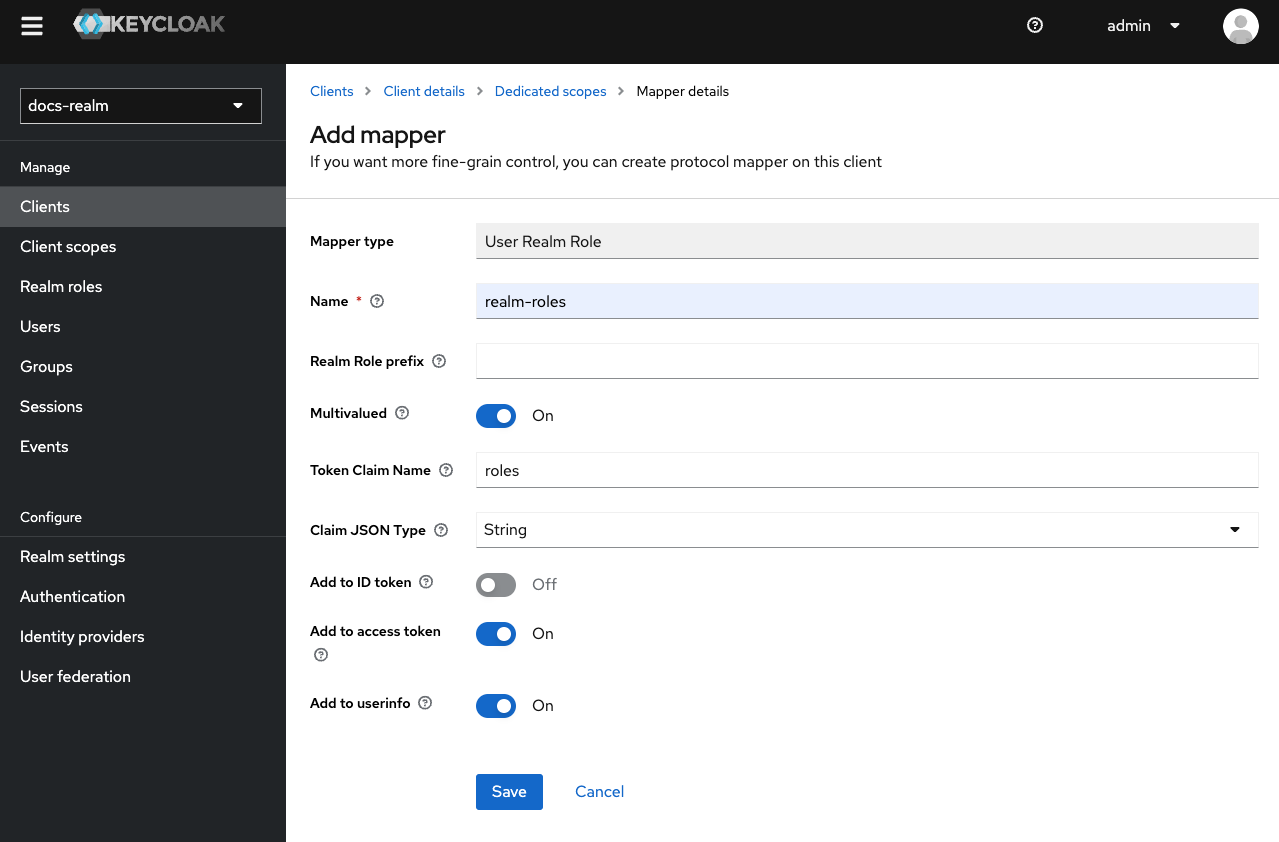 Click Save.
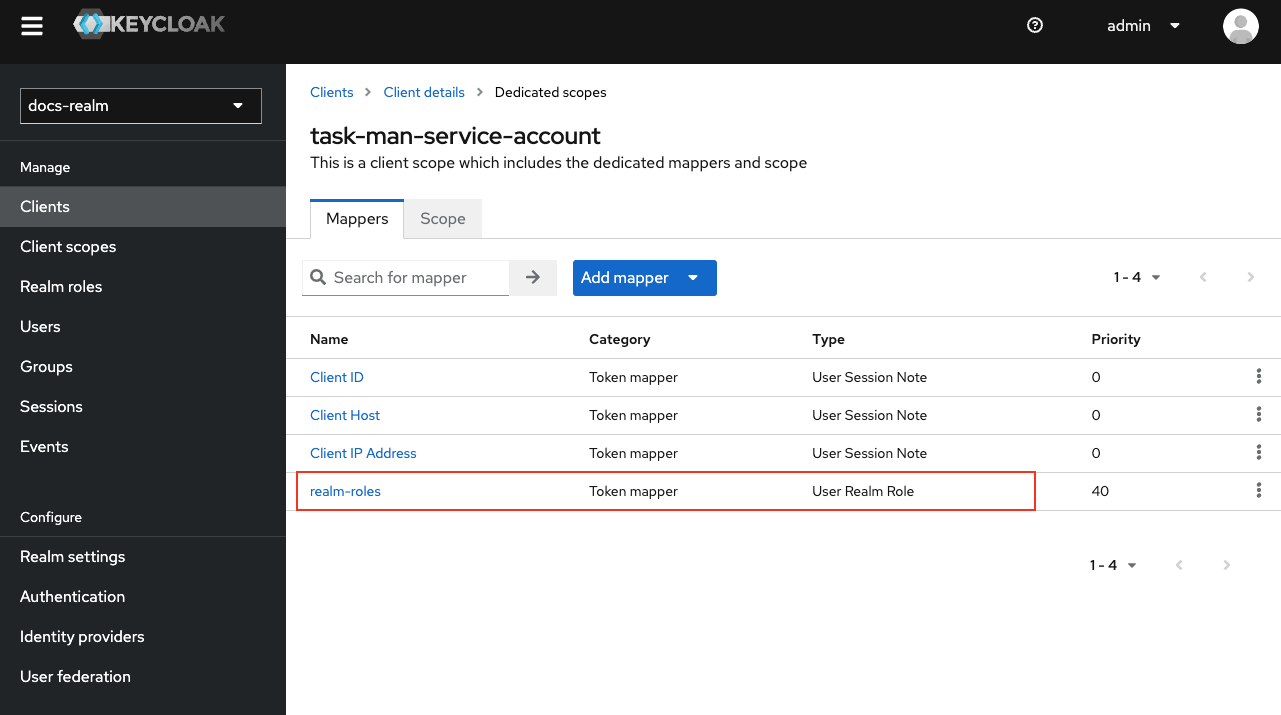
realm-roles.Token Claim Name: Set it to roles.Disable Add to ID token.Add the Service Account Realm Role
Assign the
FLOWX_ROLE service account realm role (used to grant permissions for starting processes).The
FLOWX_ROLE is used to grant permissions for starting processes in the FlowX.AI Designer platform. By default, this role is named FLOWX_ROLE, but its name can be changed from the application configuration of the Engine by setting the following environment variable:FLOWX_PROCESS_DEFAULTROLESConfiguring access rights for Task Management
Process engine service account
The process engine requires a process engine service account to make direct calls to the Keycloak API.This service account is also needed to be able to use Start Catch Event node.
- 1-3: Follow the same steps as in the Admin Service Account Configuration: Admin service account:
This service account does not require service account client roles. It needs a realm role (to be able to start process instances) and realm-roles mapper.
- Add the
FLOWX_ROLEservice account realm role (used to grant permissions for starting processes):

- Add a realm-roles mapper:
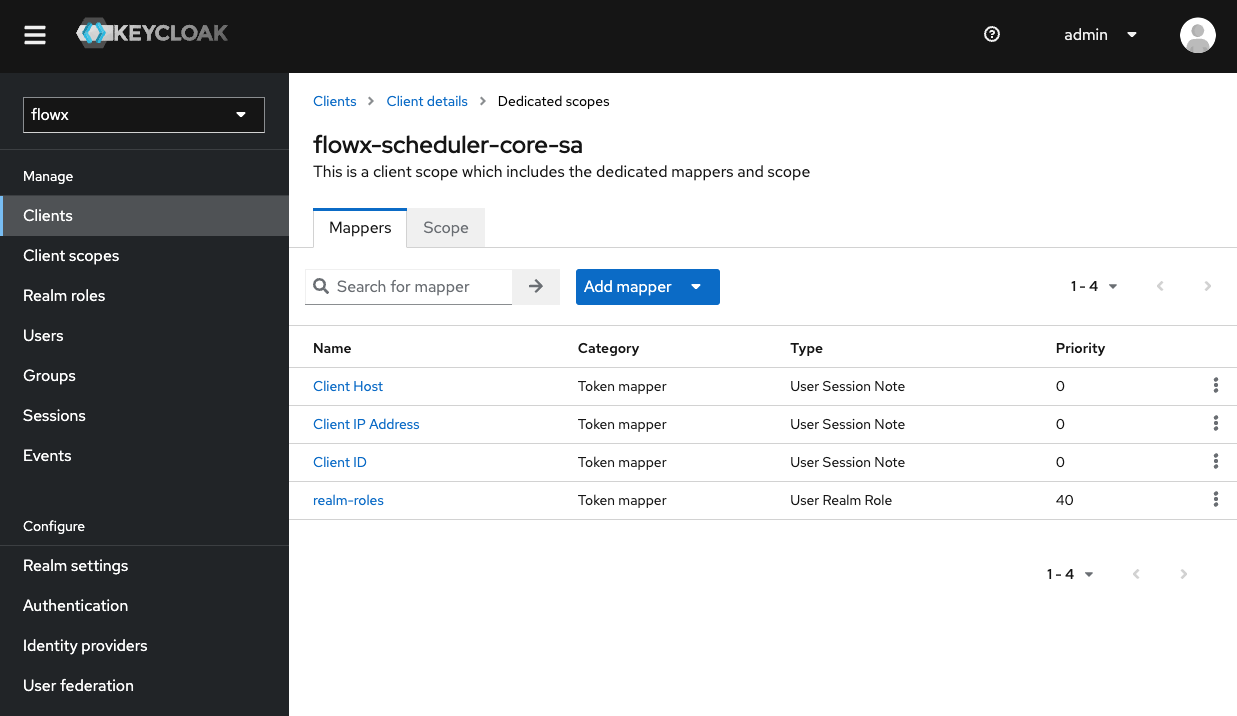
Scheduler service account
This service account is used for Start Timer Event node. The registered timers in the scheduler require sending a process start message to Kafka. Authentication is also necessary for this operation.
- Assign the
FLOWX_ROLEas service account role (this is needed to run process instances).
- Add a realm-roles mapper (as shown in the example for process-engine service account).