> ## Documentation Index
> Fetch the complete documentation index at: https://docs.flowx.ai/llms.txt
> Use this file to discover all available pages before exploring further.
# Sending an email
> To use the notification plugin for sending emails with attachments, you must define the same topic configuration as for sending regular notifications. A notification template must be created, and the corresponding Kafka topics must be defined.
Before proceeding, make sure you understand [how to send basic notifications](./sending-a-notification).
For **new processes**, use the [Send Notification action](../../../../building-blocks/actions/send-notification-action) instead. It provides typed configuration fields and validation, and runs through the same notification backend. This Kafka-based guide is preserved for existing flows and advanced cases where the payload must be hand-crafted.
## Overview
This guide explains how to send emails with document attachments through the notification plugin. You'll learn how to:
* Configure email templates with dynamic content
* Reference generated documents as attachments
* Implement the complete email notification flow in your processes
## Prerequisites
1. A configured notification template (see [Managing notification templates](./managing-notification-templates))
2. Properly defined Kafka topics for the notification plugin
3. Files to attach (such as generated documents or uploaded files)
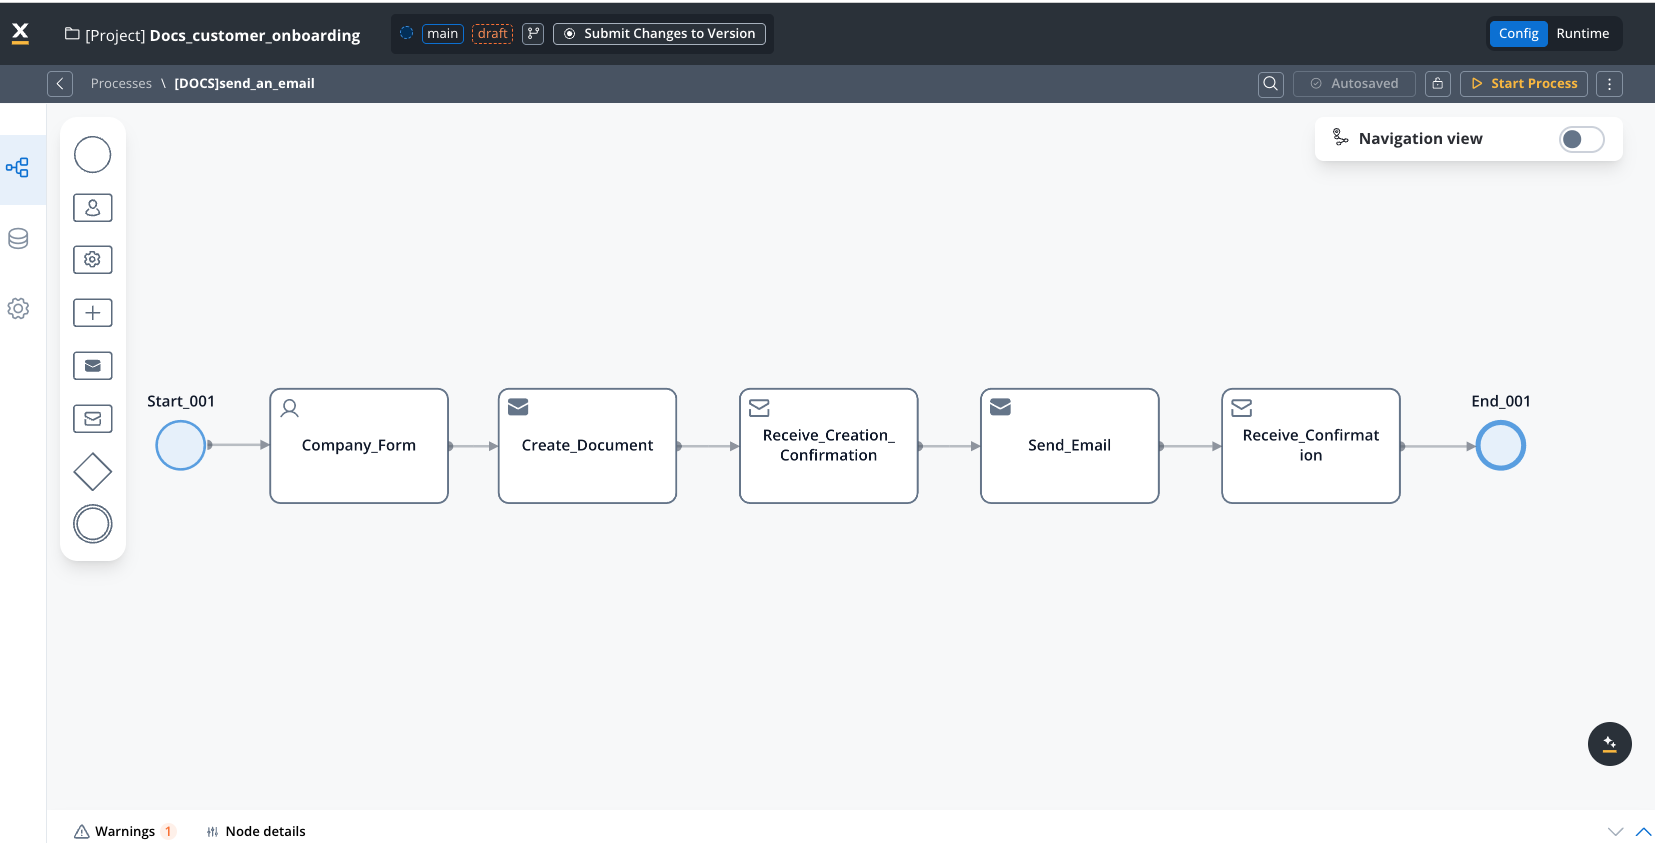
## Implementing email notifications with attachments
Let's walk through a common scenario: sending a customer a copy of their account details document via email.
If you need to generate the document first, see the document generation guide.
### Understanding document references
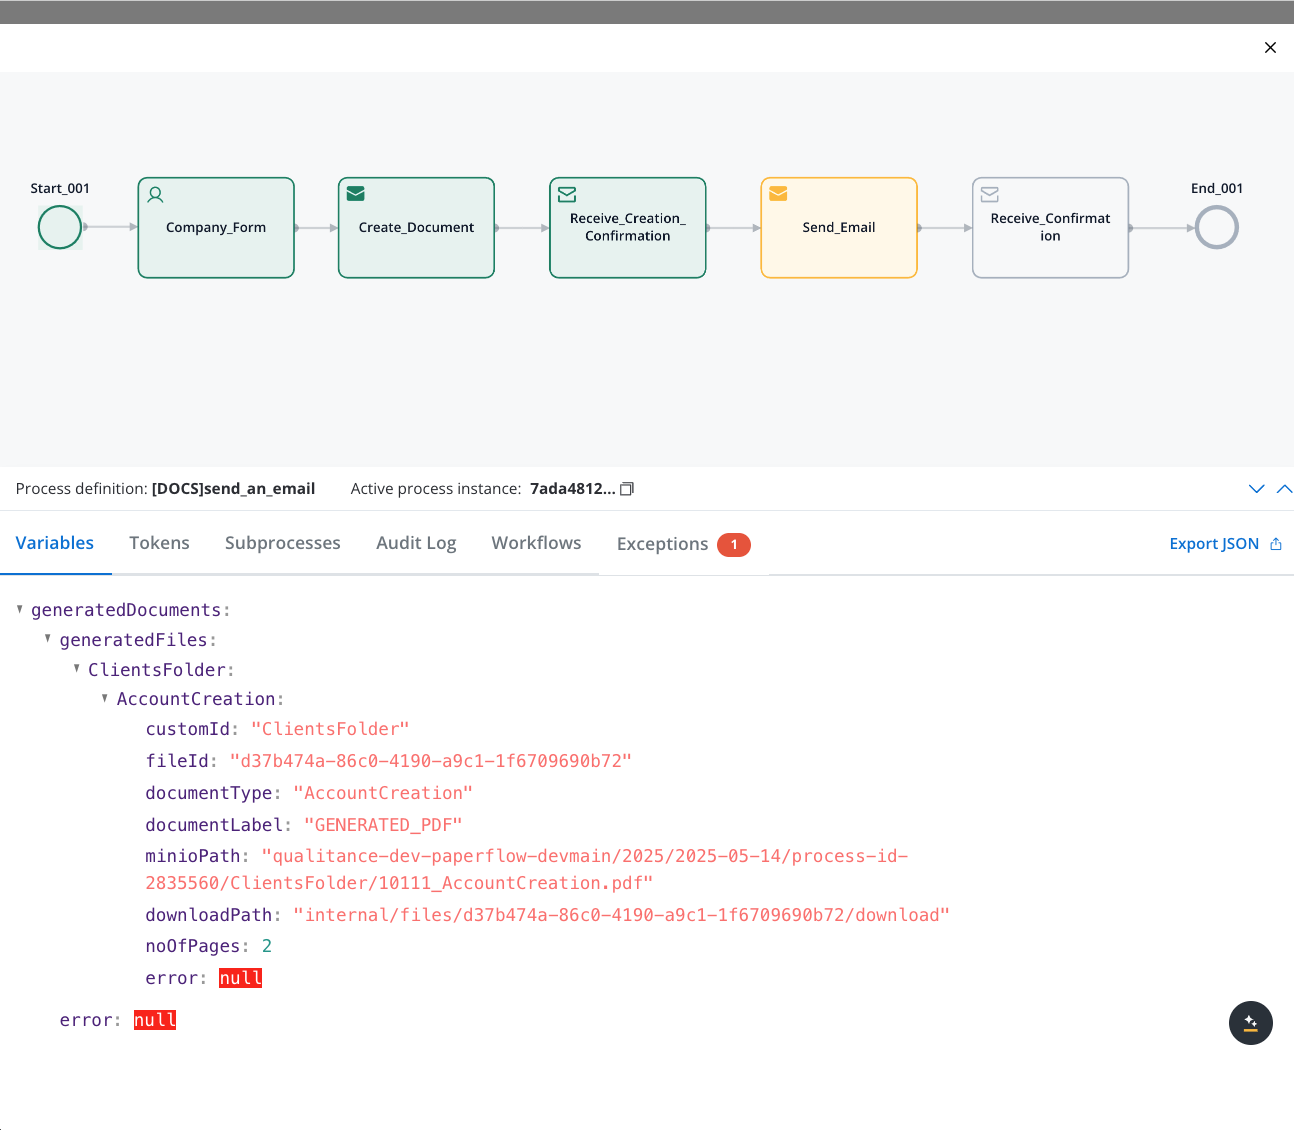
When you generate a document, as explained in the [Generating documents](../documents-plugin/generating-from-html-templates) guide, you need to reference two key pieces of information:
1. **minioPath**: The storage location of the generated document
2. **documentType**: The type identifier used to create the attachment filename
These values are stored in the process instance with the following structure:
```
generatedDocuments.generatedFiles.{{customId}}.{{templateName}}.minioPath
generatedDocuments.generatedFiles.{{customId}}.{{templateName}}.documentType
```
For example, if your document generation used:
* customId: "ClientsFolder"
* templateName: "AccountCreation"
The paths would be:
```json theme={"system"}
...
"attachments": [
{
"path": "${generatedDocuments.generatedFiles.ClientsFolder.AccountCreation.minioPath}",
"filename": "${generatedDocuments.generatedFiles.ClientsFolder.AccountCreation.documentType}.pdf"
}
]
```
You can verify these values in the process instance details:
### Step-by-step implementation
Configure the template you'll use for the email:
* Define subject line, body text, and placeholders for dynamic content
* Set proper HTML formatting if needed
* Test the template to ensure it displays correctly
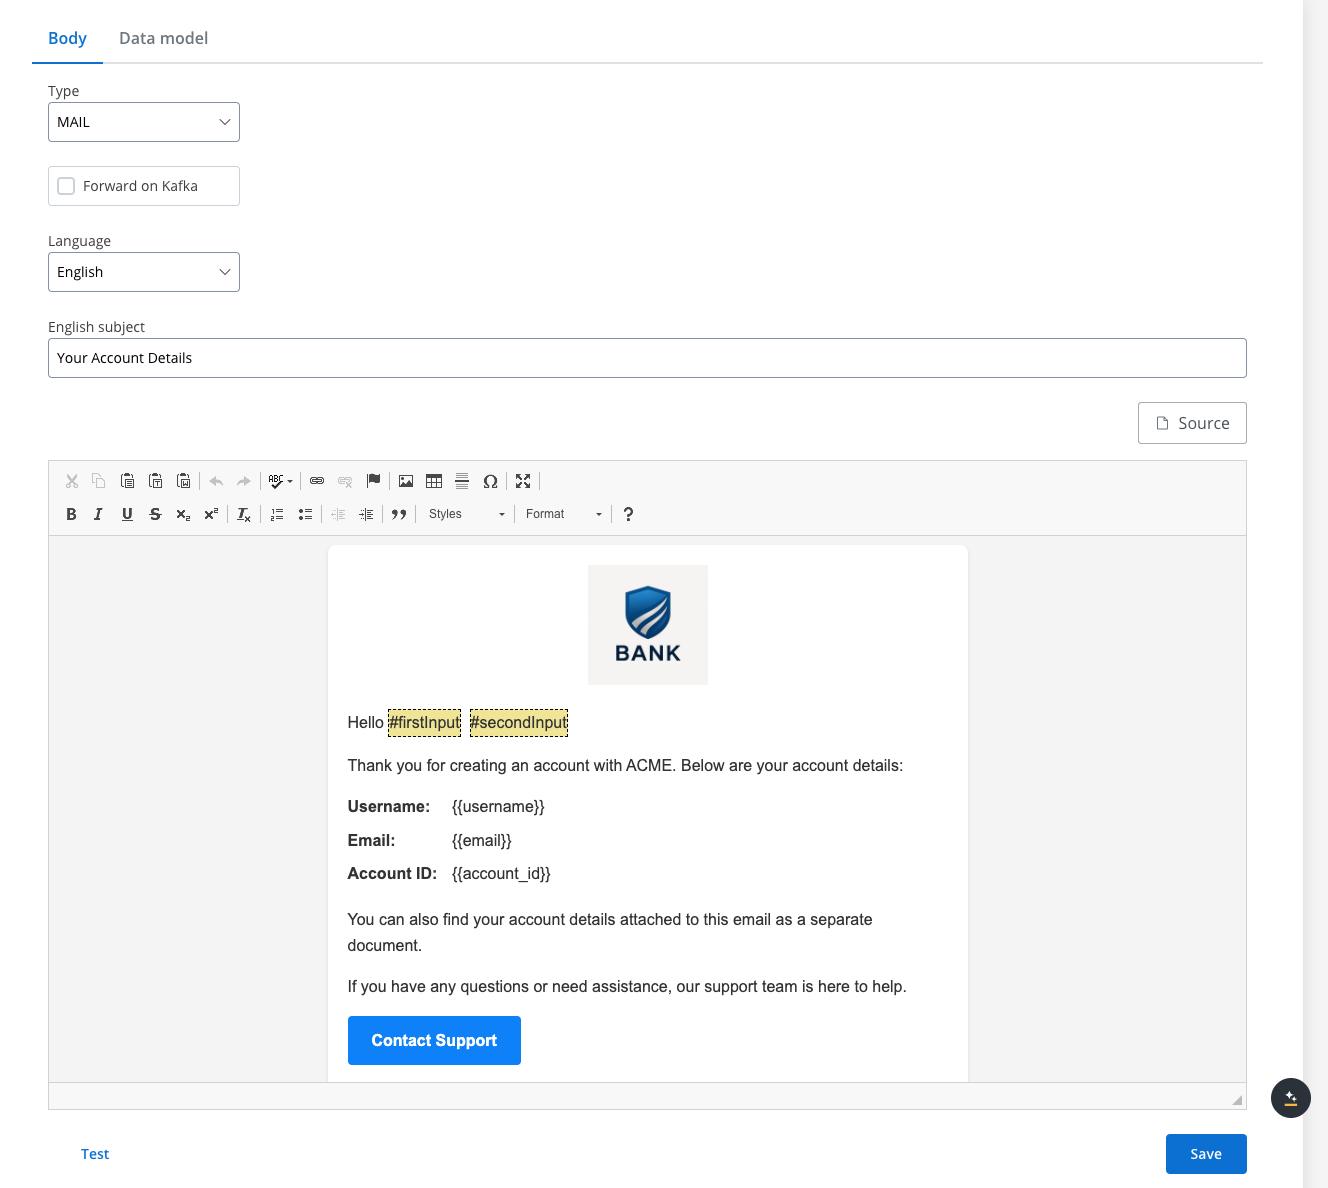
See [Managing notification templates](./managing-notification-templates) for detailed instructions.
Confirm that the required Kafka topics are properly defined:
1. Navigate to **FlowX Designer → Platform Status**
2. Select **notification-plugin-mngt**
3. Expand **kafkaTopicsHealthCheckIndicator → details → configuration → topic → notification → internal**
4. Verify that the input and output topics for email notifications are listed

In your process definition:
1. Open the process definition in your project in FlowX Designer
2. Add a [Send Message Task (Kafka)](../../../../building-blocks/node/message-send-received-task-node#send-message-task) after the document generation step
3. Add a [Receive Message Task (Kafka)](../../../../building-blocks/node/message-send-received-task-node#receive-message-task) after the Send Message Task
On the Send Message Task, add a Kafka send action, add the corresponding Kafka topic and create the JSON payload containing all information needed for the email:
```json theme={"system"}
{
"templateName": "accountDetails",
"channel": "MAIL",
"receivers": ["something@email.com"],
"language": "en",
"contentParams": {
"firsInput": "${application.client.firstName}",
"secondInput": "${application.client.lastName}"
},
"attachments": [
{
"path": "${generatedDocuments.generatedFiles.ClientsFolder.AccountCreation.minioPath}",
"filename": "${generatedDocuments.generatedFiles.ClientsFolder.AccountCreation.documentType}.pdf"
}
]
}
```
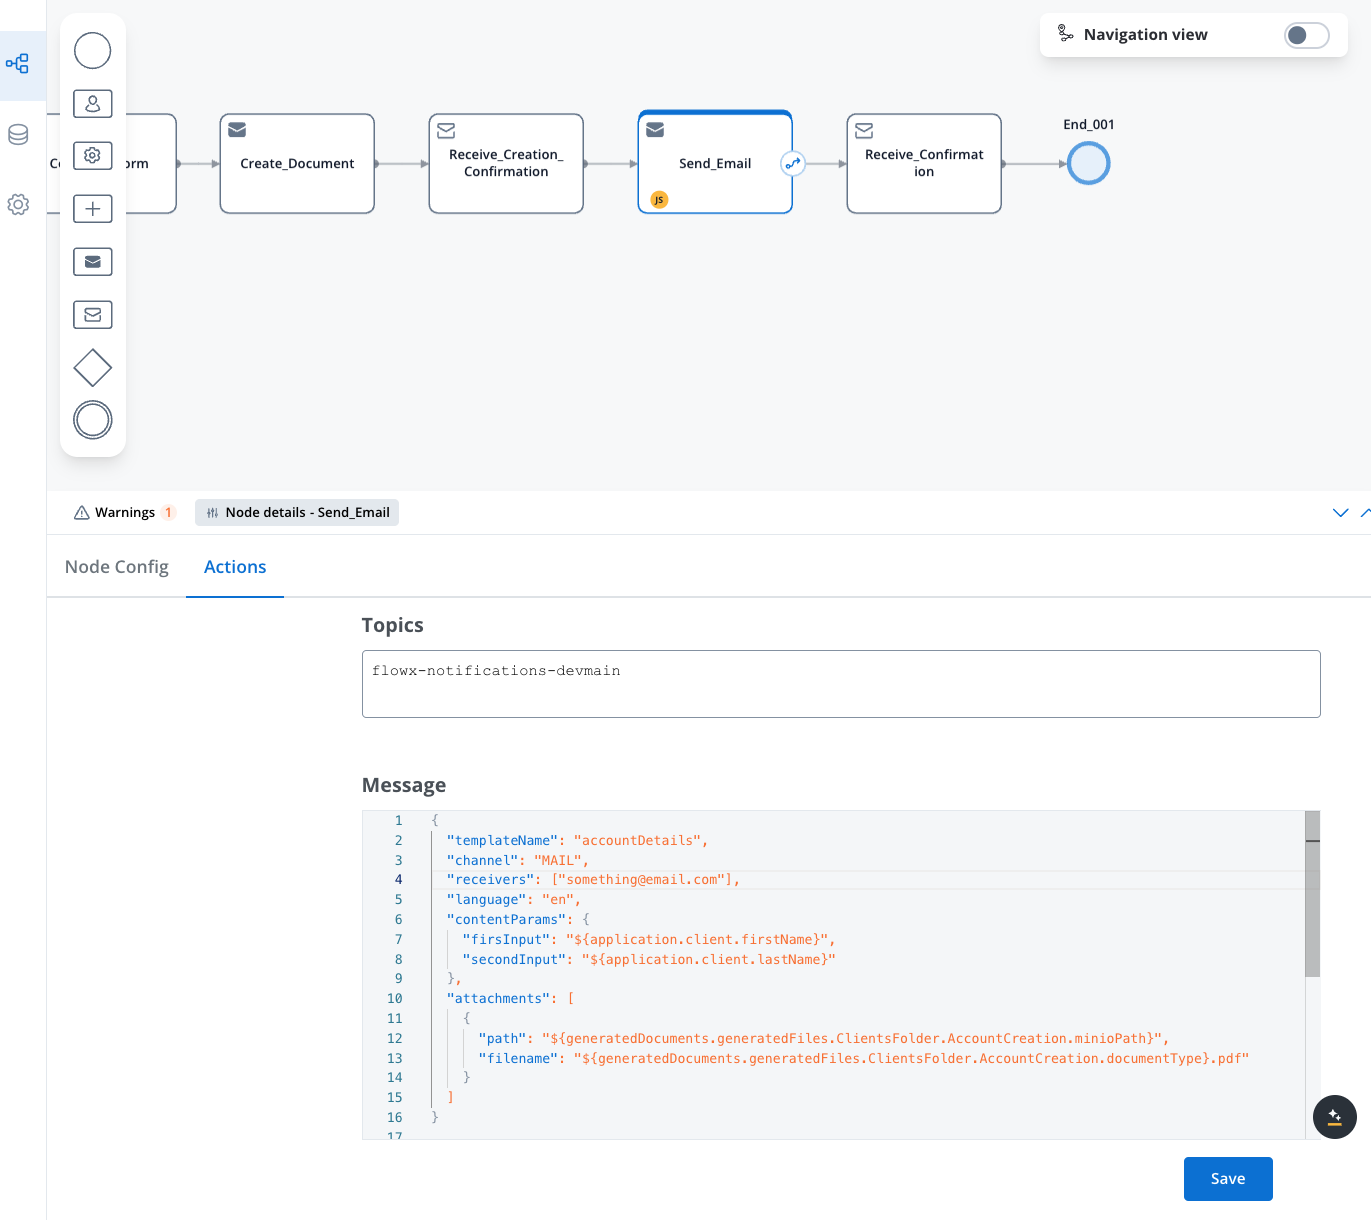
Key parameters:
* **templateName**: The name of your configured email template
* **language**: The language code matching your template's language version
* **receivers**: Array of email addresses (can use process data variables)
* **ccReceivers**: Array of email addresses to be added as CC (can use process data variables)
* **bccReceivers**: Array of email addresses to be added as BCC (can use process data variables)
* **contentParams**: Values to replace template placeholders
* **attachments**: Array of files to attach, with filename and minioPath/storage path
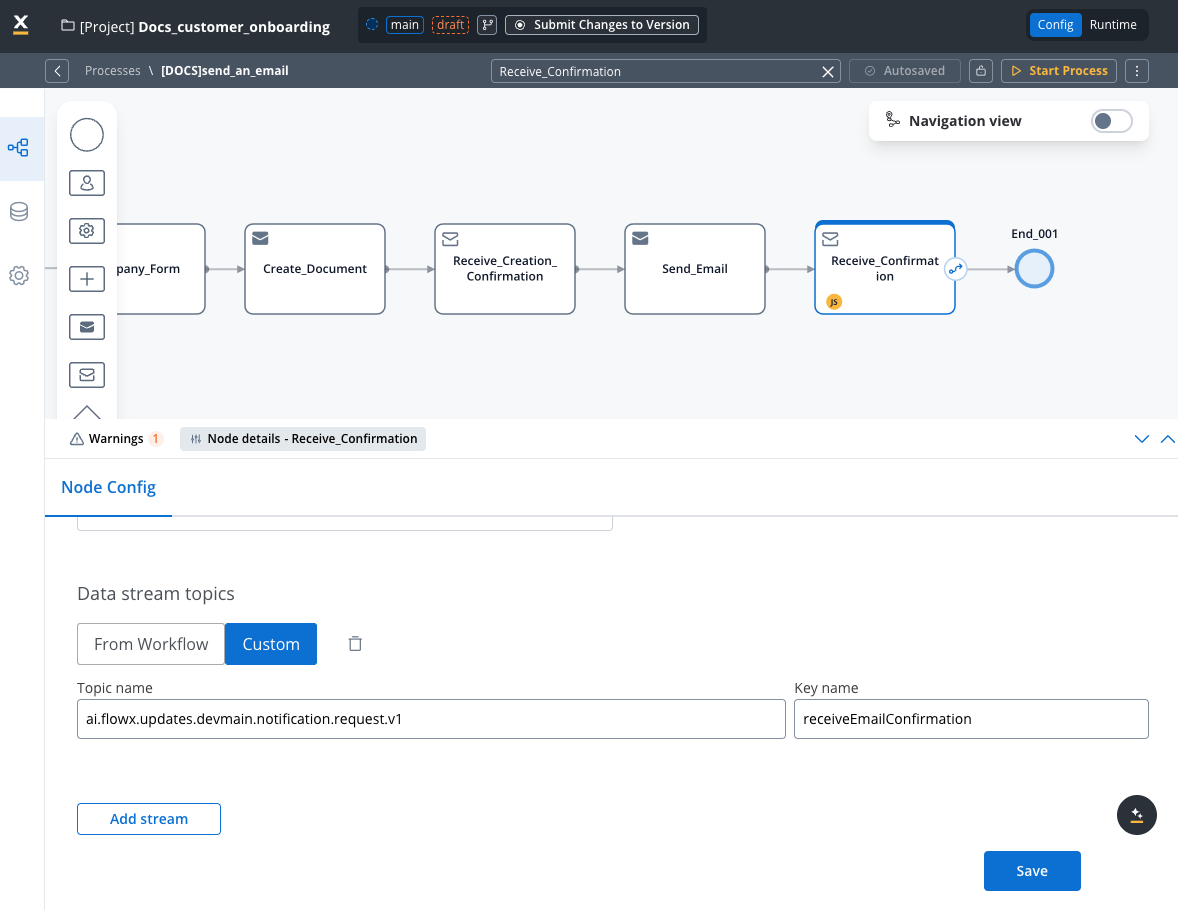
On the Receive Message Task, add a Kafka receive action, add the corresponding Kafka topic and configure the node with the following properties:
* Go to **Node config** tab
* Under **Data stream topics** select **Custom**
* Add the topic name
* Click **Save**
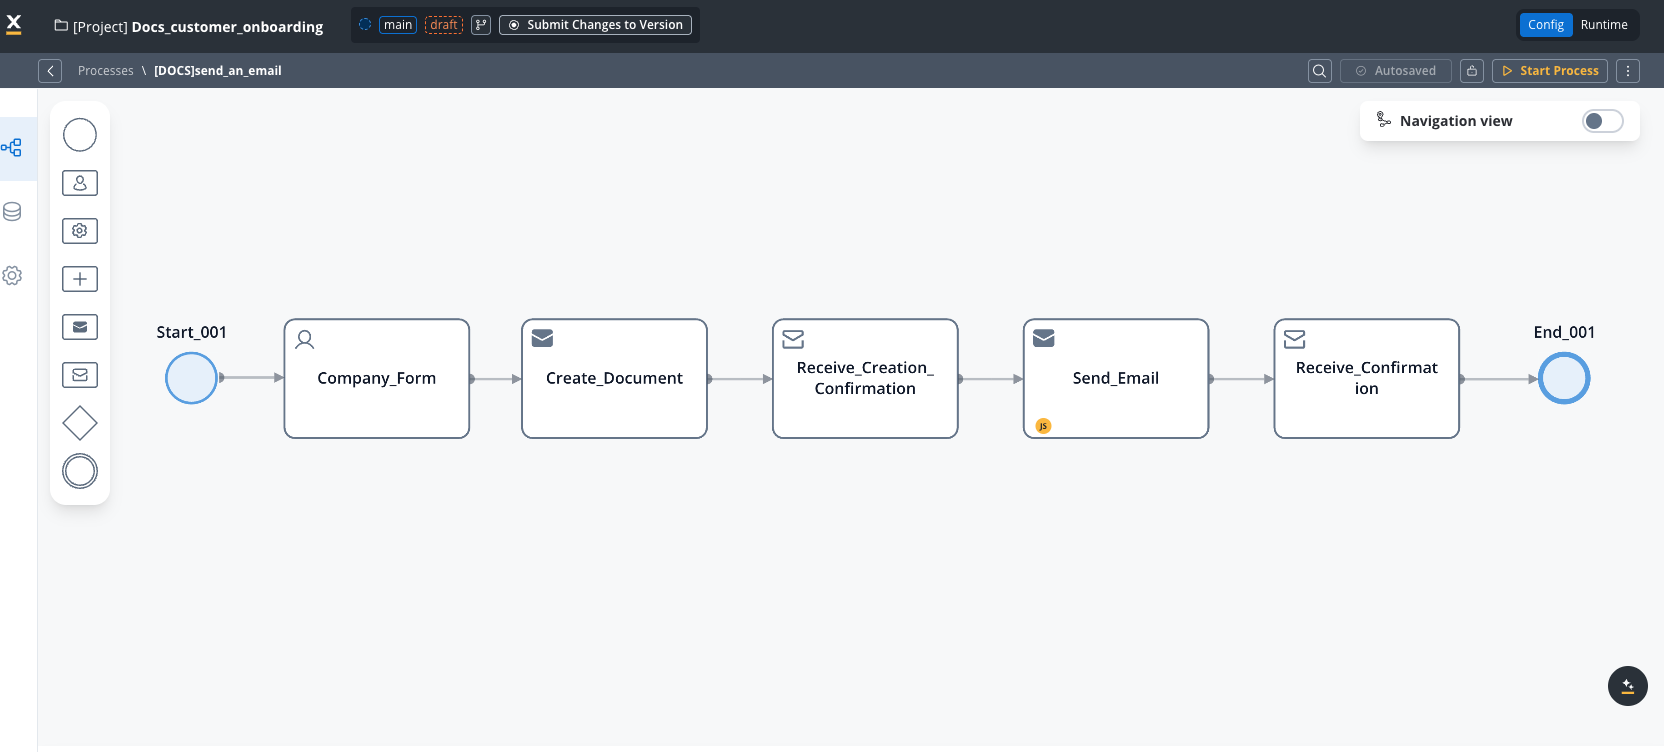
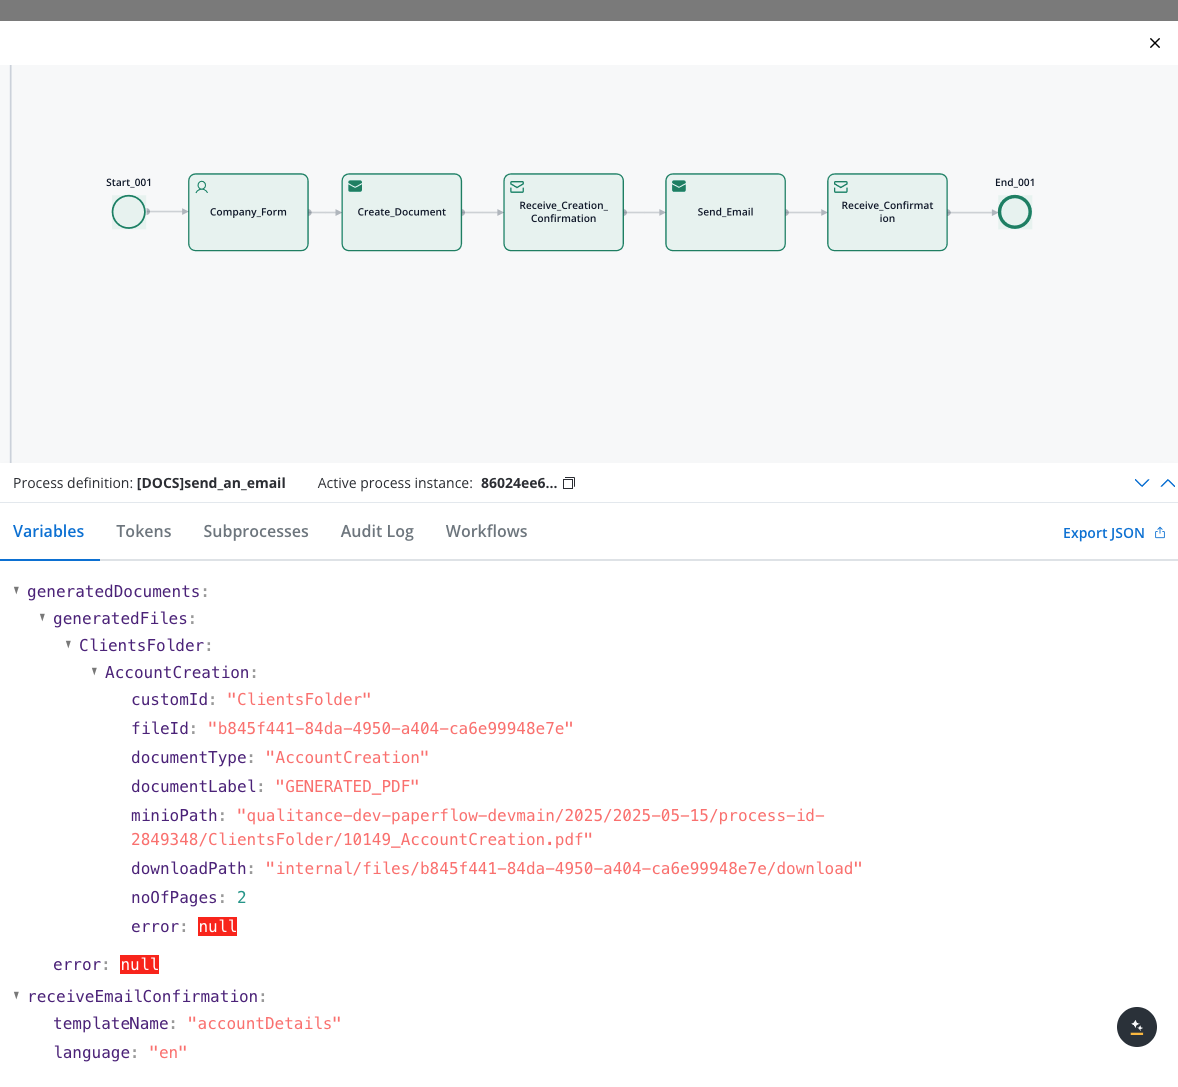
Run the process and check the result in the process instance details:
## Request payload reference
### Required fields
| Field | Description | Example |
| ------------ | ---------------------------------------------- | -------------------------------------------------------- |
| templateName | The unique identifier of your email template | "accountDetails" |
| channel | The delivery channel (use "MAIL" for email) | "MAIL" |
| language | Language code (must match a template language) | "en" |
| receivers | List of email addresses to receive the message | \["[customer@example.com](mailto:customer@example.com)"] |
### Optional fields
| Field | Description | Example |
| ------------- | ------------------------------------------------- | ----------------------- |
| contentParams | Key-value pairs for template variable replacement | `{"firstName": "John"}` |
| attachments | List of files to attach to the email | See below |
### Attachment structure
Each attachment requires:
```json theme={"system"}
{
"path": "${path.to.file.in.storage}",
"filename": "desired_filename.extension"
}
```
* **path**: References the storage location (usually a MinIO path from document generation)
* **filename**: The name recipients will see for the attached file (can include process variables)
## Testing and troubleshooting
After configuring your email notification:
1. Verify that variables resolve correctly in the template and attachment references
2. Check email delivery to test recipients
3. Review notification plugin logs if issues occur
### Common issues
| Problem | Solution |
| ------------------- | ------------------------------------------------------------------------------- |
| Email not received | Verify template name, receiver address, and SMTP configuration |
| Missing attachment | Check that the MinIO path is correct and the file exists |
| Template errors | Ensure all variables in template have corresponding values in contentParams |
| Variable resolution | Confirm process variables use the correct path (check in process instance view) |
For further assistance, check the notification plugin logs in your environment.