> ## Documentation Index
> Fetch the complete documentation index at: https://docs.flowx.ai/llms.txt
> Use this file to discover all available pages before exploring further.
# Deleting files
> The Documents plugin provides functionality for deleting files.
## How files get deleted
Files in the Documents Plugin can be deleted in two ways:
Using the Kafka delete action described below to manually delete a specific file by its `fileId` and `customId`.
When uploading a new file with the **same `customId` AND `documentType`** combination as an existing file, the previous file is automatically marked as deleted.
**Understanding implicit deletion**
The implicit deletion behavior ensures that each `customId` + `documentType` combination points to only one active file. When you upload a new file with an existing combination:
* The previous file is marked as deleted in the database
* The previous file's download URLs stop working
* The new file becomes the active document for that combination
This is by design and useful for scenarios where you want to replace documents (e.g., updating a profile photo or replacing a draft contract). However, if you need to store multiple files of the same type, ensure each has a **unique `customId`**.
## Prerequisites
Before deleting files, ensure:
1. **Access Permissions**: Ensure that the user account used has the necessary access rights for updates or deletions.
2. **Kafka Configuration**:
* **Verify Kafka Setup**: Ensure proper configuration and accessibility of the Kafka messaging system.
* **Kafka Topics**: Understand the Kafka topics used for these operations.
3. **File IDs and Document Types**: Prepare information for updating or deleting files:
* `fileId`: ID of the file to delete.
* `customId`: Custom ID associated with the file.
In the example below, we use a `fileId` generated for a document using [**Uploading a New Document**](./uploading-a-new-document) scenario.
```json theme={"system"}
{
"docs": [
{
"customId": "119407",
"fileId": "c4e6f0b0-b70a-4141-993b-d304f38ec8e2",
"documentType": "BULK",
"documentLabel": null,
"minioPath": "flowx-dev-process-id-119408/119407/466_BULK.pdf",
"downloadPath": "internal/files/c4e6f0b0-b70a-4141-993b-d304f38ec8e2/download",
"noOfPages": 2,
"error": null
}
],
"error": null
}
```
## Configuring the deletion process
To delete files, follow these steps:
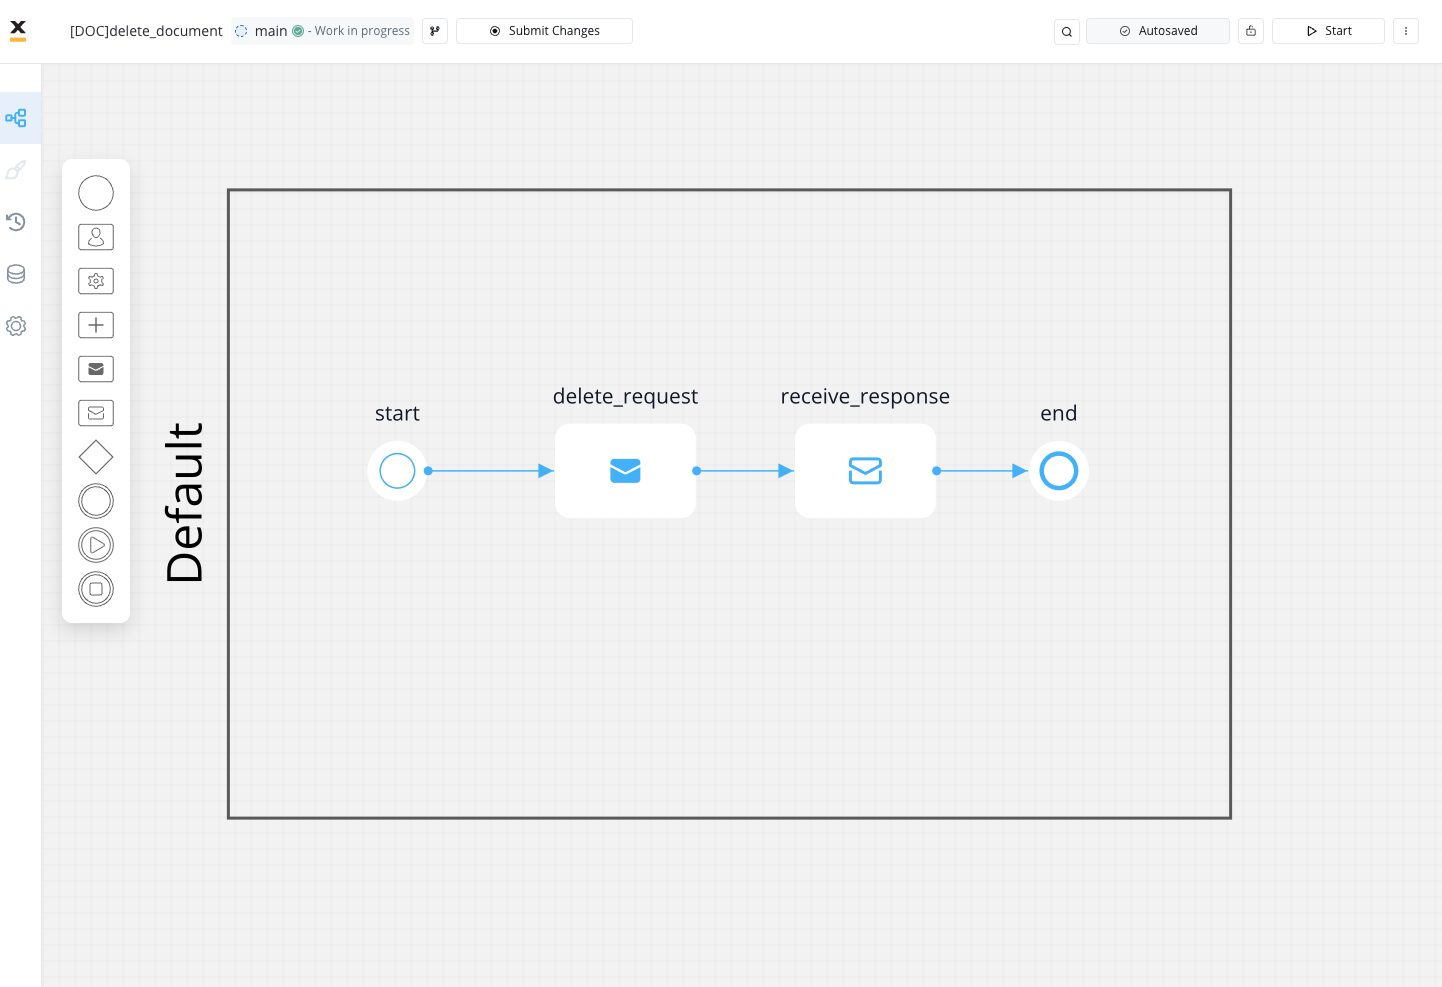
1. Create a process that includes a [**Send Message Task (Kafka)**](../../../../building-blocks/node/message-send-received-task-node) node and [**Message Event Receive (Kafka)**](../../../../building-blocks/node/message-send-received-task-node#configuring-a-message-receive-task-node) node:
* Use the **Send Message Task** node to send the delete request.
* Use the **Receive Message Task** node to receive the delete reply.
2. Configure the **first node (Send Message Task)** by adding a **Kafka Send Action**.
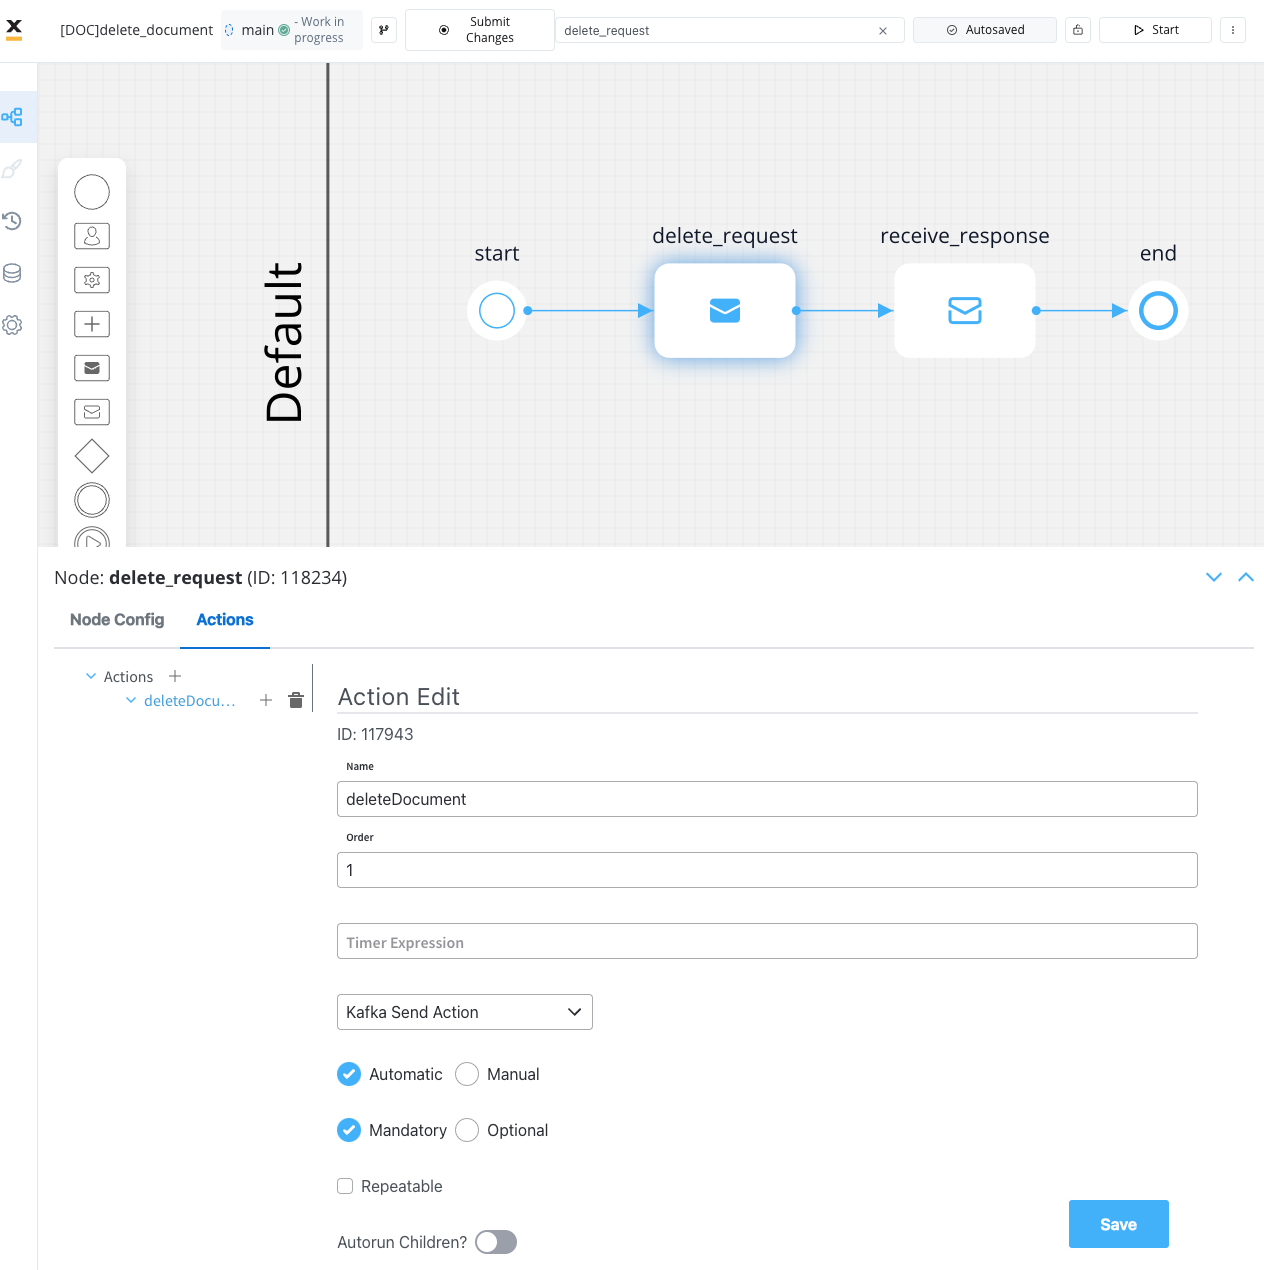
3. Specify the [**Kafka topic**](../../../../../setup-guides/documents-plugin-setup) for sending the delete request.
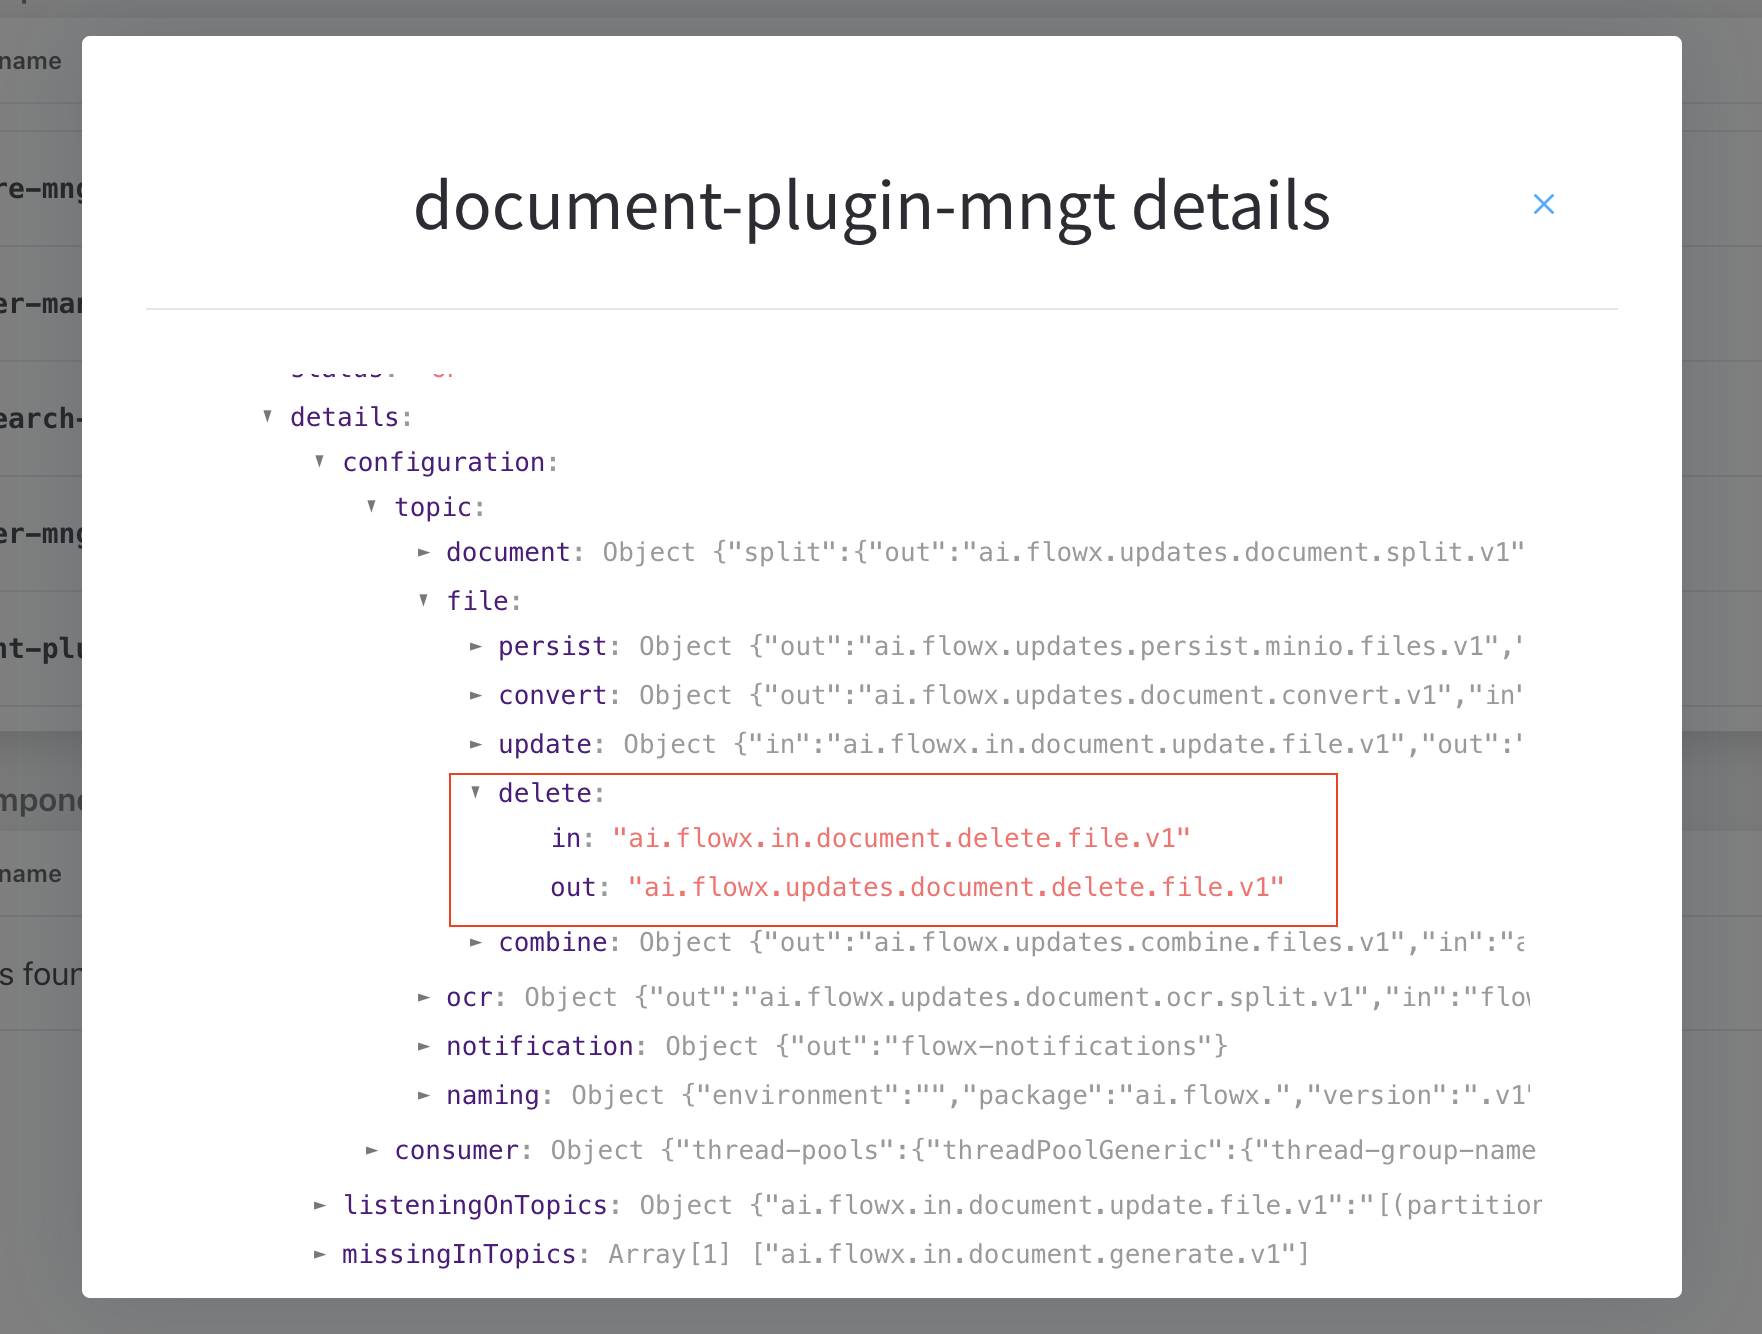
To identify defined topics in your environment:
* Navigate to **Platform Status > FLOWX Components > document-plugin-mngt** and click the eye icon on the right side.
* In the details screen, expand the `KafkaTopicsHealthCheckIndicator` line and then **details → configuration → topic → file → delete**. Here will find the in and out topics for deleting files.
4. Fill in the request message body.

#### Message request example
Example of a message following the custom integration data model:
```json theme={"system"}
{
"customId": "119408",
"fileId": "c4e6f0b0-b70a-4141-993b-d304f38ec8e2"
}
```
* **fileId**: The ID of the file.
* **customId**: The custom ID.
5. Configure the **second node (Receive Message Task)** by adding a Data stream topic:
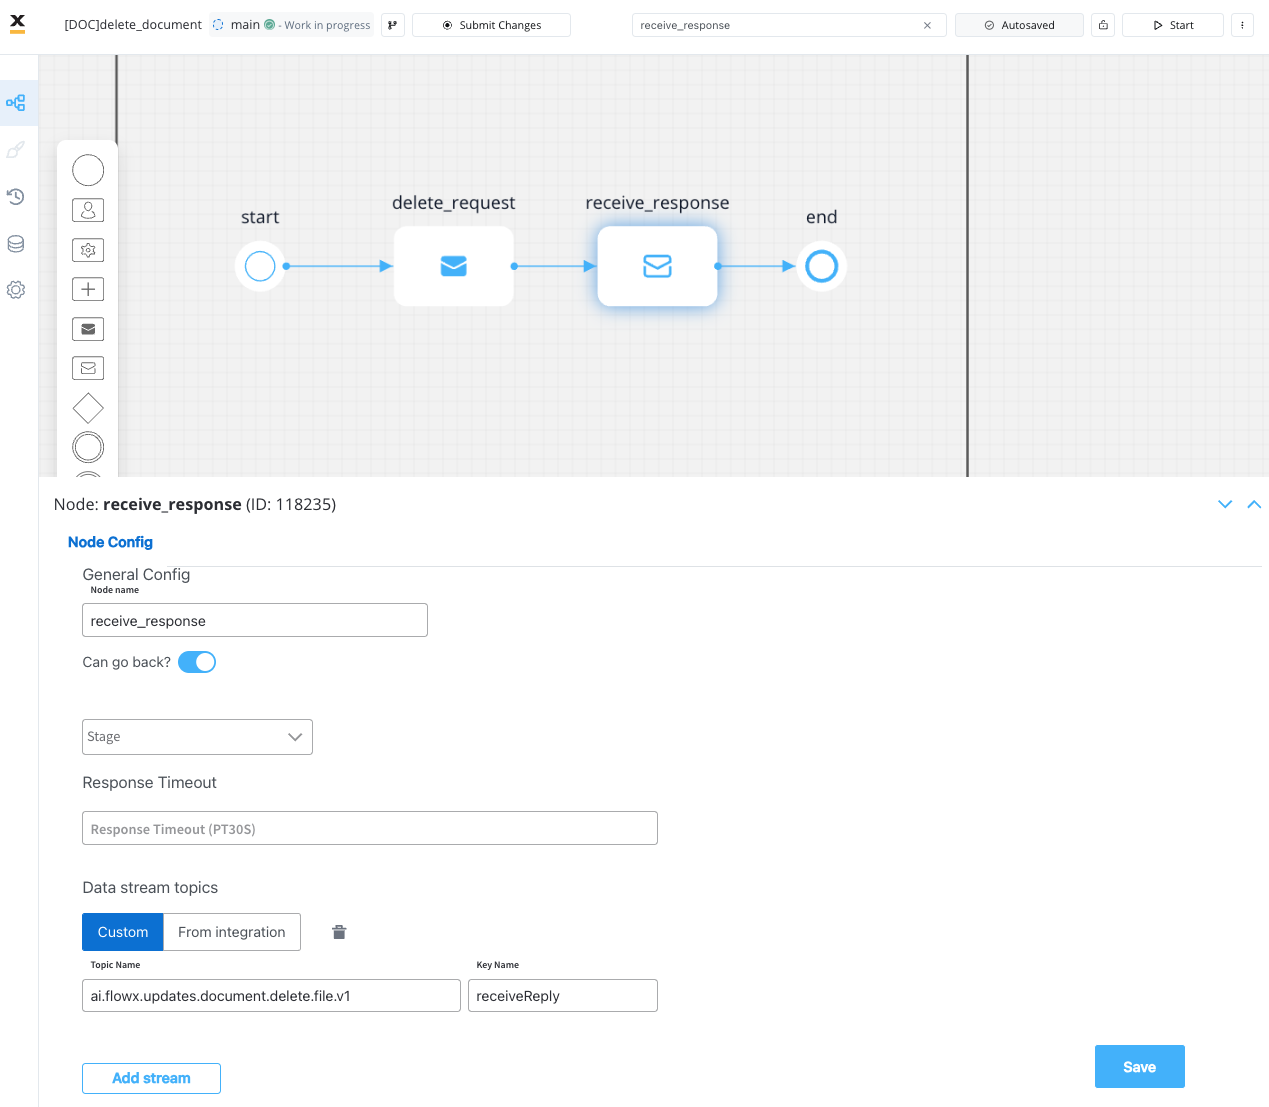
The response will be sent to `..out` Kafka topic.
### Receiving the reply
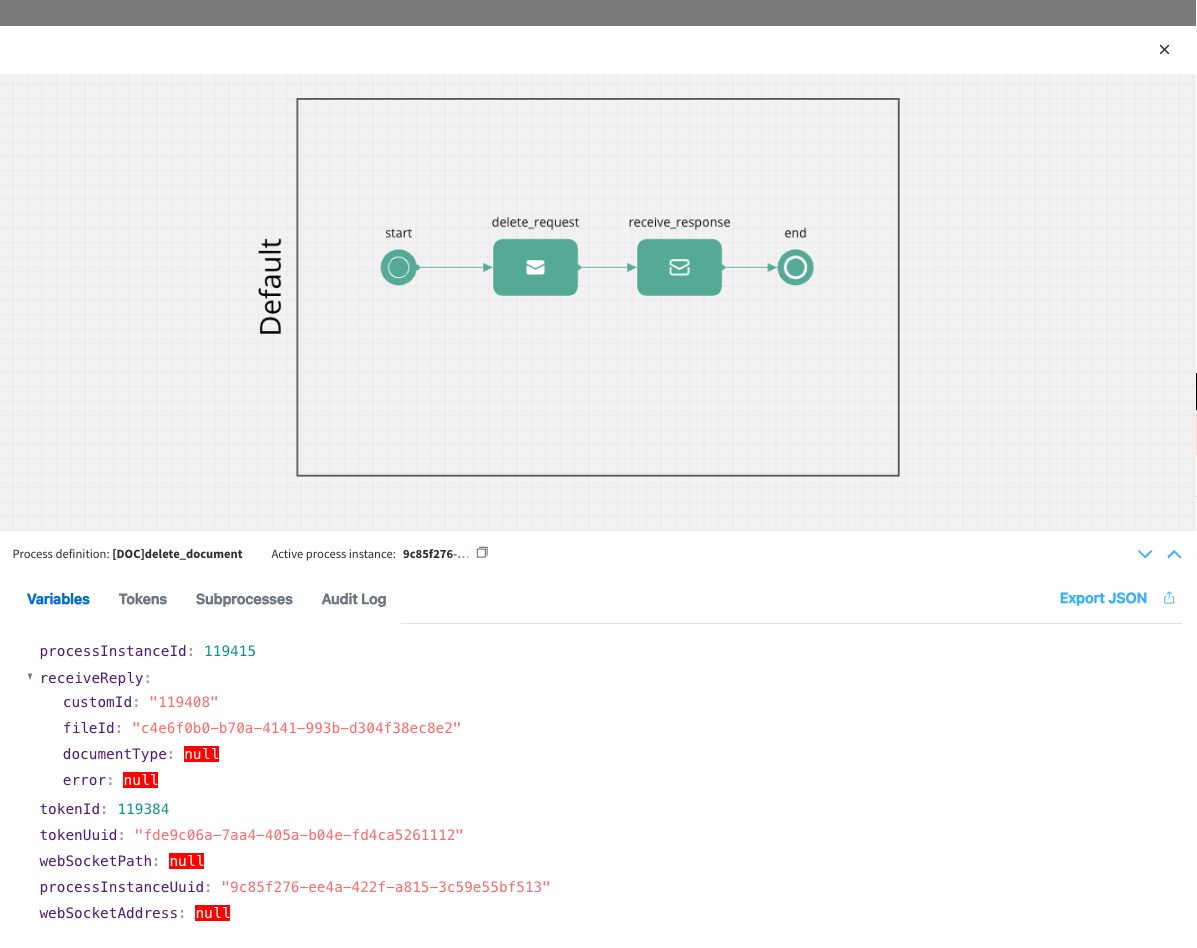
The reply body should contain the following values:
* **customId**: The unique identifier for your document (it could be for example the ID of a client)
* **fileId**: The ID of the file
* **documentType**: The document type
* **error**: Any error message in case of an error during the deleting process
#### Message response example
```json theme={"system"}
{
"customId": "119408",
"fileId": "c4e6f0b0-b70a-4141-993b-d304f38ec8e2",
"documentType": null,
"error": null
}
```