> ## Documentation Index
> Fetch the complete documentation index at: https://docs.flowx.ai/llms.txt
> Use this file to discover all available pages before exploring further.
# Adding a new node
> Learn how to add and configure different node types to build process flows in FlowX.AI Designer.
Once you've created a process definition, the next step is to build your process flow by adding and connecting nodes. Nodes represent different steps, events, and decision points in your business process.
## What is a BPMN node?
A BPMN (Business Process Model and Notation) node is a visual representation of a point in your process. Nodes are added at specific process points to denote the entrance or transition of a record within the process. Each node type has a specific purpose and configuration requirements.
## Available node types
FlowX.AI supports a rich variety of BPMN node types that you can use to model your business processes:
### Flow control nodes
Marks the beginning of a process flow
Marks the conclusion of a process flow
### Activity nodes
Executes automated tasks and business rules
Creates user interfaces and handles user interactions
Sends data to external systems or services
Receives data from external systems or services
### Gateway nodes
Creates decision points with mutually exclusive paths
Splits process flow into multiple concurrent paths
### Event nodes
Captures interactions between different process participants
Triggers actions based on time conditions or delays
Manages error handling in processes
### Subprocess nodes
Calls and runs a subprocess within the main process
Initiates subprocesses embedded within a parent process
### Boundary event nodes
Waits for a specific message during task execution
Triggers based on time conditions during task execution
Catches errors during task or subprocess execution
Boundary events can only be attached to certain node types:
* User Task
* Service Task
* Send Message/Receive Message Tasks
* Subprocess (Embedded and Call Activity)
For more information on BPMN node types and BPMN standards, see the following resources:
BPMN node types in FlowX.AI
Learn fundamental BPMN concepts and standards
For a comprehensive understanding of BPMN standards and concepts, see [BPMN 2.0 Basic Concepts](../../platform-overview/frameworks-and-standards/business-process-industry-standards/intro-to-bpmn).
Learn more about BPMN and how it's used in FlowX through our Academy course
## Adding a node to your process
1. Open **FlowX.AI Designer** and navigate to your project
2. Go to the **Processes** section within your project
3. Click on the process definition you want to edit
1. Locate the node palette on the left side of the screen
2. **Drag and drop** your desired node type onto the canvas
3. Position the node where you want it in your process flow
Organize your process flow from left to right for better readability. Place related nodes closer together to show their relationship.
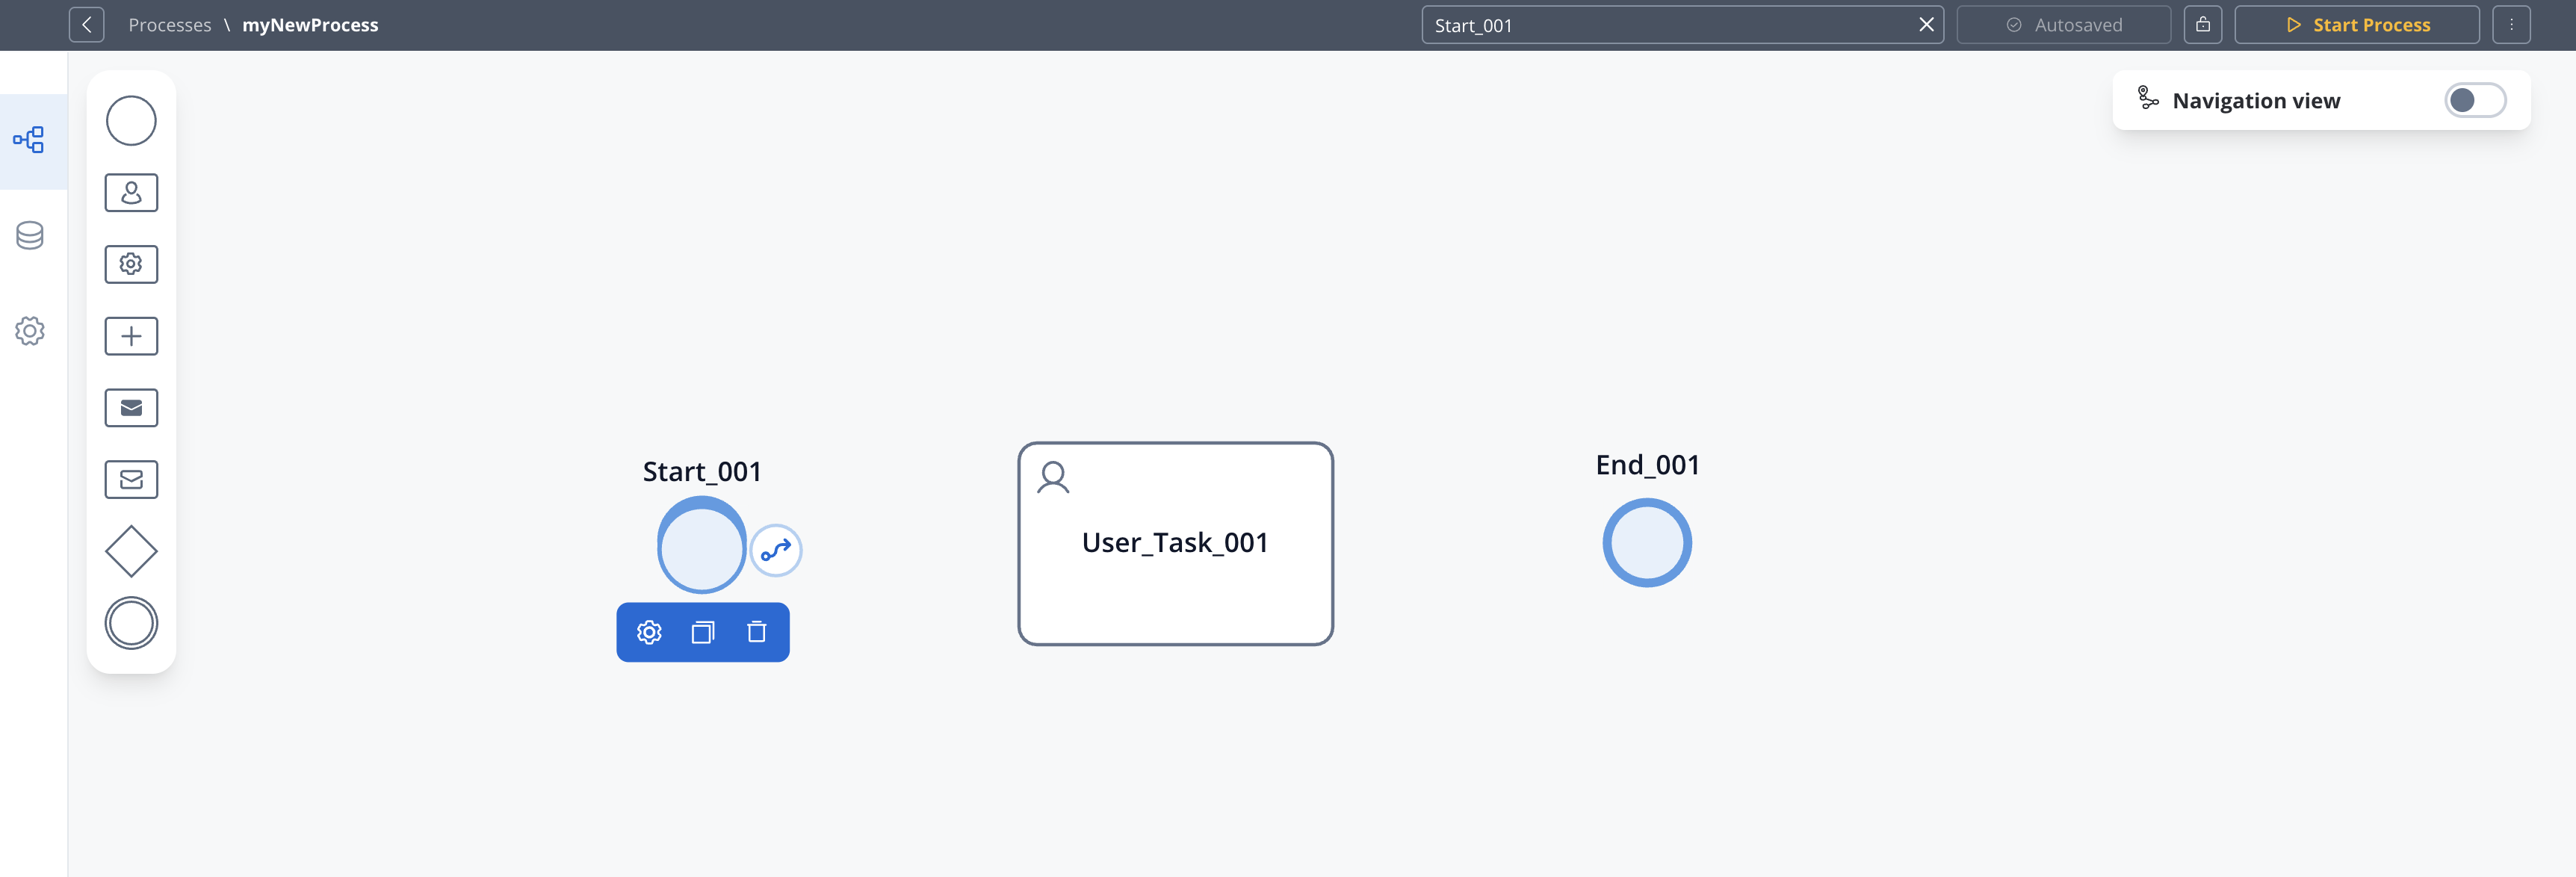
To create a connection between nodes (called a sequence flow):
1. Click on the source node to select it
2. Click the **arrow** icon that appears
3. Click on the target node you want to connect to
4. A sequence flow arrow will be created between the two nodes
Every node (except End nodes) must have at least one outgoing sequence flow, and every node (except Start nodes) must have at least one incoming sequence flow for the process to be valid.
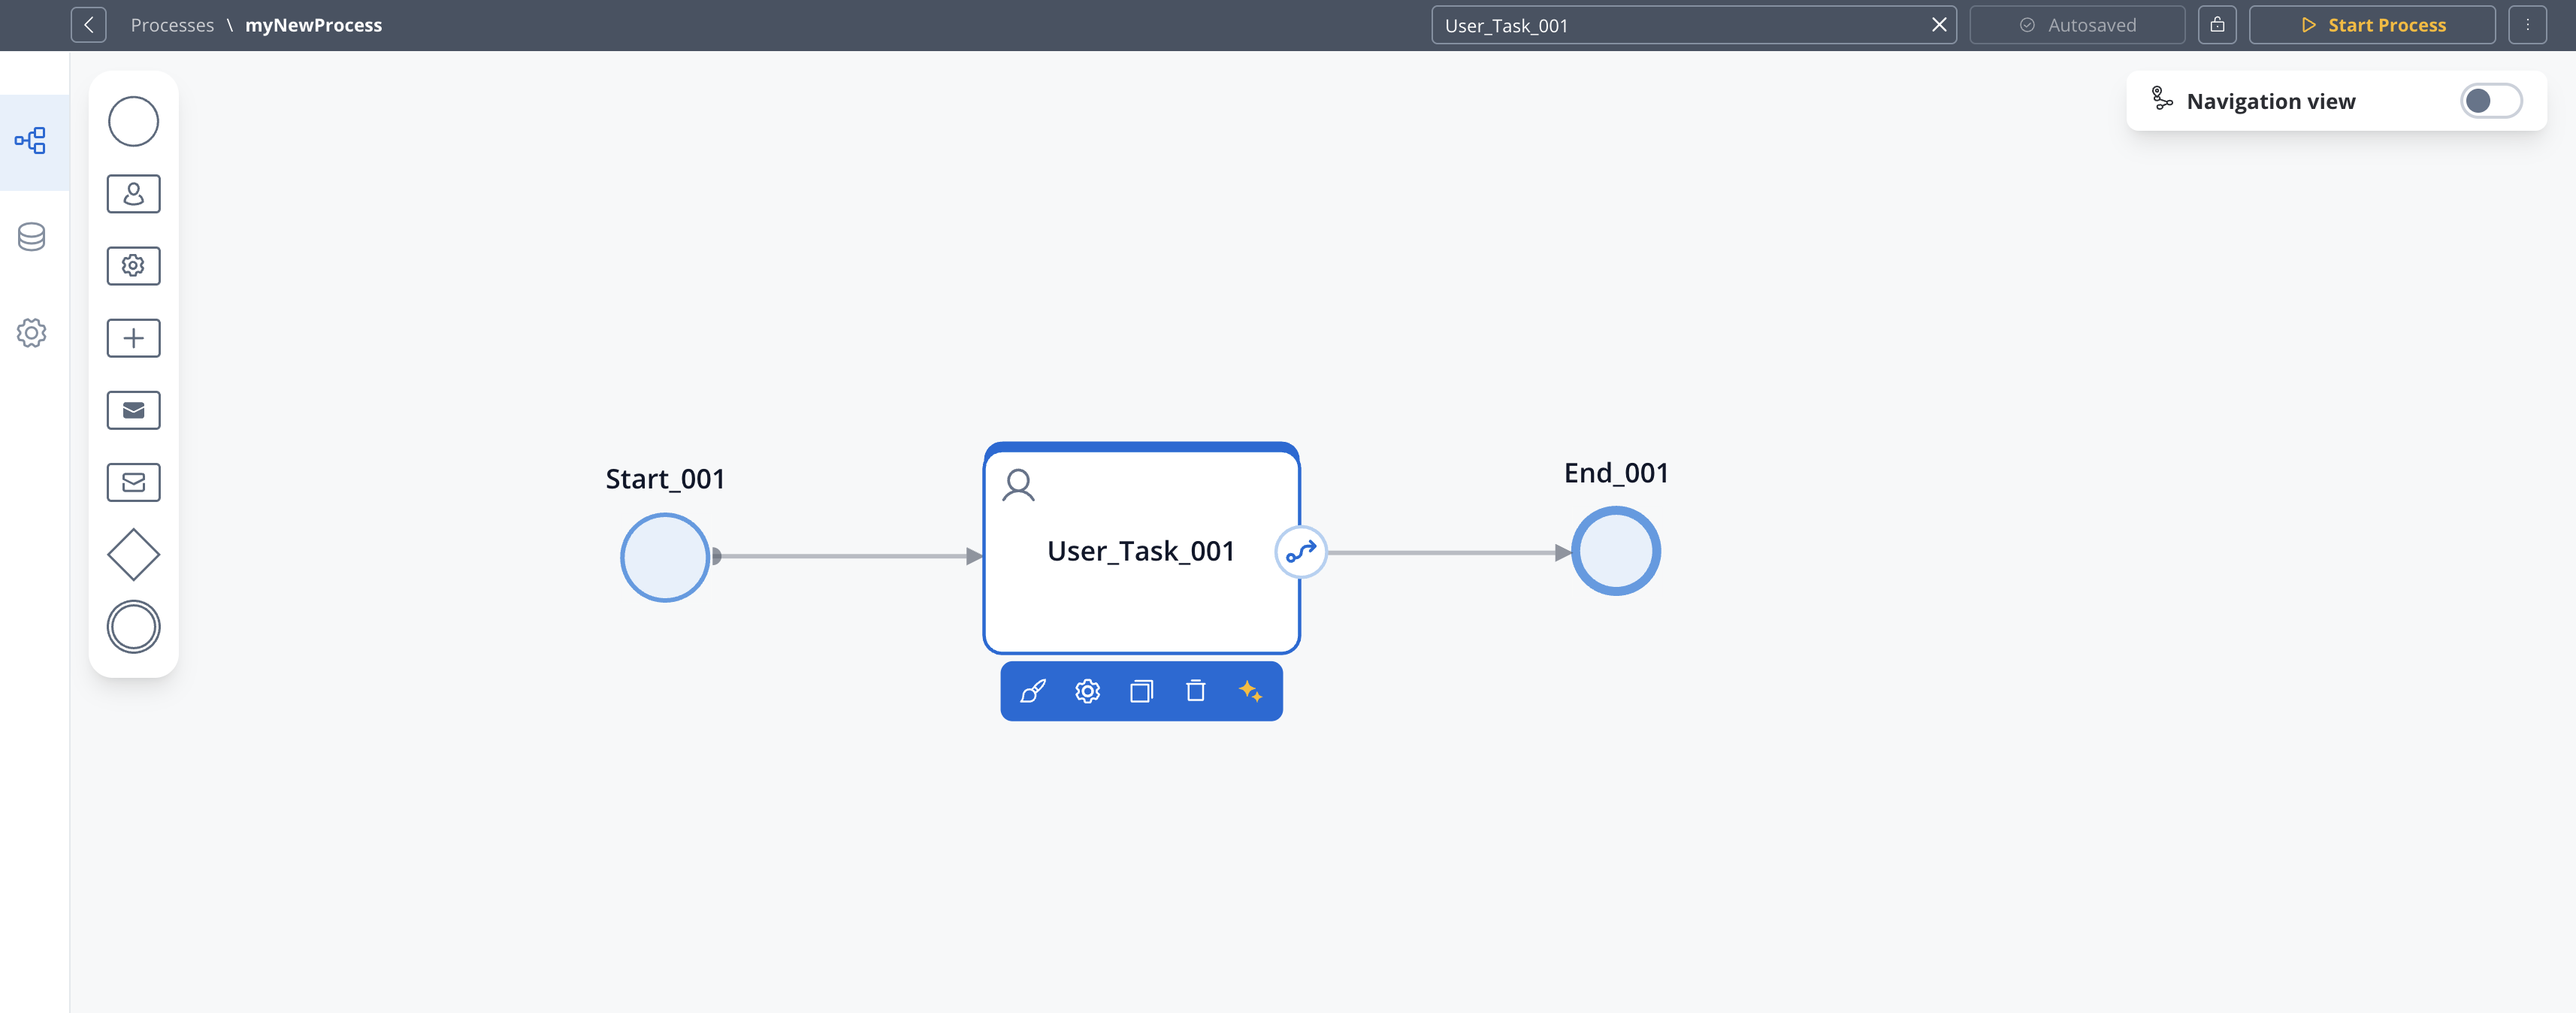
After adding a node, you need to configure its properties:
1. Click on the node to select it to open the properties panel
2. Click edit icon to open the properties panel
3. Configure basic properties like name and description
4. Set node-specific properties depending on the node type
5. Configure actions for the node
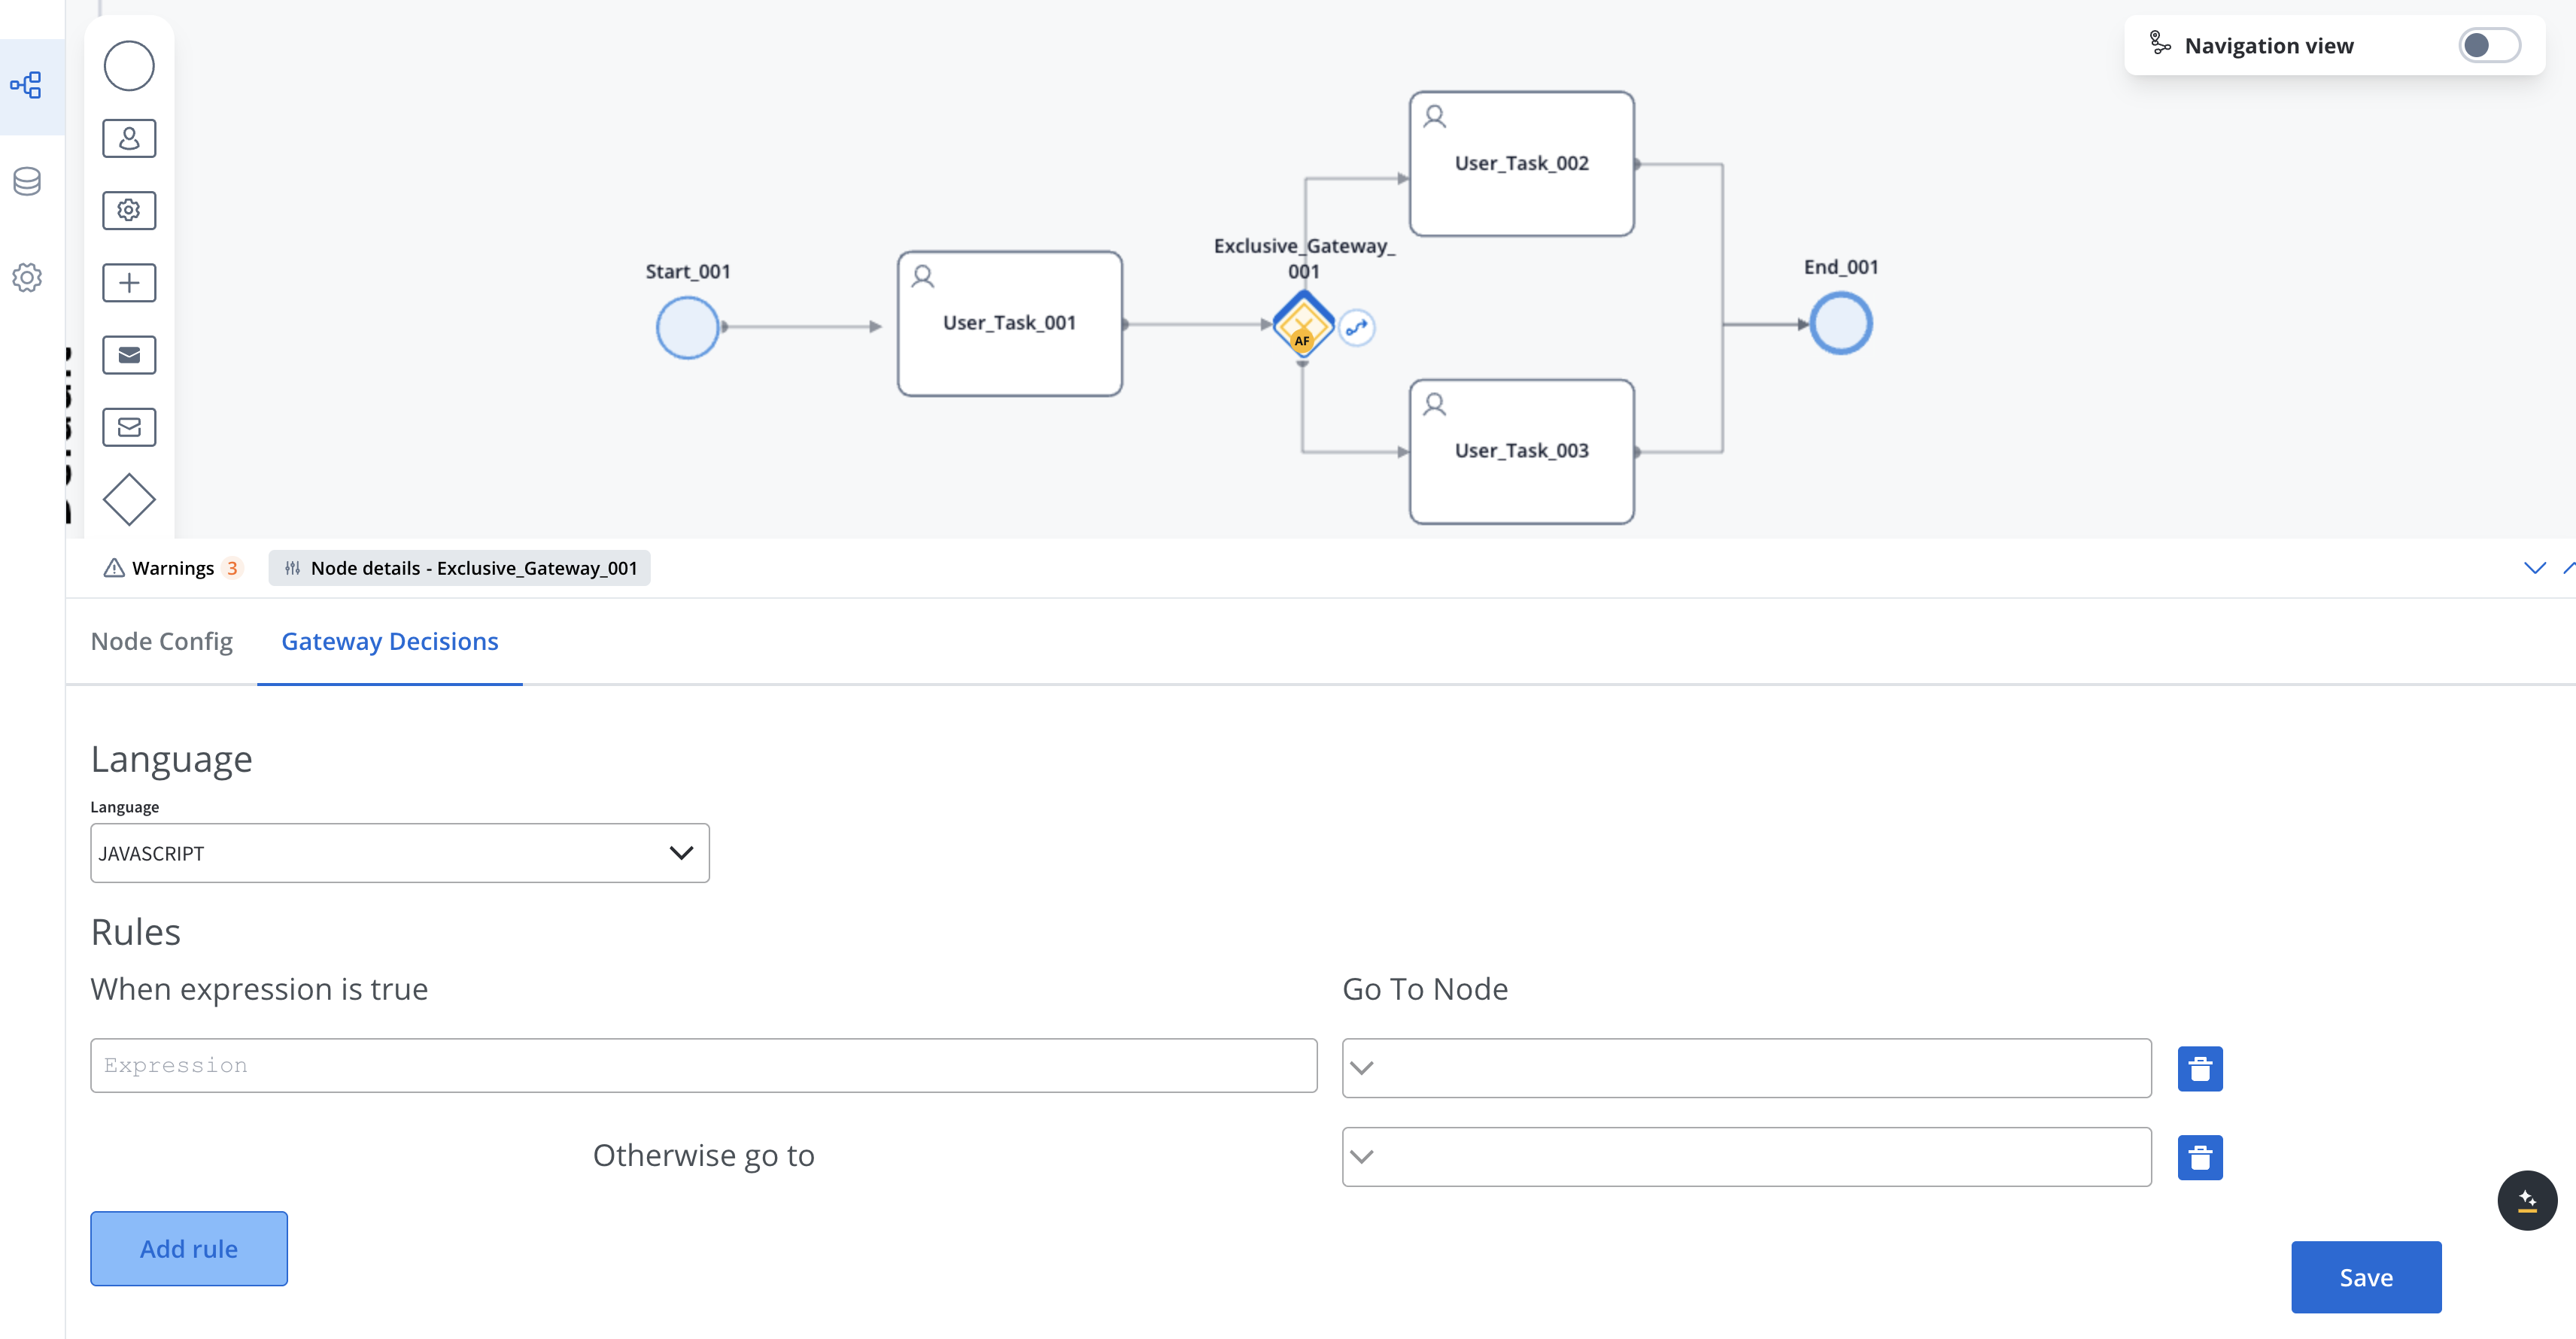
Different node types have different configuration options. For example, Gateway nodes have condition-related settings.
For nodes that support actions (task nodes, user task nodes, and message nodes):
1. Select the node
2. In the properties panel, navigate to the **Actions** section
3. Click **+ Add Action**
4. Select the action type and configure its parameters
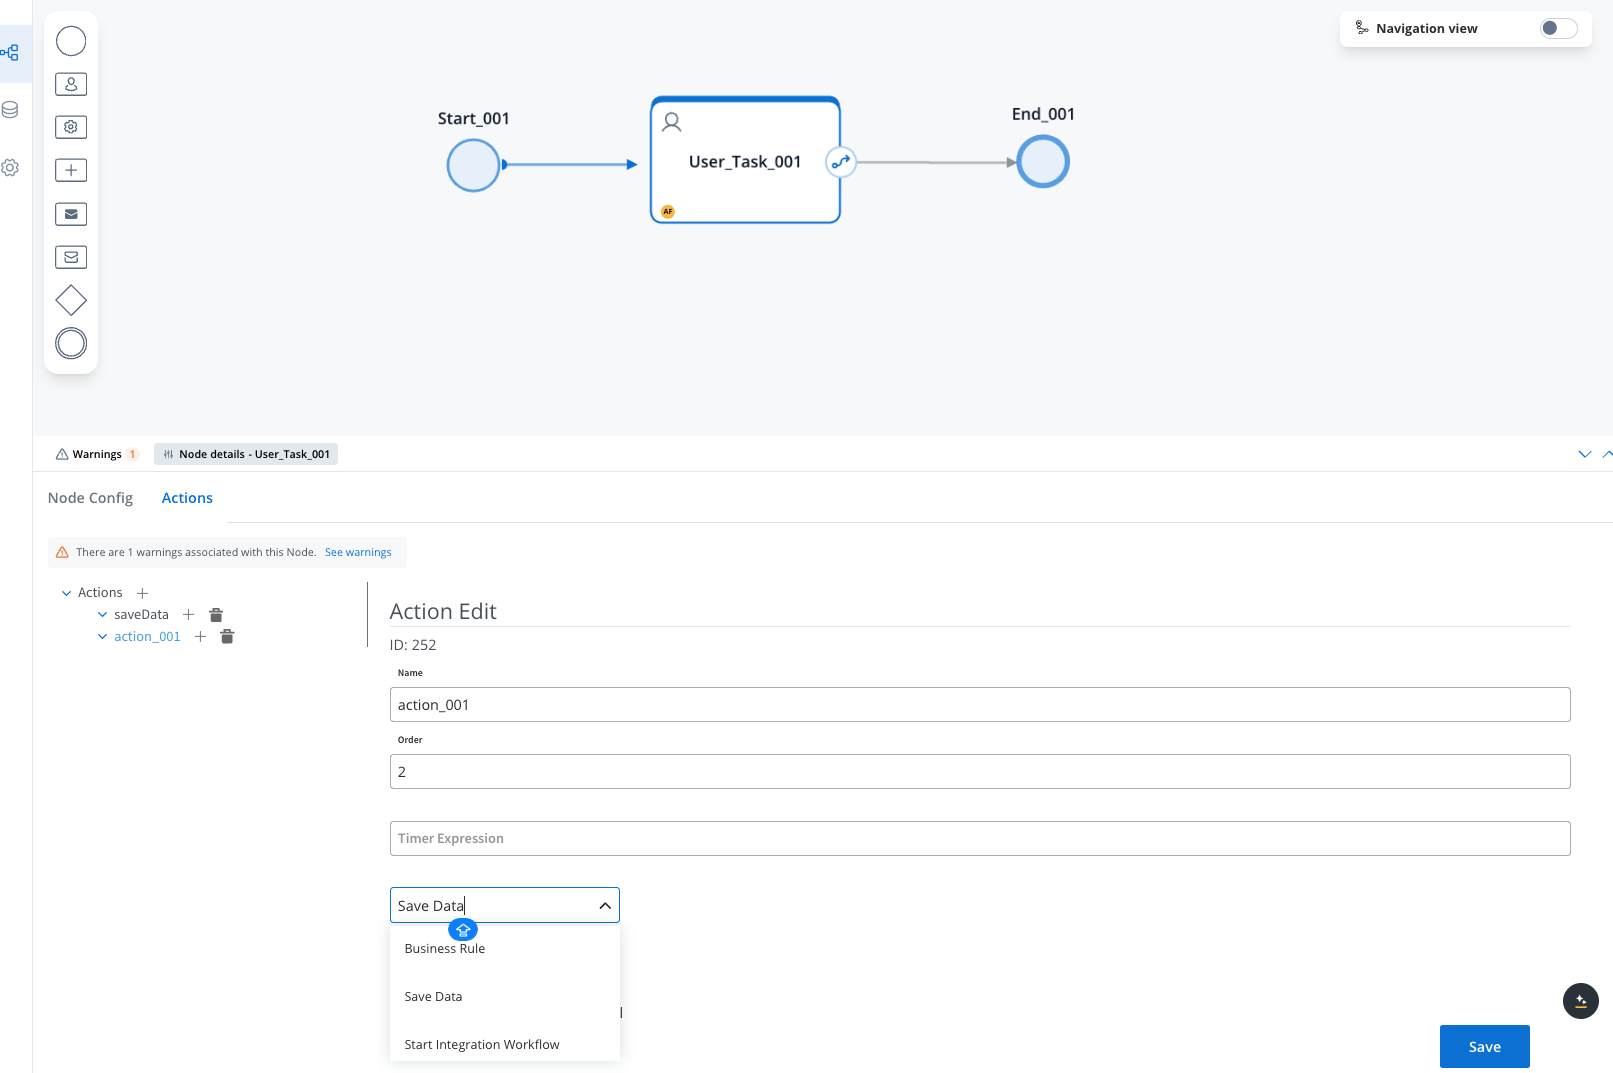
Actions allow you to incorporate business rules, save data, send messages, and interact with users. Learn more about [Node Actions](../../building-blocks/actions/actions).
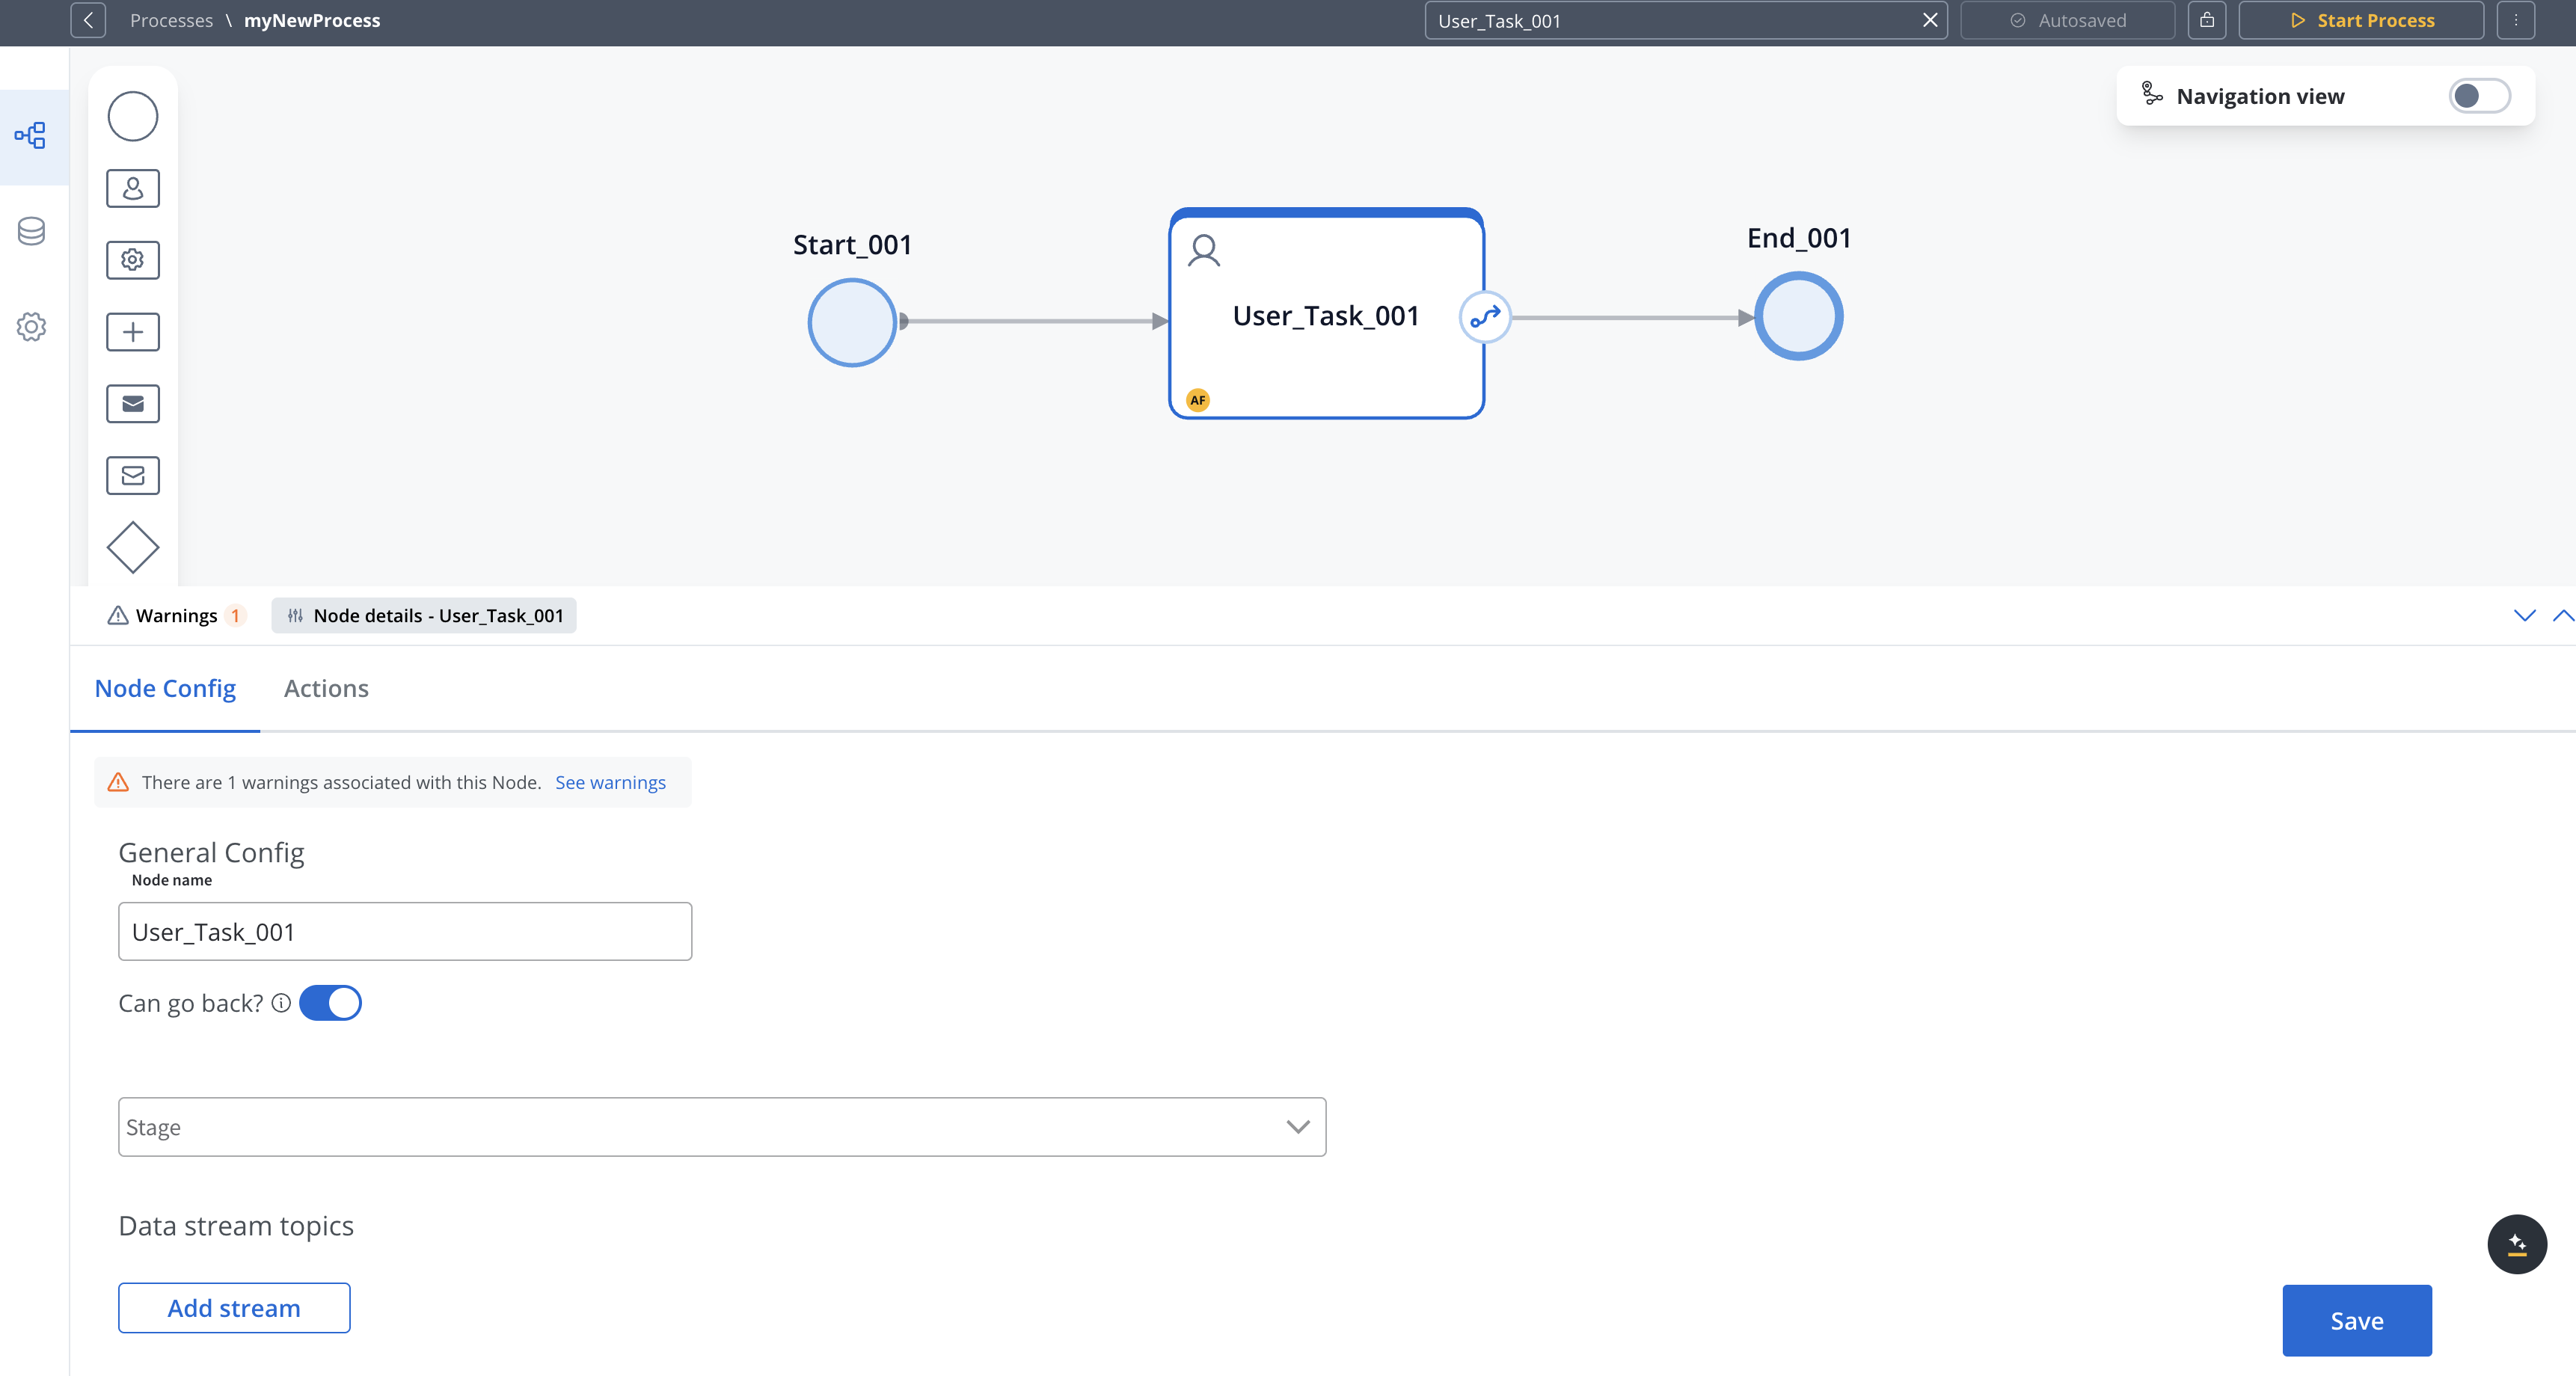
## Common node configuration options
While each node type has specific properties, many share these common configuration options:
* **Name**: A descriptive name for the node (visible in the Process Designer).
* **Can go back**: Option available in various nodes that controls whether users can return to previous steps in a process. When enabled (set to true), it allows users to revisit and redo that step after completing it.
* **Stage**: The stage of the process the node belongs to.
For nodes that support actions:
* **Action Type**: Type of action to execute
* **Action Parameters**: Configuration for the specific action
* **Execution Order**: Sequence for multiple actions on a node
## Node type-specific configuration
* UI Component selection
* Form configuration
* Data validation rules
* Task assignment settings
* Condition expressions
* Default sequence flow
* Branch naming
* Gateway direction (diverging/converging)
* Message format
* Target system
* Correlation keys
* Timeout handling
* Service implementation
* Input/output mapping
* Error handling
* Execution parameters
## Best practices
**When adding nodes to your process:**
* **Use descriptive names** for nodes to make the process easier to understand
* **Organize the layout** from left to right for better readability
* **Limit the number of sequence flows** from a single node to maintain clarity
* **Group related functionality** into subprocesses to reduce complexity
* **Document assumptions and decisions** in node descriptions
* **Validate your process** regularly during development to catch errors early
## Next steps
After adding nodes to your process, you can:
Configure business rules and actions for your nodes