> ## Documentation Index
> Fetch the complete documentation index at: https://docs.flowx.ai/llms.txt
> Use this file to discover all available pages before exploring further.
# Reusable UI Templates
> Create and manage modular UI components that can be used across multiple User Tasks and processes in your FlowX.AI applications.
## What are Reusable UI Templates?
Reusable UI Templates are self-contained UI component hierarchies that you design once and instantiate multiple times throughout your application. They solve common UI development challenges:
* **Repetitive styling**: No more redoing component styles and properties for similar UI patterns
* **Manual updates**: Reduce the need to manually change components across multiple locations
* **Template management**: Centralized configuration and management of UI templates
Reusable UI Templates focus on visual components and layout. They cannot include reusable business rules or complex business logic.
## Key benefits
Ensure uniform UI patterns across your entire application
Design once and use many times - no more recreating similar patterns
Update templates in one place to affect all instances automatically
Templates work across different platforms and channels
## Template types
FlowX.AI supports two main types of reusable UI templates:
**Characteristics:**
* Include input parameters that receive data from the process
* Support output parameters that send data back to the process
* Contextualized based on runtime data
* Ideal for forms and data-driven interfaces
**Use cases:** User registration forms, data collection cards, feedback forms
**Characteristics:**
* Self-contained UI components
* No data exchange with the process
* Focus on consistent styling and layout
* Purely visual/structural elements
**Use cases:** Headers, footers, information panels, navigation elements
## Template structure
A reusable template consists of:
* **Root component**: A single container (Card, Container, or Custom Component)
* **UI hierarchy**: Child components arranged in a hierarchical structure
* **Event handlers**: Interactive elements that can trigger process actions
* **Data model**: Input and output parameters for template configuration
* **Configuration**: Name, description, and resource metadata
## Before you begin
Make sure you have:
* Access to FlowX.AI Designer
* Appropriate permissions to create and manage reusable resources
* A clear understanding of the UI pattern you want to standardize
## Create a reusable template
1. In FlowX.AI Designer, go to your project
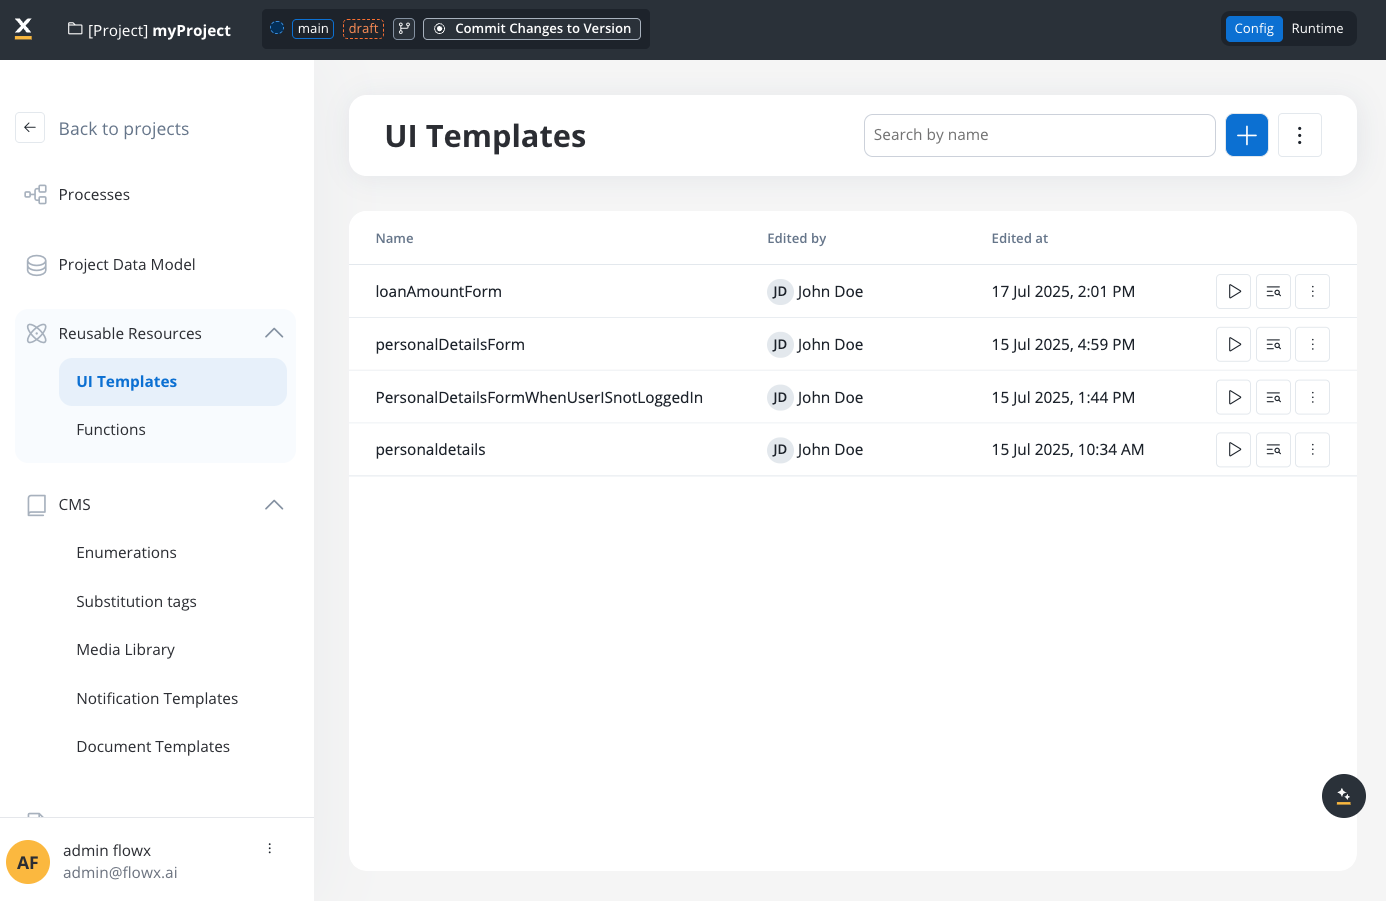
2. Navigate to **Reusable Resources** > **Templates**
3. Click **+ New Reusable Template**
1. Enter a descriptive name for your template (required)
Template names cannot contain spaces. Use UpperCamelCase or underscores instead.
* ✅ Good: `PersonalDetailsCard`, `User_Registration_Form`
* ❌ Avoid: `Personal Details Card`, `user-form`
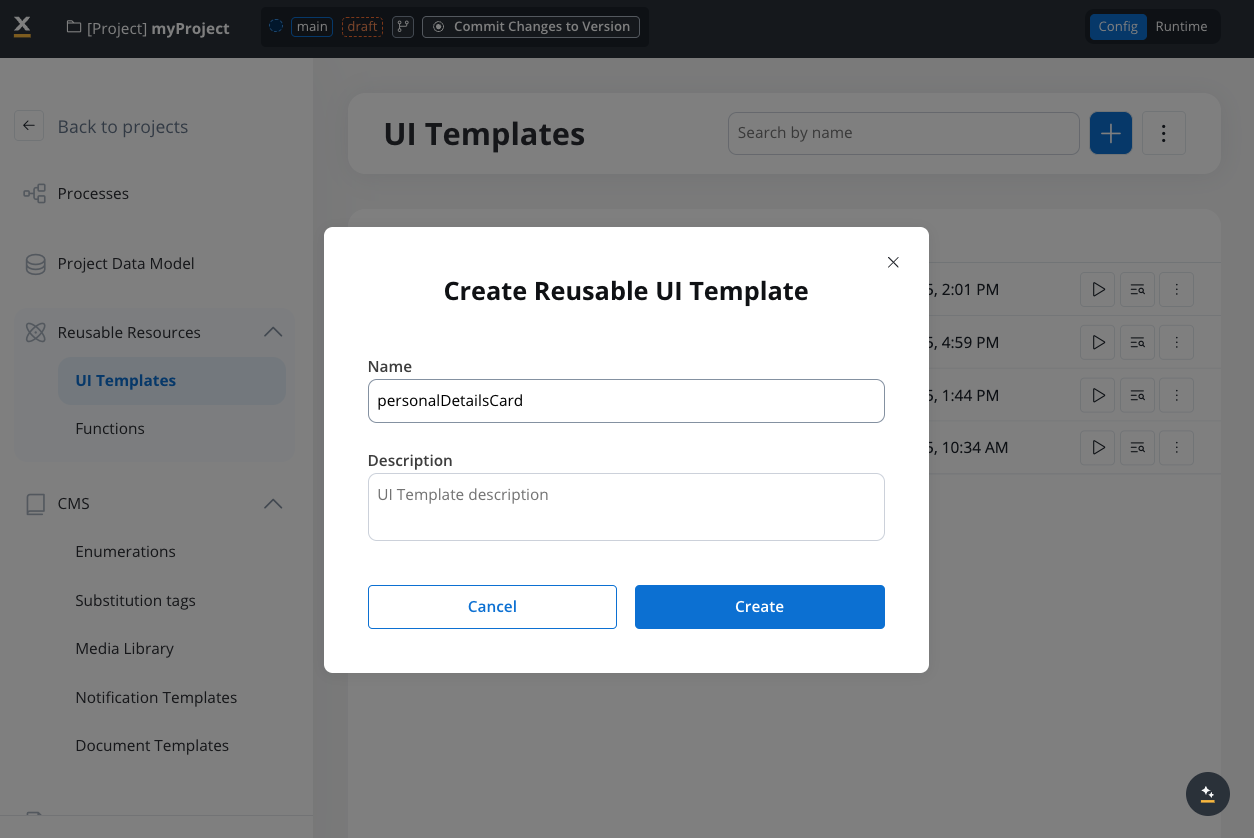
2. Add an optional description explaining the template's purpose
3. Choose your root component type:
* **Card**: Best for content needing visual separation and styling
* **Container**: Ideal for layout and grouping without visual styling
4. Configure the data model with input and output parameters
The **template data model** defines the internal data structure that the template uses to exchange data with the process — which fields the template receives as input and which it sends back as output. It is separate from the process data model and scoped only to this template.
If you're unfamiliar with how data models work in FlowX, see the [Process data model](../process/data-model) documentation.
Set up the internal data structure that your template will use:
1. **Set the root element** (e.g., `applicationUI`)
2. **Define field attributes** with appropriate data types:
**Example: Personal Details Template**
```
applicationUI:
├── firstName_UI – string
├── lastName_UI – string
├── emailAddress_UI – string
├── phoneNumber_UI – string
├── dob_UI – date
├── gender_UI – string
├── consent_UI – boolean
└── ssn – string
```
Use descriptive field names with consistent naming patterns (e.g., `fieldName_UI`) to clearly identify template-specific data.
Define the data contract between your template and the process:
**Input Parameters:**
* Data that flows INTO the template from the process
* Example: `ssn` (pre-filled from existing process data)
**Output Parameters:**
* Data that flows OUT of the template back to the process
* Example: `firstName_UI`, `lastName_UI`, `emailAddress_UI`, `phoneNumber_UI`, `dob_UI`, `gender_UI`, `consent_UI`
Parameters control data flow only. They don't determine field visibility or editability - you can still edit input parameter fields unless explicitly made read-only.
Once parameters are defined, click **Done** to establish the template's data contract.
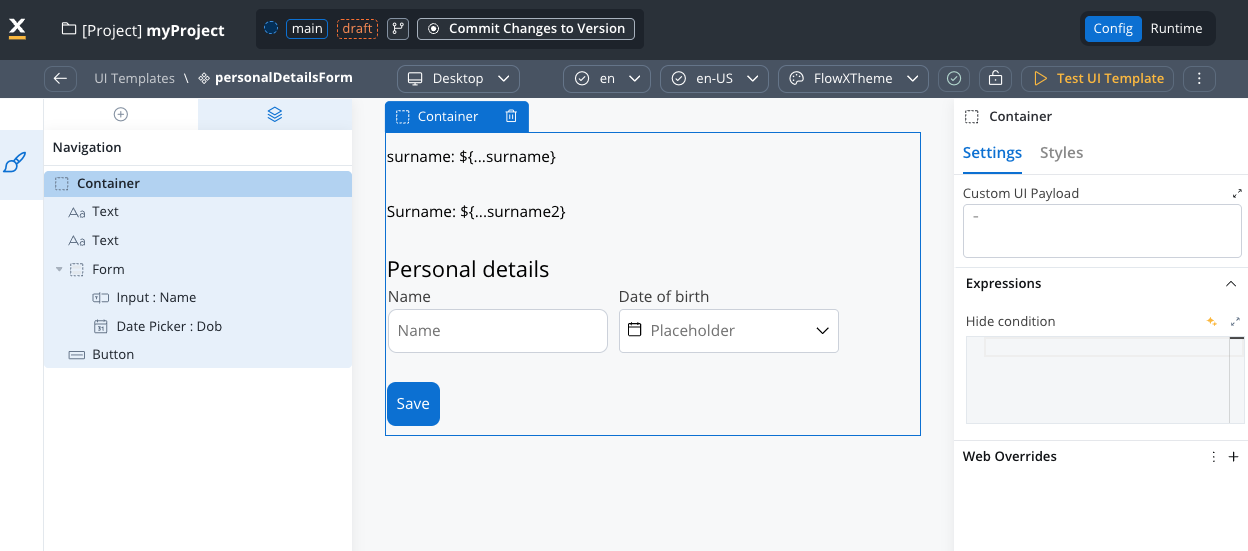
Use the template UI designer to build your component structure:
```
Root Component (Card/Container)
├── UI Components (Text, Input, Button, etc.)
├── Layout Components (Containers, Flex containers)
└── Interactive Components (Forms, Actions)
```
The template UI designer focuses on screen parts without navigation concepts or process-related navigation.
Define interactive elements within your template:
* Define event handlers within the reusable template
* Assign node actions when instantiated in User Tasks
* Use for standard actions like "Save", "Submit", or "Cancel"
* Template holds forms with specific information
* User Task contains actions to validate and send data
* Use for complex forms combining template and User Task data
1. Use **Preview Mode** to see how your template renders
2. Verify component hierarchy and basic functionality
3. Test with different themes and configurations
4. Save your template when testing is successful
Preview Mode provides visual-only testing. Templates are not functional until embedded in a live process with proper parameter mapping.
## Use templates in User Tasks
To integrate reusable templates into your processes, follow this complete workflow:
### Prerequisites: Set up data models
1. In your project, define the main entity (e.g., `Application`)
2. Add child objects that match your template structure (e.g., `Client`)
3. Include all fields from your template's data model:
* `firstName`, `lastName`, `emailAddress`
* `phoneNumber`, `dob`, `gender`, `consent`, `ssn`
1. Reference the project entity in your process
2. Select `application` as the root entity
3. Include `Client` as a child object
4. The data model will automatically populate with the correct entities
### Add and configure templates
1. Open the UI Designer for your User Task
2. In the component panel, locate **Reusable Templates**
3. Drag and drop your desired template into the UI hierarchy
4. The template will appear with red warning icons indicating unmapped parameters
1. Select the template instance in the UI hierarchy
2. Navigate to the template settings panel
3. Click **Define Parameters** for Input Parameters
4. Map each input to process data using dynamic keys:
**Example mapping:**
```
Static value: "123-45-6789"
Dynamic key: ${application.client.ssn}
```
Use dynamic keys like `${application.client.fieldName}` to pull data from your process context automatically.
1. Click **Define Parameters** for Output Parameters
2. Select all fields that should return data to the process
3. Map each output to the corresponding process data structure:
**Example mappings:**
```
applicationUI.firstName_UI → ${application.client.firstName}
applicationUI.lastName_UI → ${application.client.lastName}
applicationUI.emailAddress_UI → ${application.client.emailAddress}
```
4. Test the parameter mappings to ensure data flows correctly
1. **Define process action**: In Process Designer, create a node action (e.g., `saveData`)
2. **Link to template**: Return to UI Designer, select the action button within the template
3. **Configure the handler**: In the **Event Handlers** section, add a handler with **Node Action** as the action type and select your node action
4. FlowX.AI automatically fills in the action identifier and establishes the connection
### Runtime behavior
At runtime, the process engine expands reusable templates by:
* Replacing the `REUSABLE_TEMPLATE` placeholder with the actual component hierarchy
* Maintaining proper parent-child relationships
* Ensuring unique identifiers for each instance
* Preserving configured event handlers and data bindings
## Manage templates
### View template usage
To see where a template is used:
1. Go to **Reusable Resources** > **Templates**
2. Select your template
3. Click the **Usages** tab
4. Review all processes and User Tasks using the template
### Update templates
When you modify a reusable template:
* Changes automatically propagate to all instances
* Existing process instances may need to restart for updates
* Instance-specific configurations are preserved
* The system validates changes to prevent breaking existing implementations
Template updates affect all instances immediately. Test changes thoroughly before saving to avoid disrupting active processes.
### Template dependencies
Reusable templates can reference these project resources:
Use for dropdown menus and selection components within your templates
Include images, documents, and other media assets in your templates
Add dynamic content that updates based on process context
Apply consistent styling across all template instances
## Event handlers in templates
### Current capabilities
Event handlers in reusable templates support basic interactive functionality. The system handles:
* **Action context management**: Unique identification for template instances
* **Form submission**: Automatic identification of form elements within template context
* **Data mapping**: Proper mapping of data keys to process variables
* **Validation preservation**: Template validation rules are maintained across instances
### Planned scenarios
**How it works:**
1. Define an event handler within the reusable template
2. Assign the node action when instantiated in a User Task
3. Use for standard actions needing different backend connections
**Best for:** "Save", "Submit", or "Cancel" actions that need process-specific handling
**How it works:**
1. Template holds a form with additional information
2. User Task contains the action to validate and send data
3. Combines data from both template and other User Task forms
**Best for:** Complex forms where template data combines with User Task data
Reusable UI Templates are designed as self-contained components and do not support nesting within other reusable templates
## Troubleshooting
**Possible causes:**
* Invalid template hierarchy
* Missing dependencies (enumerations, media, themes)
* Insufficient permissions
* Invalid component configurations
**Solutions:**
* Verify template structure in the designer
* Check all referenced resources exist
* Confirm user permissions for template access
* Validate component property settings
**Possible causes:**
* Incorrect action context configuration
* Invalid form submission setup
* Data model compatibility issues
* Missing action permissions
**Solutions:**
* Verify action context is properly set
* Check form submission configuration
* Ensure data models match between template and process
* Review user permissions for action execution
**Possible causes:**
* Invalid key mappings in template instances
* Mismatched process data model structure
* Data type incompatibilities
* Incorrect substitution tag usage
**Solutions:**
* Validate key mappings match expected data structure
* Check process data model compatibility
* Ensure data types align between components and data sources
* Review substitution tag configurations
## Reusable UI Templates vs. Reusable Functions
Understanding the difference between these two reusable components is crucial:
**Purpose:** UI Designer components for creating reusable interface elements
**Scope:**
* Visual components and layout
* Styling and basic UI interactions
* Form structure and input patterns
**Usage context:** User Tasks and interface design
**Cannot:** Include reusable business rules or complex business logic
**Purpose:** Business logic components for data processing
**Scope:**
* Data processing and validation
* Calculations and transformations
* Integration patterns and API calls
**Usage context:** Service Tasks and process automation
**Cannot:** Be used within reusable UI templates
## Advanced features
### Planned enhancements
Future support for using templates within other templates for enhanced modularity
Input and output parameters with function-like behavior and type safety
Mock data testing and interactive validation capabilities
Export/import templates and library dependency management
### Export and import
You can export and import reusable UI templates to transfer them between projects or environments.
#### Exporting
1. Navigate to **Reusable Resources** > **UI Templates**
2. Open the context menu for the template you want to export
3. Select **Export**
4. The template is downloaded as a ZIP file
#### Importing
1. Navigate to **Reusable Resources** > **UI Templates**
2. Open the context menu and select **Import**
3. Select the ZIP file exported from another project or environment
4. If templates with the same identifiers already exist, a **Review Resource Identifiers Conflicts** modal appears
5. Choose a strategy for each conflicting template (or use **Apply to all**):
* **Keep both** - imports the template as a new copy alongside the existing one
* **Replace** - overwrites the existing template with the imported version
* **Skip this one** - keeps the existing template unchanged
6. Click **Continue** to complete the import
Importing is only available for work-in-progress (WIP) project versions. You cannot import into a committed version.