> ## Documentation Index
> Fetch the complete documentation index at: https://docs.flowx.ai/llms.txt
> Use this file to discover all available pages before exploring further.
# Message Start Event
> Start a process instance when a specific message, incoming email, or incoming webhook is received by the Message Start Event node.
**Why this matters:** The Message Start Event allows a process to be triggered and initiated based on the reception of a specific message, an incoming email, or an external webhook request.
## Configuring a message start event
A Message Start Event is a special event in a process that initiates the start of a process instance upon receiving a specific trigger. It acts as the entry point for the process, waiting for the designated trigger to occur. Once triggered, the process instance is created and begins its execution, following the defined process flow from that point onwards.
To use this type of node with the task management plugin, you must have a service account defined in your identity solution. For more information, see how to [create service accounts using Keycloak](../../../../setup-guides/access-management/configuring-an-iam-solution#process-engine-service-account).

### General config
The name of the node.
Assign a stage to the node, if needed.
***
### Process trigger
The **Trigger Type** determines how the process instance is started. Four options are available:
Use this trigger type when you want to start a process instance from another process using a [Message Throw Event](./message-throw-intermediate-event). This is the classic approach for inter-process communication.
Select **Internal Throw Message** to enable message-based triggering from other processes.
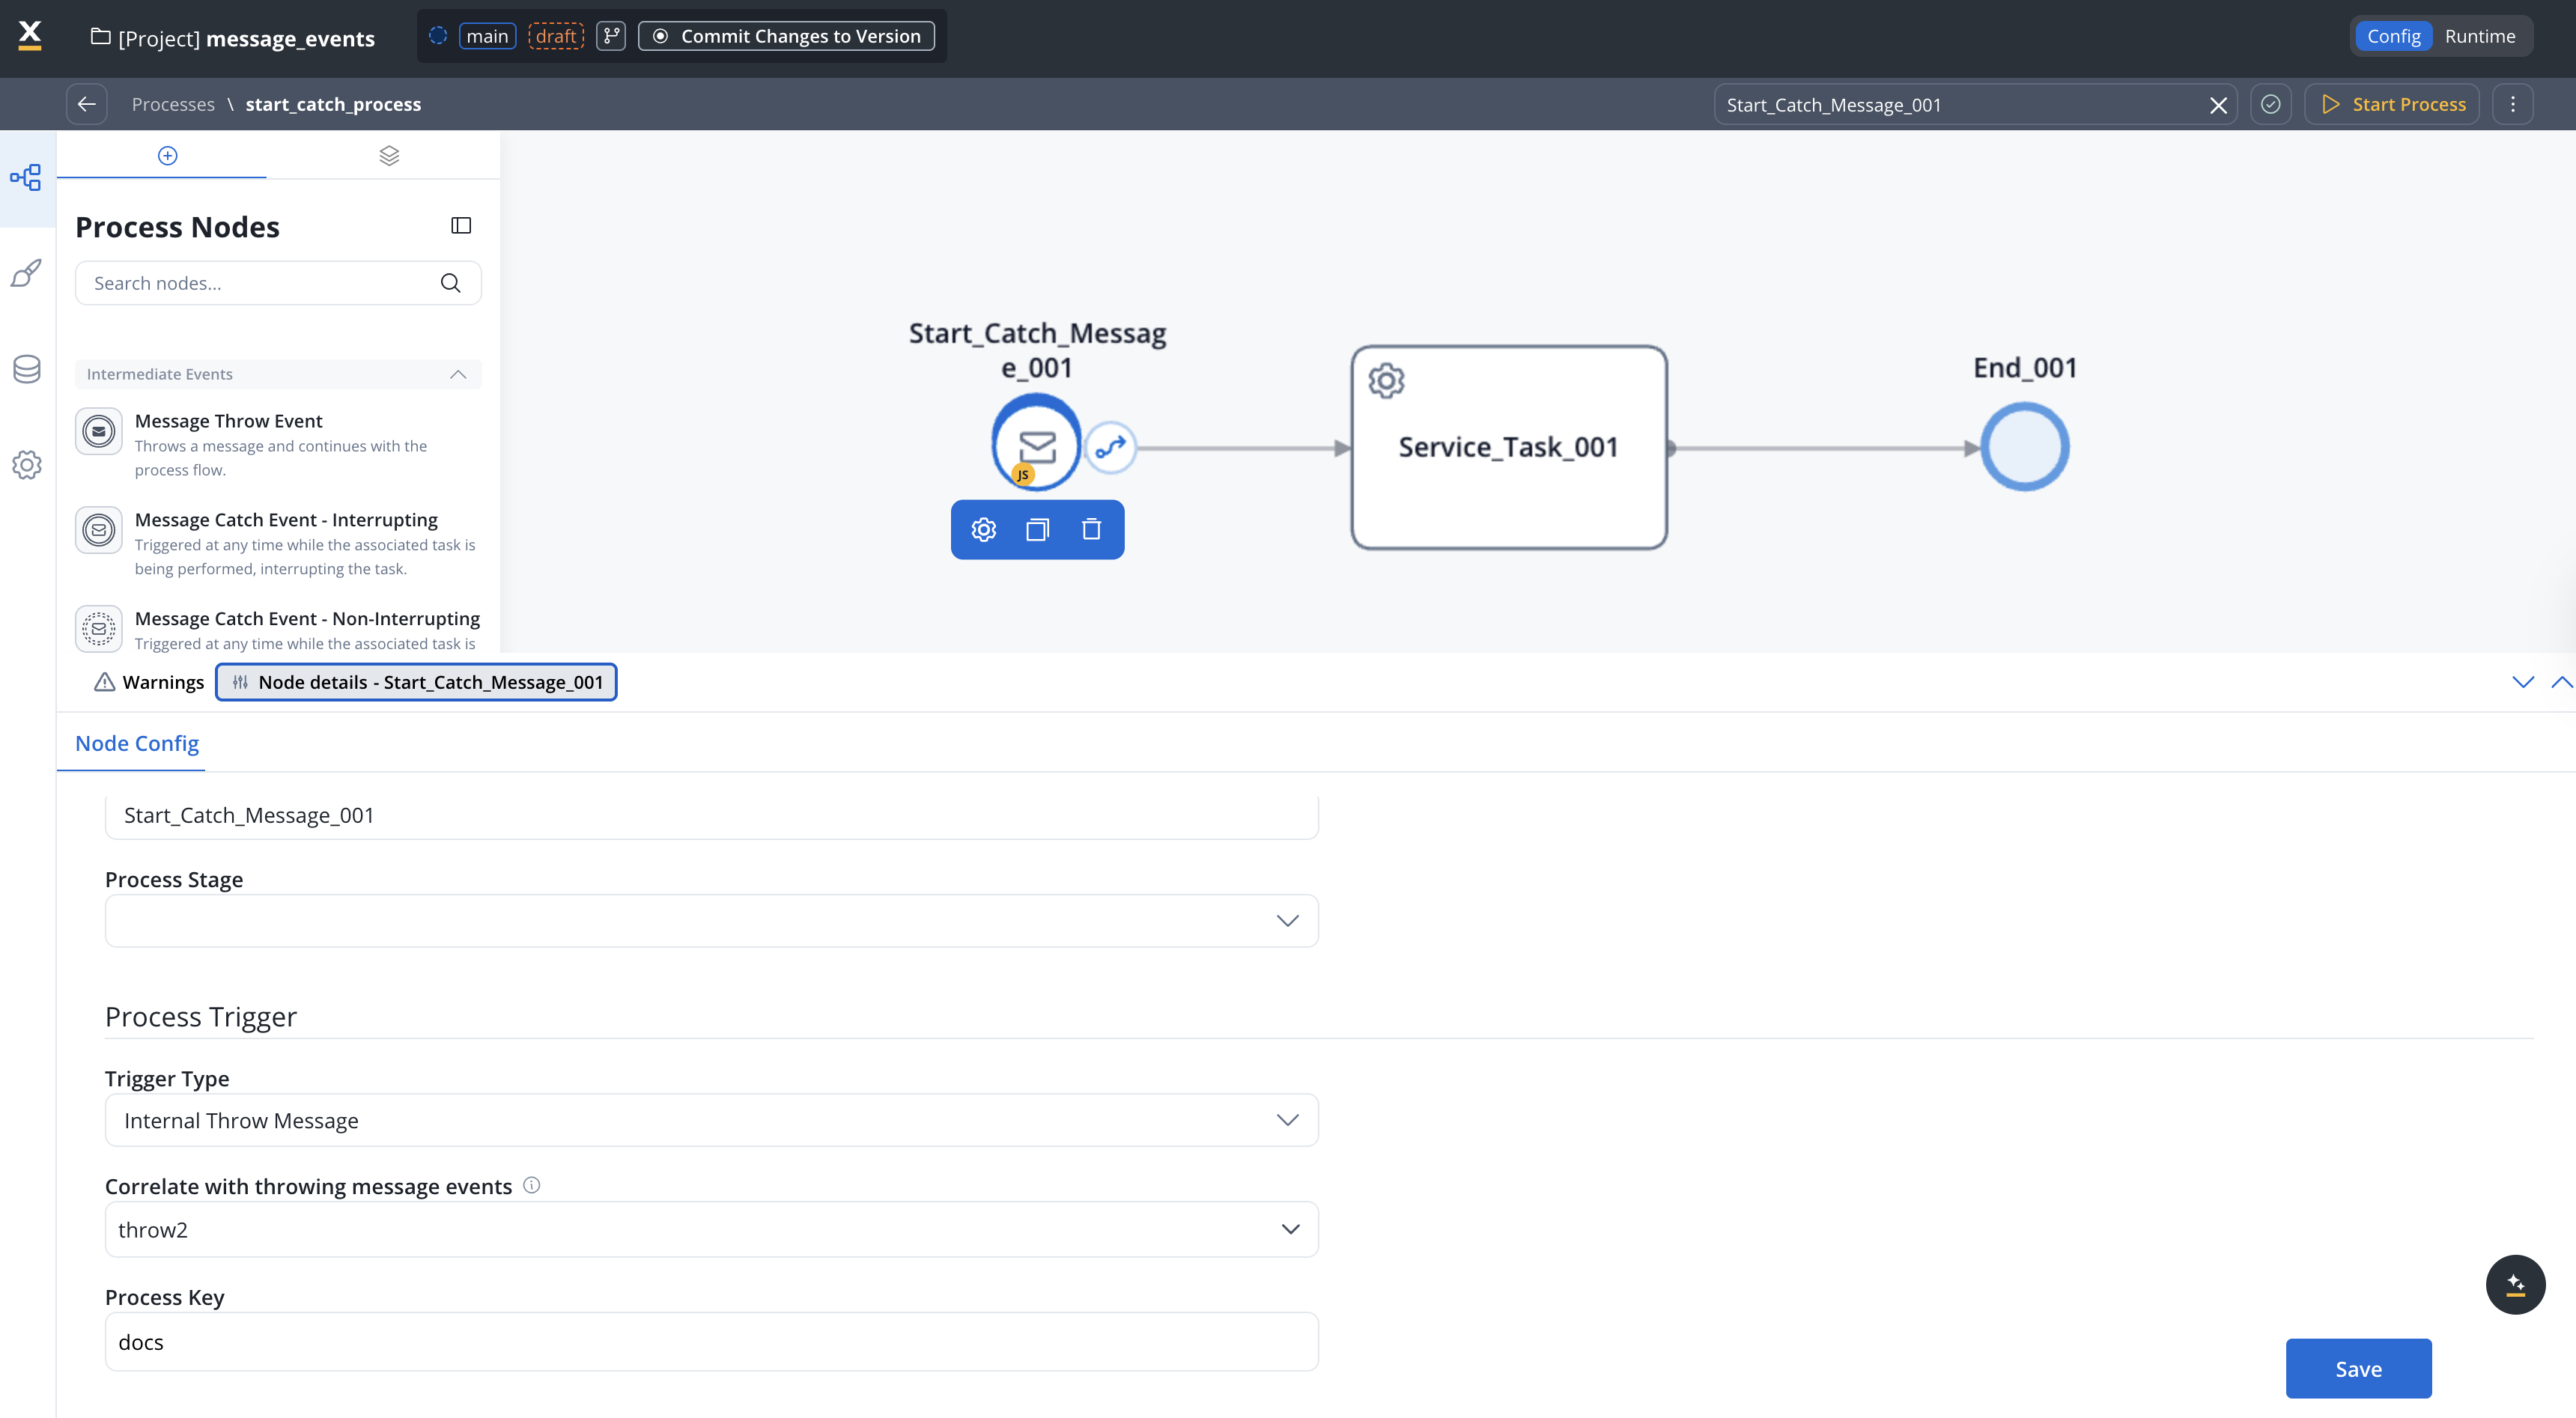
The message event name that this start event listens for. This must match the event name configured in the corresponding Message Throw Event from the sending process.
The process key / variable name where incoming message data will be mapped in the started process. The data sent from the throwing process will be available under this key.
**Note:** The correlation key field is not available for Message Start Events. Correlation keys are only used for intermediate catch events where a running process instance needs to be identified. For start events, a new process instance is always created.
Use this trigger type when you want to automatically start a process instance when an email is received. This requires an Email Trigger data source to be configured in Integration Designer.

Select **Email Trigger** to enable email-based process triggering.
Choose the Email Trigger data source that will initiate this process. The dropdown displays all Email Trigger resources configured in your application.
Before using Email Trigger, you must configure an Email Trigger data source in Integration Designer. See [Email Trigger](../../../platform-deep-dive/integrations/email-trigger) for complete setup instructions.
When an email arrives and triggers the process, the email data (sender, subject, body, attachments, etc.) is automatically mapped to the process instance data. See the [Email Trigger documentation](../../../platform-deep-dive/integrations/email-trigger#email-data-mapping) for the complete data structure.
Use this trigger type when you want to automatically start a process instance when an email is received in a Microsoft Outlook mailbox via the MS Graph API. This requires a Microsoft Outlook data source with **Read** or **Read & Send** scope configured in Integration Designer.
Select **Microsoft Outlook** to enable Outlook email-based process triggering.
Choose the Microsoft Outlook data source that will initiate this process. The dropdown displays all Microsoft Outlook data sources with Read or Read & Send scope configured in your application.
Before using Microsoft Outlook, you must configure a Microsoft Outlook data source in Integration Designer. See [Microsoft Outlook](../../../platform-deep-dive/integrations/microsoft-outlook-data-source) for complete setup instructions.
When an email arrives and triggers the process, the email data (sender, subject, body, attachments, headers) is automatically mapped to the process instance data. The `x-ms-graph-message-id` header is included for reply threading. See the [Microsoft Outlook documentation](../../../platform-deep-dive/integrations/microsoft-outlook-data-source#email-data-schema) for the complete data structure.
Use this trigger type when you want to start a process instance from an external HTTP POST request. This requires an Incoming Webhook data source to be configured in Integration Designer.

Select **Incoming Webhook** to enable webhook-based process triggering.
Choose the Incoming Webhook data source that will initiate this process. The dropdown displays all Incoming Webhook resources configured in your project.
Before using Incoming Webhook, you must create an Incoming Webhook data source in Integration Designer. See [Incoming Webhooks](../../../platform-deep-dive/integrations/incoming-webhooks) for complete setup instructions.
When a webhook request triggers the process, the payload data (body, headers, timestamp) is automatically mapped to the process instance data. See the [Incoming Webhooks documentation](../../../platform-deep-dive/integrations/incoming-webhooks#webhook-payload) for the complete data structure.
When switching between trigger types in the Designer UI, the configuration fields are automatically cleared to prevent invalid configurations. Ensure you reconfigure all required fields after changing the trigger type.
***
## Example: Interprocess communication with internal throw message
This section demonstrates how to use the **Internal Throw Message** trigger type to start a process from another process.
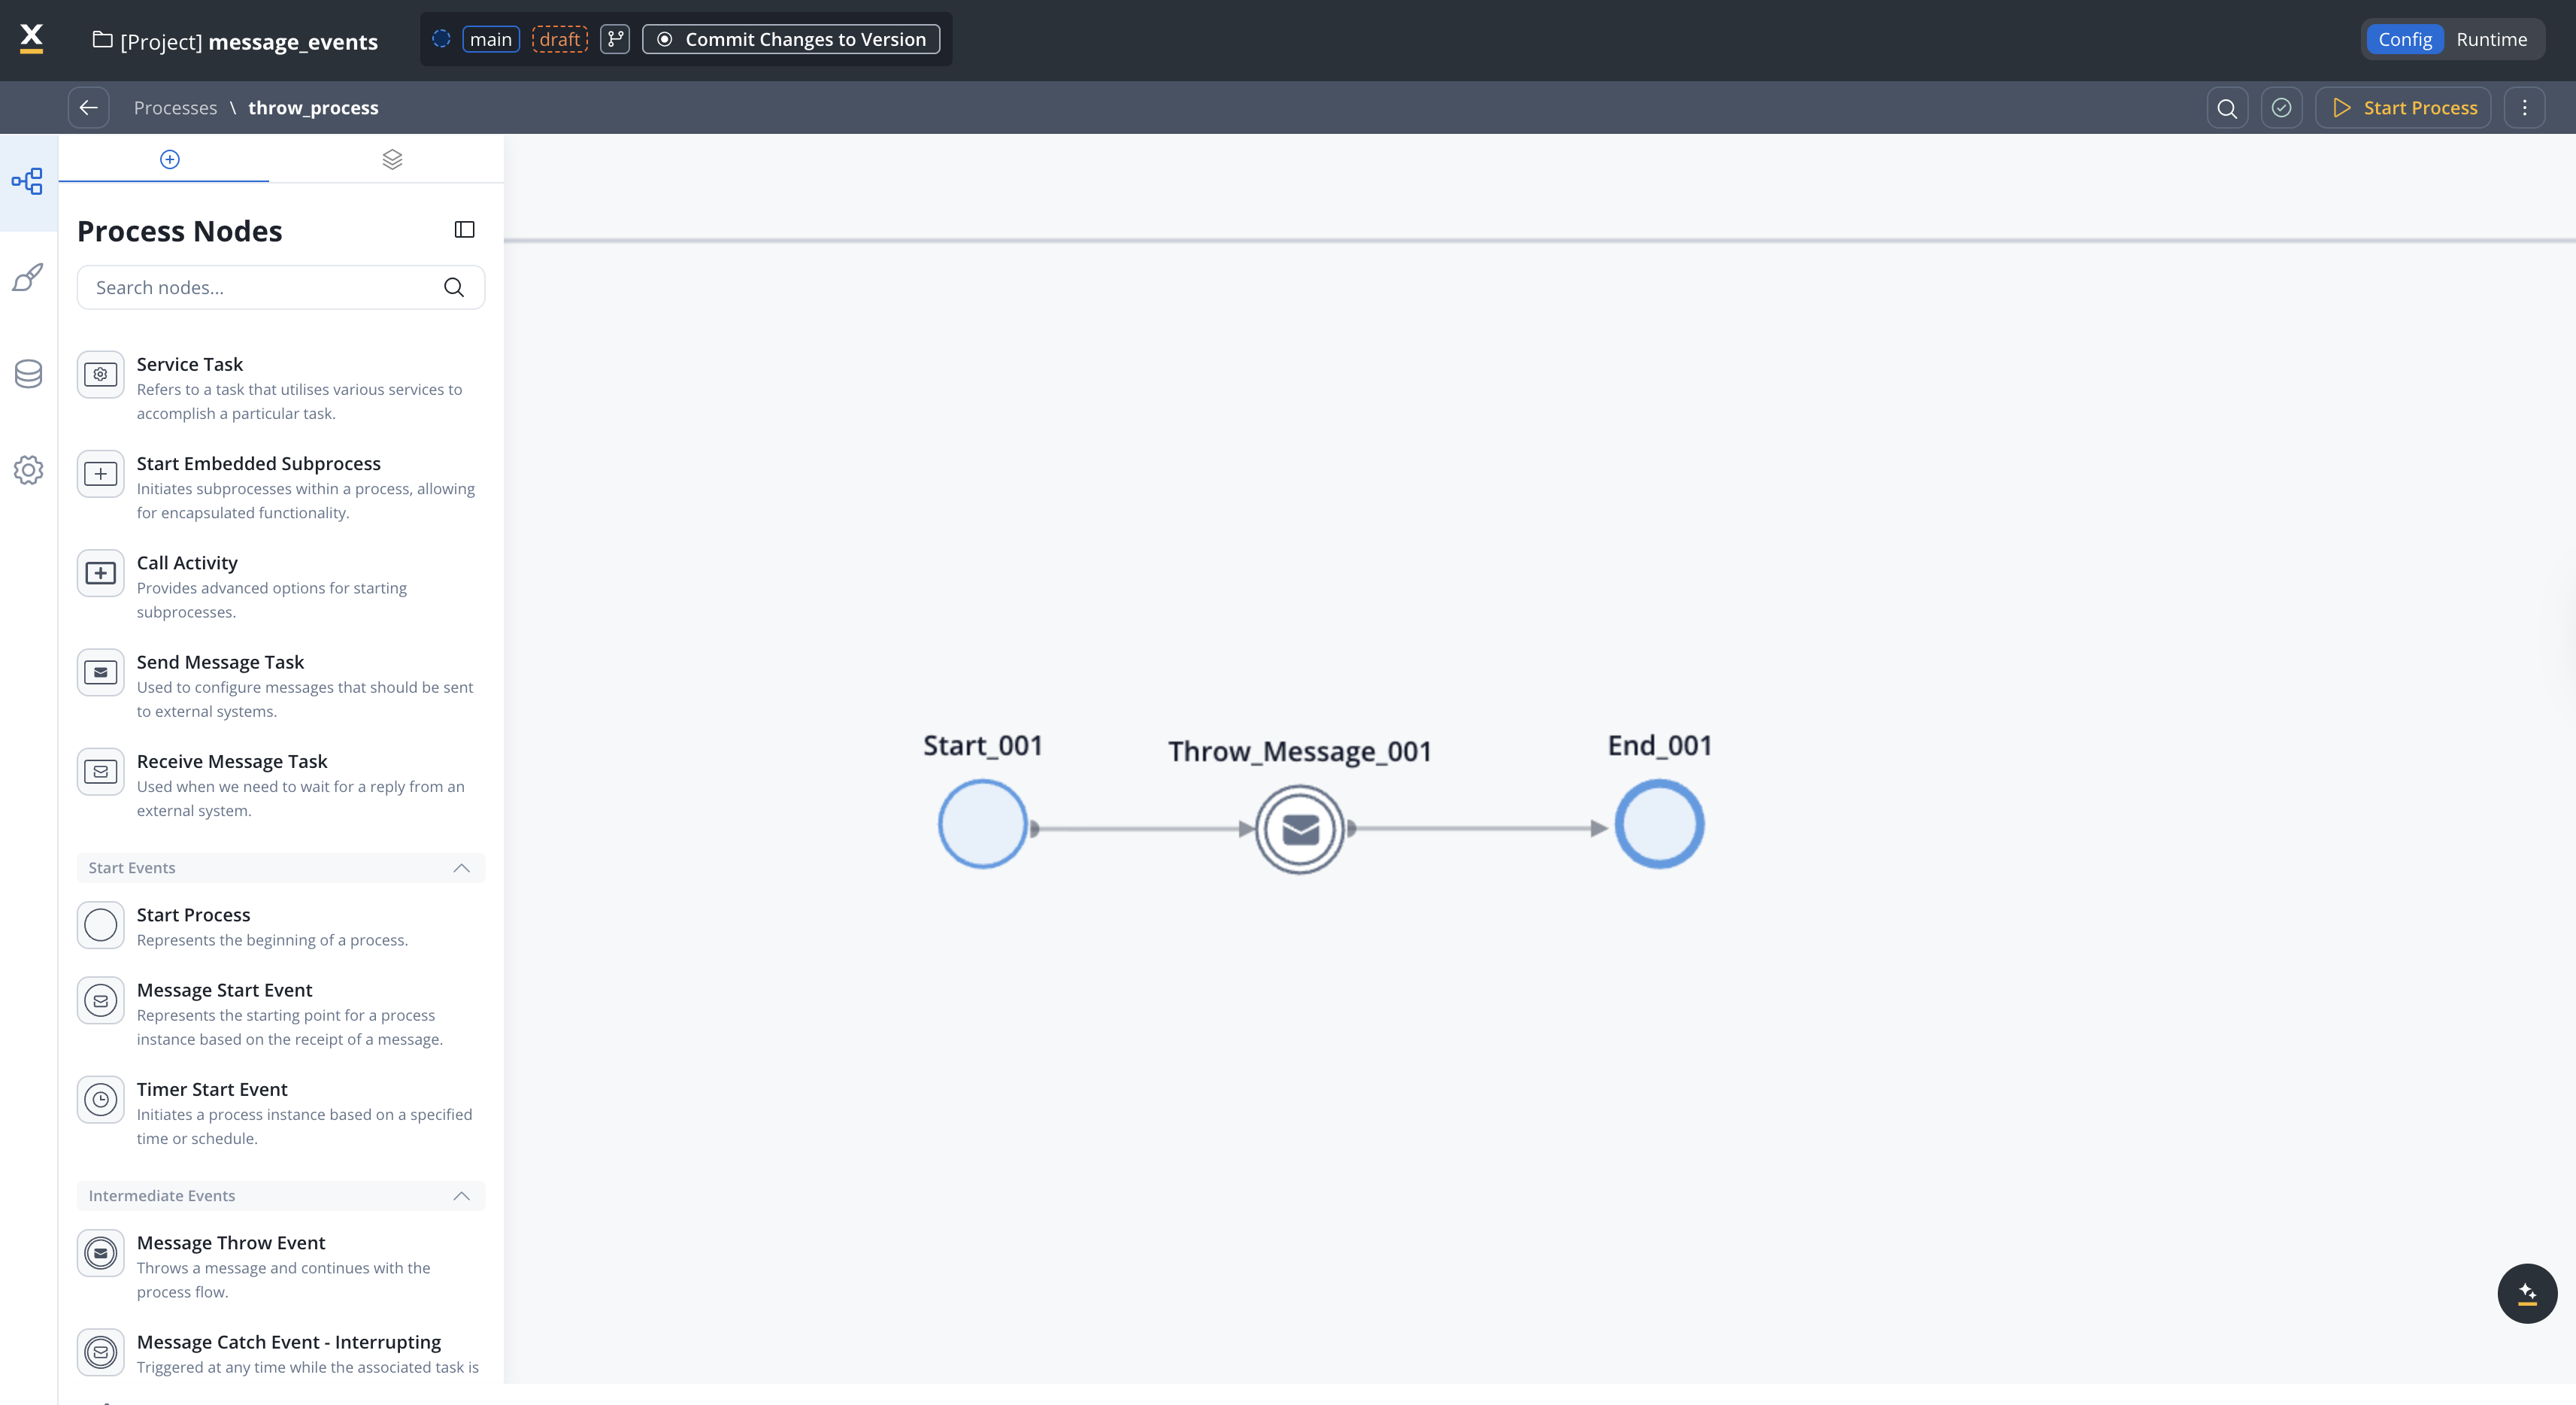
### Throwing process (sender)
The throwing process contains a [Message Throw Event](./message-throw-intermediate-event) that sends a message to start the target process.
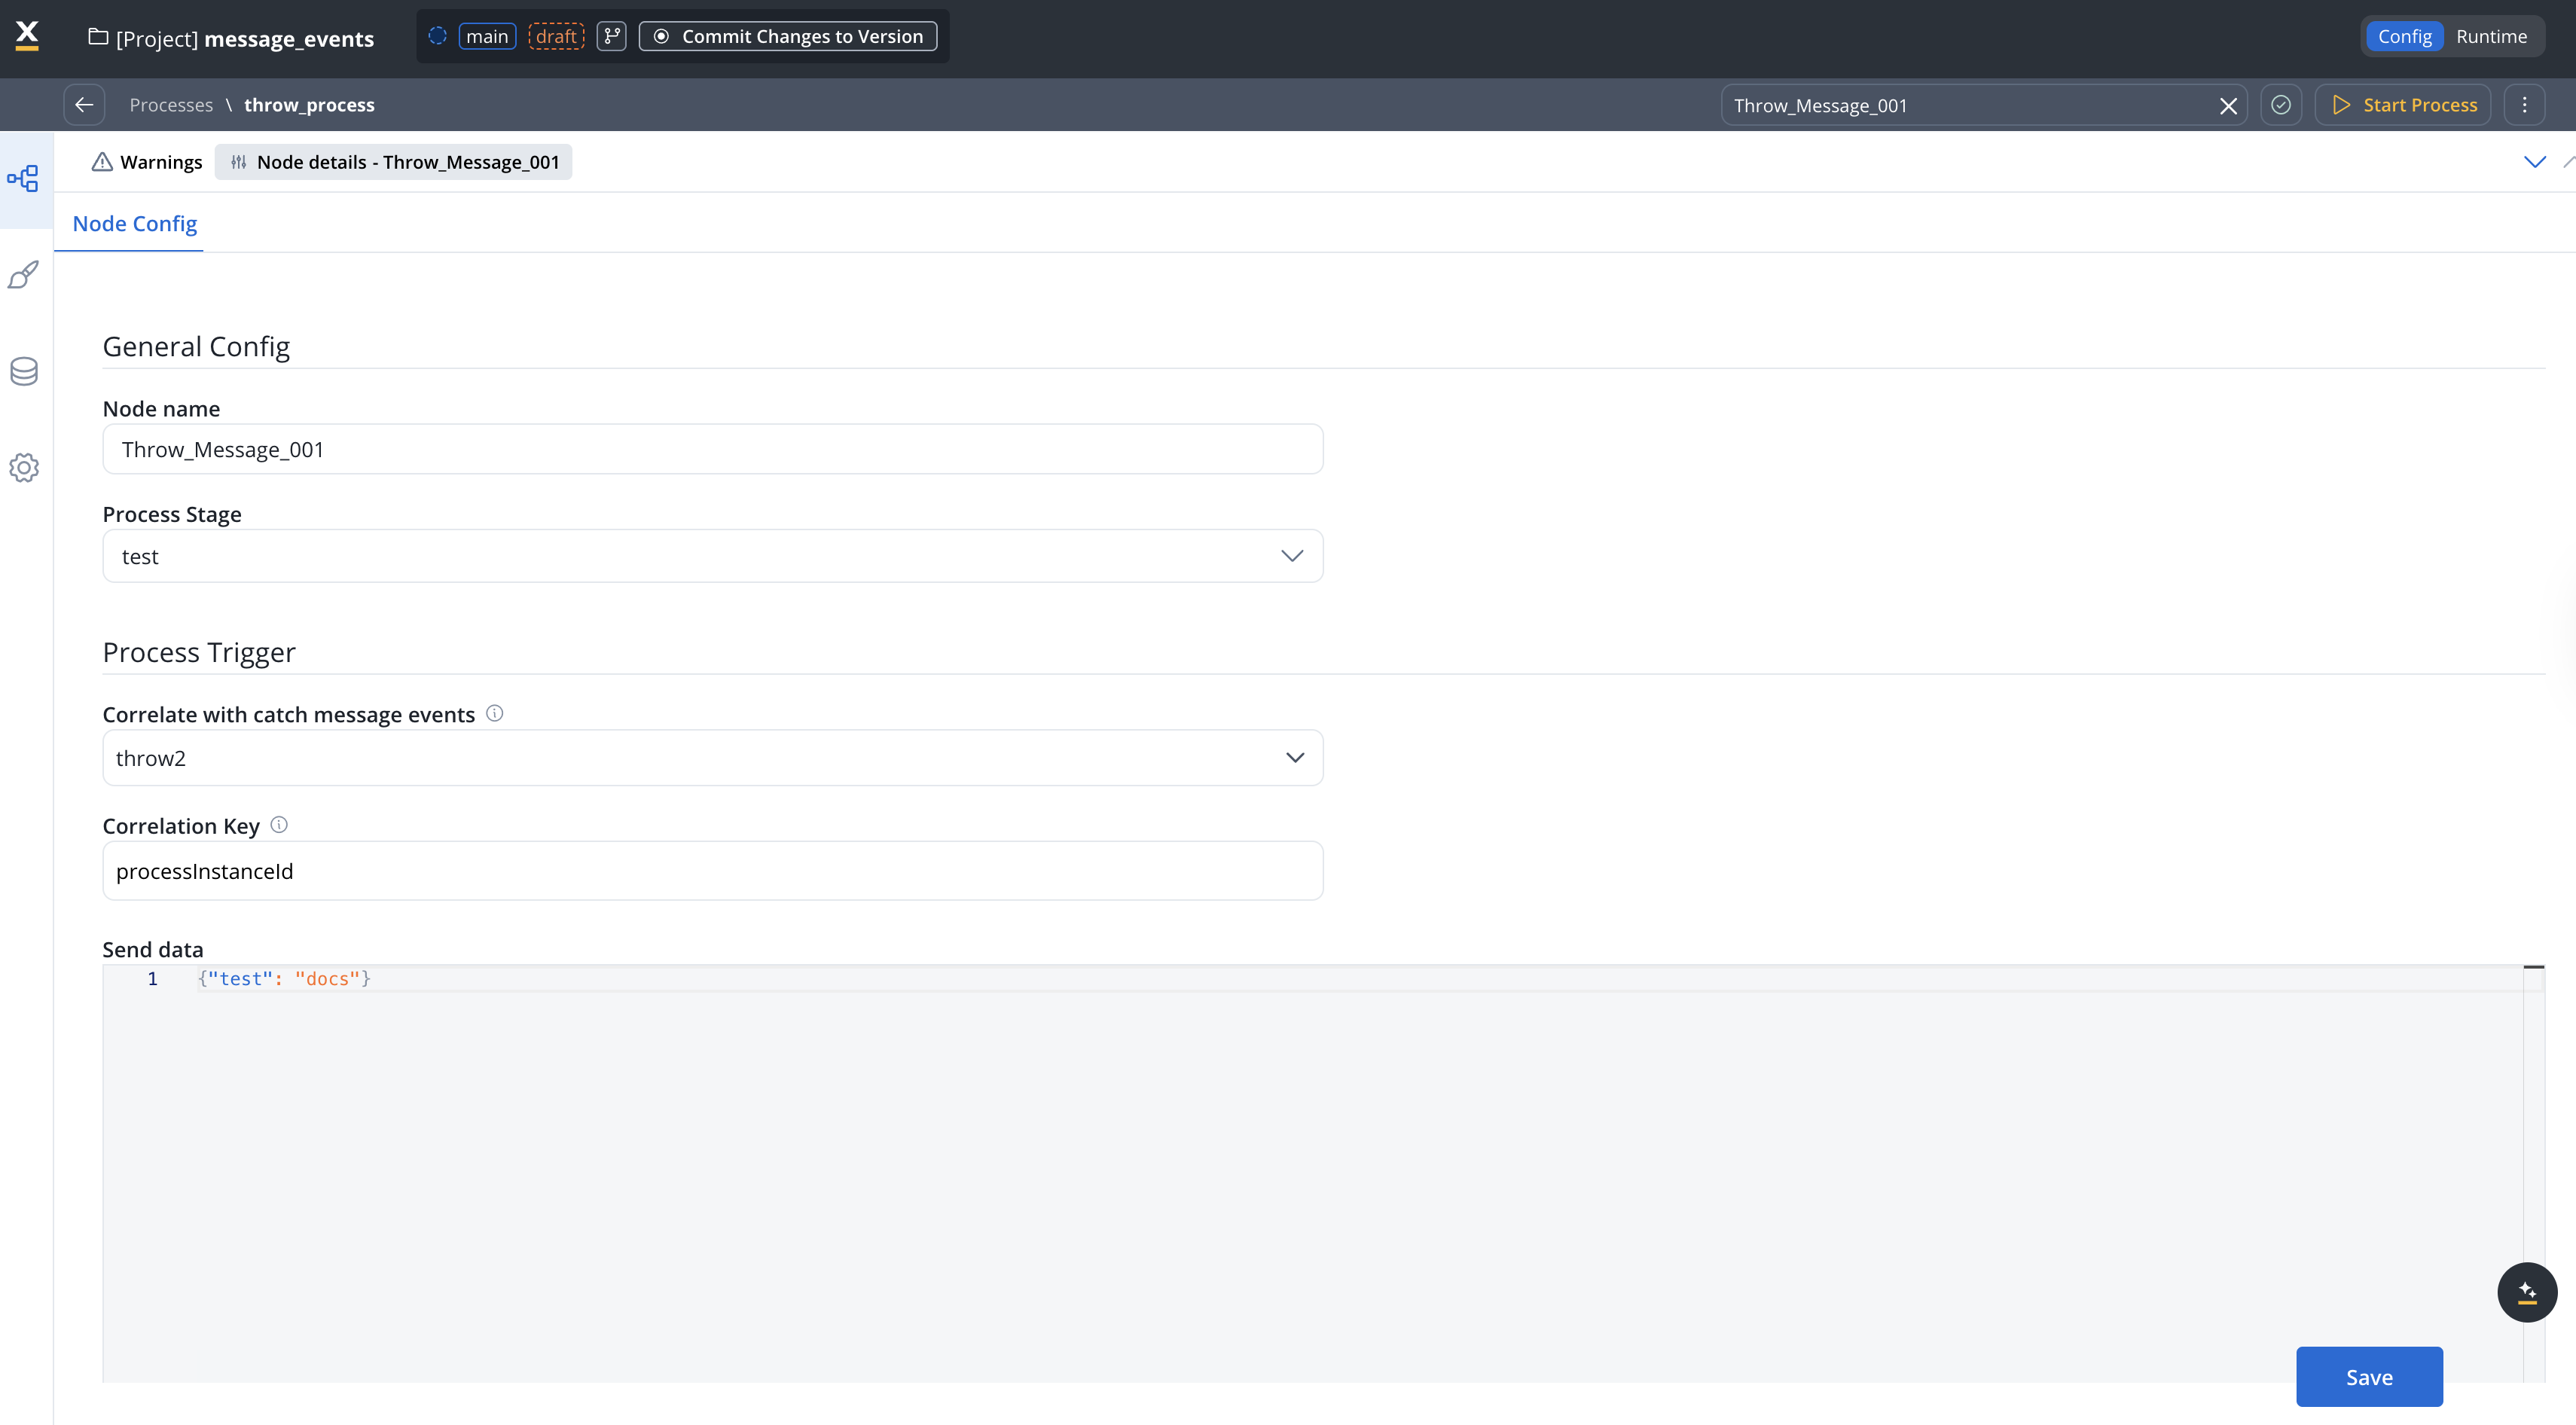
#### Configuring the throw intermediate event
The message event name. This must match the **Correlate with throwing message events** value configured in the target Message Start Event.
Define a JSON structure with the data to be sent along with the message. For example:
```json theme={"system"}
{"test": "docs"}
```
Assign a stage to the node if needed.
### Catching process (receiver)
The catching process uses a Message Start Event configured with the **Internal Throw Message** trigger type.
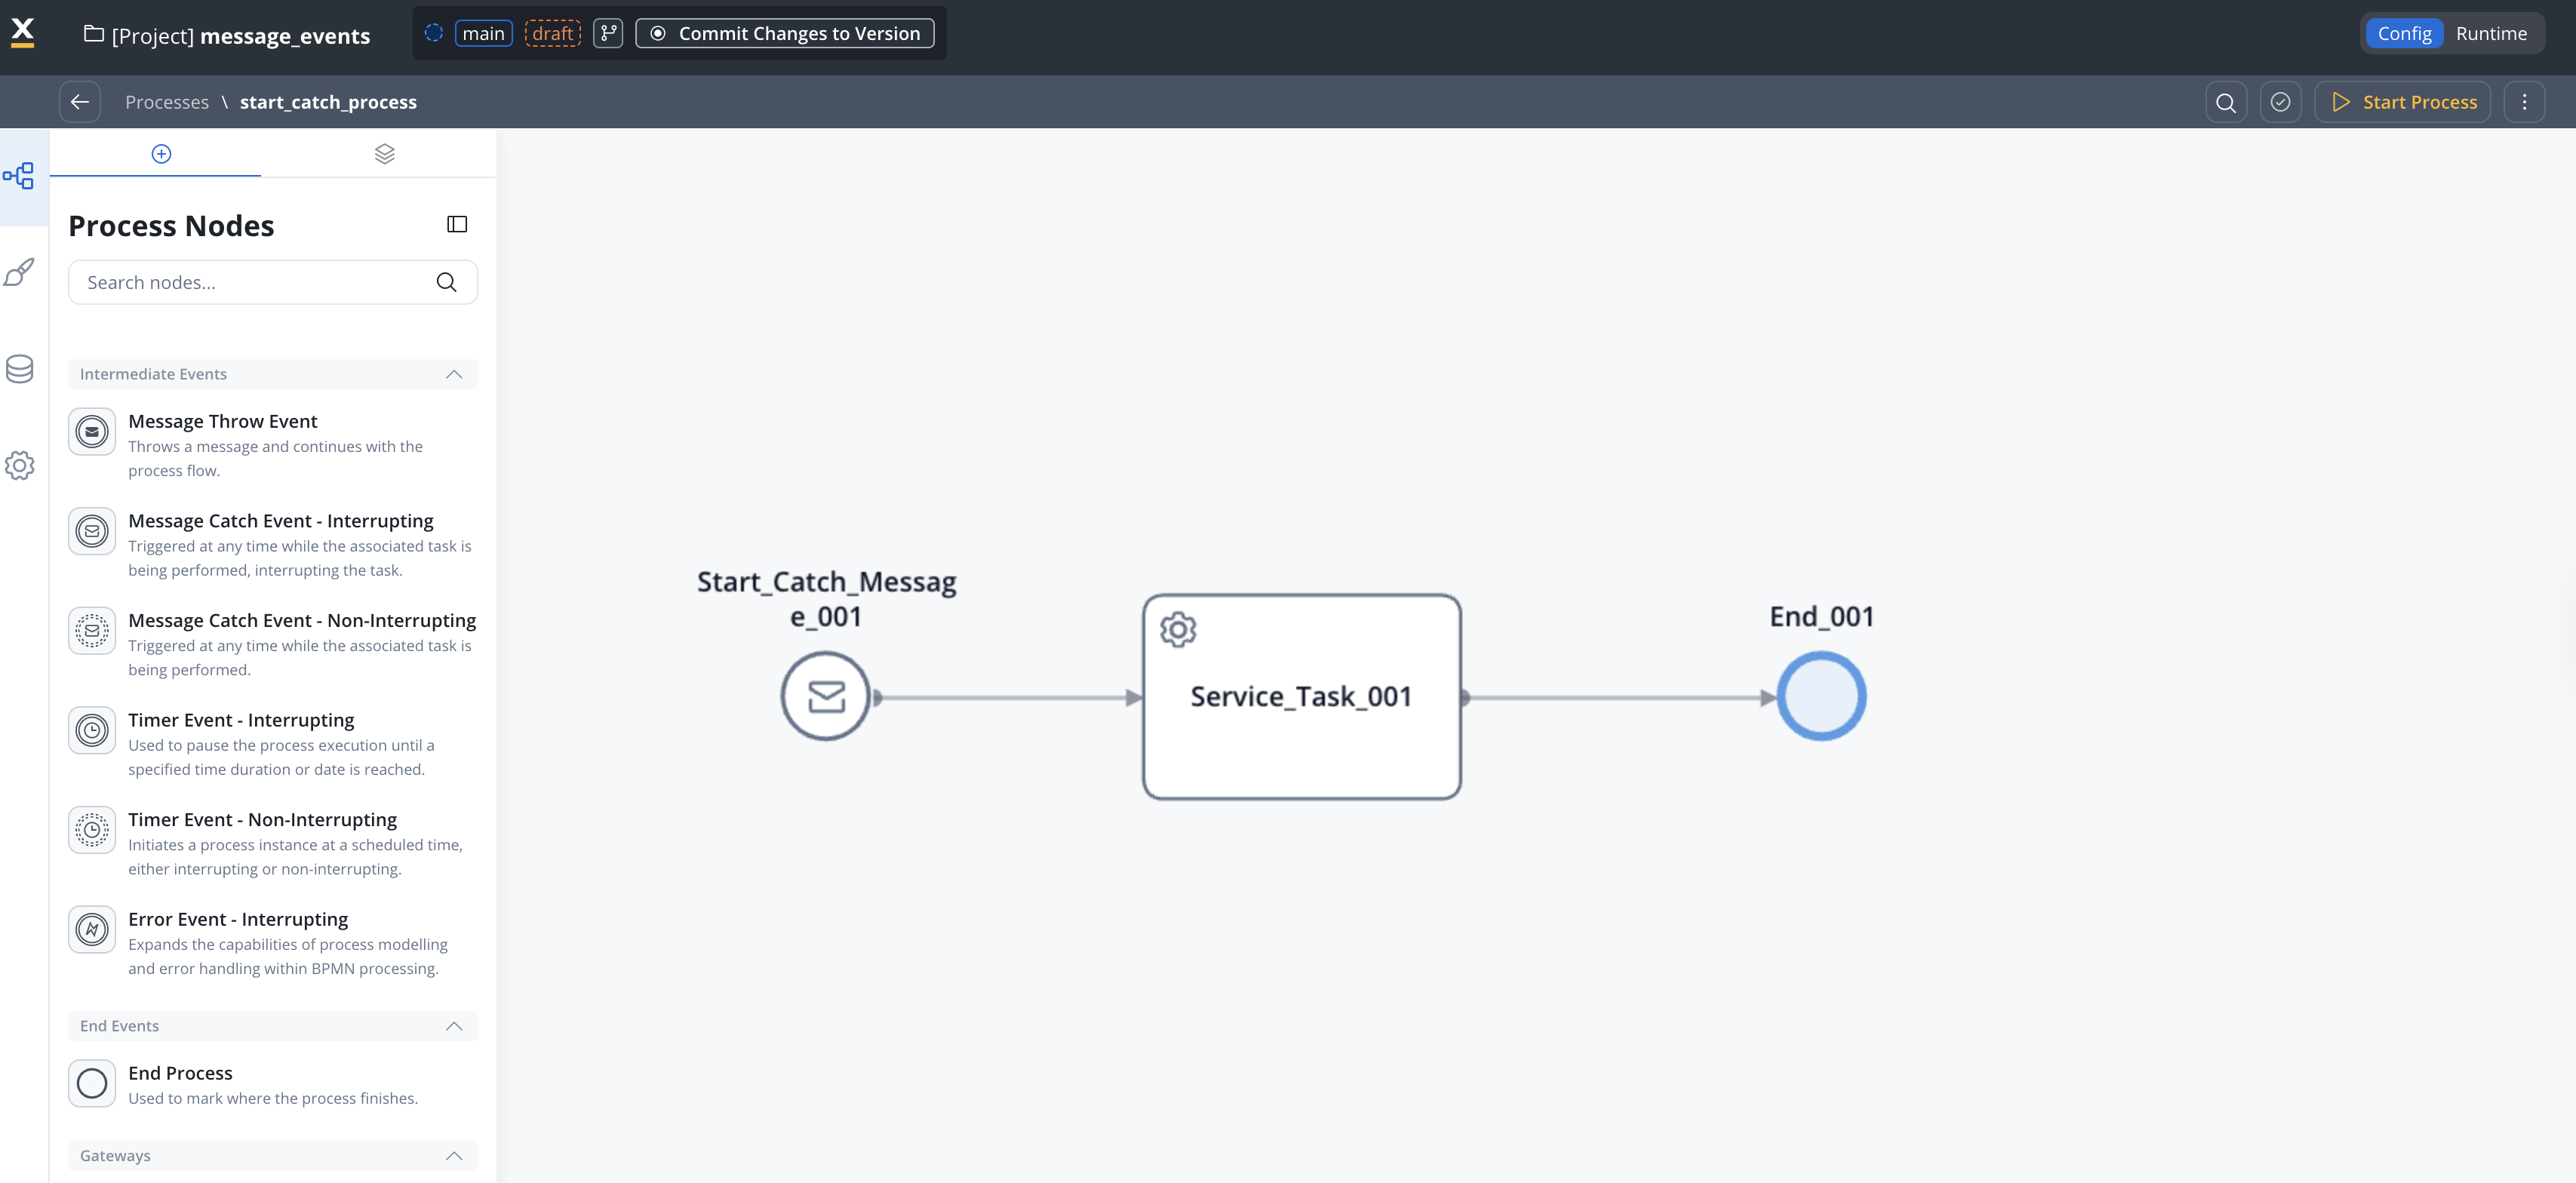
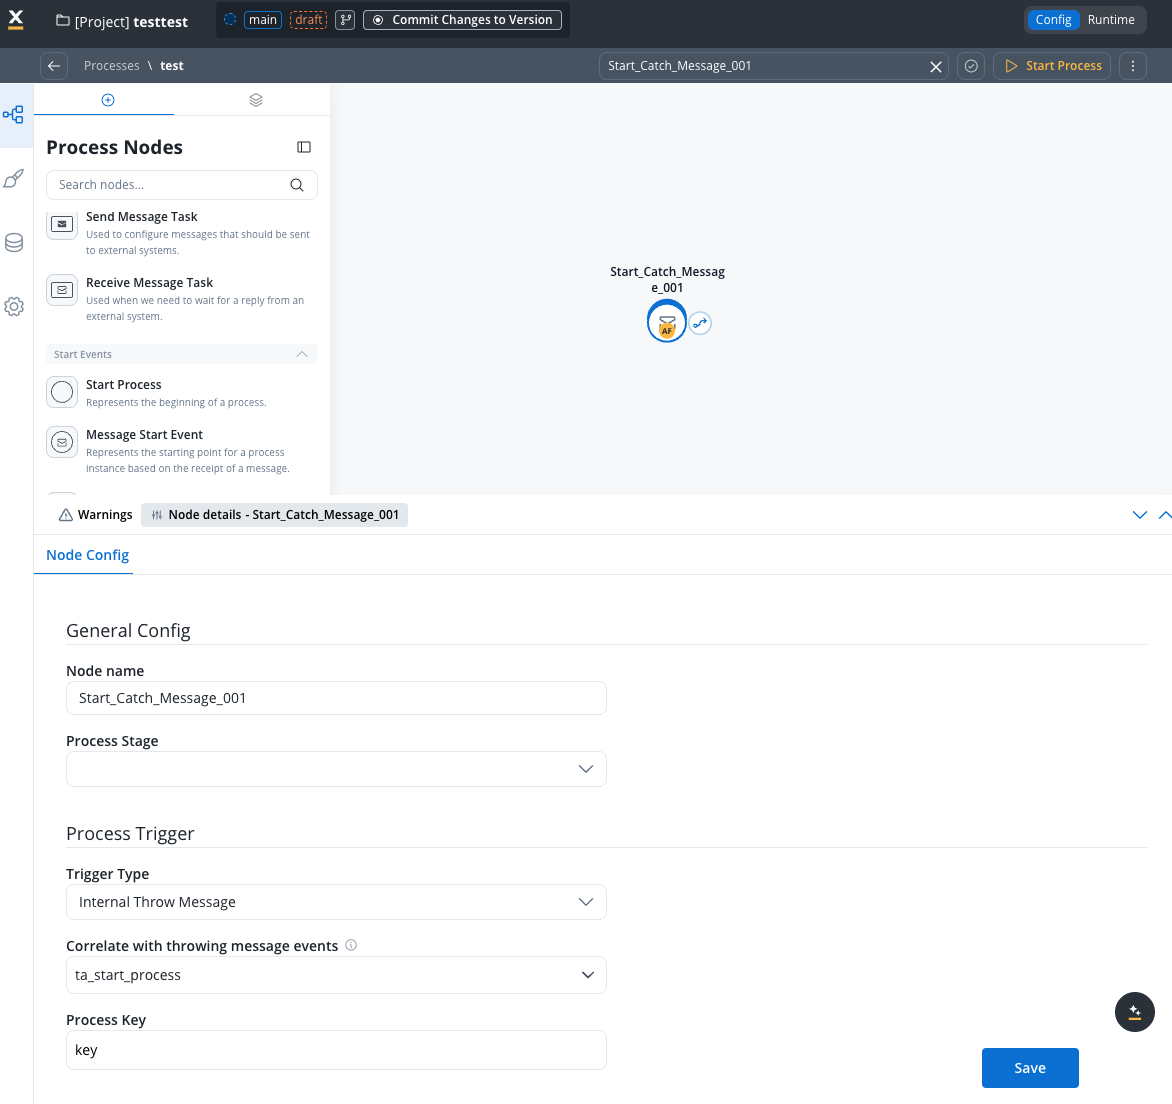
#### Configuring the Message Start Event (Start Catch Message) node
Remember, it's mandatory to have a service account defined in your identity solution to have the necessary rights to start a process using the message catch start event. For more information, see how to [create service accounts using Keycloak](../../../../setup-guides/access-management/configuring-an-iam-solution#process-engine-service-account).
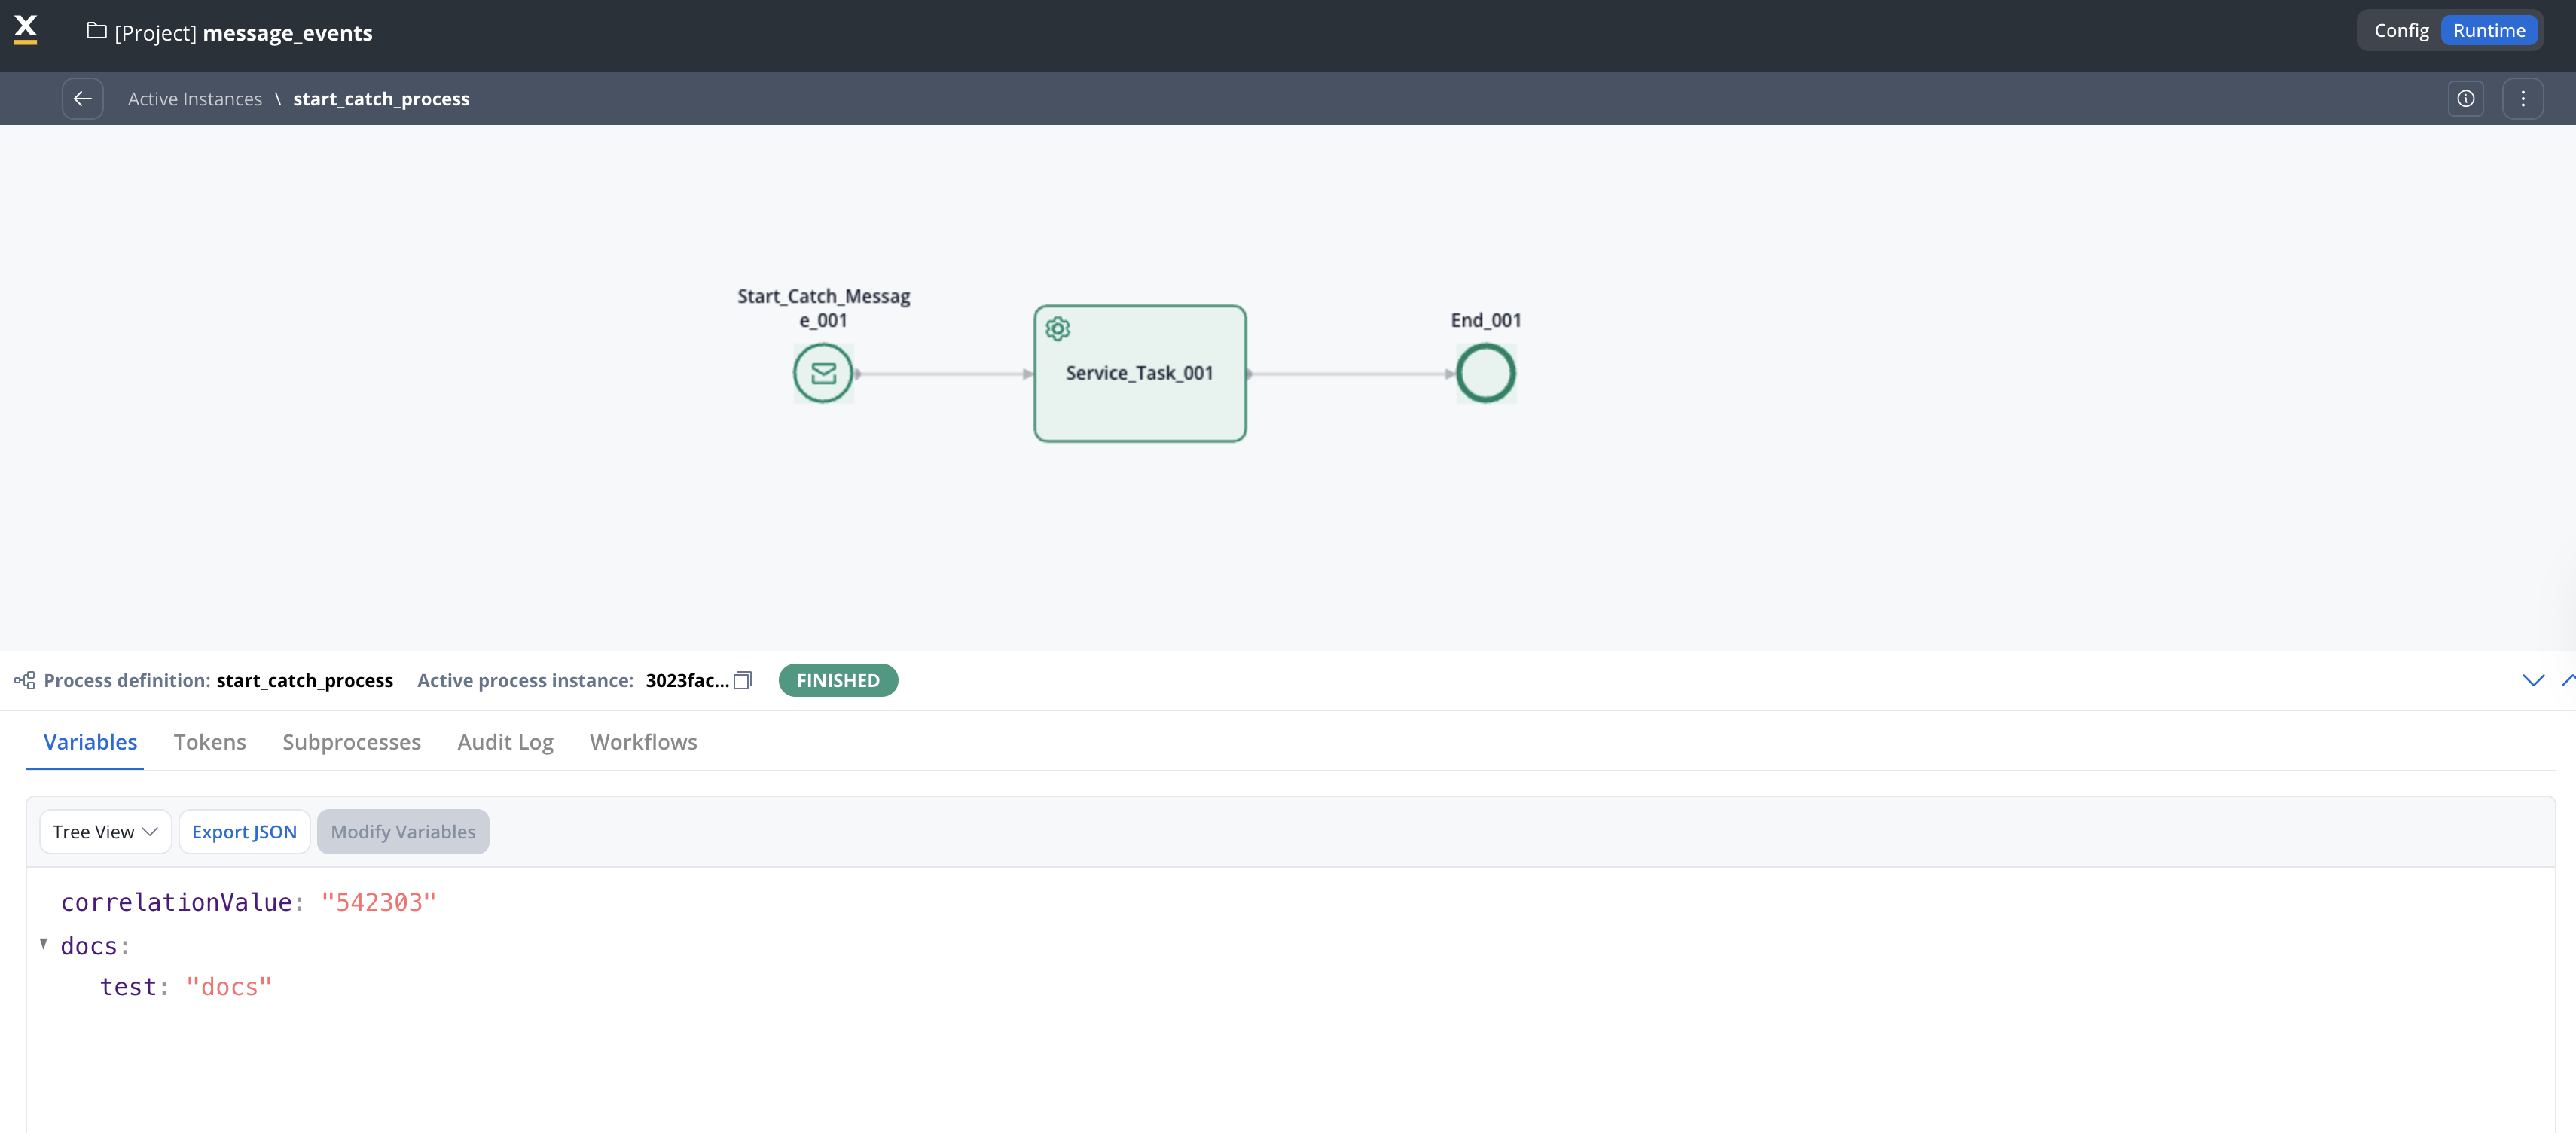
### Result
After running the throw process, the process containing the Message Start Event (Start Catch Message) node is triggered automatically. The data sent from the throwing process is available in the new process instance: