> ## Documentation Index
> Fetch the complete documentation index at: https://docs.flowx.ai/llms.txt
> Use this file to discover all available pages before exploring further.
# Node actions
> Actions define the activities that a node handles. Actions have various types and specify communication details for plugins or integrations.
Node actions allow you to incorporate **business rules** into a **process**, and send data to front-end apps.
The FlowX.AI platform supports the following **types of node actions**:
You can only define and add actions on the following types of **nodes**: [**send message task**](../node/message-send-received-task-node#message-send-task), [**task**](../node/task-node) and [**user task**](../node/user-task-node).
Actions fall into two categories:
* Business rules
* User interactions
### Business rules
Actions use action rules such as MVEL expressions or scripts in JavaScript, Python, or Groovy to attach business rules to a node.
For more information about supported scripting languages, see Supported scripts.
Each button on the user interface corresponds to a manual user action.
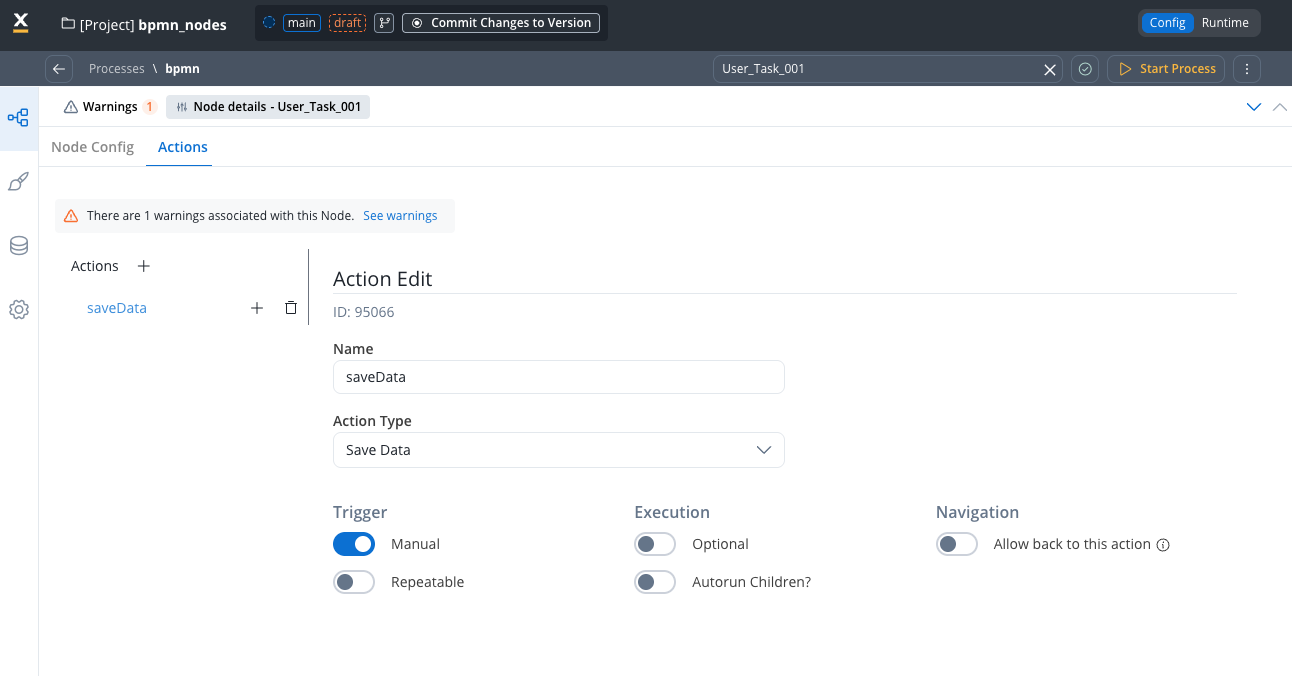
### Action edit
When configuring an action, the Action Edit panel provides three main configuration sections:
#### Trigger
This section defines how and when you can execute the action:
* **Manual**: Requires manual triggering through the REST API, typically by a user interaction in the interface (for example, clicking a button). When turned off, the action runs automatically.
* **Repeatable**: When enabled, you can trigger the action multiple times. When turned off, you can execute the action only once.
Manual actions can be either mandatory or optional. Automatic actions are always considered mandatory.
#### Execution
This section controls the action's execution behavior:
* **Optional**: When enabled, the action is optional and the flow can advance without executing it. When turned off (default), the action is mandatory.
* **Autorun Children?**: When enabled, all child actions marked as mandatory and automatic run immediately after the parent action completes. Default is off.
If all mandatory actions on a node are not executed, the flow (token) doesn't advance.
#### Navigation
This section controls user navigation behavior:
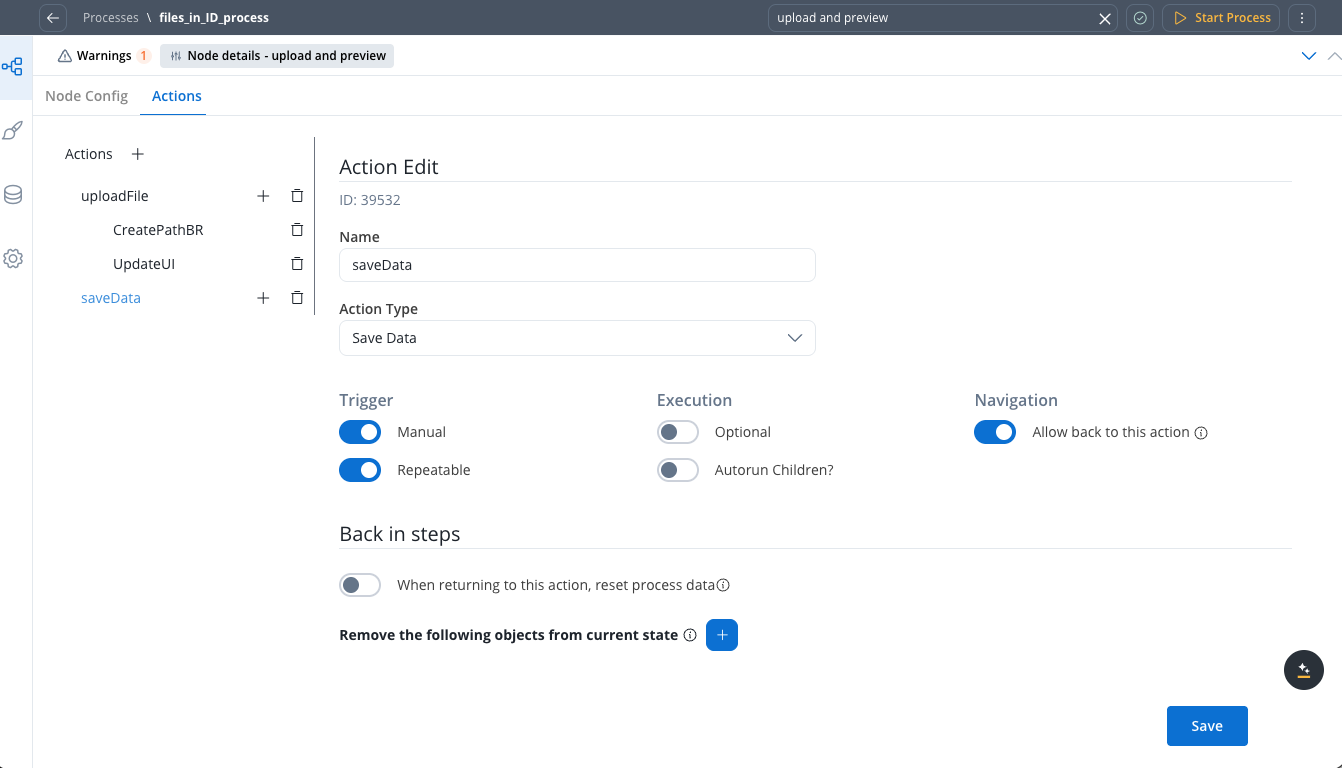
* **Allow back to this action**: Returns the token to this action from a downstream node only if you trigger the action manually.
When enabled, you have the following "Back in steps" configuration options available:
* **When returning to this action, reset process data**: Restores the process state and data to how it was before the initial execution of this action. Default is off.
* **Copy the following objects from current state**: Specifies process keys that retain their data as persisted before you navigate back to this action.
### Action parameters
Action parameters store extra values as key/value pairs, such as topics for outgoing messages or message formats for the front-end.
## Configuring actions
Beyond the basic trigger, execution, and navigation settings described in the preceding section, actions have additional characteristics:
### Action order
When multiple actions exist on a single node, the system executes them in the order you define them.
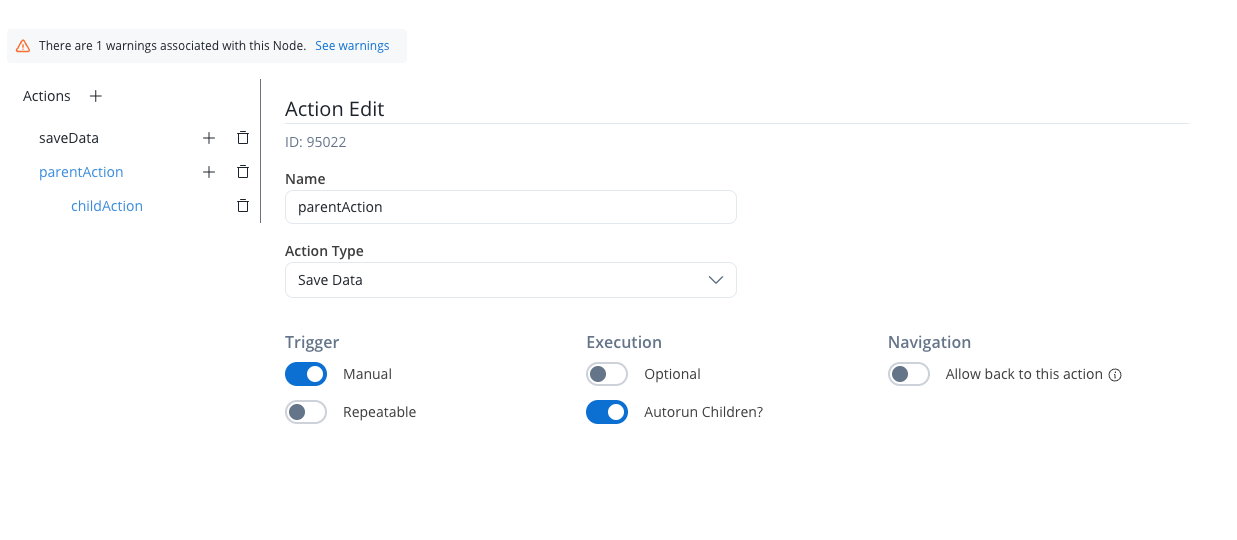
### Parent/child hierarchy
Actions can be organized in a parent/child hierarchy, allowing you to create dependent action chains. Child actions can be configured to:
* Run automatically after the parent completes (using **Autorun Children?**): When enabled, all child actions marked as mandatory and automatic run immediately after the parent action completes. Default is off.
* Execute as callbacks when responses are received from external systems
For more information on adding and managing actions, see the following section:
## Linking actions together
You can link actions together in two ways so that certain actions run immediately after others:
Certain actions can run immediately after another action by setting the `parentName` field on the action for callbacks. Callback actions are performed when the Engine receives a specific message, indicated by the `callbacksForAction` header in the message. To run actions immediately after the parent action, set the `autoRunChildren` flag to `true` for the parent action.
### Child actions
A parent action has a flag `autoRunChildren`, set to `false` by default. When you set this flag to `true`, the child actions (the ones defined as mandatory and automatic) run immediately after the parent action completes execution.

### Callback actions
You can mark child actions as callbacks to run after receiving a reply from an external system. Set these actions when defining the interaction with the external system (the [Kafka send action](../node/message-send-received-task-node#configuring-a-message-send-task-node)).
For example, you can use a callback function to handle a user's interaction with a web page, such as uploading a file. When the user performs the action, the callback function executes, allowing the web app to respond appropriately.
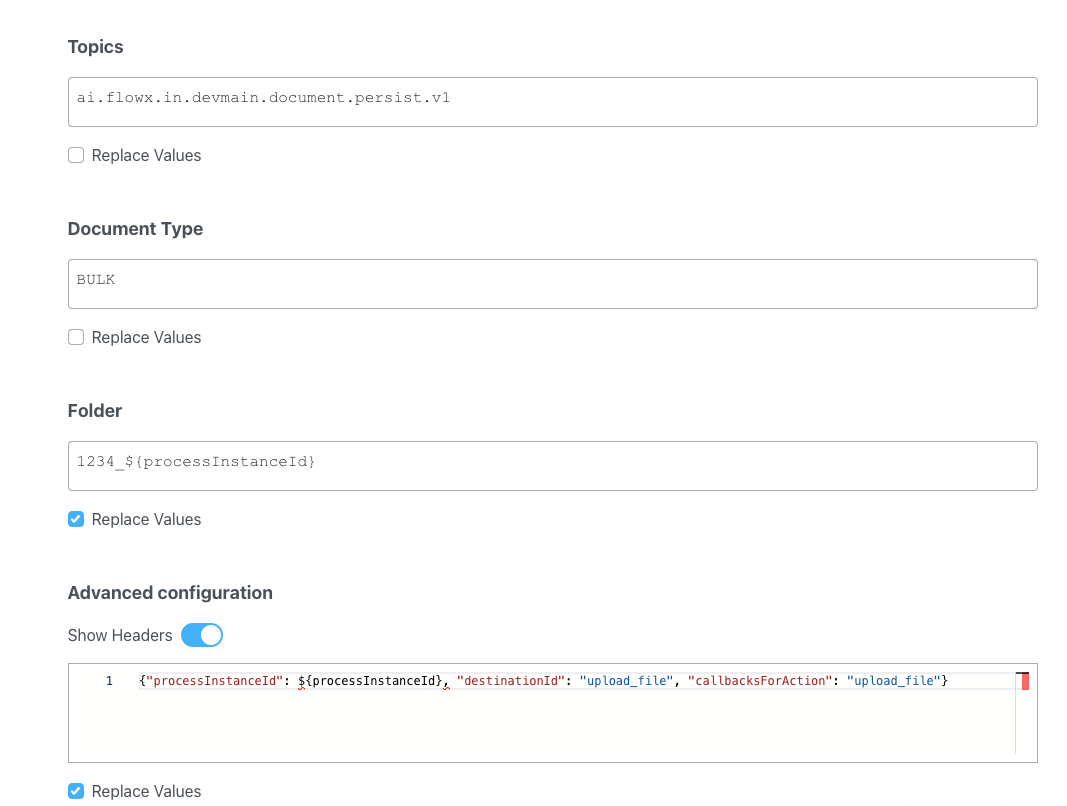
#### Example
Add callback actions in the **Advanced configuration** tab, in the **header** parameter `callbacksForAction`.
```js theme={"system"}
{"processInstanceId": ${processInstanceId}, "destinationId": "upload_file", "callbacksForAction": "upload_file"}
```
* `callbacksForAction`: The value of this key is a string that specifies a callback action associated with the `upload_file` destination ID. This is part of an event-driven system (Kafka send action) where the system calls this callback after the `upload_file` action completes.