> ## Documentation Index
> Fetch the complete documentation index at: https://docs.flowx.ai/llms.txt
> Use this file to discover all available pages before exploring further.
# Generate OTP
> There are some cases when you will need to generate an OTP (One Time Password) from a business flow, for example when validating an email account.
The notifications plugin handles both the actual OTP code generation and sending the code to the user using a defined [notification template](../managing-notification-templates).
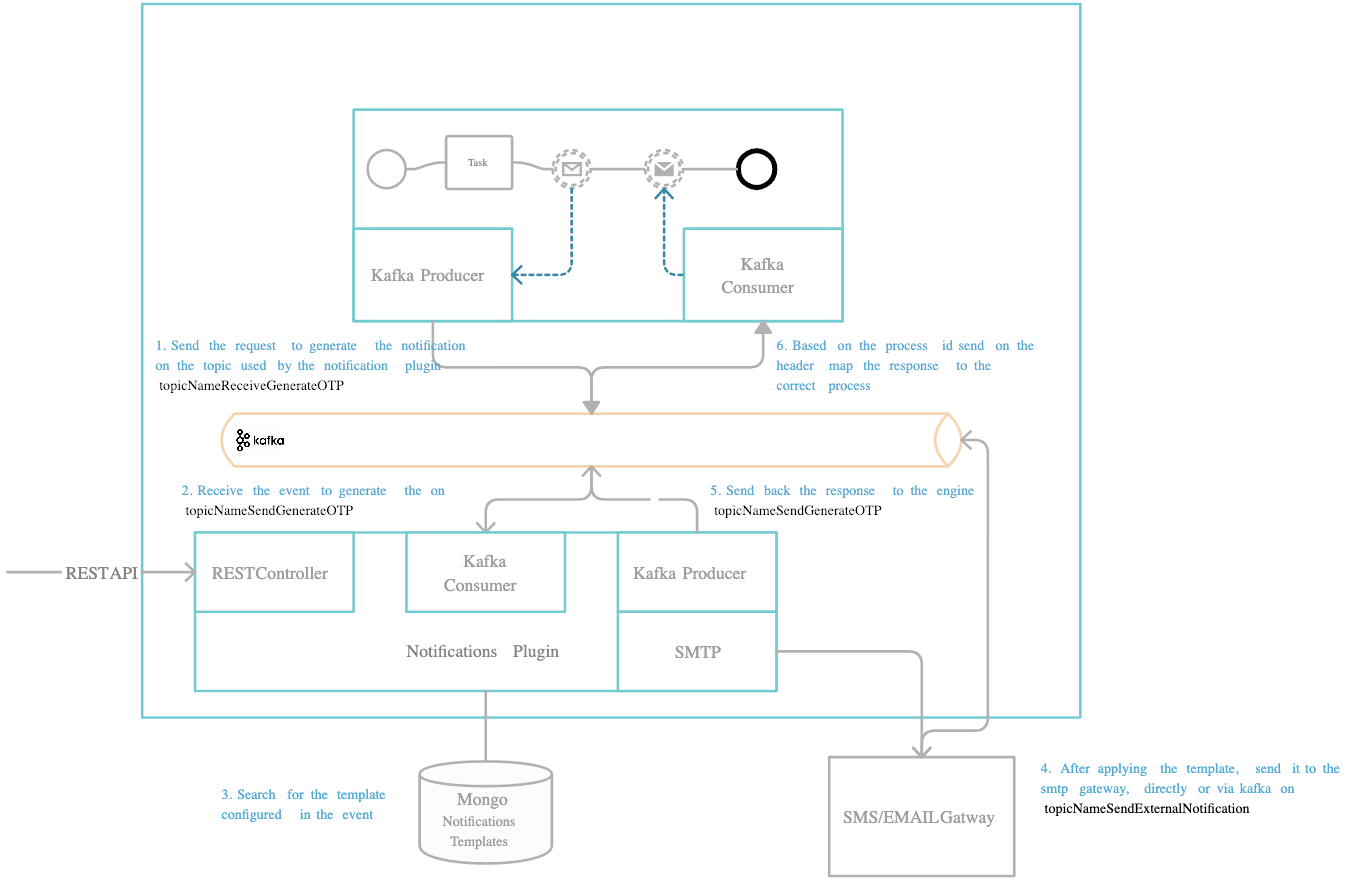
## Define needed Kafka topics
**DEVELOPER**: Kafka topic names can be set/found by using the following environment variables in your Notifications plugin deployment:
* `KAFKA_TOPIC_OTP_GENERATE_IN` — the OTP generate request is sent on this topic. **Default:** `ai.flowx.plugin.notification.trigger.generate.otp.v1`
* `KAFKA_TOPIC_OTP_GENERATE_OUT` — after the OTP is generated and sent to the user, the response is sent back to the Engine on this topic. **Default:** `ai.flowx.engine.receive.plugin.notification.generate.otp.results.v1`
The Engine is listening for messages on topics with names of a certain pattern, make sure to use an outgoing topic name that matches the pattern configured in the Engine.
## Request to generate an OTP
Send the request on the `KAFKA_TOPIC_OTP_GENERATE_IN` topic. The body holds the following values:
| Field | Description |
| ------------------- | --------------------------------------------------------------------------------------------- |
| `processInstanceId` | Process instance ID |
| `templateName` | Name of the [notification template](../managing-notification-templates) used to send the code |
| `language` | Template language to use, for example `en` |
| `channel` | Notification channel: `MAIL`, `SMS`, or `PUSH` |
| `clientId` | Business identifier of the client (for example, the SSN) |
| `recipient` | Notification receiver: email address or phone number |
| `data` | Parameters substituted into the notification template (for example, `name`) |
```json theme={"system"}
{
"processInstanceId": 1994,
"templateName": "your_otp_mail_template",
"language": "en",
"channel": "MAIL",
"clientId": "1871201460101",
"recipient": "john.doe@example.com",
"data": {
"name": "John"
}
}
```
You don't send the OTP code yourself. The plugin generates it and automatically injects it into the template data under the reserved key **`otpValue`** before rendering — see [Notification template](#notification-template) below.
The `contentParams` field is deprecated. Use `data` instead.
## Notification template
The OTP code is delivered using a notification template created in **Content Management** → **Notification Templates**. In the template **Body**, reference the generated code with the `#otpValue` placeholder (this maps to `${otpValue}` in the **Source** view):
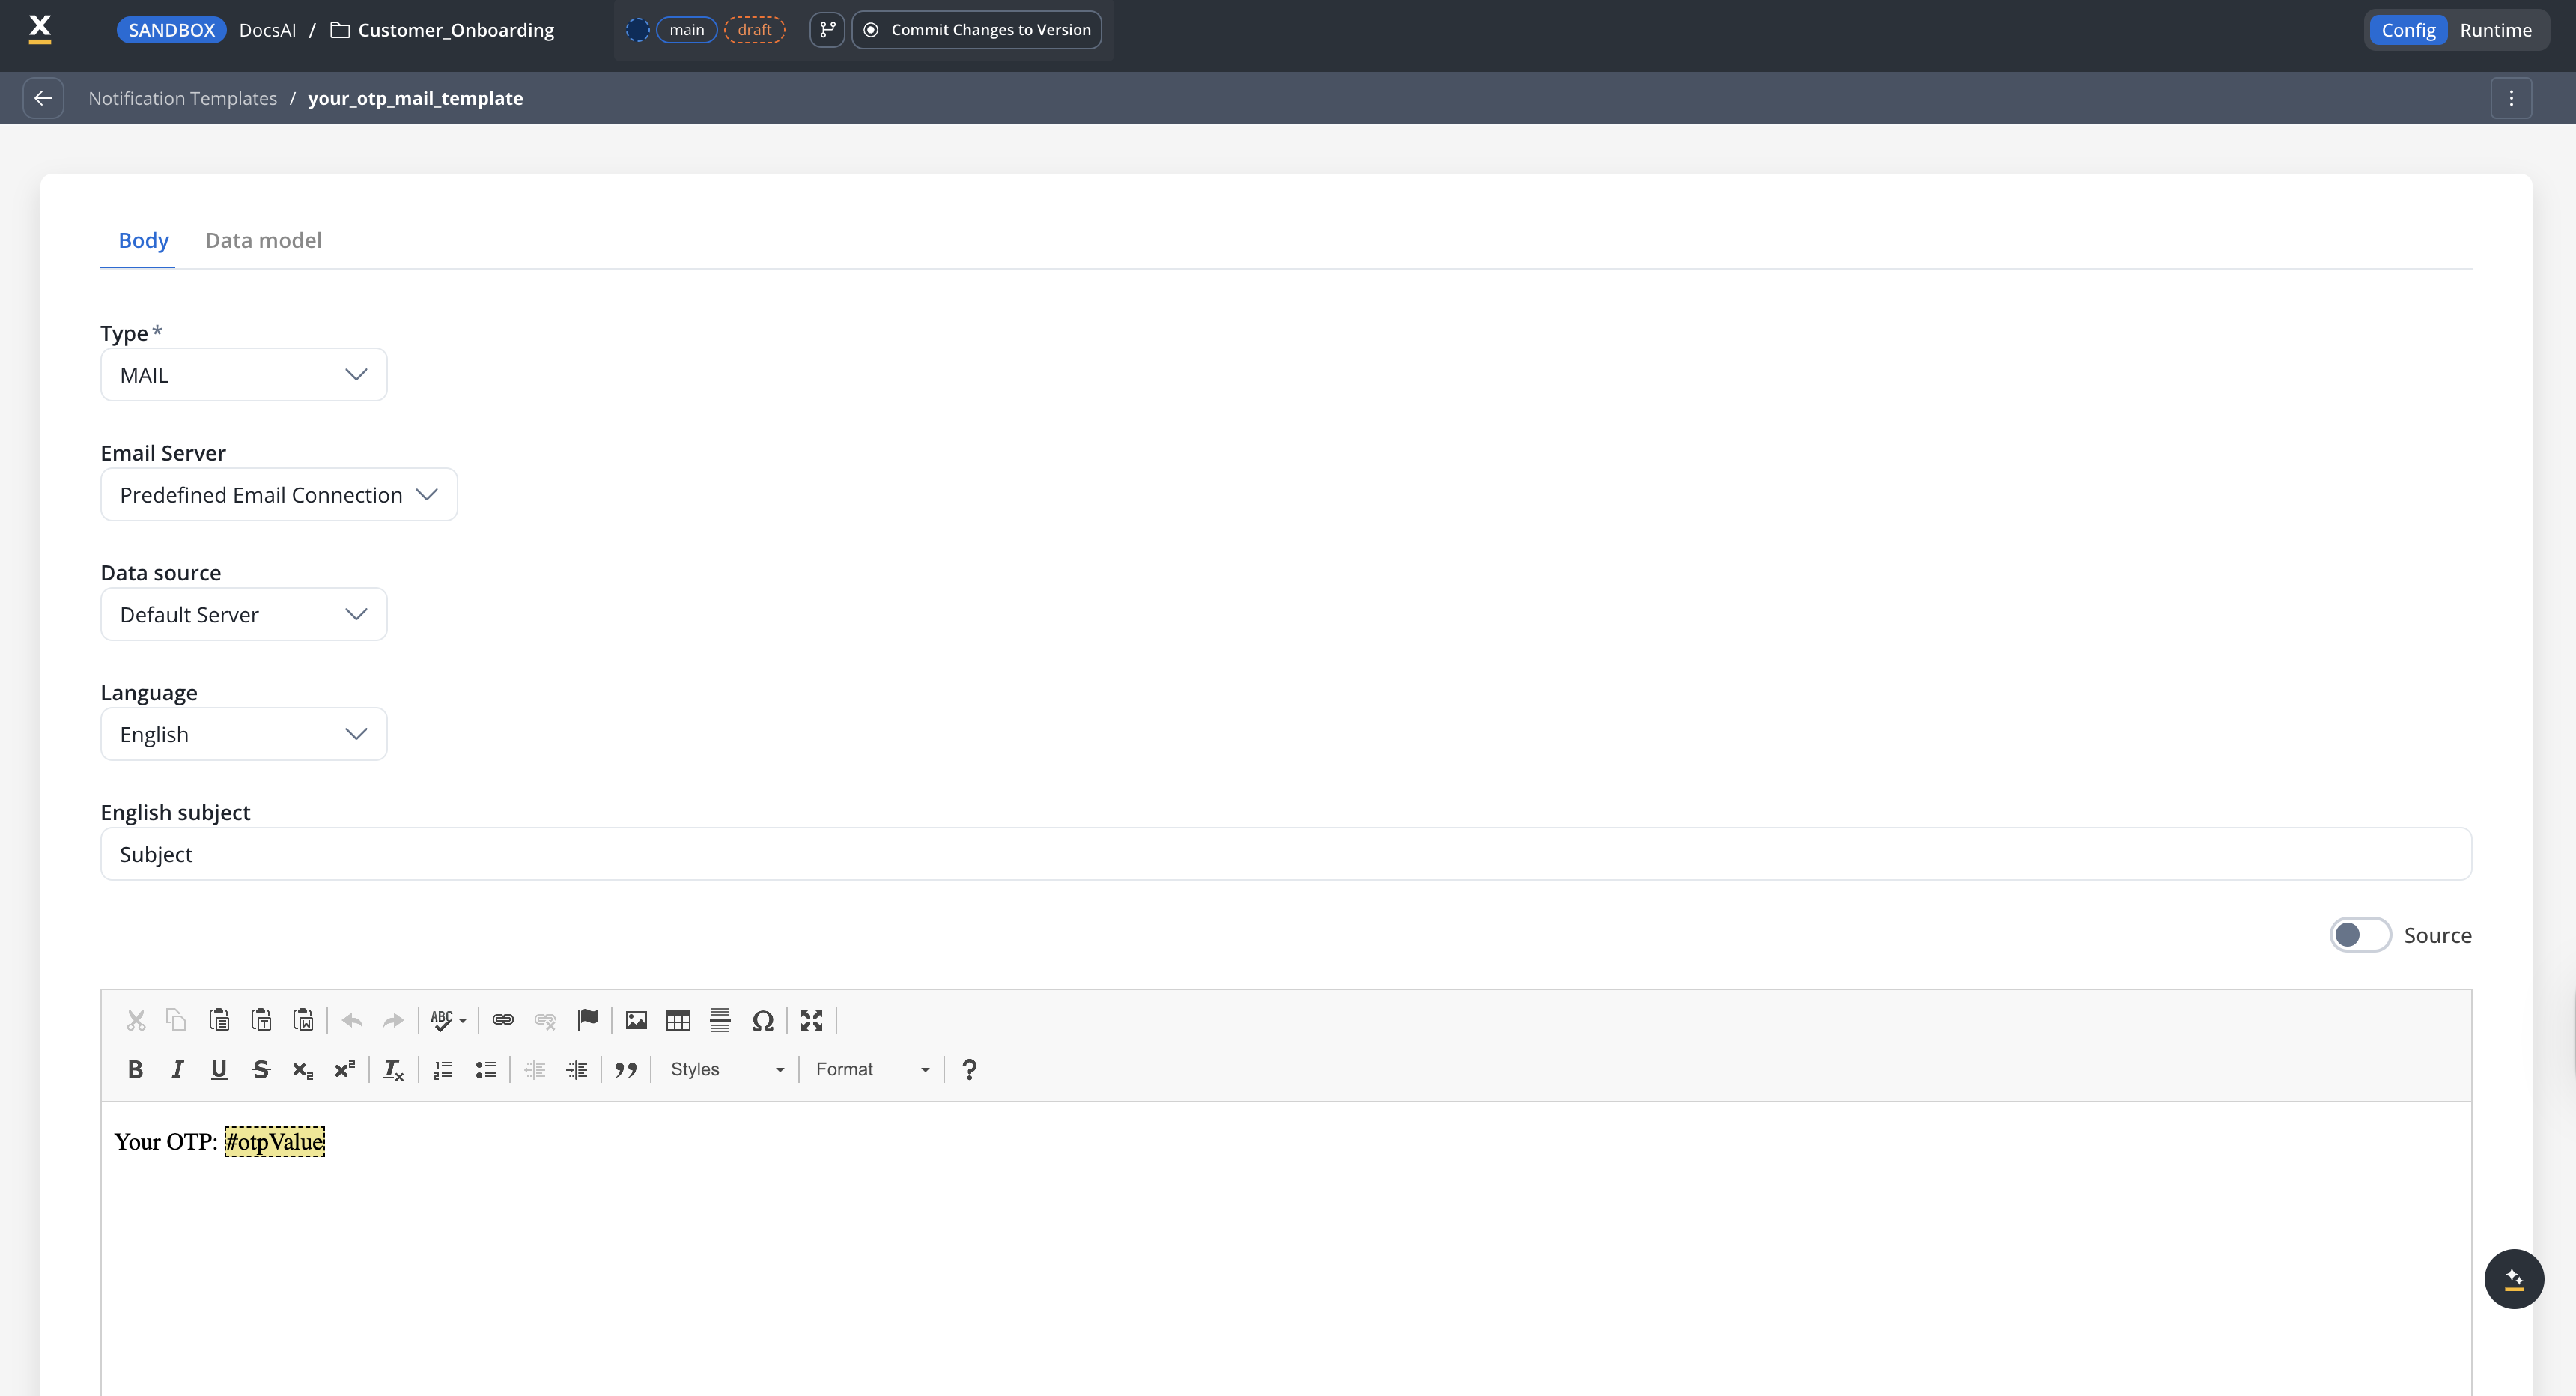
In the template **Data model**, declare the parameters the template expects. `otpValue` holds the generated code; any other parameters (such as `name`) are taken from the `data` object in the request:
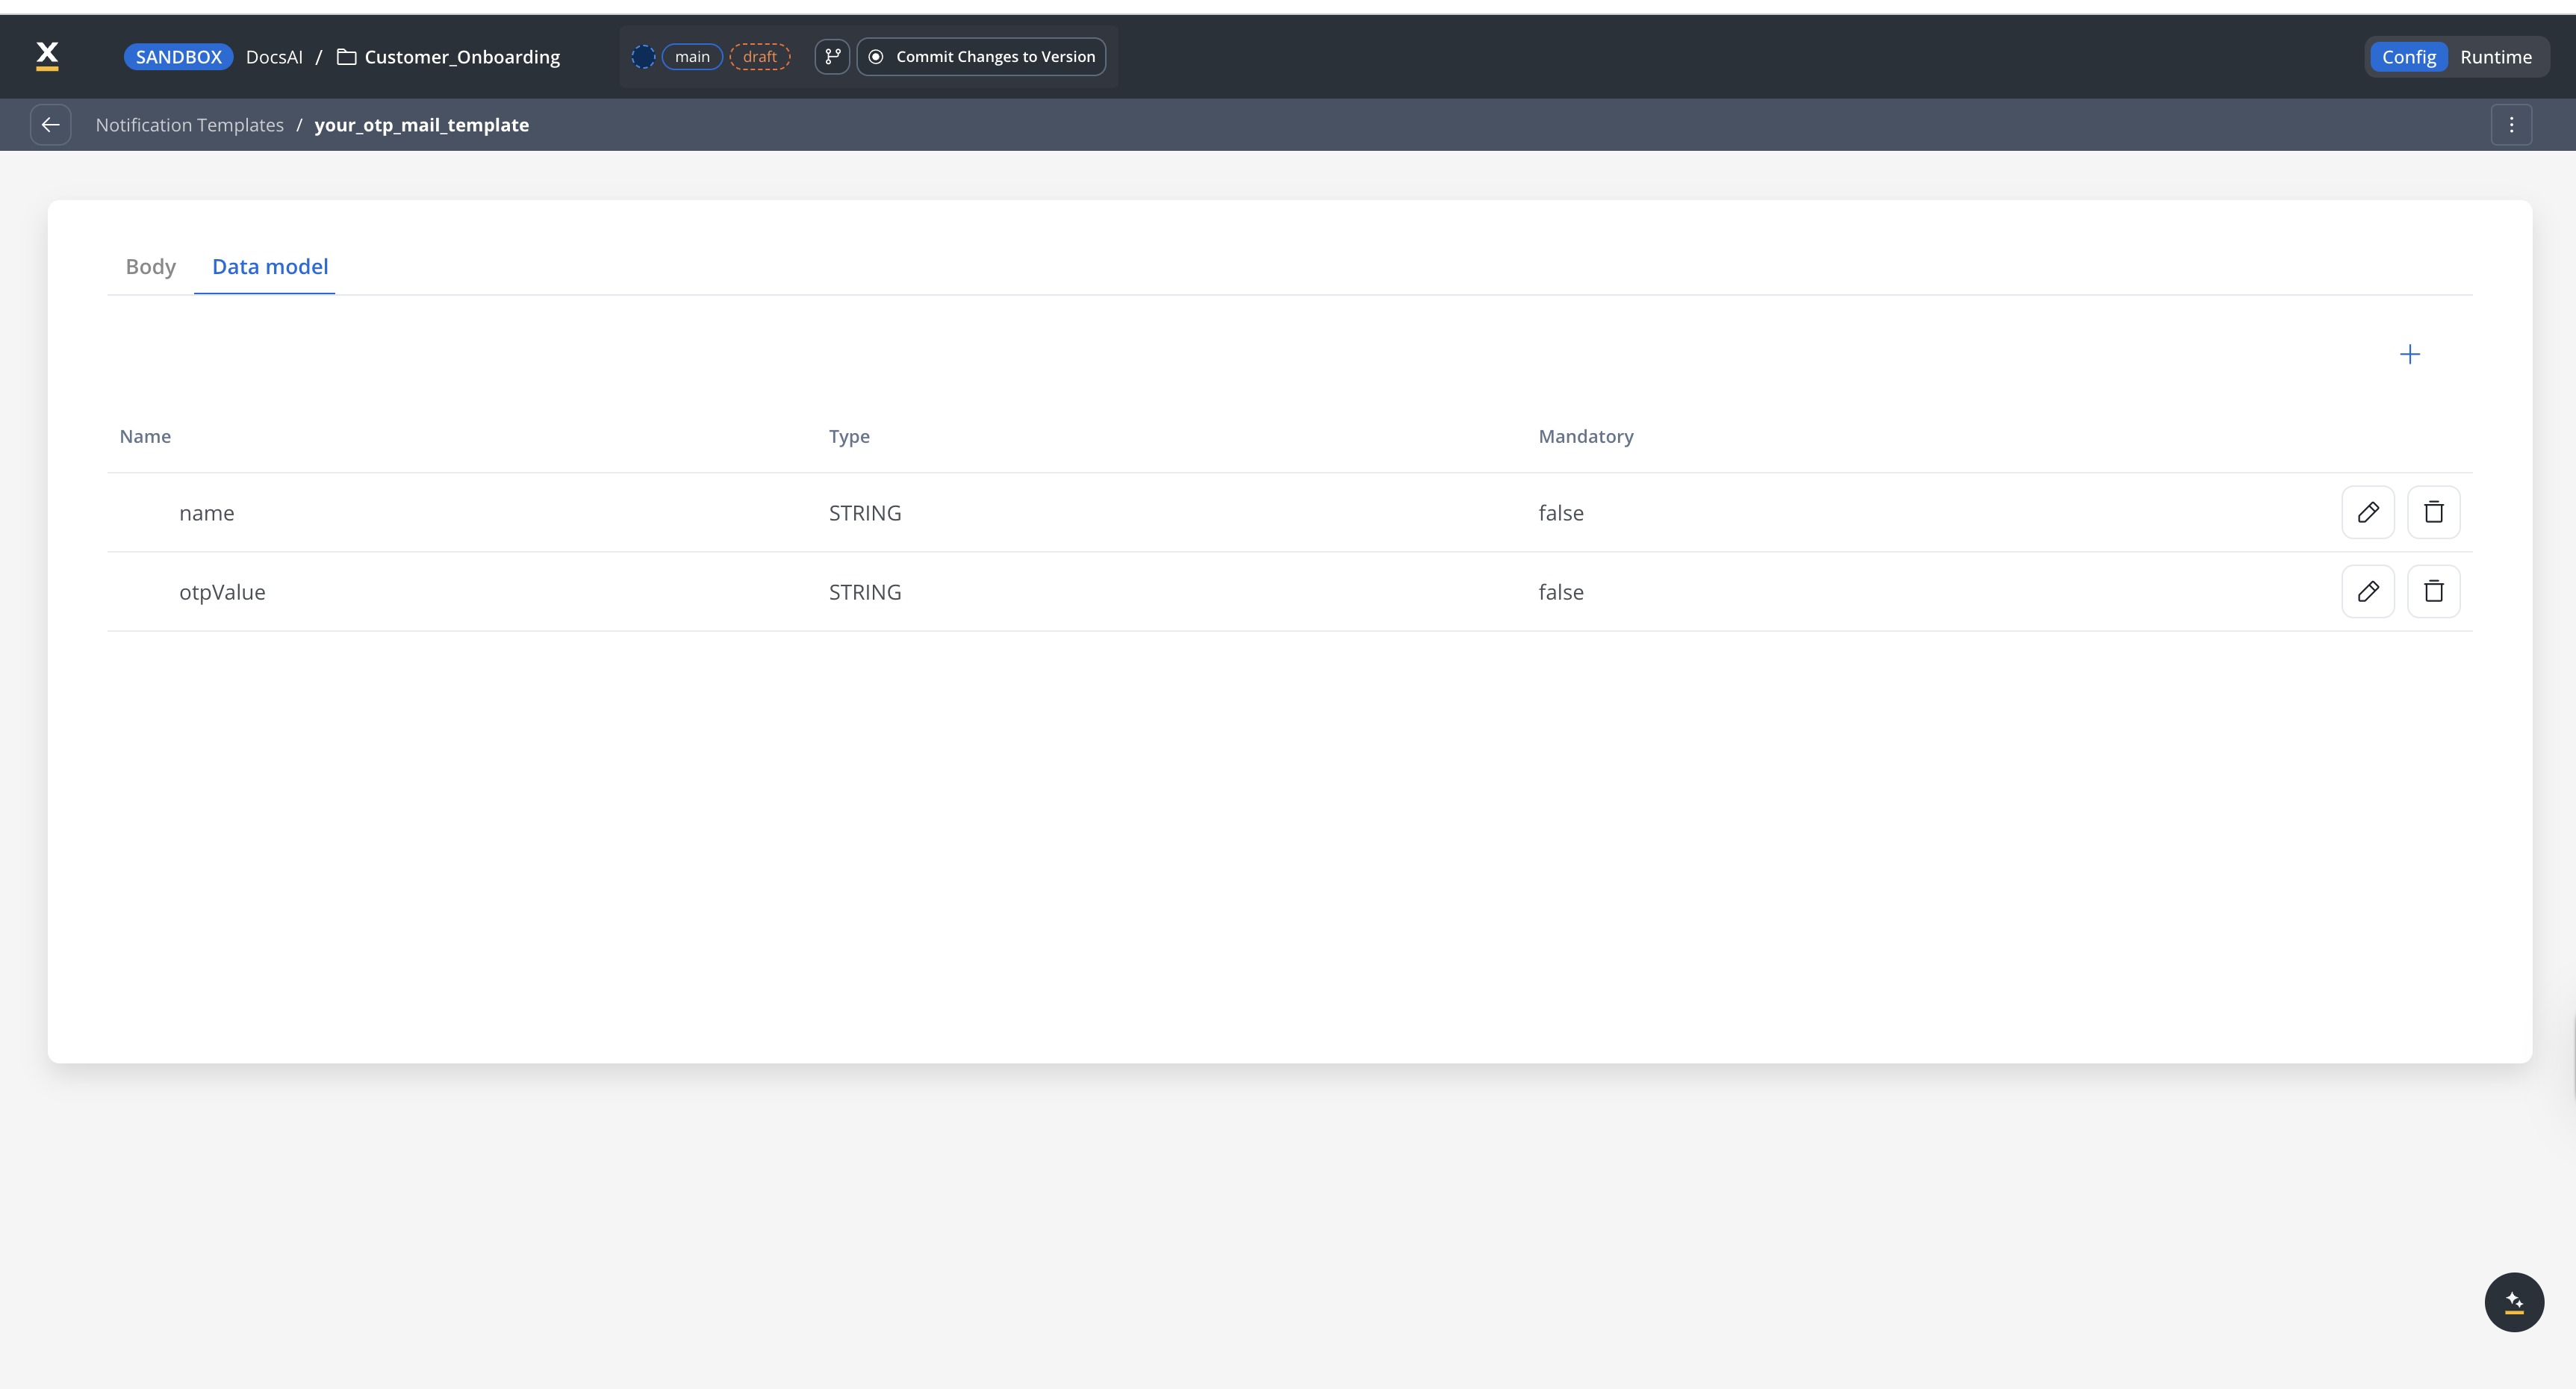
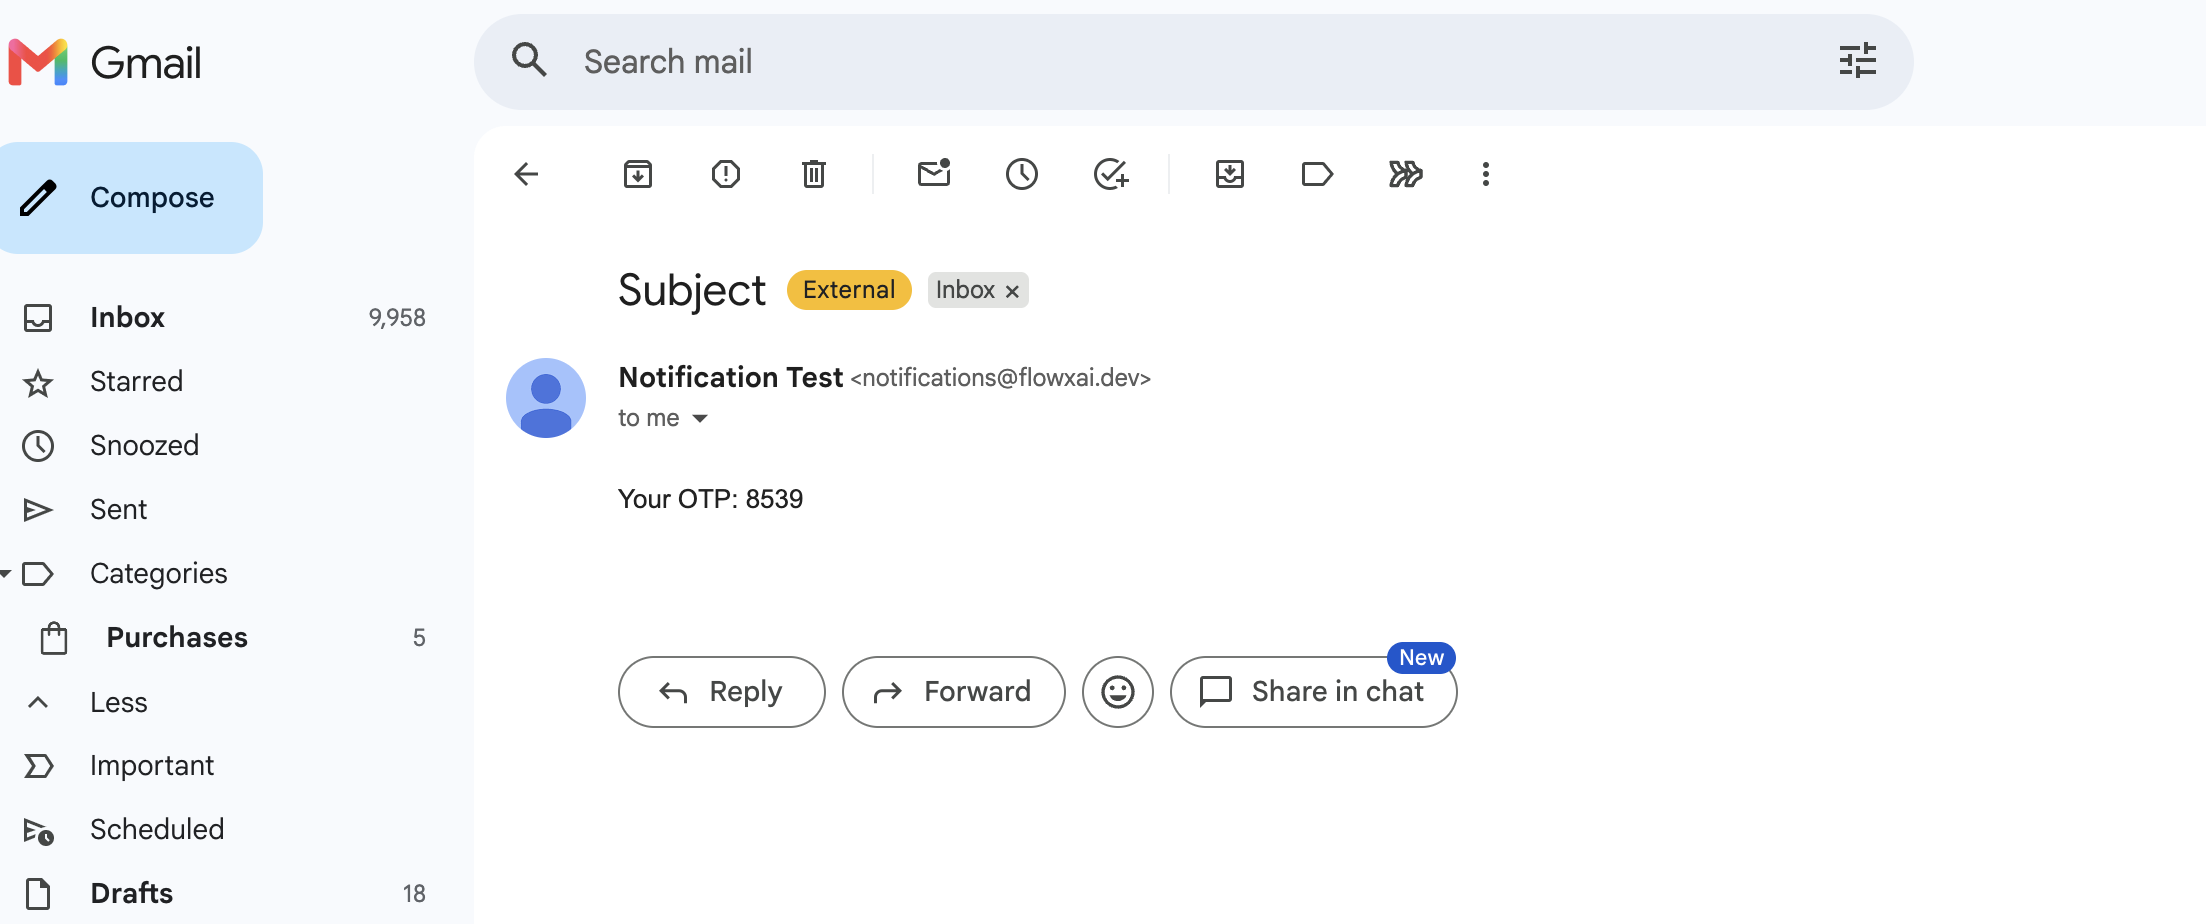
You never pass `otpValue` in the request — the plugin adds it automatically. The number of digits in the code is controlled by the `FLOWX_OTP_LENGTH` environment variable (**default:** `4`).
## Response from generate OTP
The response is sent back to the Engine on the `KAFKA_TOPIC_OTP_GENERATE_OUT` topic. The reply body holds the following values:
| Field | Description |
| ------------------- | ----------------------------------------------------------------- |
| `processInstanceId` | Process instance ID |
| `clientId` | Client identifier |
| `channel` | Notification channel used |
| `otpSent` | Confirmation whether the notification was sent: `true` or `false` |
| `error` | Error description, if any (otherwise `null`) |
```json theme={"system"}
{
"processInstanceId": 1994,
"clientId": "1871201460101",
"channel": "MAIL",
"otpSent": true,
"error": null
}
```
## Example: generate an OTP from a business flow
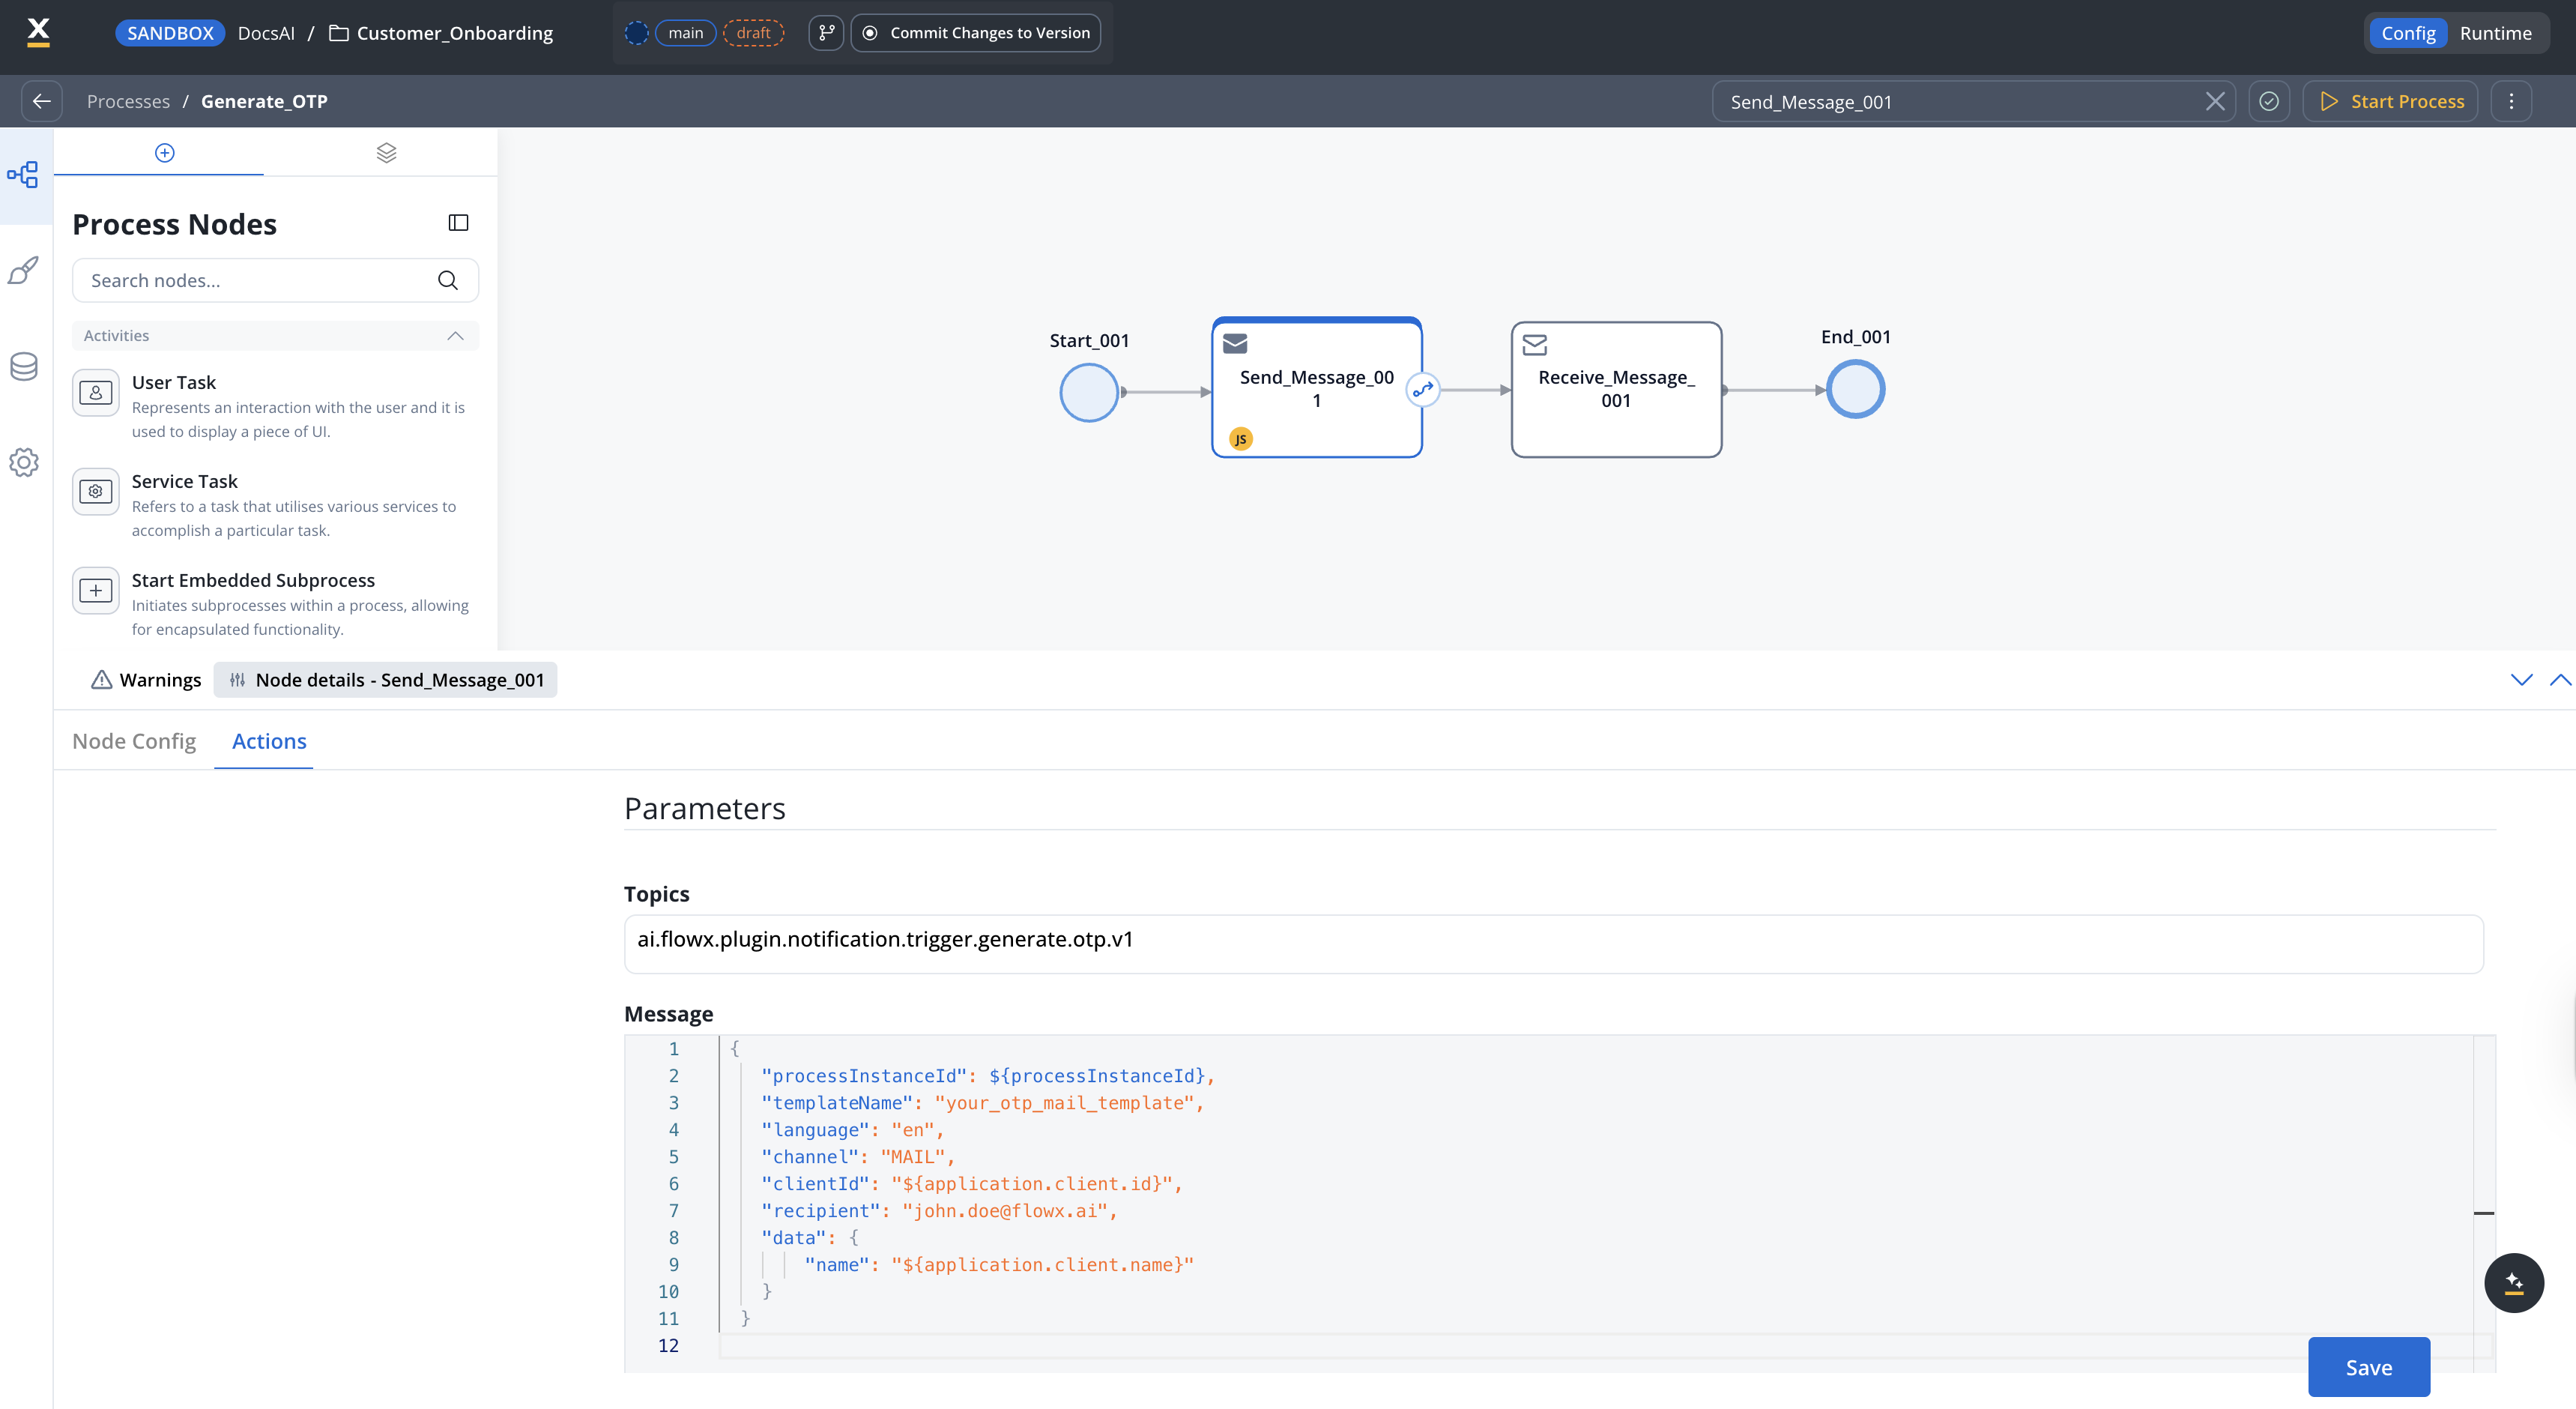
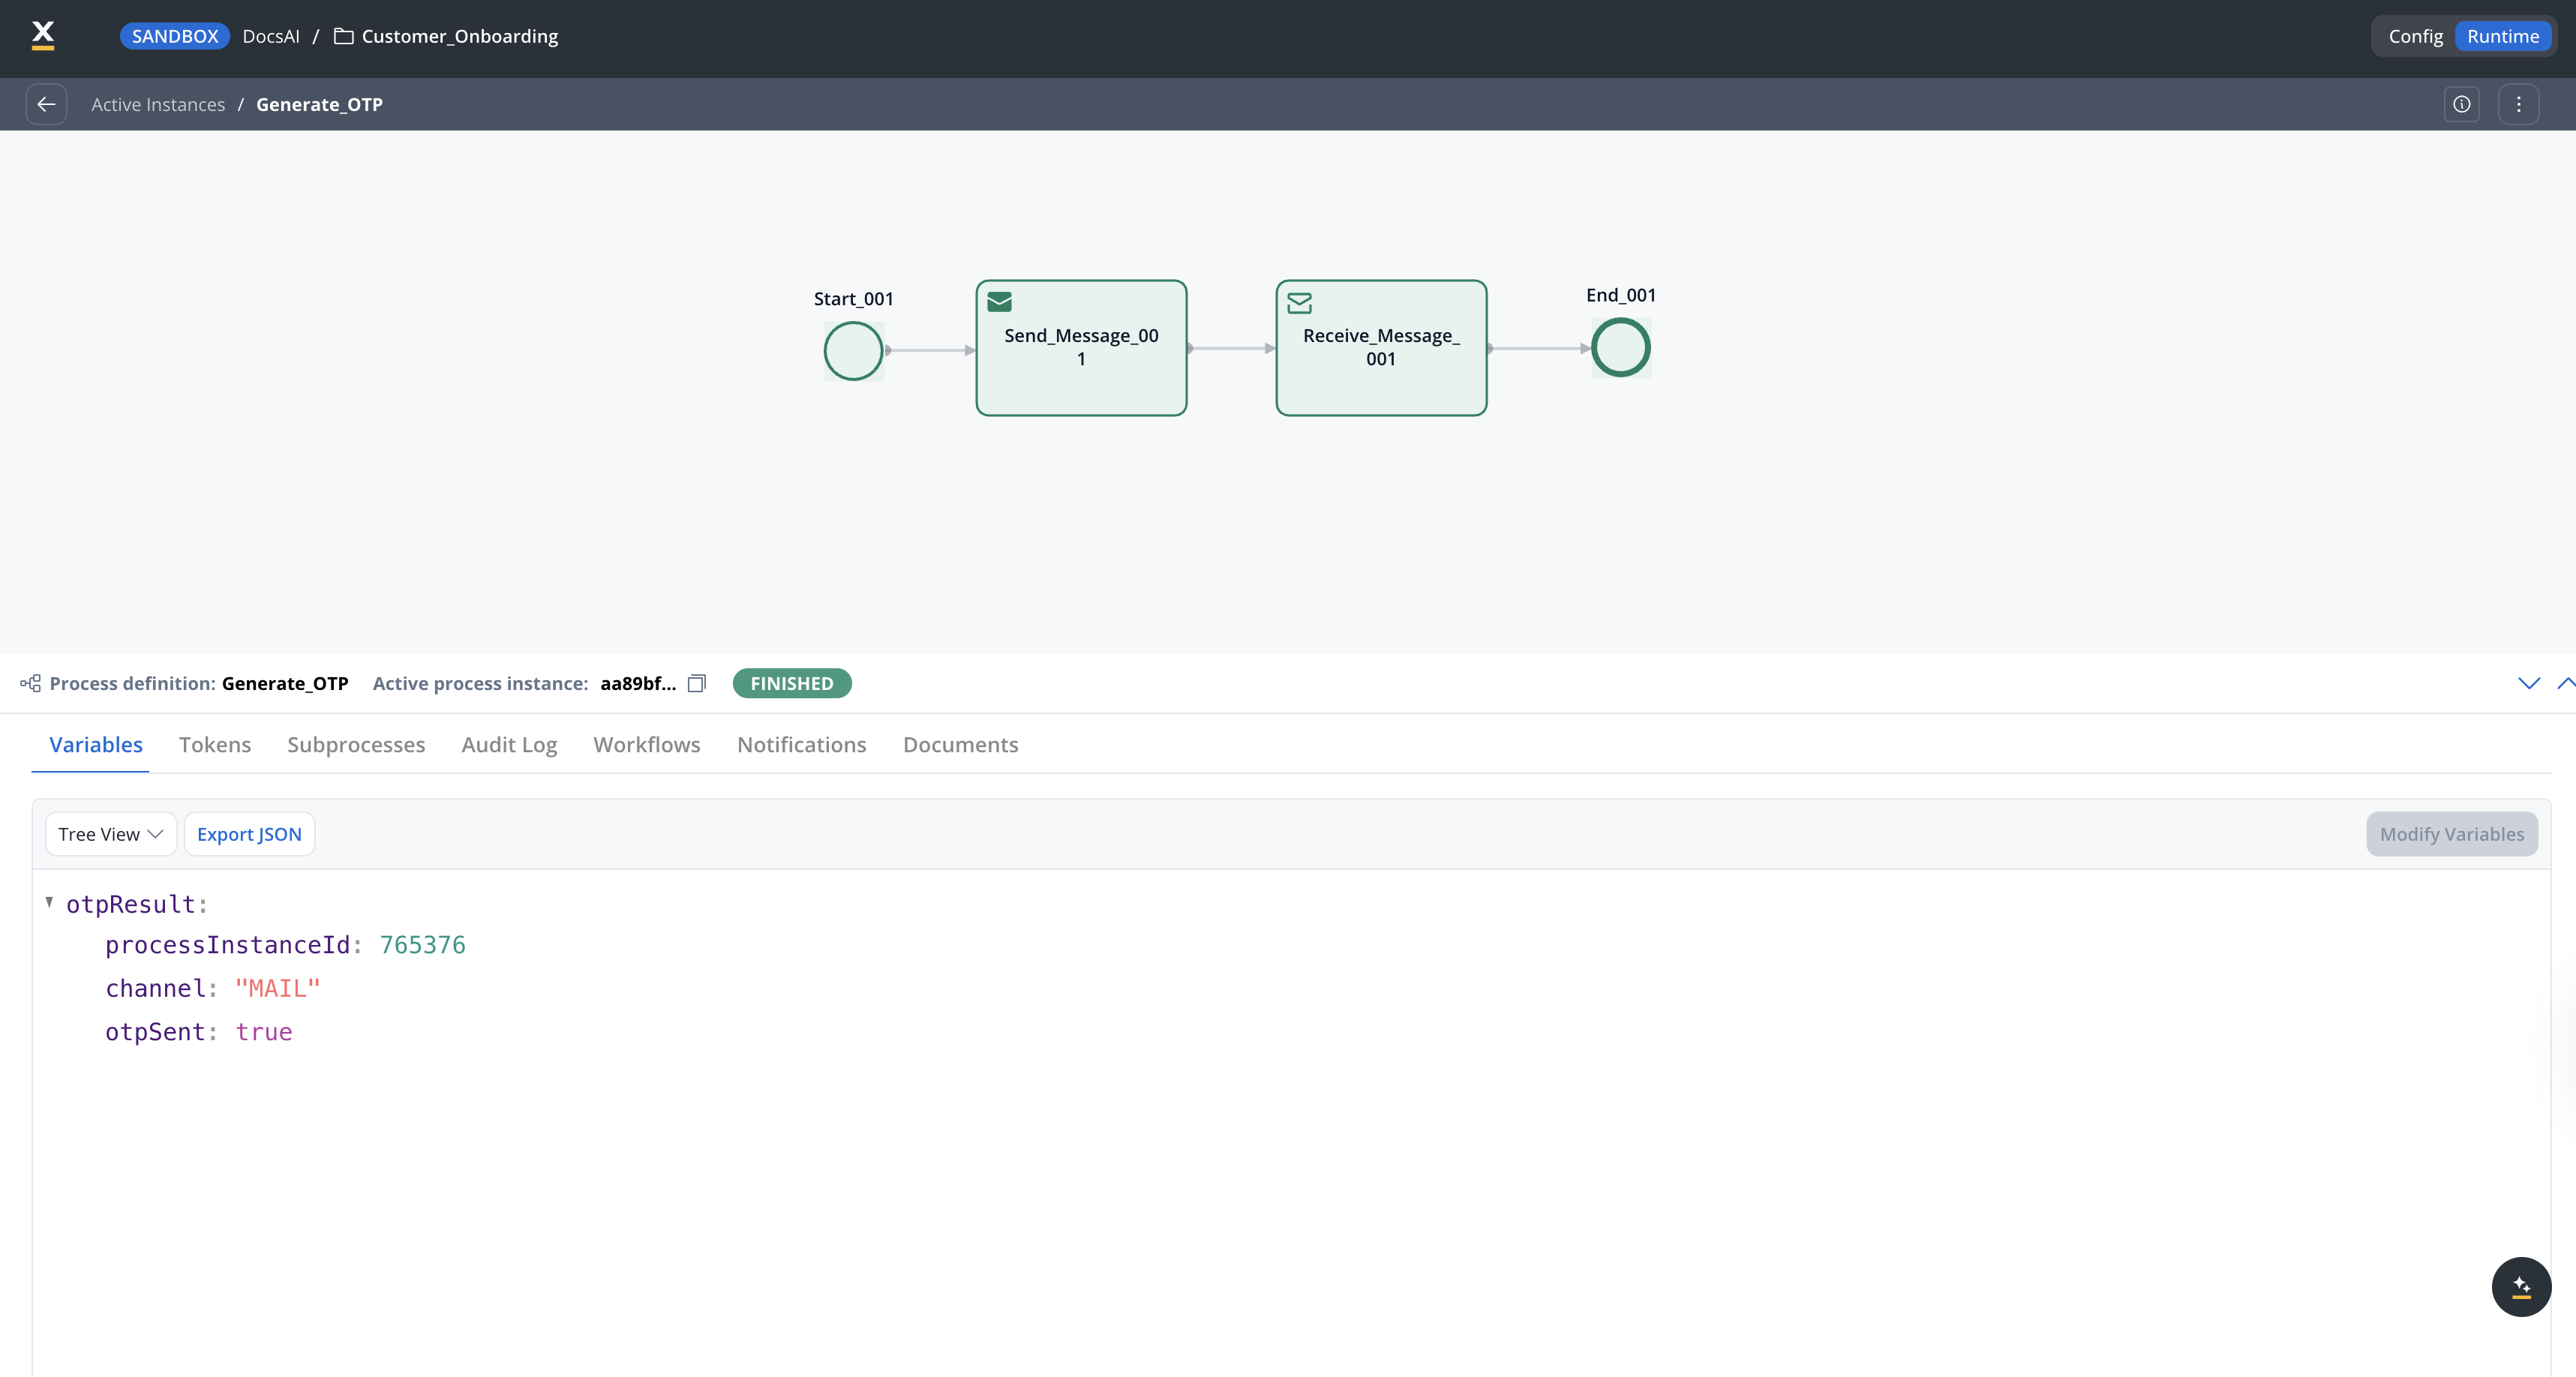
This example uses a simple process with a **Kafka send** node (to request the OTP) and a **Kafka receive** node (to capture the response):
Identify the business identifier you will use to validate the OTP (for example, a user identification number).
1. Configure the notification template that you want to use (for example, a `MAIL` template).
2. Make sure the Kafka communication through the `KAFKA_TOPIC_OTP_GENERATE_IN` topic (send the OTP request) and the topic used to receive the response (`KAFKA_TOPIC_OTP_GENERATE_OUT`) is defined properly.
You can check the defined topics by going to **FlowX Designer** → **Platform Status** → **notification-plugin-mngt** → **kafkaTopicsHealthCheckIndicator** → **details** → **configuration** → **topic** → **otp**.
3. Add a **Kafka send** action to the correct node in the process definition. Set the topic to `KAFKA_TOPIC_OTP_GENERATE_IN` and configure the message body:
4. Add a **Kafka receive** node and configure the process key where the response is stored (for example, `otpResult`).
5. When the process runs, the response lands on that key, confirming the OTP was sent:
6. The recipient receives the OTP code rendered from the notification template:
## Related topics
- [Handling OTP](/5.1/docs/platform-deep-dive/core-extensions/content-management/notifications-plugin/otp-flow/otp-flow.md)
- [Validate OTP](/5.1/docs/platform-deep-dive/core-extensions/content-management/notifications-plugin/otp-flow/validate-otp.md)
- [Notifications plugin setup](/5.1/setup-guides/notifications-plugin-setup.md)
- [Notification Templates](/5.1/docs/platform-deep-dive/core-extensions/content-management/notifications-plugin/notifications-plugin-overview.md)
- [Input field](/5.1/docs/building-blocks/ui-designer/ui-component-types/form-elements/input-form-field.md)