> ## Documentation Index
> Fetch the complete documentation index at: https://docs.flowx.ai/llms.txt
> Use this file to discover all available pages before exploring further.
# Exporting and importing projects
> Learn how to transfer projects between environments using the export and import functionality in FlowX.AI Designer.
Moving projects between environments is a common requirement in enterprise software development. FlowX.AI provides robust export and import functionality to help you promote your projects from development to testing and production environments.
In recent versions of FlowX.AI, the export/import functionality has moved from the process definition level to the project level, allowing for more comprehensive and consistent transfers between environments.
## Project vs. process export/import
Modern versions of FlowX.AI use **project-level** export and import operations rather than process-level ones. This approach ensures that all related resources, dependencies, and configurations are transferred together, maintaining the integrity of your application.
This documentation covers the updated project export/import approach. If you're using an older version of FlowX.AI that still handles exports at the process definition level, some details may differ.
## Exporting a project
1. Open **FlowX.AI Designer** and go to the **Projects** section
2. Select the project you want to export
1. Open the project actions menu (typically a three-dot or "More" icon)
2. Select the **Export** option
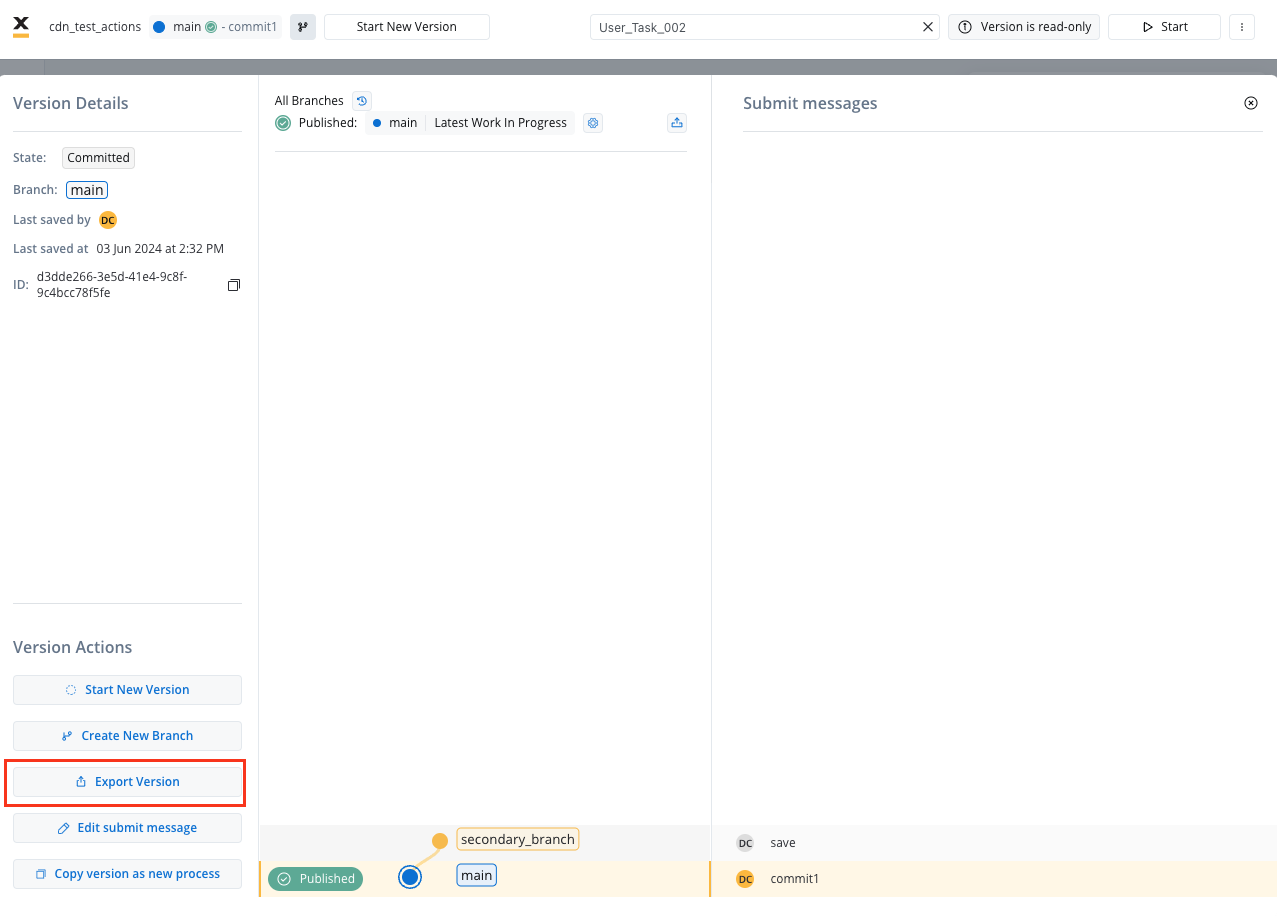
The screenshot above shows the legacy process export UI. The project export interface may look different but follows similar principles.
Depending on your version, you may have options to:
1. Export the entire project or specific versions
2. Include or exclude certain resources
3. Select dependency handling options
1. Click the **Export** button to generate the export package
2. The system will create a downloadable file containing your project
3. Save this file to your local system
Use a clear naming convention for your export files to help identify their contents later, such as `[project-name]_[version]_[environment]_[date].zip`.
## Importing a project
1. Open **FlowX.AI Designer** in the target environment
2. Go to the **Projects** section
1. Look for an **Import Project** or similar button
2. Click this button to start the import process
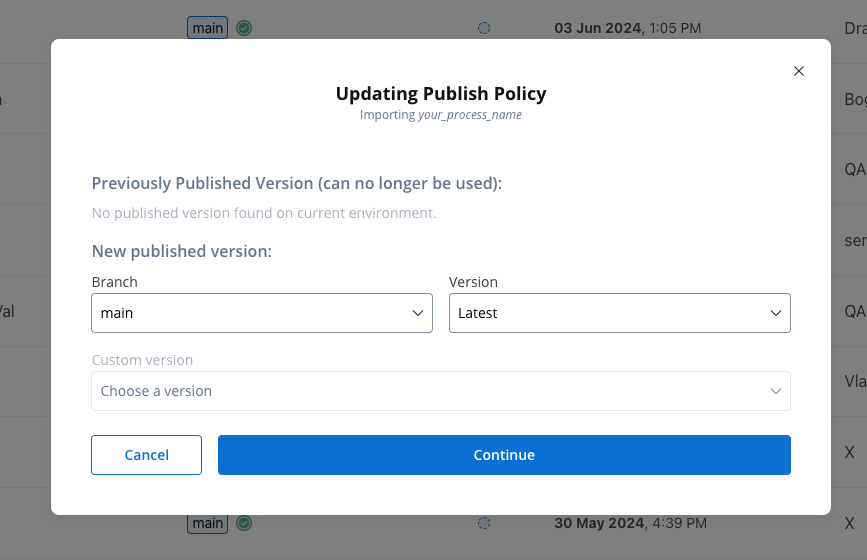
1. The system will open a file browser dialog
2. Navigate to and select your previously exported file
3. Click **Open** or **Select** to proceed
Before completing the import, the system will display information about what's being imported:
1. Project details and versions
2. Potential conflicts with existing content
3. Dependency status
Pay careful attention to any warnings about version conflicts or missing dependencies, as these might require manual resolution.
1. Review all information carefully
2. Make any necessary adjustments to import options
3. Click **Import** or **Confirm** to complete the process
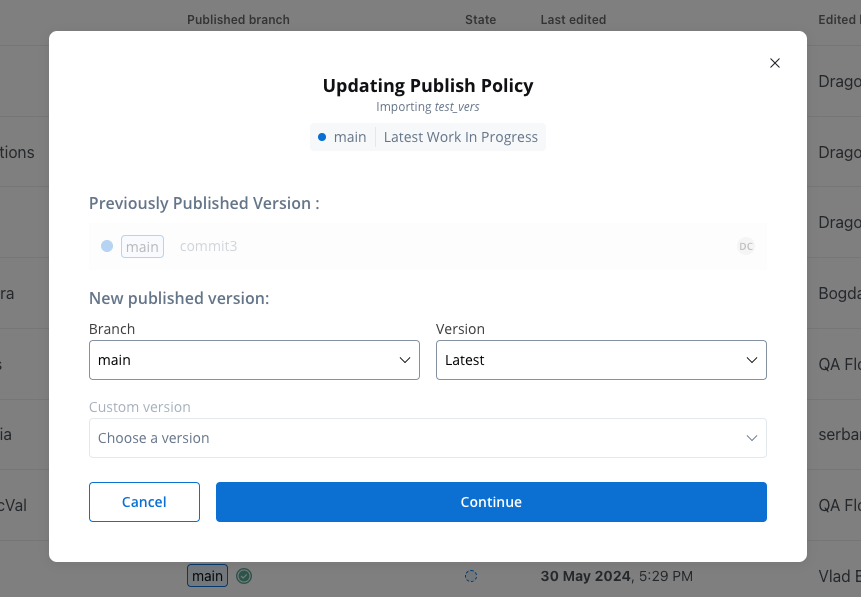
## Import scenarios
When importing a project, you may encounter different scenarios depending on whether the project already exists in the target environment and what versions are present.
### New project import
If the project does not exist in the target environment, it will be created with all its resources, and you'll see all versions from the export file.

### Existing project with no additional versions
If the project exists but doesn't have versions beyond those in the import file, the system will update the existing project with any changes from the import file.
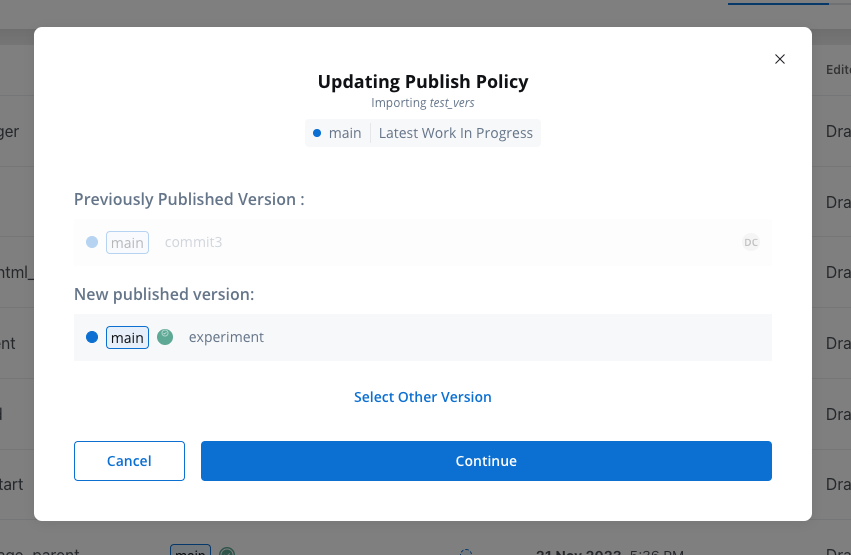
### Existing project with additional versions
If the target environment has versions not present in the import file, or if versions have diverged, you'll need to resolve these conflicts during import.
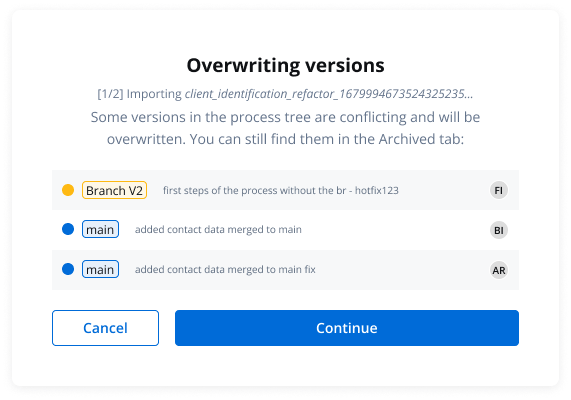
Be cautious when overwriting versions, as this can impact any running processes or deployed applications that use those versions.
## Best practices for export/import
**When transferring projects between environments:**
* **Plan your promotion path** - Establish a clear workflow for moving from development to testing to production
* **Use consistent naming** - Name your projects, versions, and export files consistently across environments
* **Document dependencies** - Keep track of dependencies between projects and libraries
* **Test after import** - Always validate your project in the new environment after import
* **Version control** - Consider using external version control systems in addition to FlowX.AI's built-in versioning
* **Incremental imports** - For large projects, consider importing incrementally rather than all at once
* **Backup before import** - Always back up the target environment before performing significant imports
## Common issues and solutions
**Issue**: Import fails due to version incompatibility between environments.
**Solution**: Ensure all environments are running compatible versions of FlowX.AI. If necessary, upgrade the older environment before attempting import.
**Issue**: Imported project references libraries or resources not present in the target environment.
**Solution**: Export and import dependencies first, or update the project to use dependencies available in the target environment.
**Issue**: Conflicts between imported versions and existing versions.
**Solution**: Carefully review the differences and decide whether to overwrite or preserve existing versions. Consider merging changes manually for complex conflicts.
**Issue**: Hard-coded environment-specific values in processes or configurations.
**Solution**: Use environment variables and configuration parameters instead of hard-coded values to ease transitions between environments.
## Next steps
After importing your project, you should:
Ensure all process definitions, UI components, and other resources imported correctly
Adjust any environment-specific settings for the new environment
Validate that all process flows work as expected in the new environment
Create a build from your imported project for deployment
## Related topics
- [Themes](/4.7.x/docs/flowx-designer/design-assets/themes.md)
- [Reporting plugin](/4.7.x/docs/platform-deep-dive/plugins/custom-plugins/reporting/reporting-overview.md)
- [Enumerations](/4.7.x/docs/platform-deep-dive/core-extensions/content-management/enumerations.md)
- [Using allocation rules](/4.7.x/docs/platform-deep-dive/core-extensions/task-management/using-allocation-rules.md)
- [Scheduled processes](/4.7.x/docs/projects/runtime/scheduled-processes.md)