> ## Documentation Index
> Fetch the complete documentation index at: https://docs.flowx.ai/llms.txt
> Use this file to discover all available pages before exploring further.
# Send data to user interface
> Send data to user interface action is based on Server-Sent Events (SSE), a web technology that enables servers to push real-time updates or events to clients over a single, long-lived HTTP connection. It provides a unidirectional communication channel from the server to the client, allowing the server to send updates to the client without the need for the client to continuously make requests.
**Why is it useful?** It provides real-time updates and communication between the **process** and the frontend application.
## Configuring a Send data to user interface action
Multiple options are available for this type of action and can be configured via the **FlowX Designer**. To configure a Send data to user interface, use the **Actions** tab at the [task node level](../../flowx-designer/managing-a-project-flow/adding-a-new-node), which has the following configuration options:
* [Action Edit](#action-edit)
* [Back in steps (for Manual actions)](#back-in-steps)
* [Parameters](#parameters)
* [Data to send (for Manual actions)](#data-to-send)
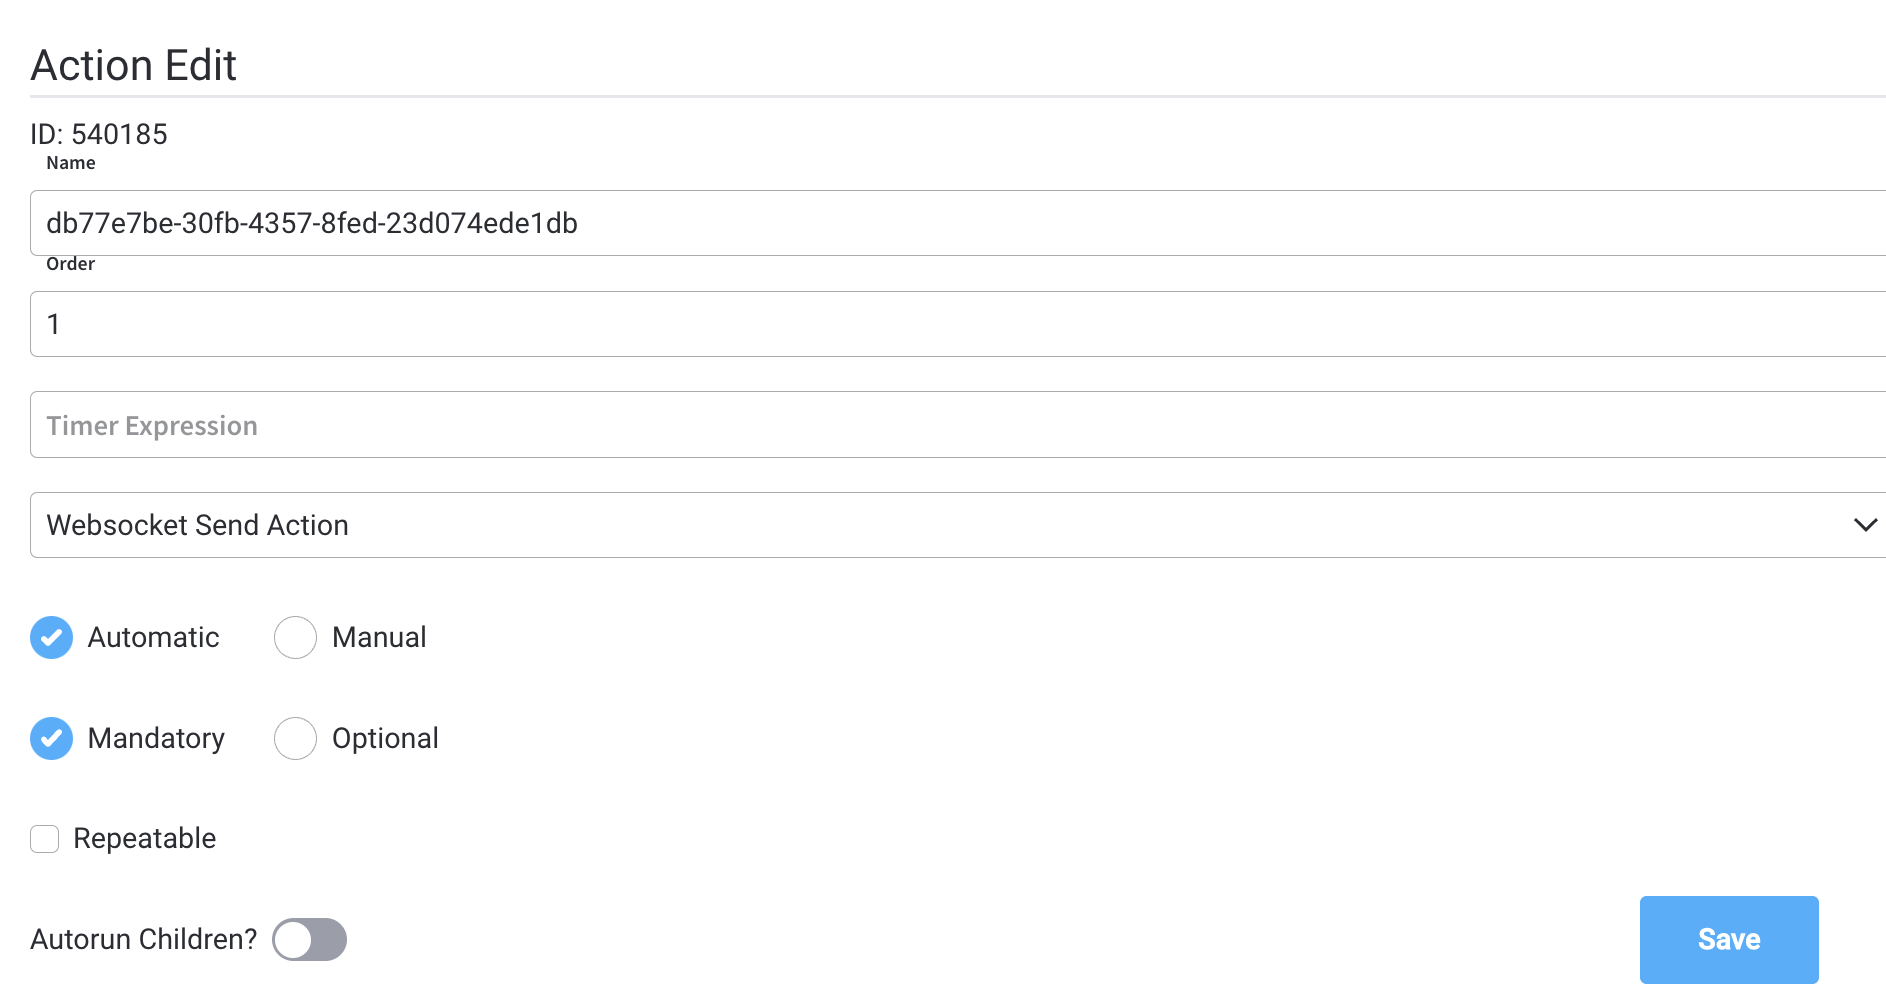
### Action Edit
* **Name** - used internally to make a distinction between different actions on nodes in the process. We recommend defining an action naming standard to be able to quickly find the process actions
* **Order** - if multiple actions are defined on the same node, the running order should be set using this option
* **Timer expression** - it can be used if a delay is required on that action. The format used for this is [**ISO 8601 duration format**](https://www.w3.org/TR/NOTE-datetime) (for example, a delay of 30 seconds will be set up as `PT30S`)
* **Action type** - should be set to Send data to user interface
* **Trigger type** (options are Automatic/Manual) - choose if this action should be triggered automatically (when the process flow reaches this step) or manually (triggered by the user); in most use cases, this will be set to automatic
* **Required type** (options are Mandatory/Optional) - automatic actions can only be defined as mandatory. Manual actions can be defined as mandatory or optional.
* **Repeatable** - should be checked if the action can be triggered multiple times
* **Autorun Children** - when this is switched on, the child actions (the ones defined as mandatory and automatic) will run immediately after the execution of the parent action is finalized
### Back in steps
* **Allow BACK on this action** - back in process is a functionality that allows you to go back in a business process and redo a series of previous actions in the process. For more details, check [Moving a token backwards in a process](../../flowx-designer/managing-a-project-flow/moving-a-token-backwards-in-a-process) section.
### Parameters
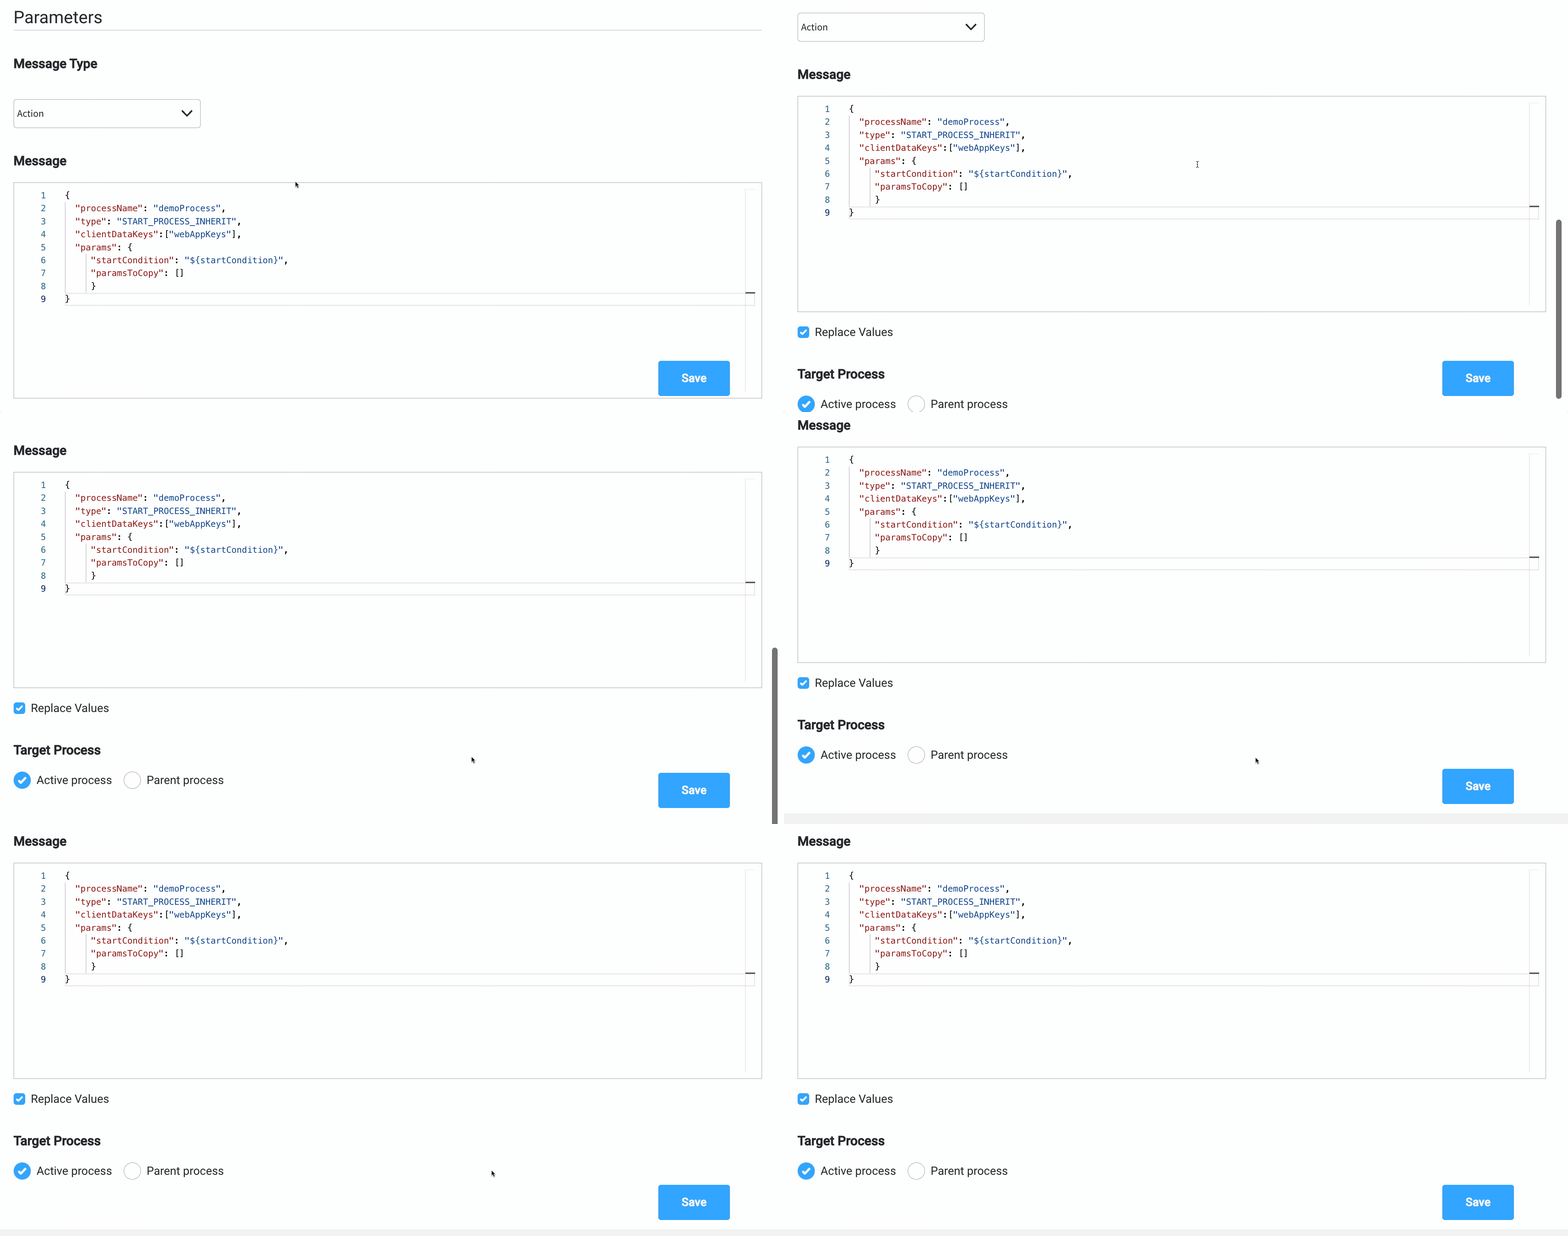
The following fields are required for a minimum configuration of this type of action:
* **Message Type** - if you only want to send data, you can set this to **Default** (it defaults to the **data** message type)
If you need to start a new process using a **Send data to user interface**, you can do that by setting the **Message Type** to **Action** and you will need to define a **Message** with the following format:
```json theme={"dark"}
{
"processName": "demoProcess",
"type": "START_PROCESS_INHERIT",
"clientDataKeys":["webAppKeys"],
"params": {
"startCondition": "${startCondition}",
"paramsToCopy": []
}
}
```
* `paramsToCopy` - choose which of the keys from the parent process parameters to be copied to the subprocess
* `withoutParams` - choose which of the keys from the parent process parameters are to be ignored when copying parameter values from the parent process to the subprocess
* **Message** - here you define the data to be sent as a JSON object, you can use constant values and values from the process instance data.
* **Target Process** - is used to specify to what running process instance should this message be sent - **Active process** or **Parent process**
If you are defining this action on a [**Call activity node**](../node/call-subprocess-tasks/call-activity-node), you can send the message to the parent process using **Target Process: Parent process**.
### Data to send
* **Keys** - are used when data is sent from the frontend via an action to validate the data (you can find more information in the [User task configuration](../node/user-task-node) section)
**Data to send** option is configurable only when the action **trigger type** is **Manual**.
### Send update data example
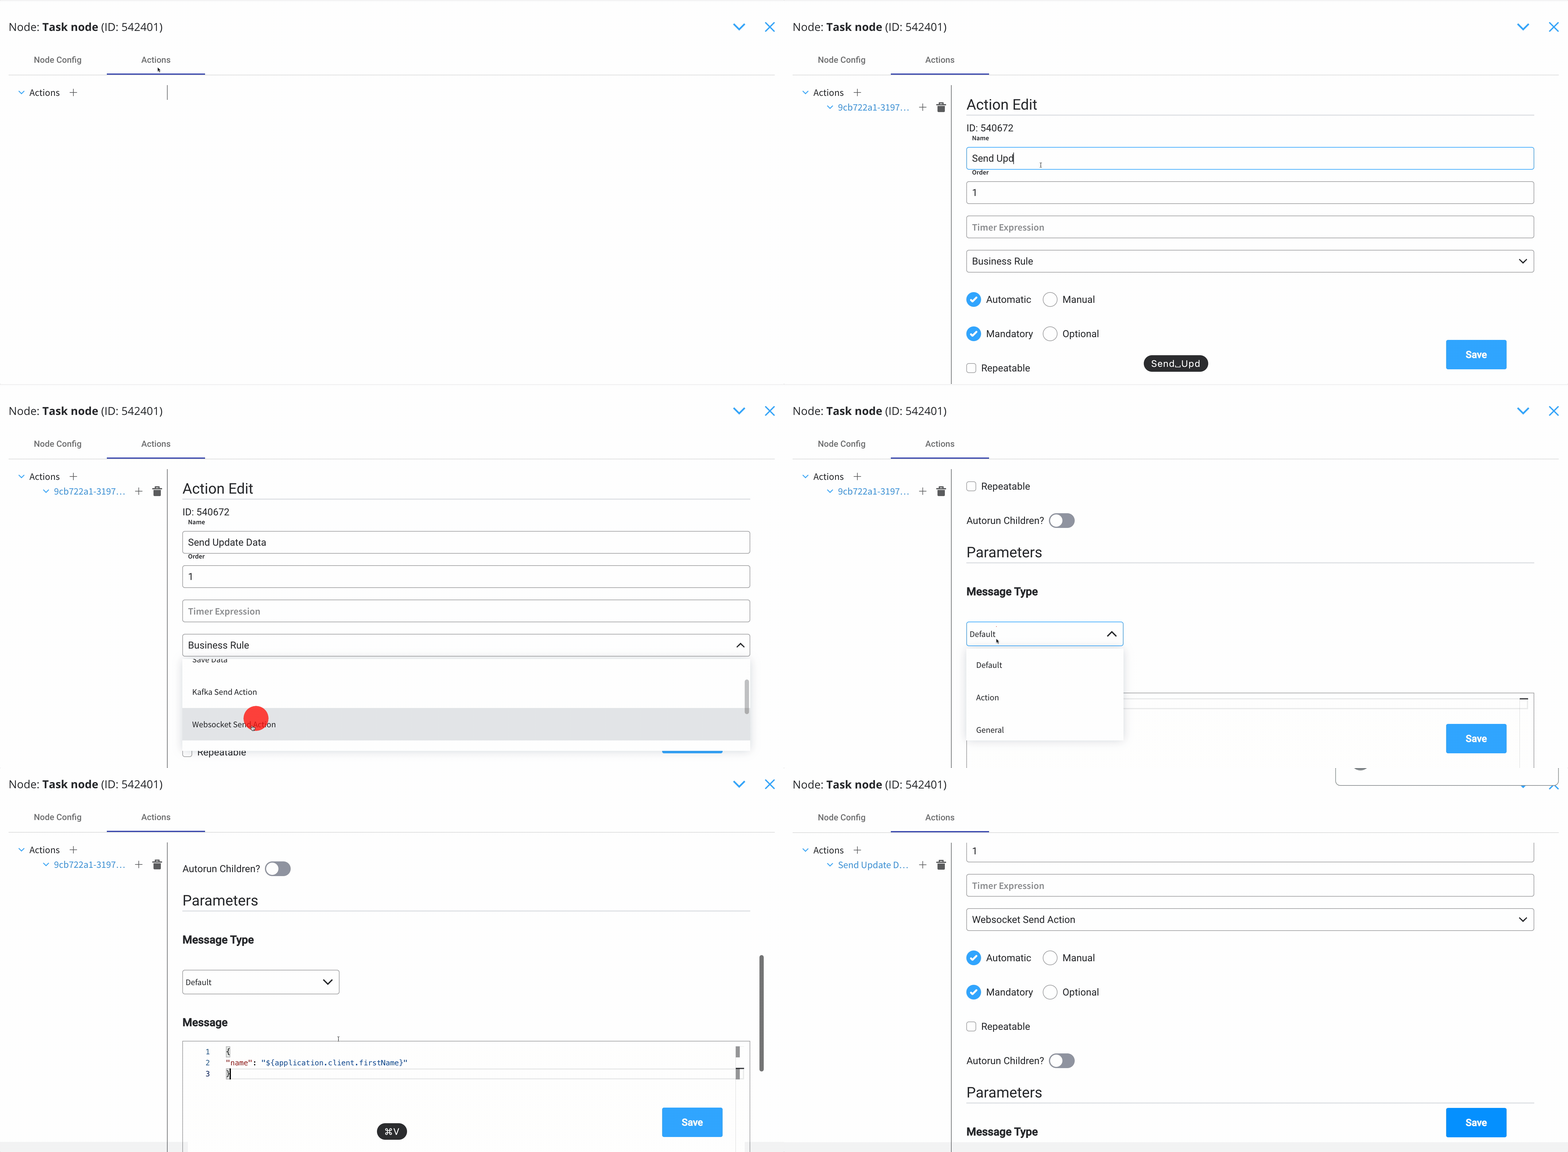
To send the latest value from the [process instance](../../projects/runtime/active-process/process-instance) data found at `application.client.firstName` key, to the frontend app, you can do the following:
1. Add a **Send data to user interface**.
2. Set the **Message Type** to **Default** (this is default value for `data`).
3. Add a **Message** with the data you want to send:
* `{ "name": "${application.client.firstName}" }`
4. Choose the **Target Process**.
## Related topics
- [Creating and uploading a new document](/4.7.x/docs/platform-deep-dive/plugins/custom-plugins/documents-plugin/uploading-a-new-document.md)
- [Task node](/4.7.x/docs/building-blocks/node/task-node.md)
- [Adding an action to a node](/4.7.x/docs/flowx-designer/managing-a-project-flow/adding-an-action-to-a-node.md)
- [Adding a new node](/4.7.x/docs/flowx-designer/managing-a-project-flow/adding-a-new-node.md)
- [Node actions](/4.7.x/docs/building-blocks/actions/actions.md)