> ## Documentation Index
> Fetch the complete documentation index at: https://docs.flowx.ai/llms.txt
> Use this file to discover all available pages before exploring further.
# Using allocation rules
> Allocation rules are meant to define when tasks should be auto-assigned to users when they reach a swimlane that has a specific role configured (for example, specific tasks will be assigned for the _front office_ and specific tasks for the _back office_ only).
Tasks will always be allocated depending on the users load (number of tasks) from current/other processes. If there are two or more users with the same number of assigned tasks, the task will be randomly assigned to one of them.
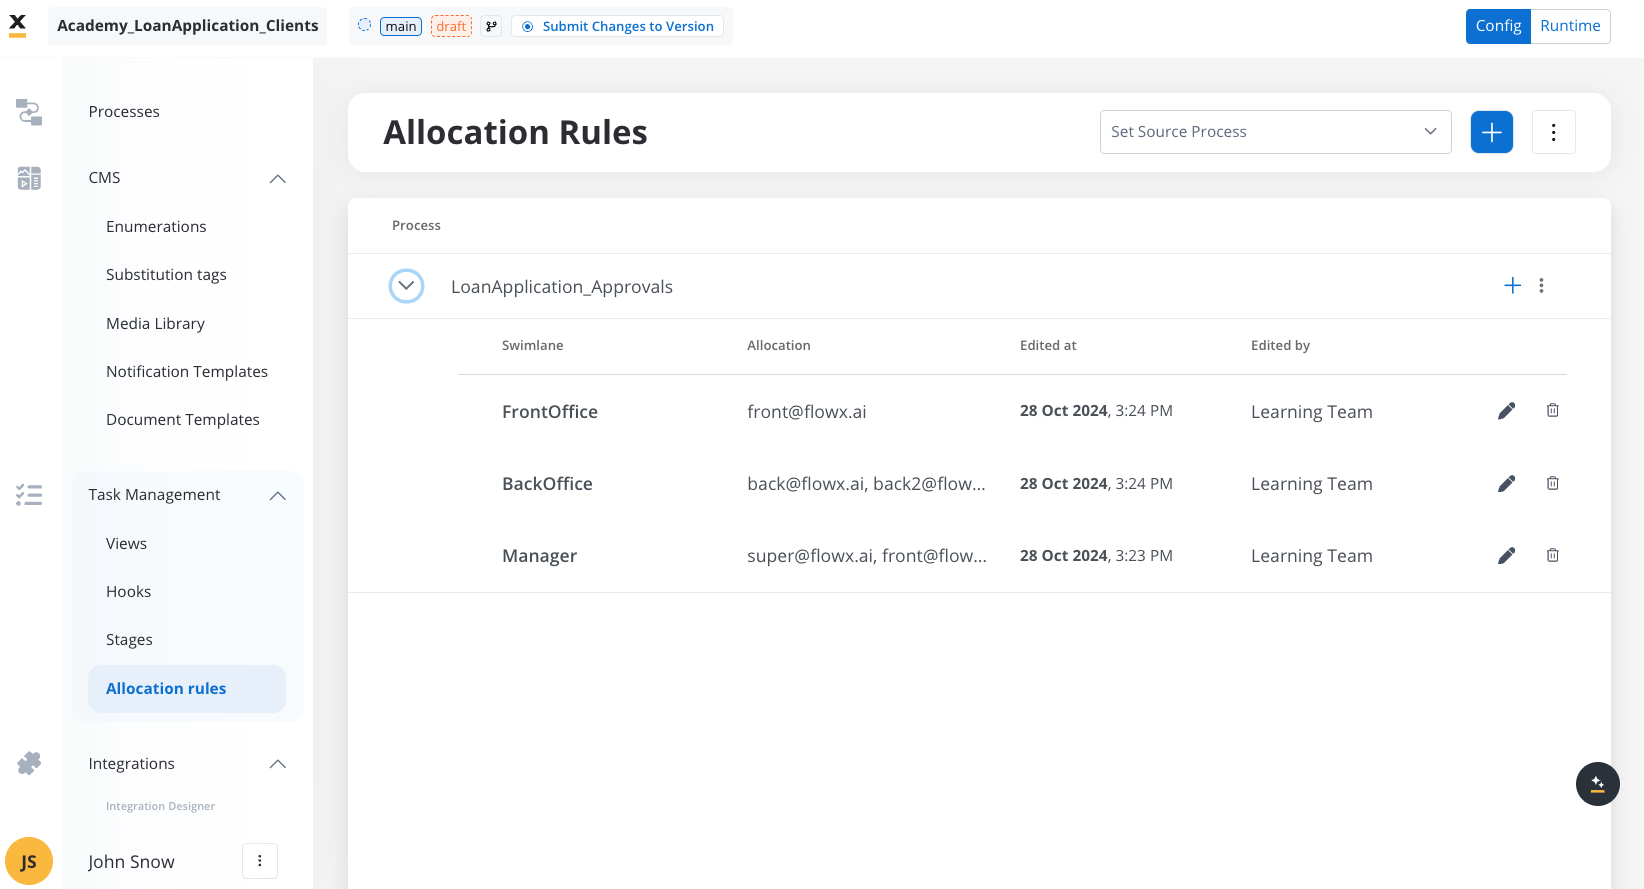
## Accessing allocation rules
To access the allocation rules, follow the next steps:
1. Open **FlowX Designer**.
2. Go to your **Application** and from the side menu, under **Task Management**, select the **Allocation rules** entry.
## Adding process and allocation rules
To add process and allocation rules, follow the next steps:
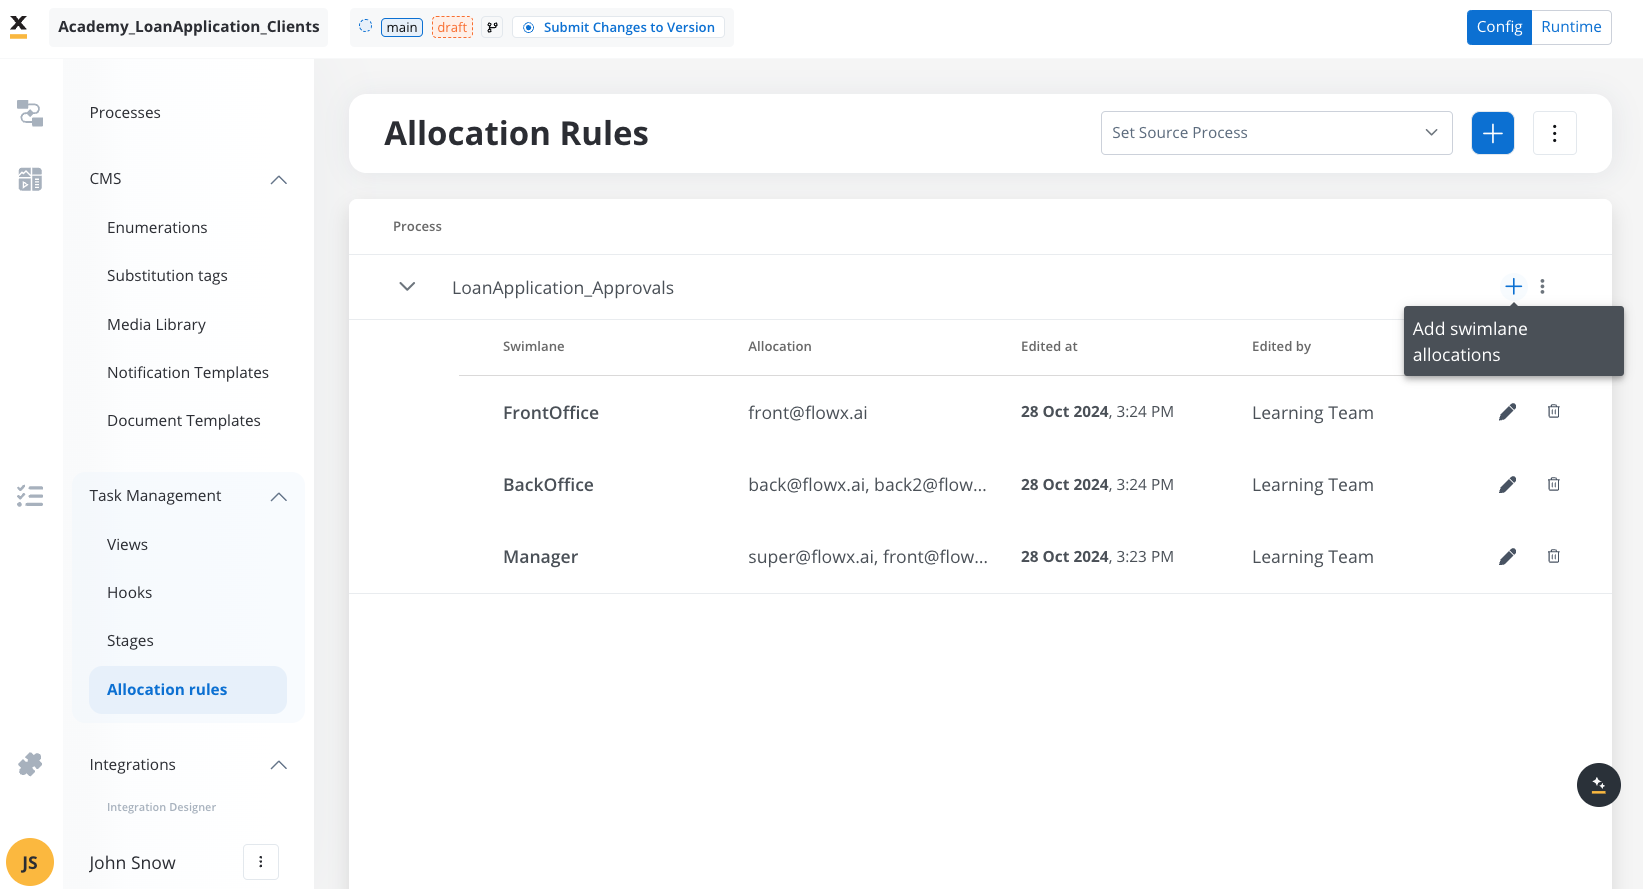
1. Click **Add process** button, in the top-right corner.

2. Select a [**process definition**](../../../building-blocks/process/process-definition) from the drop-down list.
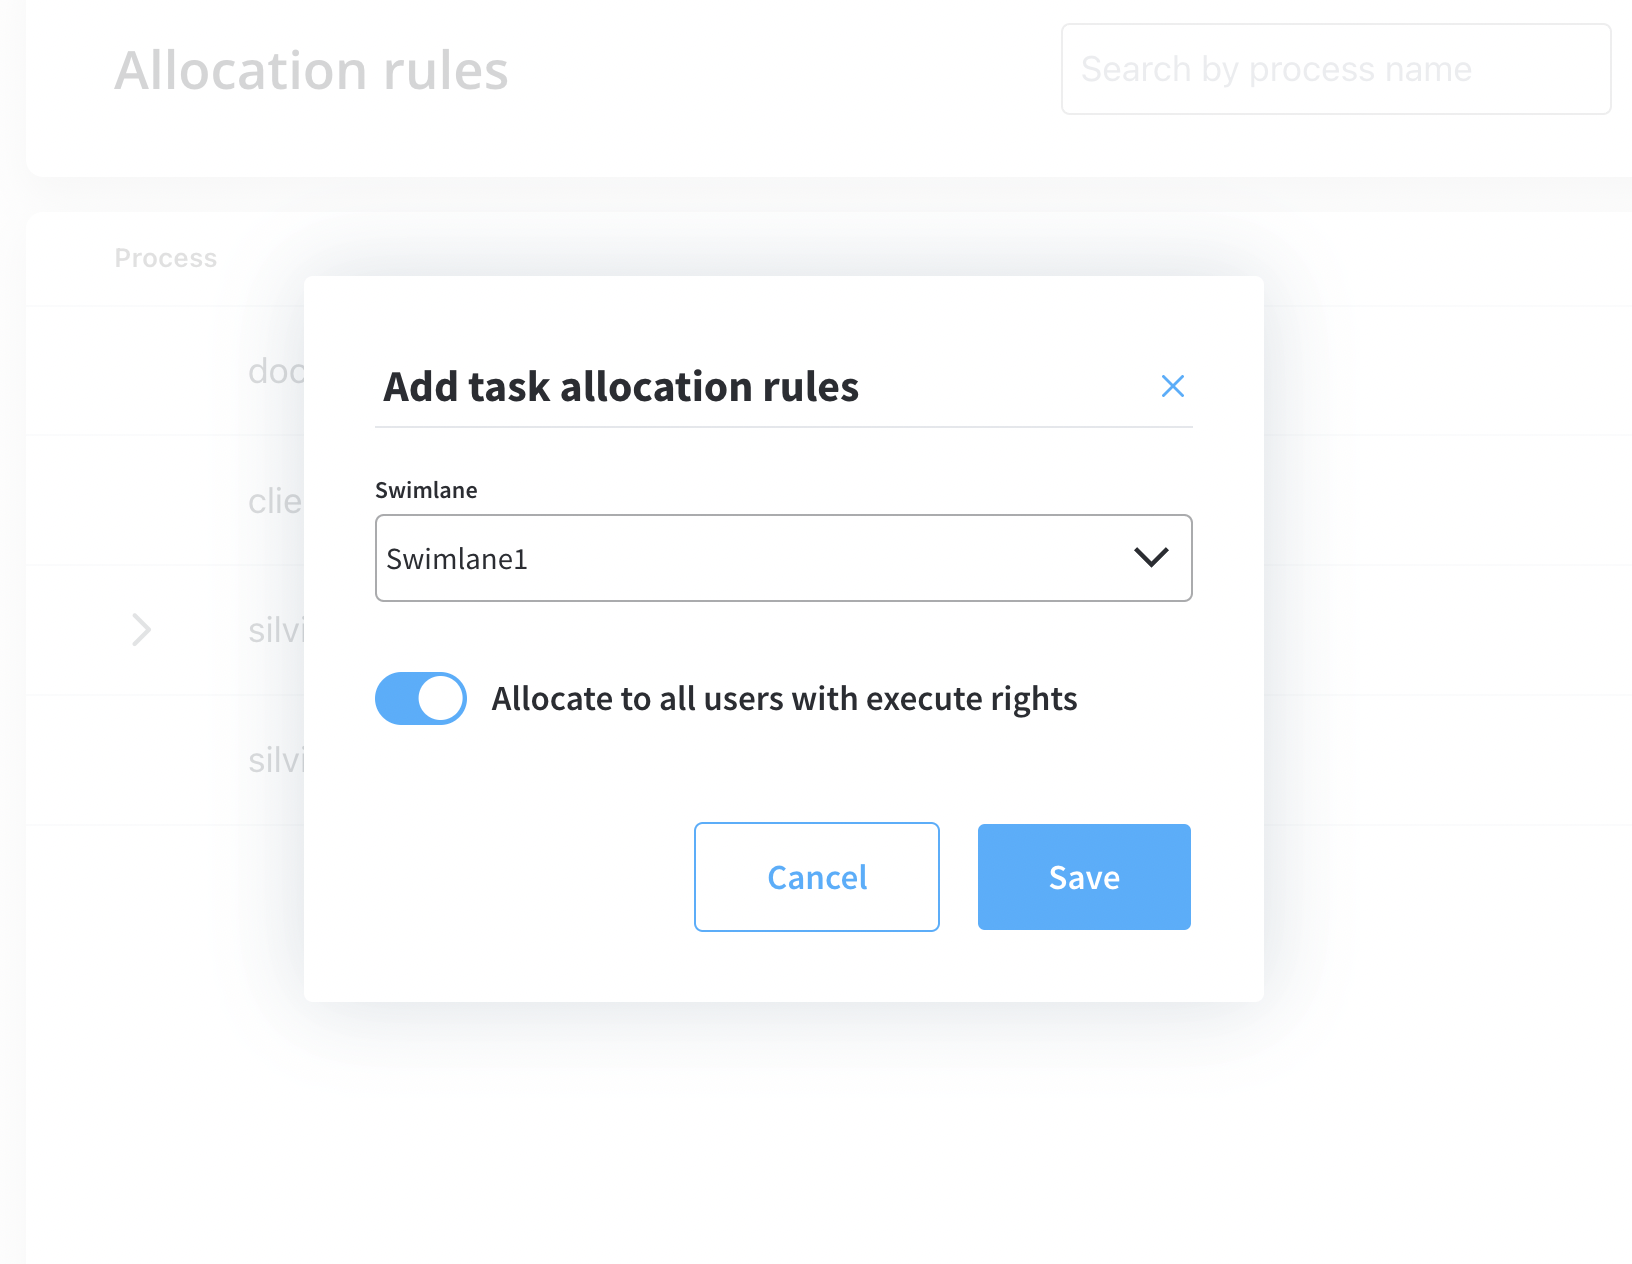
3. Click **Add swimlane allocations button (+)** to add allocations.
If there are no users with execute rights in the swimlane you want to add (`hasExecute: false`), the following error message will be displayed:
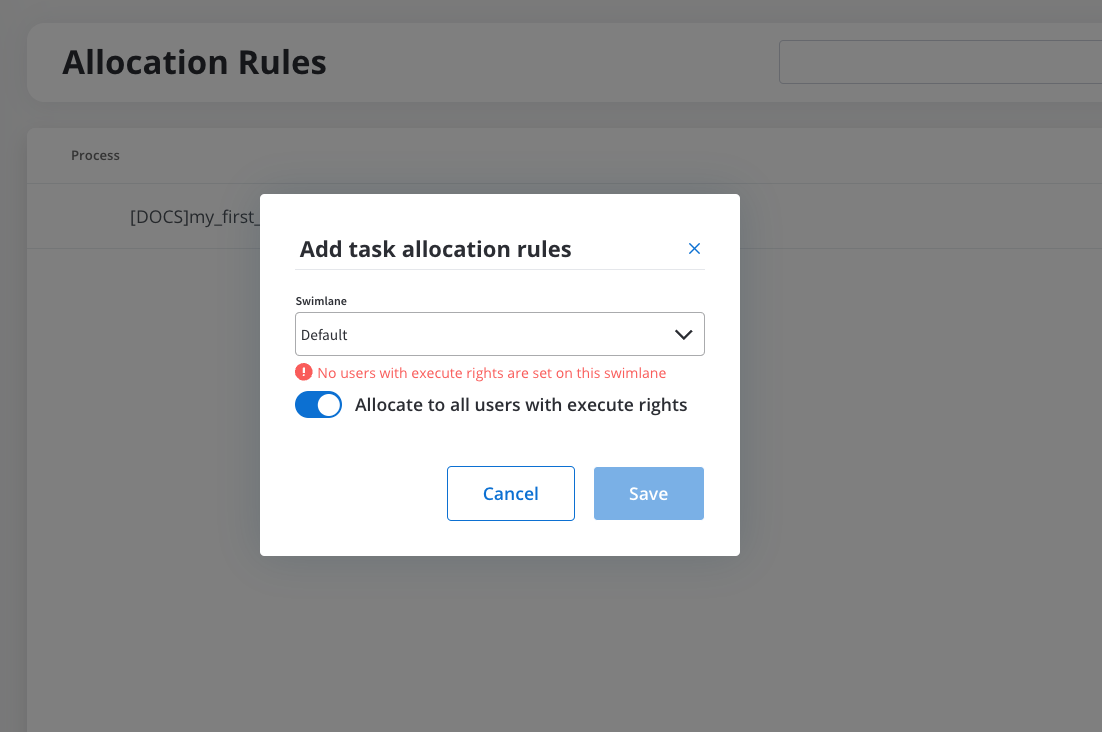
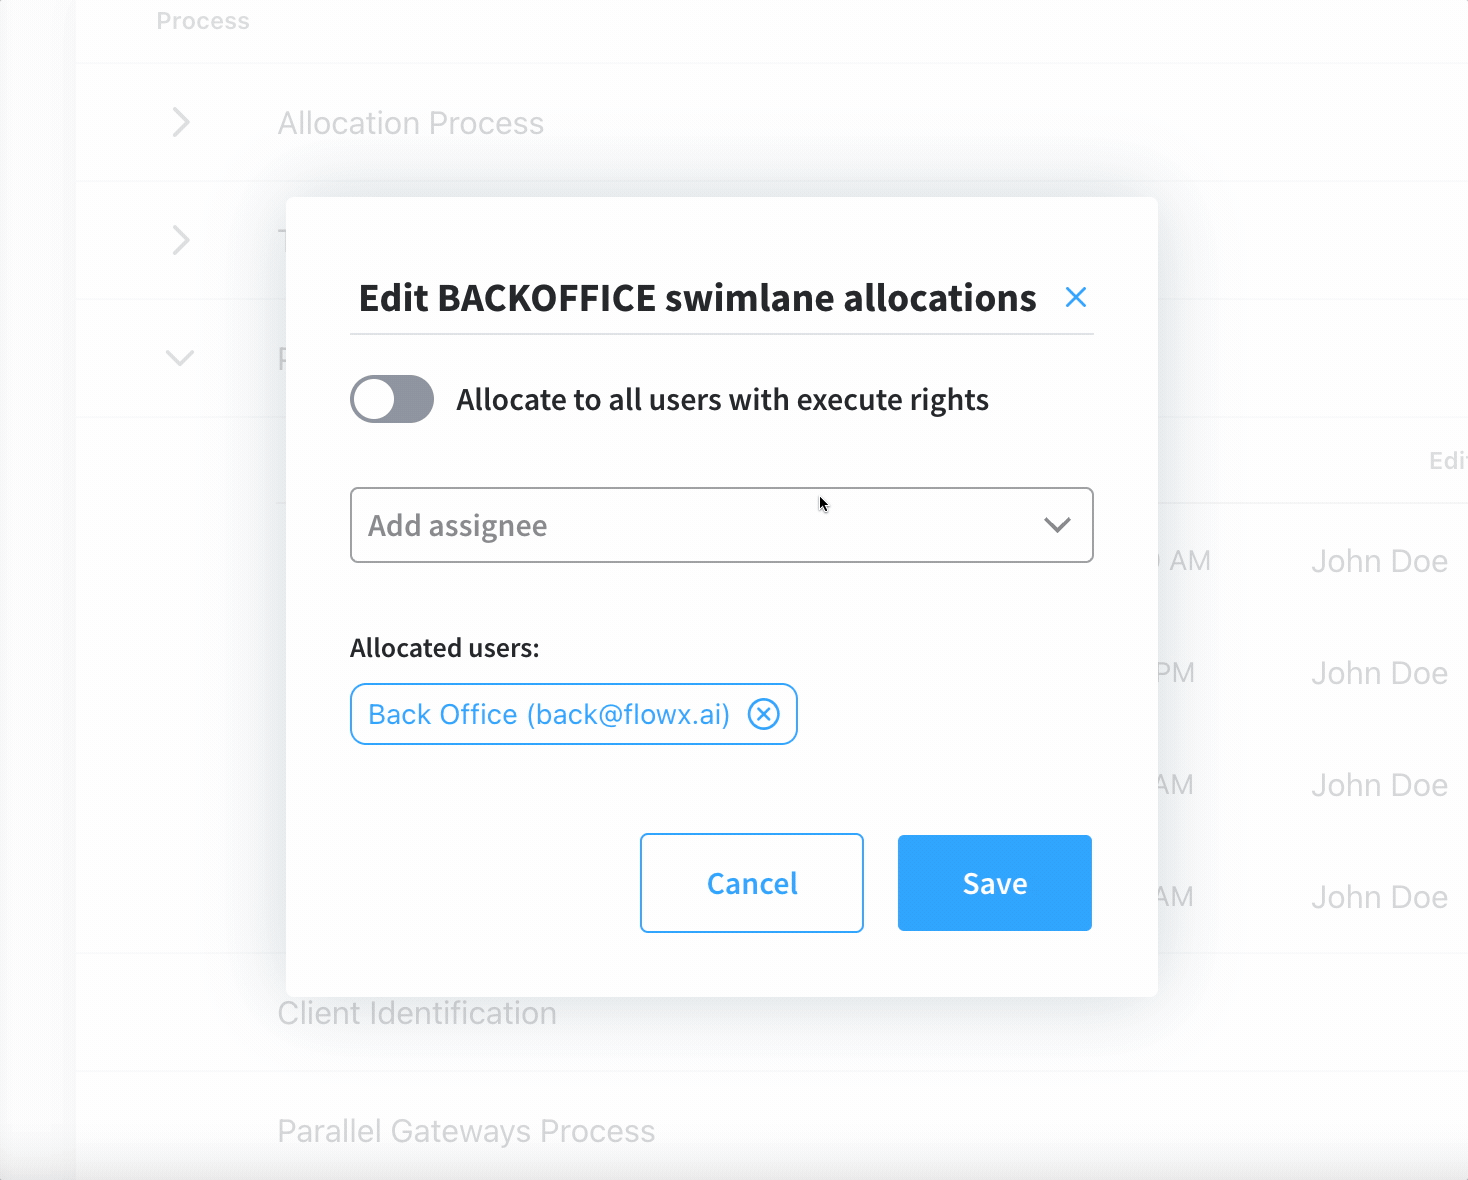
4. **Option 1**: Allocate all users with `execute rights`.
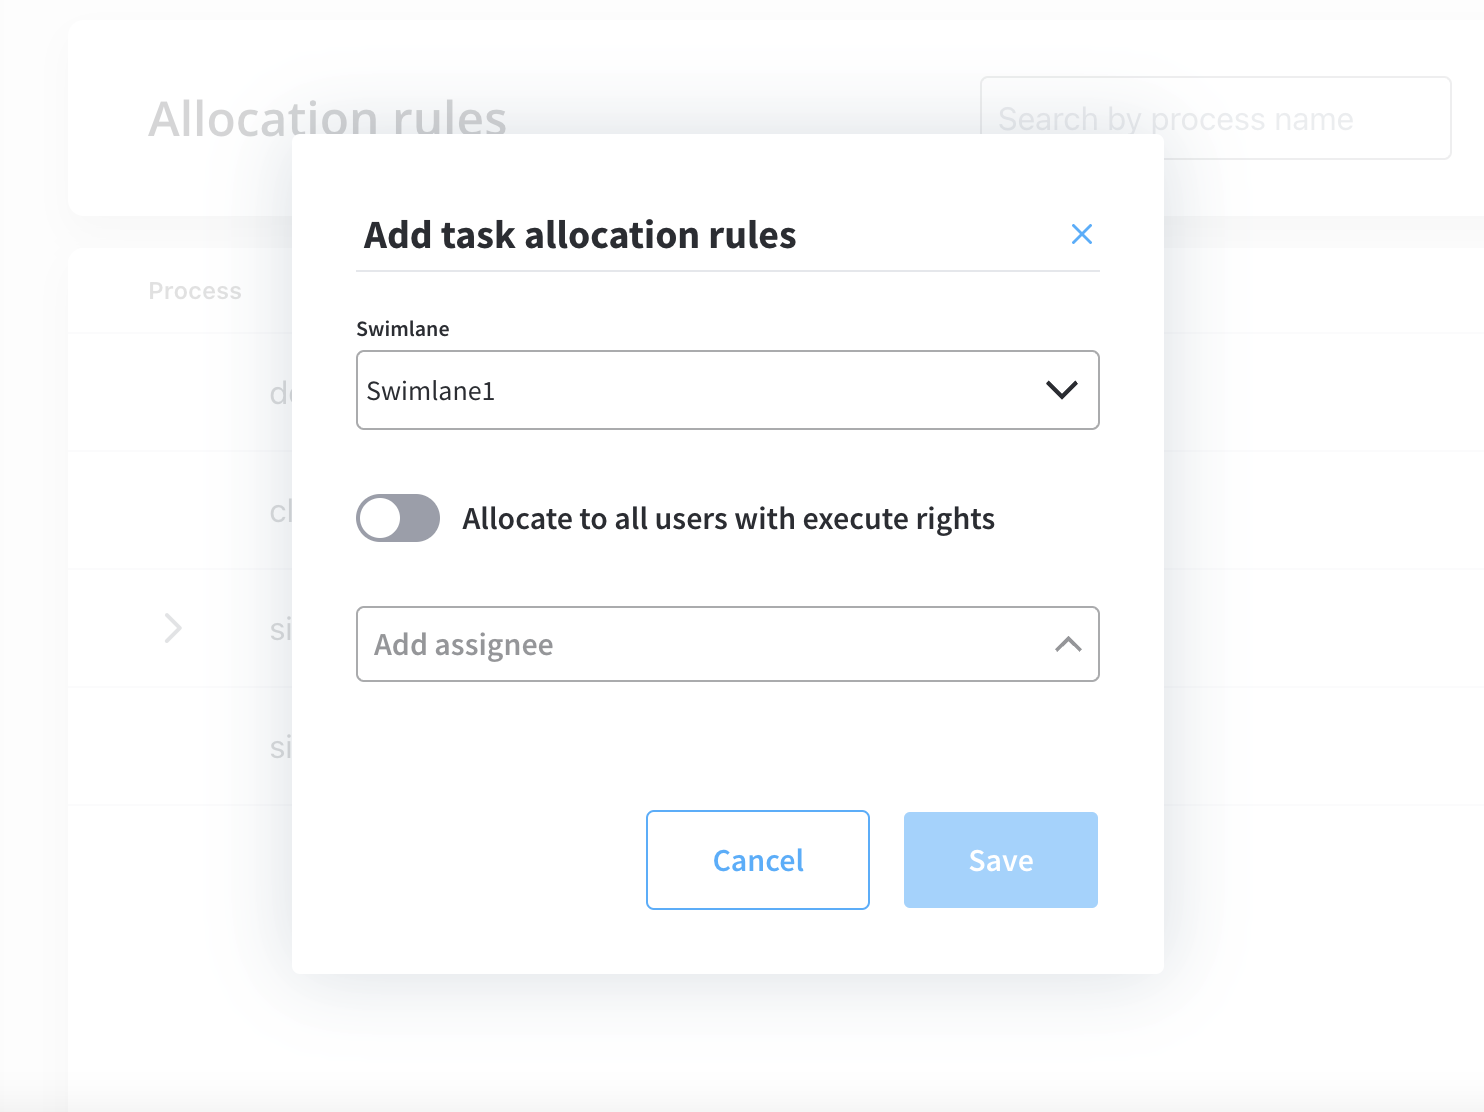
5. **Option 2**: Allocate only users you choose from the drop-down list. You can use the search function to filter users by name.
6. Click **Save**.
Users with out-of-office status will be skipped by automatic allocation. More information about out-of-office feature, [here](using-out-of-office-records).
## Editing allocation rules
To edit allocation rules, follow the next steps:
1. Click **Edit** button.
2. Change the allocation method.
3. Click **Save**.
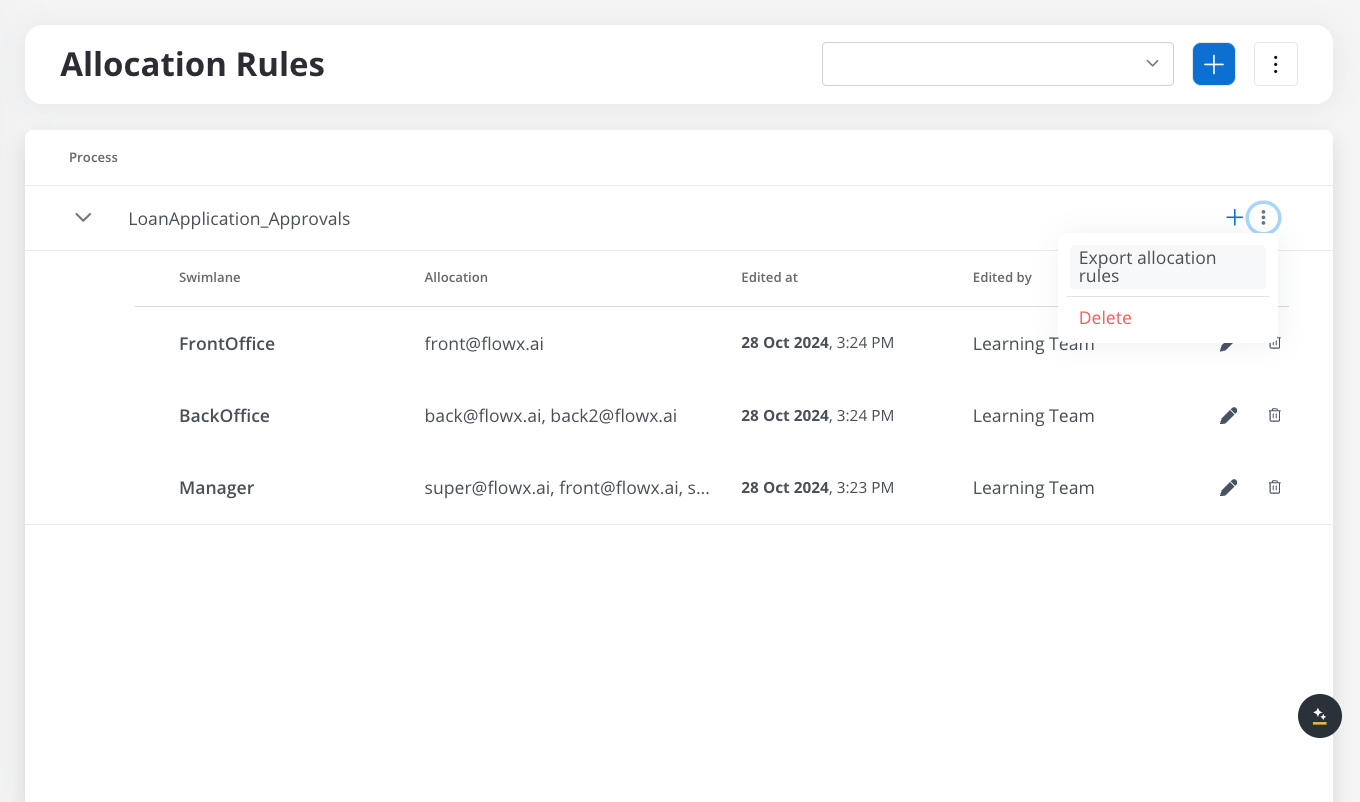
### Viewing allocation rules
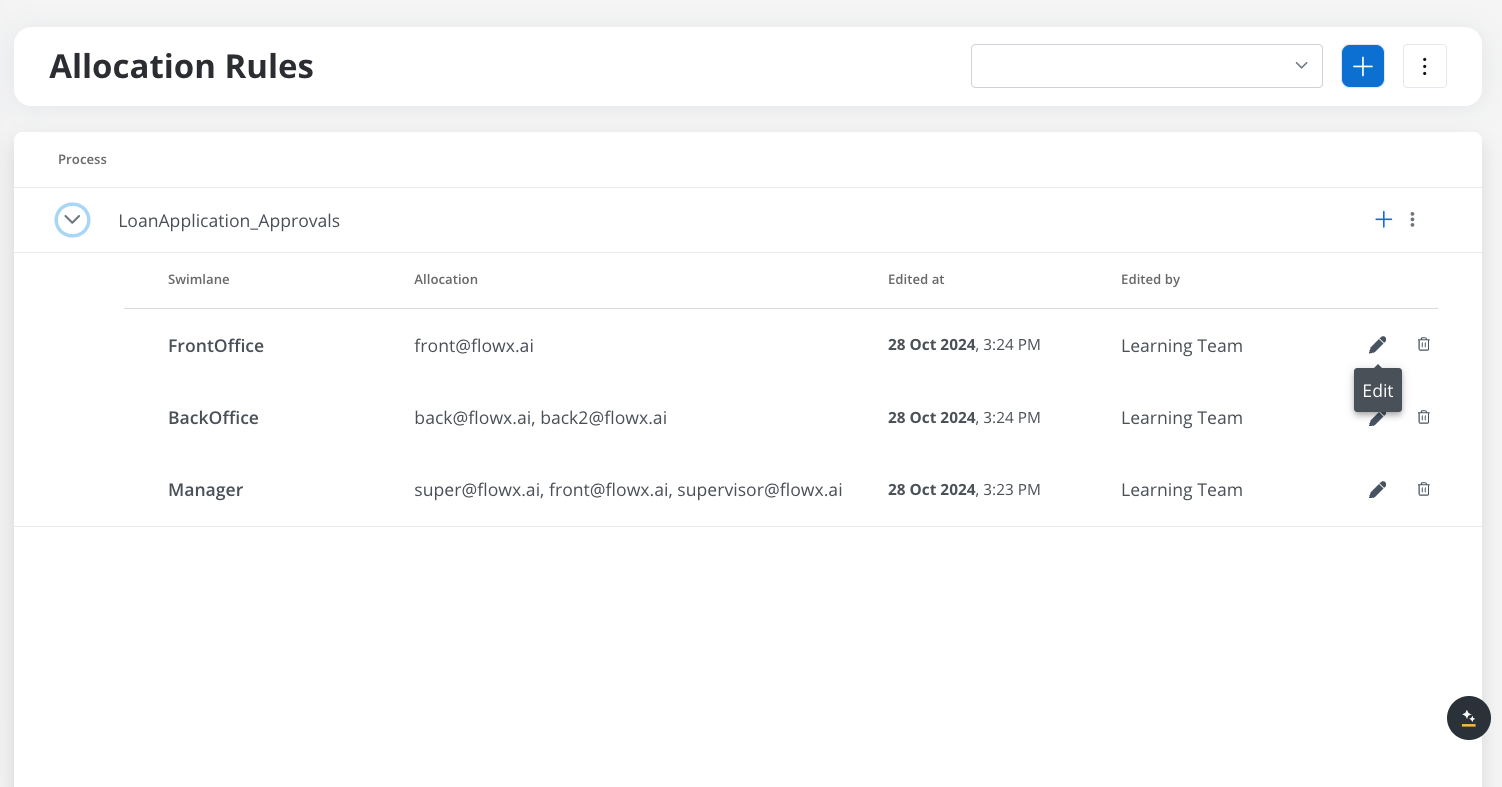
The allocation rules list displays all the configured swimlanes grouped by process:
1. **Process** - the process definition name where the swimlanes were configured
2. **Swimlane** - the name of the swimlane
3. **Allocation** - applied allocation rules
4. **Edited at** - the last time when an allocation was edited
5. **Edited by** - the user who edited/created the allocation rules
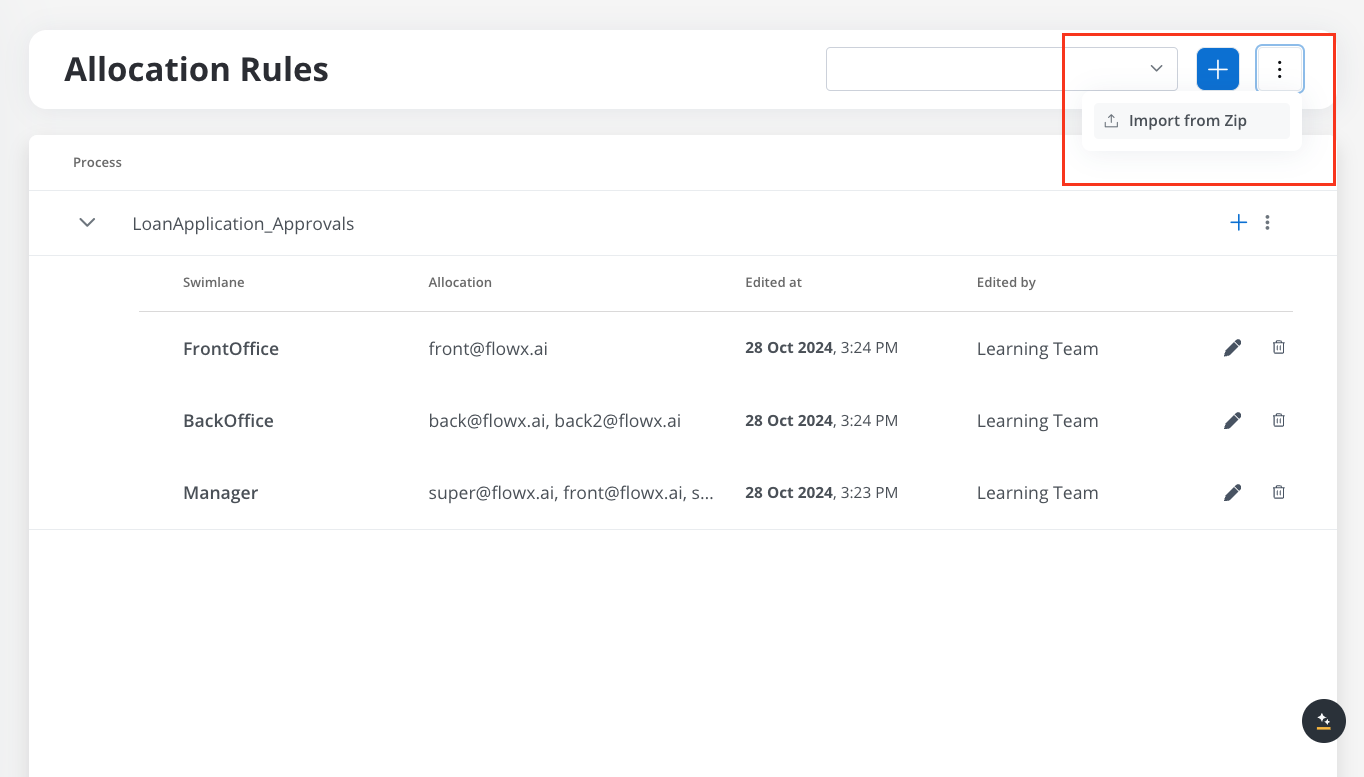
## Exporting/importing process allocation rules
To copy process allocation rules and move them between different environments, you can use the export/import feature.
You can export process allocation rules as JSON files directly from the allocation rules list: