> ## Documentation Index
> Fetch the complete documentation index at: https://docs.flowx.ai/llms.txt
> Use this file to discover all available pages before exploring further.
# Creating a user interface
You can configure interfaces for both generated and custom screens in FlowX Designer.
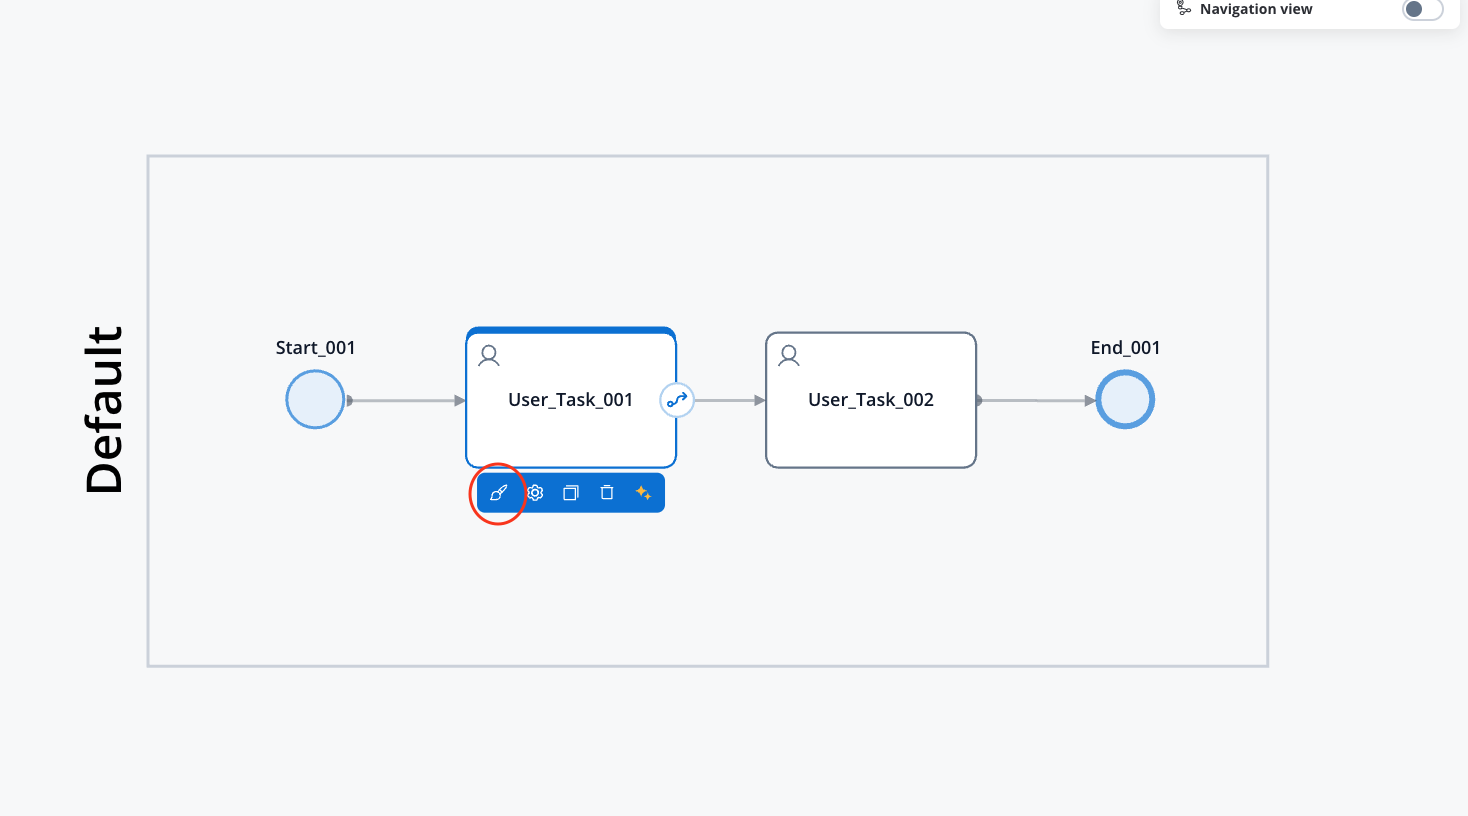
Create a simple process:
Go to **FlowX Designer** and navigate to the **Definitions** tab.
Click on the **New Process** button, using the **breadcrumbs** in the top-right corner.
Add a **Start Node**.
Add two **User Tasks** that will represent the screens of the application.
Finish your BPMN process with an **End Node**.
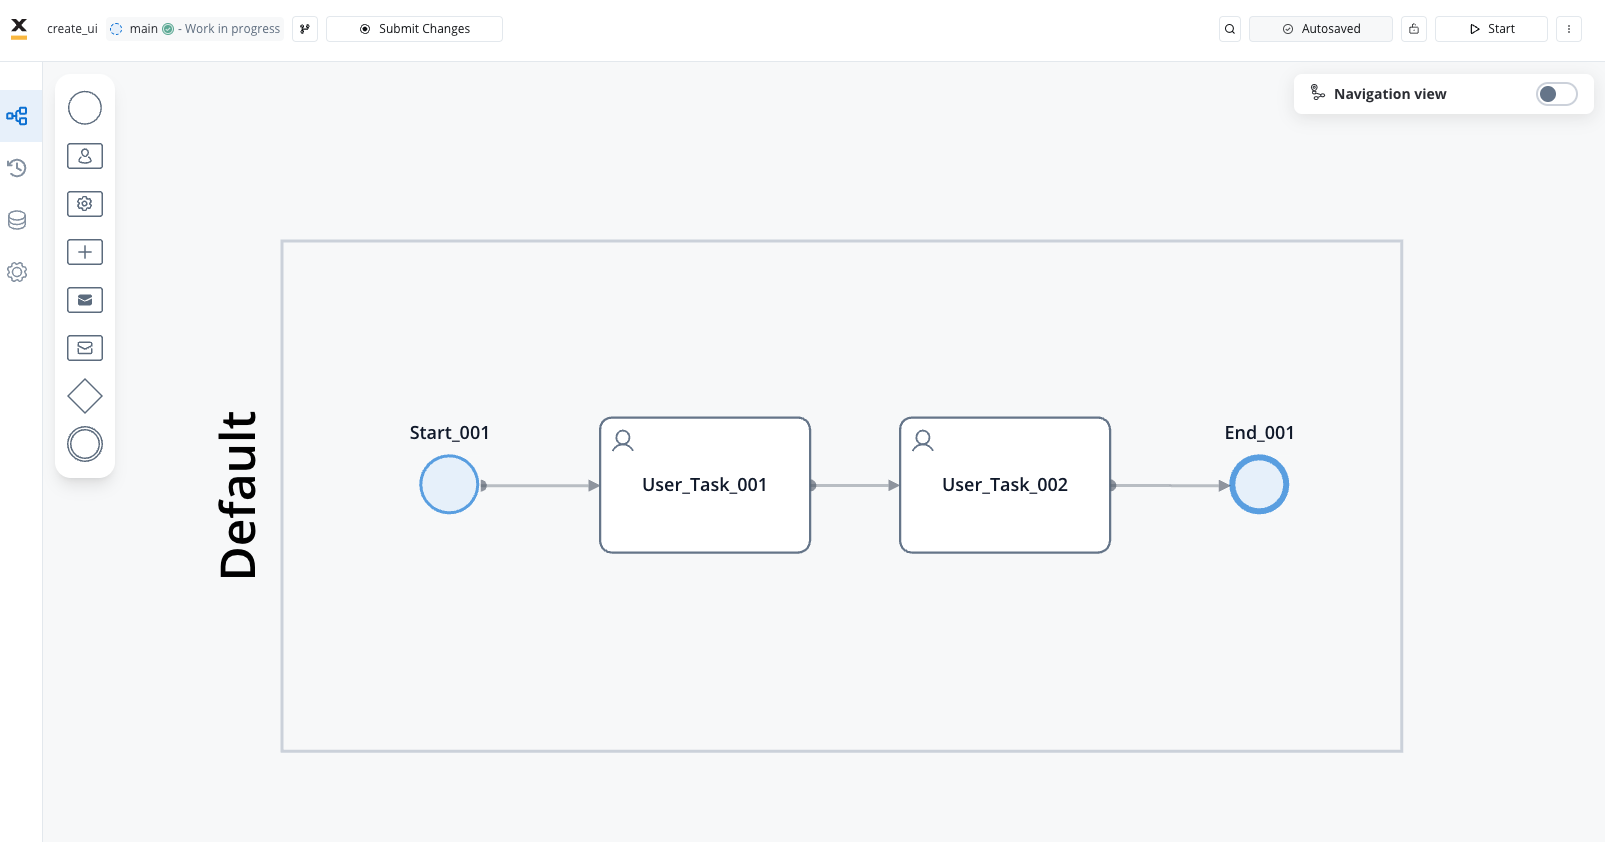
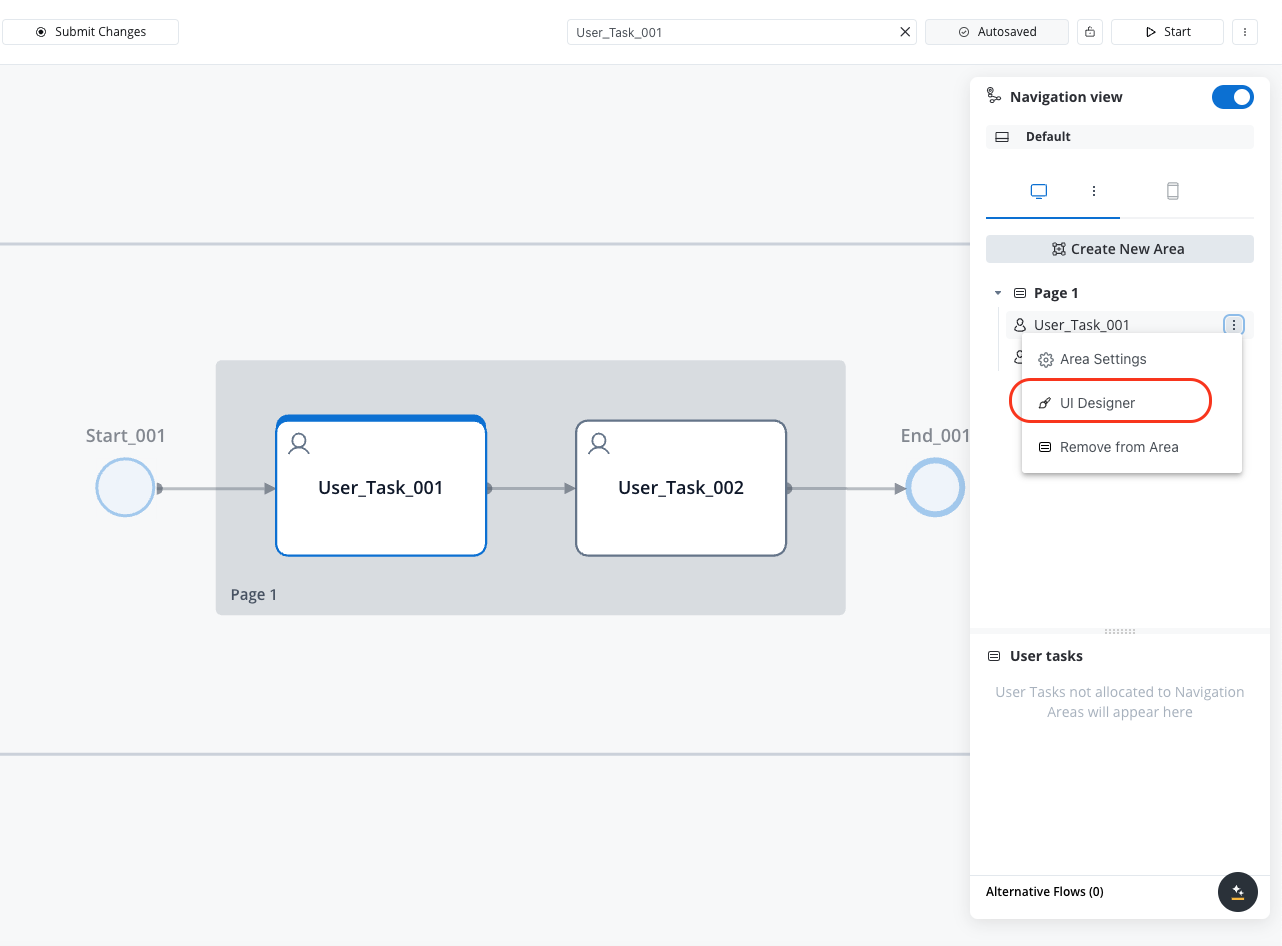
Now create a **Navigation Area** (Page) where we will include our user tasks.
In the FlowX Designer, you can create the following navigation areas:
* **Stepper**: Breaks progress into logical, numbered steps for intuitive navigation.
* **Tab Bar**: Allows users to switch between different sections or views within the application.
* **Page**: Displays full-page content for an immersive experience.
* **Modal**: Overlays that require user interaction before returning to the main interface.
* **Zone**: Groups specific navigation areas or tasks, like headers and footers.
* **Parent Process Area**: Supports subprocess design under a parent hierarchy, ensuring validation and design consistency.
## Configuring the UI
All visual properties of the UI elements and navigation areas are configured using the using the **FlowX UI Designer**.
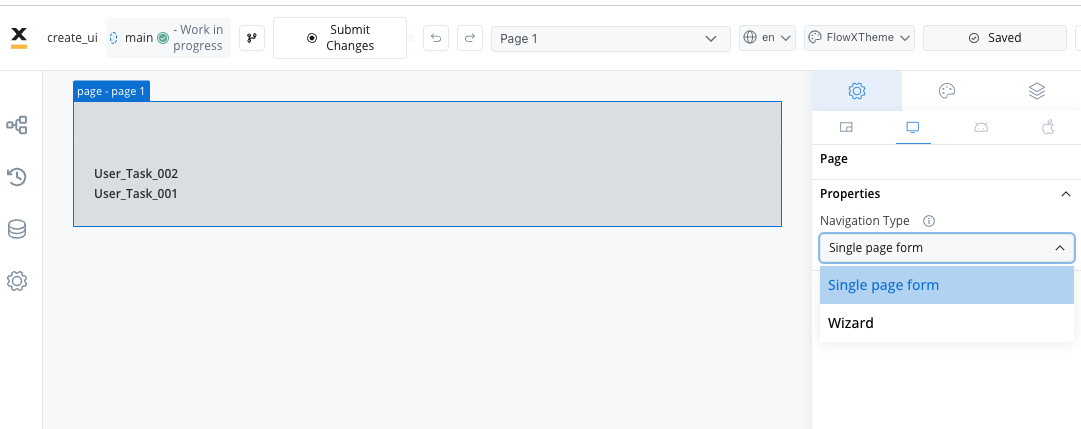
### Navigation type
To begin, we need to define the type of navigation for our page application. The options are:
* Single page form
* Wizard
We will use the **Wizard** type for our example.
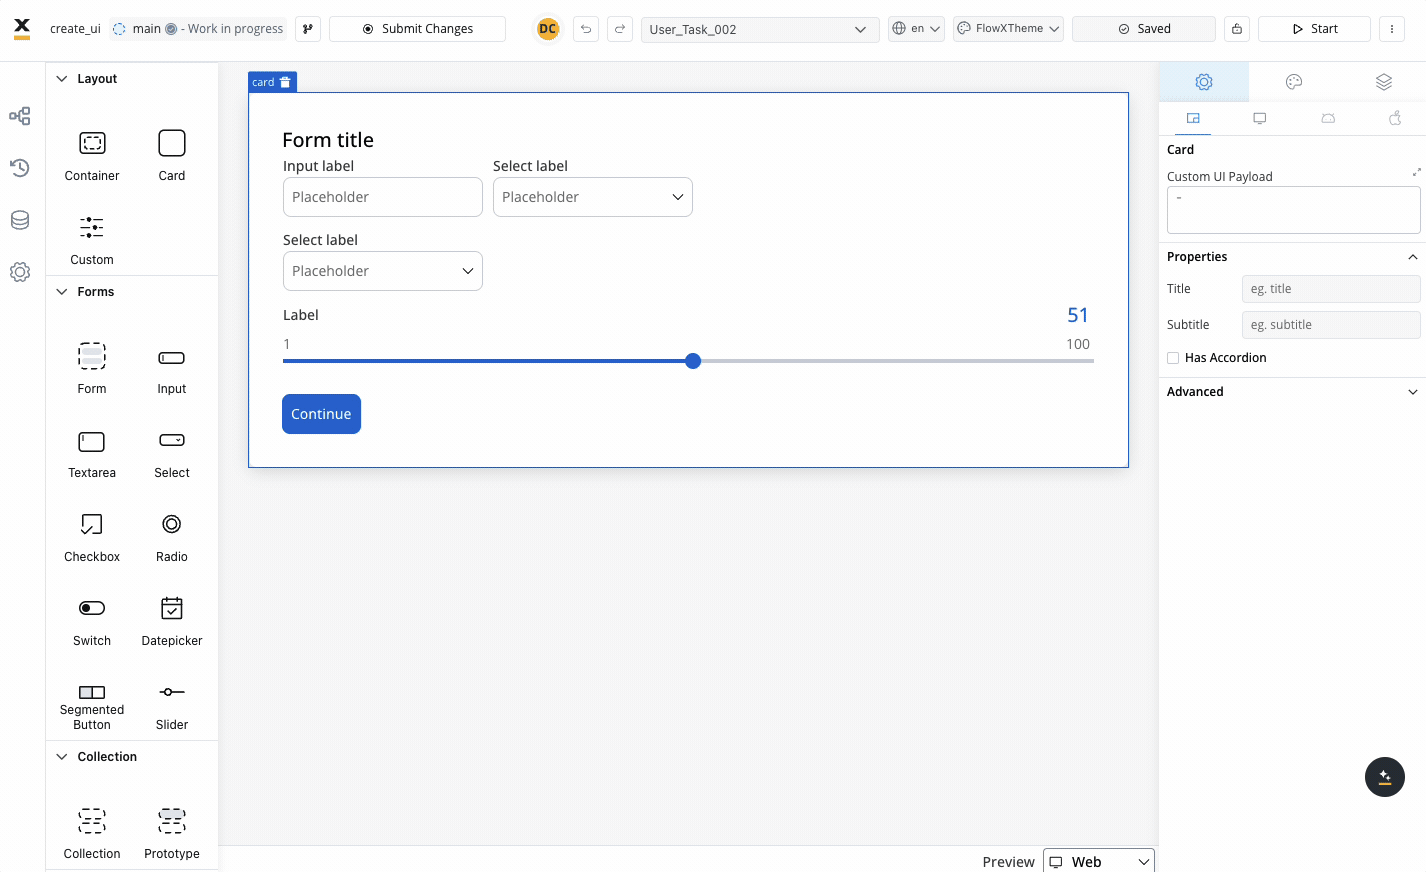
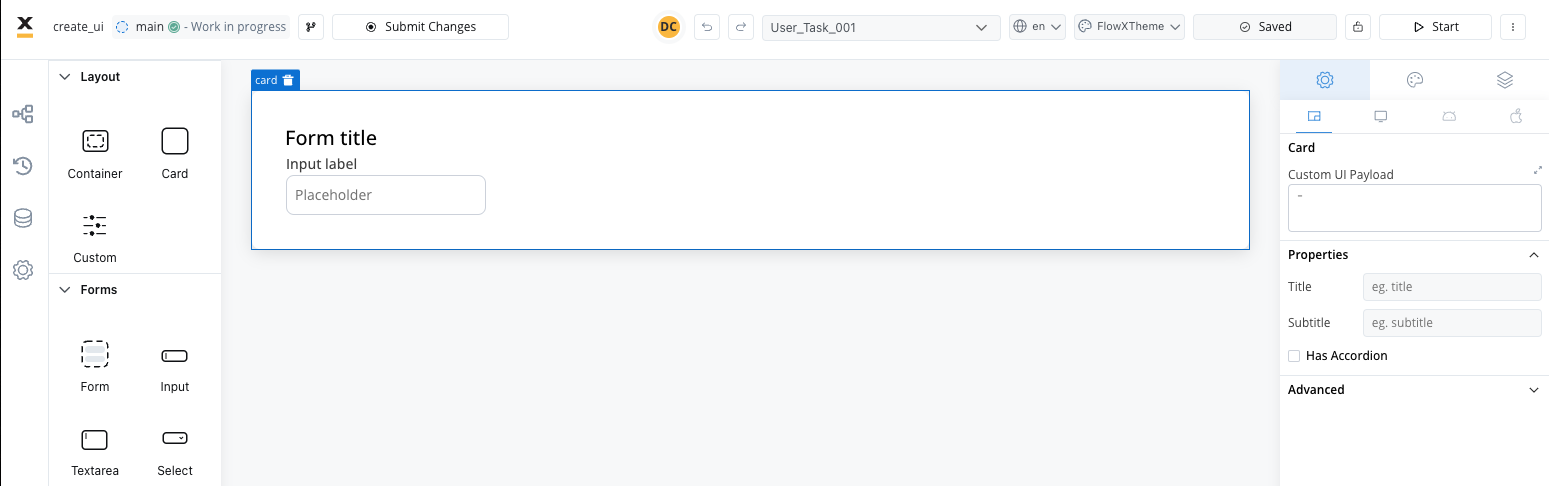
### Configuring the first screen (card)
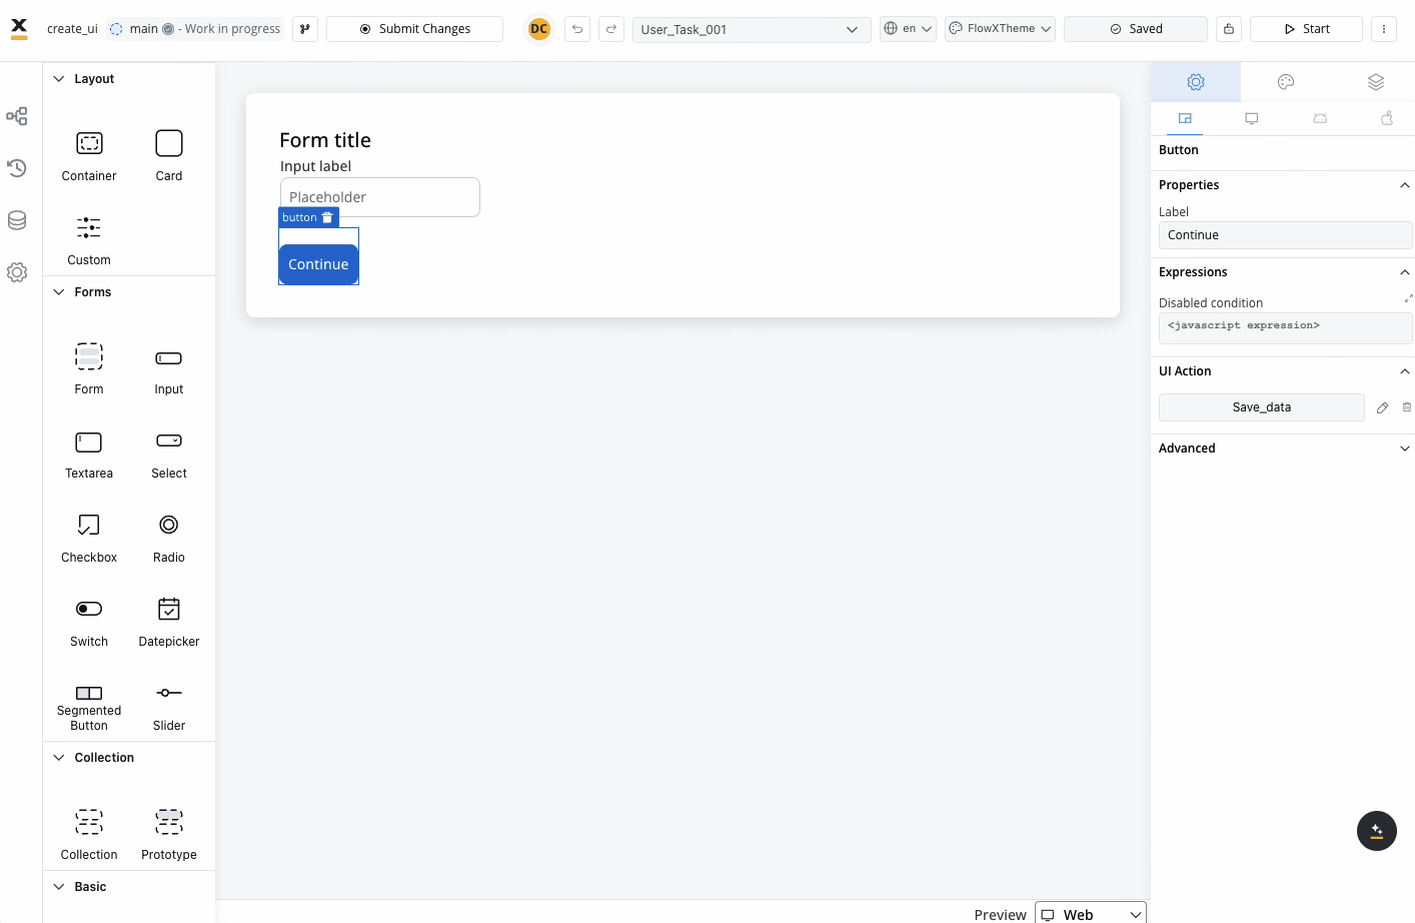
Open the **UI Designer** for your first **user task**. This will represent the **first card**.
Add a **CARD** element to the UI.
Add a **Form** to the card to group the inputs.
Add an **input** field to the form.
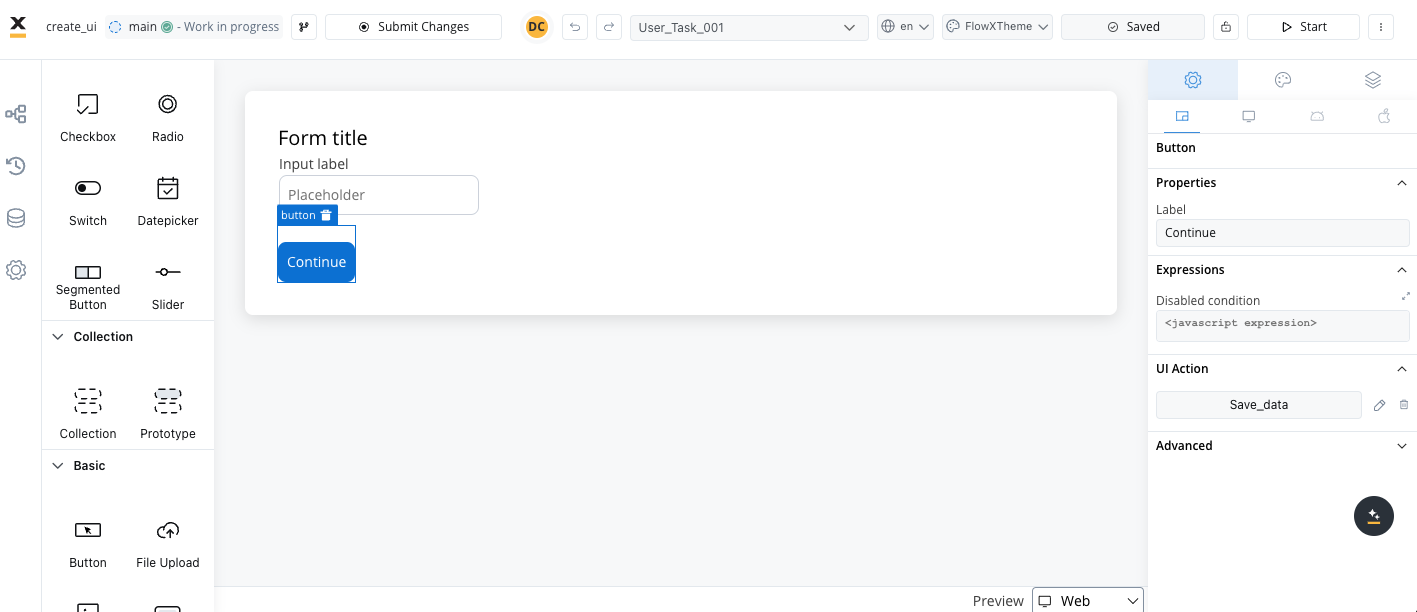
Add a button with a save data action to advance to the next screen and save the input data.
First, configure the action at the node level. The action, called when the button is clicked, should be **Manual** (not automatic because it is triggered by a user).
### Testing the first screen
Start the process definition that you just configured.
The card with the **Form** and the **Input** is displayed.
Test the **Input**.
## Configuring the second screen (card)
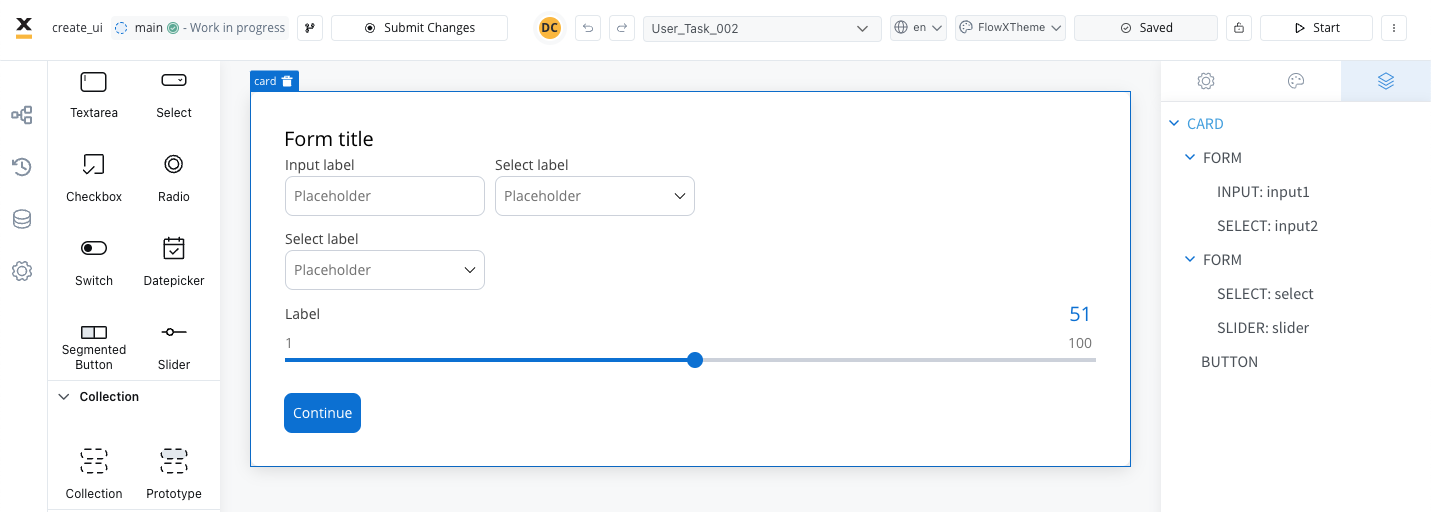
Go to your second **user task** and add a new **CARD**.
Add other UI elements of your choice.
### Testing the final result
Start the process definition again to review the final result: